

On a scale of 1-10, I love decorating for the Christmas/holiday season, with about a 7—usually excited about the idea of adding a new hit of festive decor to my home for a few special months, but often discouraged by the price tag or appearance of in-store offerings (you’ll never catch me with a blow-up lawn ornament. I deny it). There are still so many things I love to shop for… twinkle lights, greenery and shiny swag (except the cleaning ones), a cute Christmas pillow or two. I love the festive colors and warmth that come with the season, and I have no problem attending every year. But whenever I can incorporate some kind of artistic decor element into my vacation home, that original feeling gets a rating of 11. Off the charts! If you’re like me and want to make some DIY holiday decorations but don’t know where to start, keep reading for some fun and easy ideas to bring a little artsy charm to your space this winter season.
The “need to be handmade” trait is one I was either born with or was instilled in me early enough to choose otherwise. I learned my ABCs (always be crafting) and never forgot their power. My mother and I spent countless hours of my childhood finding new ways to be creative. One year in particular, we made this Halloween art masterpiece out of scrap wood pieces and about a million small magazine cut-outs.

We spent a lot of time cutting and separating lots of colors from a magazine to glue them into the mosaic jack-o’-lantern you see here. She still puts it up every year, and it’s a project that inspired me to make my first DIY of this year’s Christmas decorations 20 years later! Let me show you what I made:
collage christmas tree
I love making collages, the EHD team can attest to that. When we created our vision board at our last retreat, I stayed a few extra hours to continue our work. It’s the kind of flow state that you can’t interrupt, even if it’s 2 a.m. at night. Cutting, pasting, staring at images…this is meditation for me. A few years ago, I decided to make some silly little collage Christmas trees that I could hang on my curtains using old magazines, chipboard, glue, a handful of brads, and a few clothespins. It was so incredibly easy, and it’s a project I still bring back to show every year.
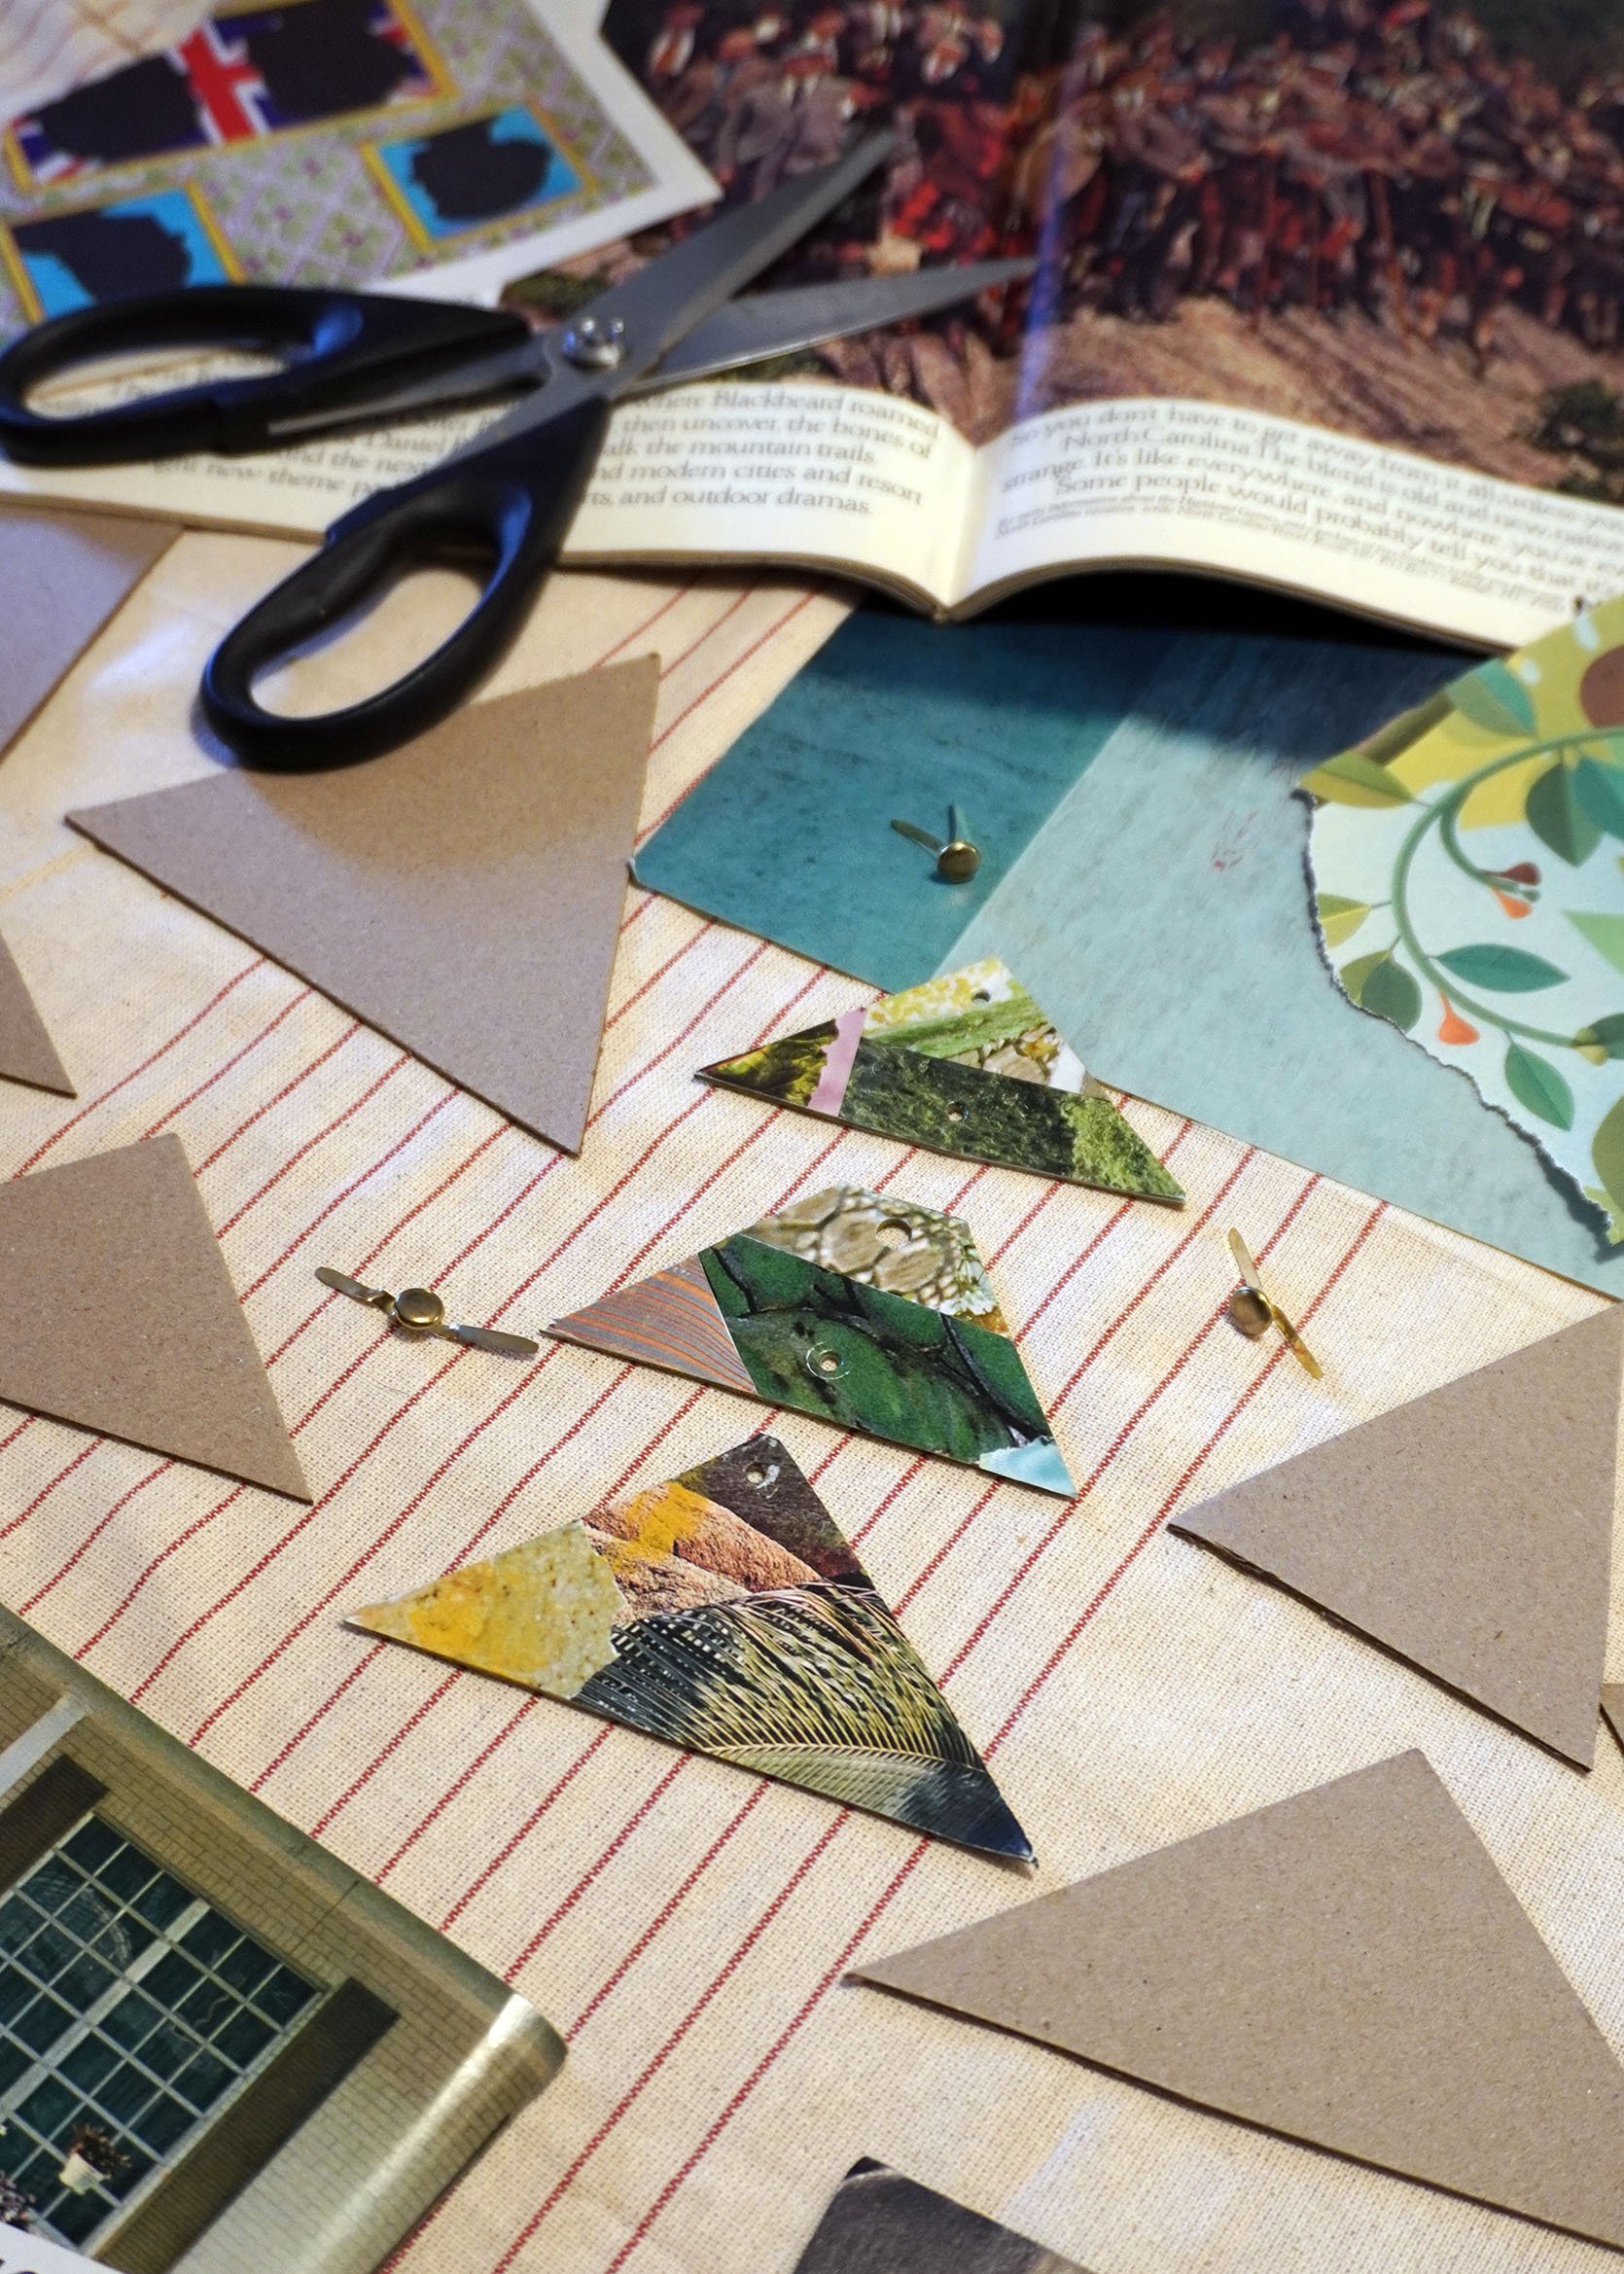
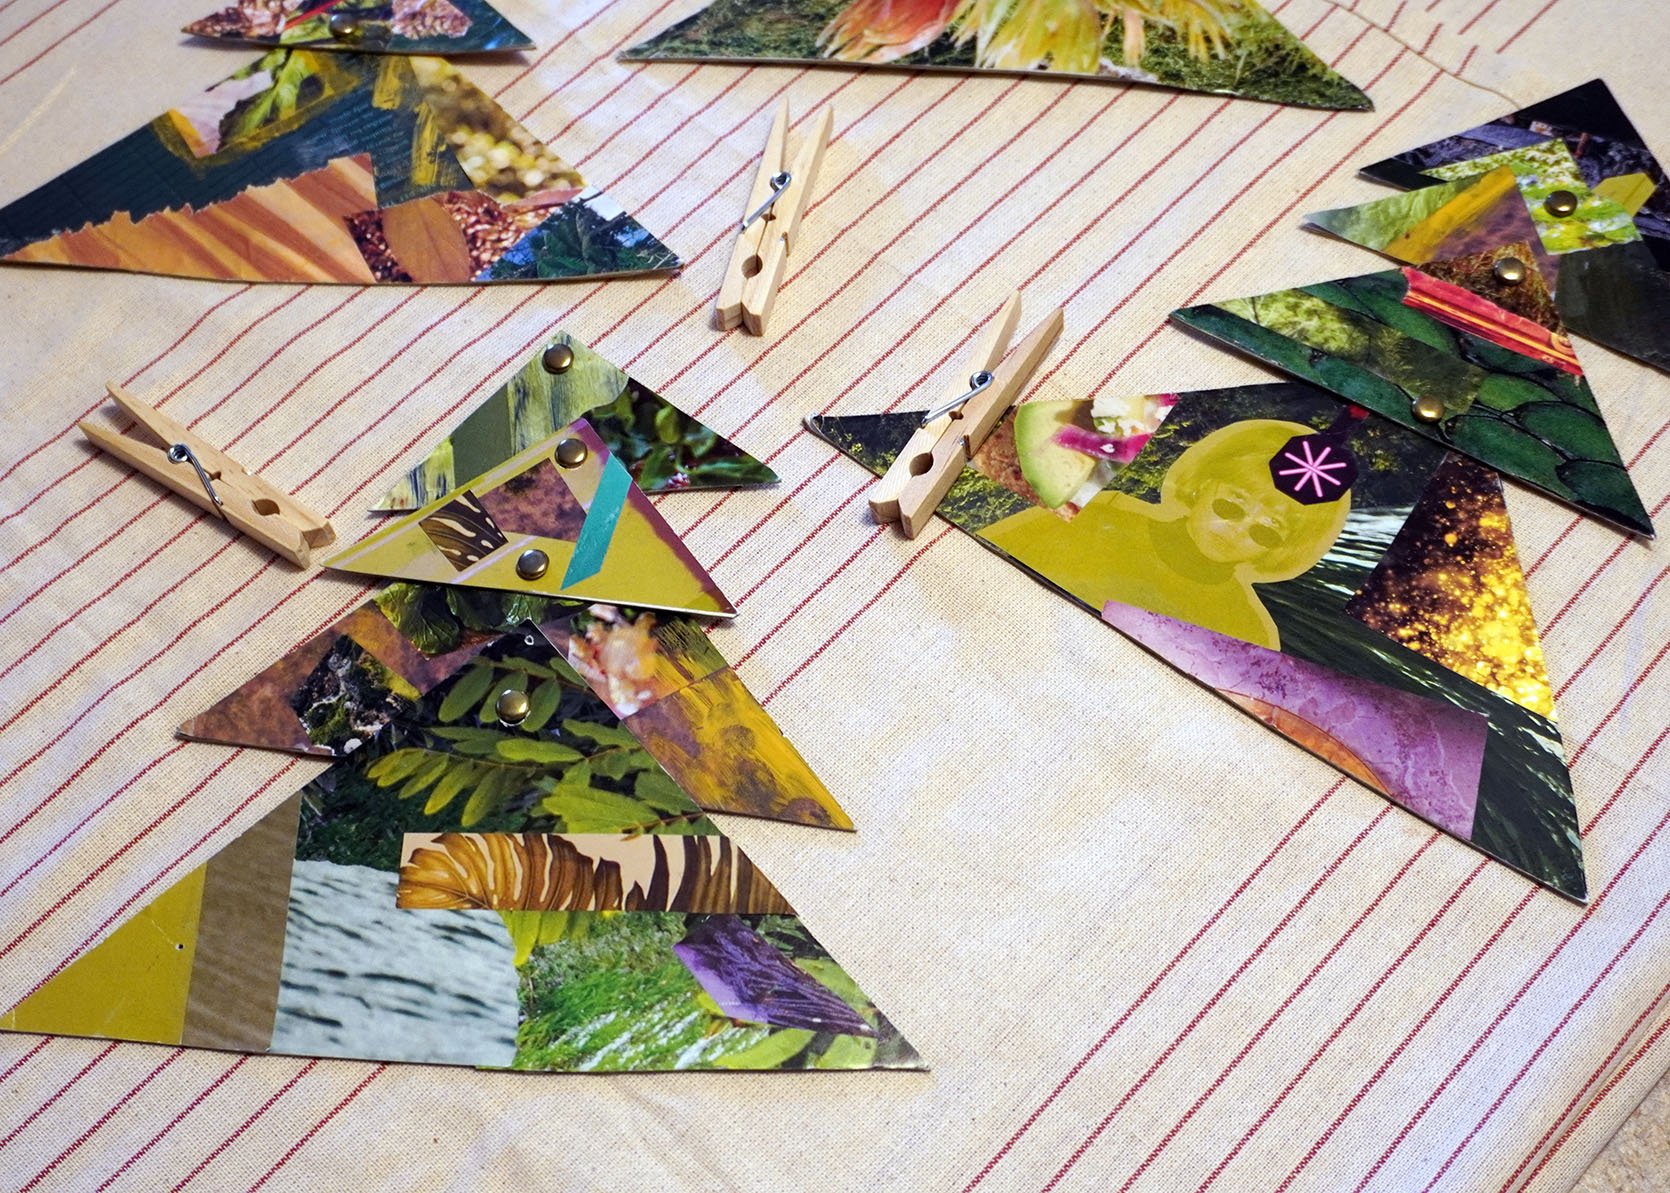
To make them, I began collecting a variety of greenery and festive, colorful textures, patterns, and interesting shapes from my journal stash. Then I cut random triangles out of some chipboard (I used the back piece of an old art pad, but any cardboard or sturdy material would work too).
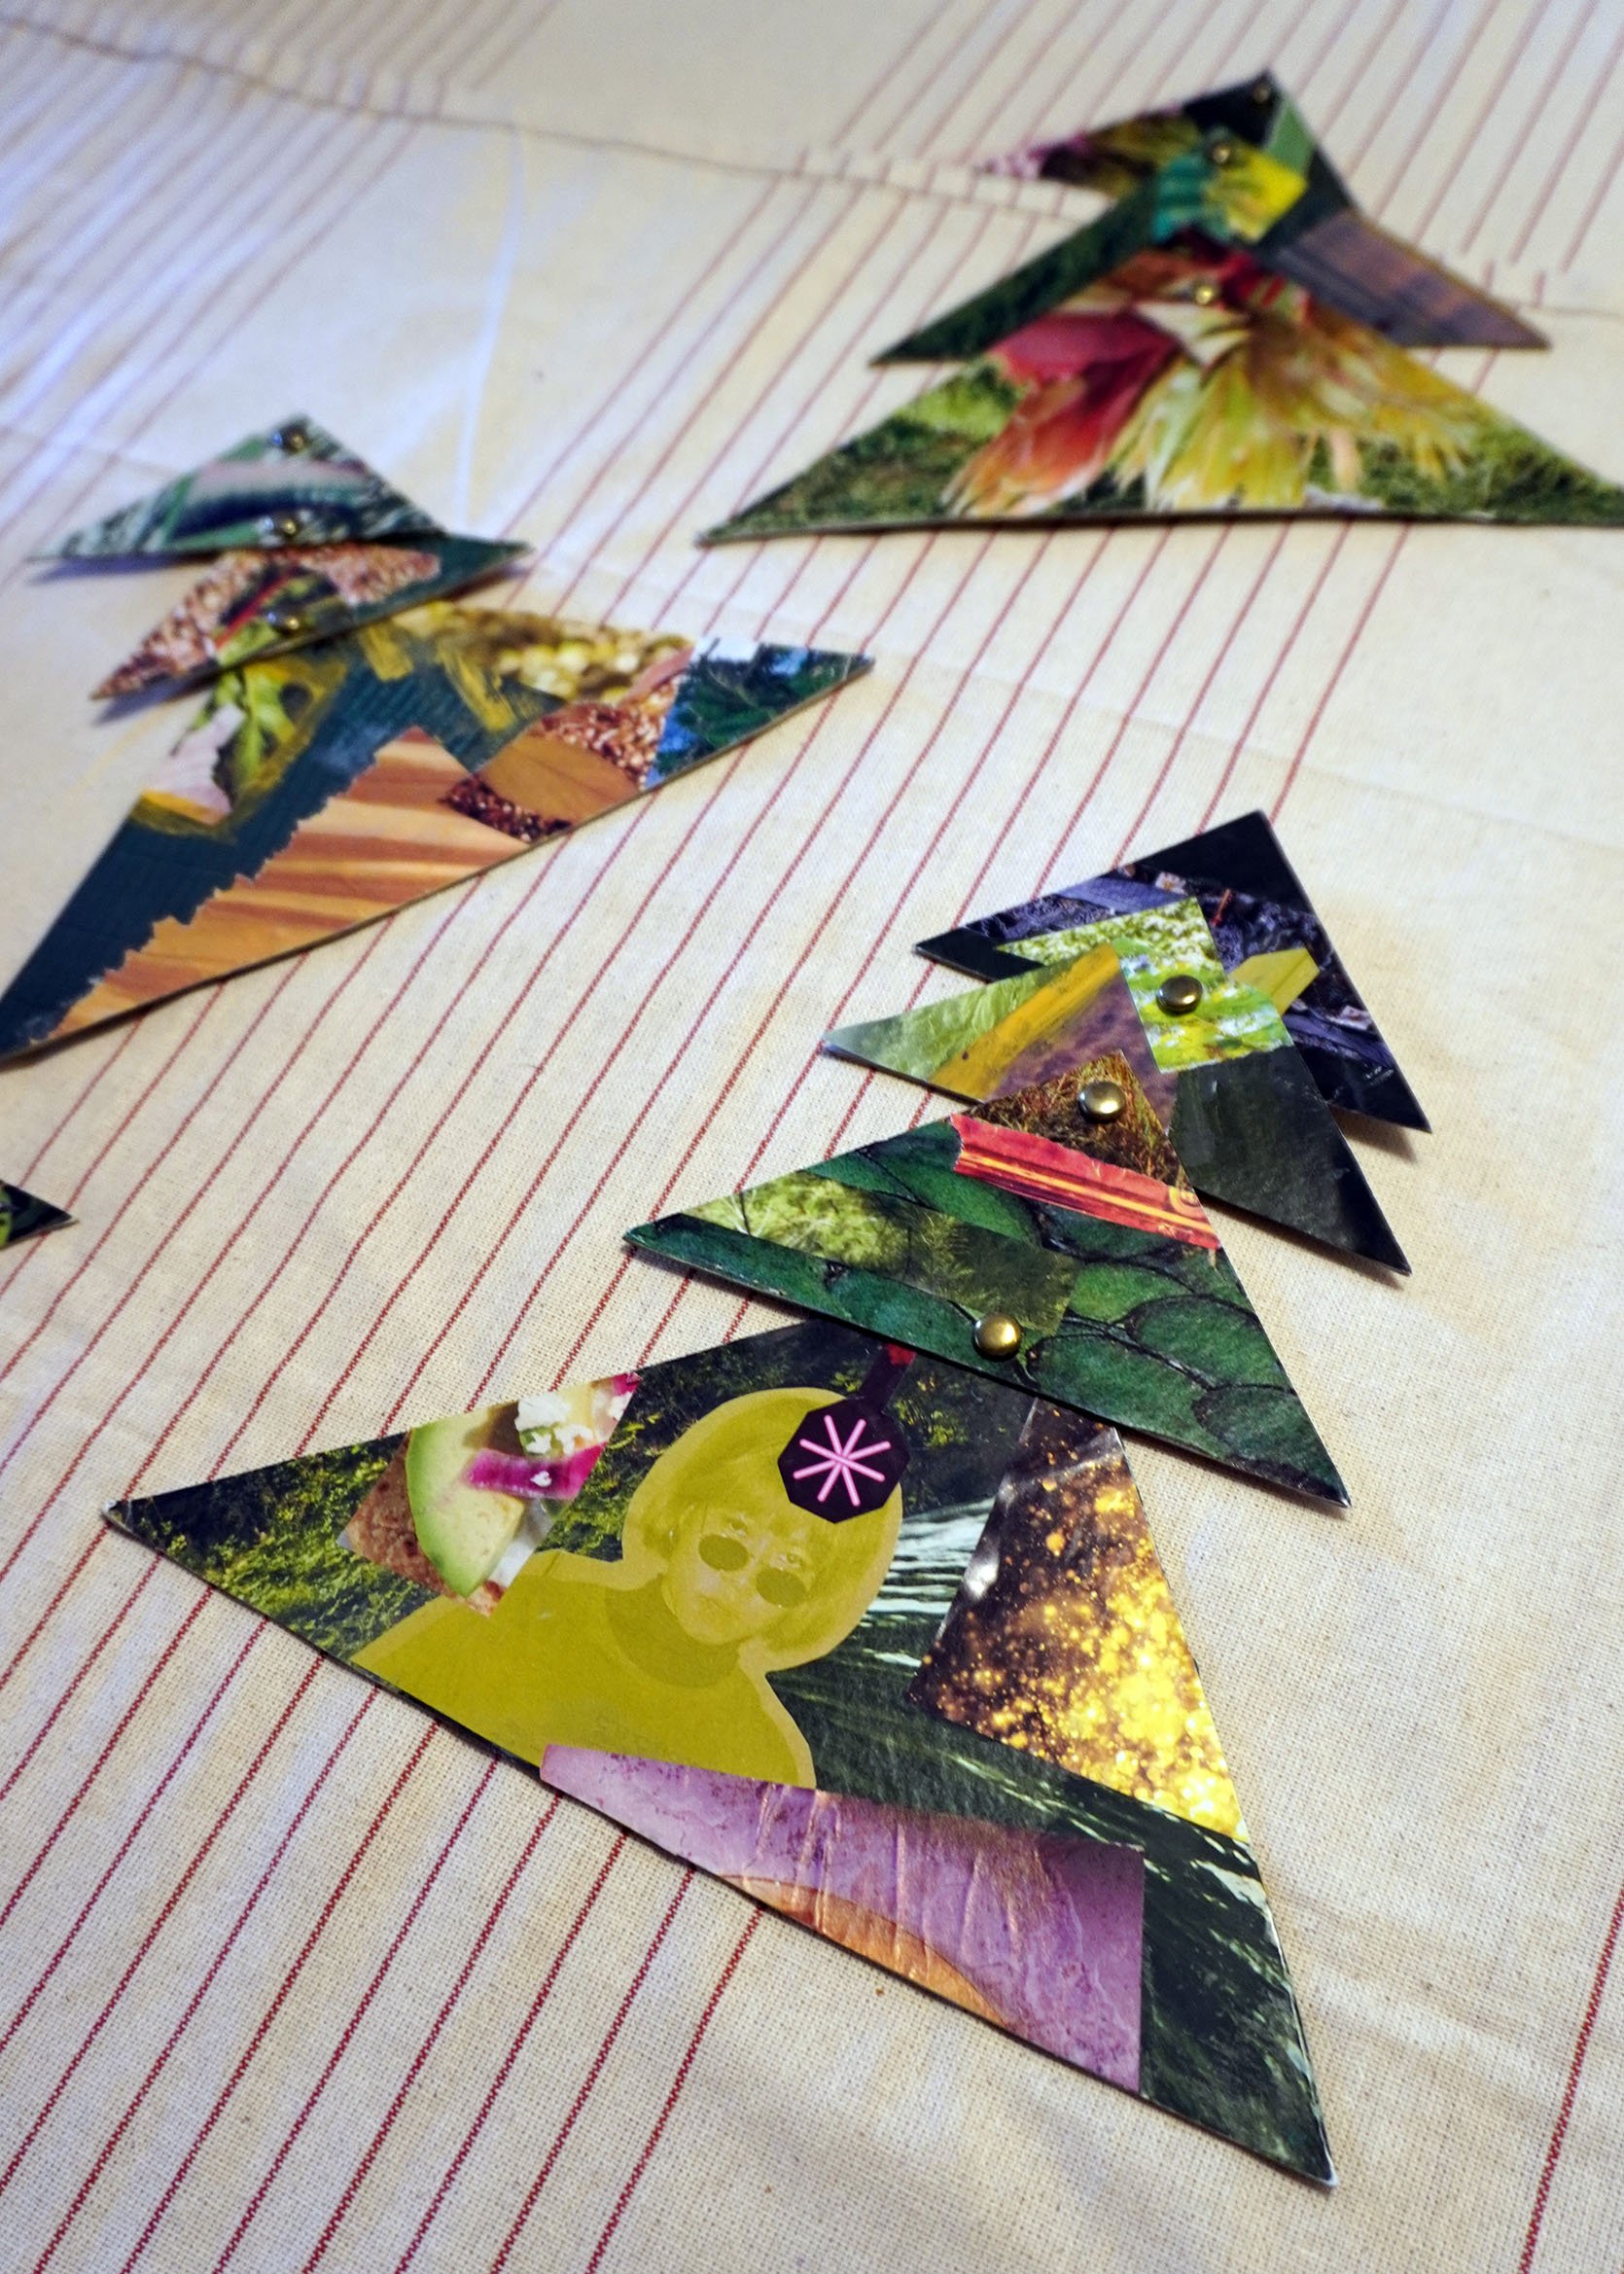
I gathered different greenery onto each triangle, trimming off the excess around the edges. I decided which triangles worked best together and stacked them, poking holes through two pieces at a time and connecting them with a small brad. Using brads to connect them allows the pieces to move somewhat like puppets. I like that extra whimsy.
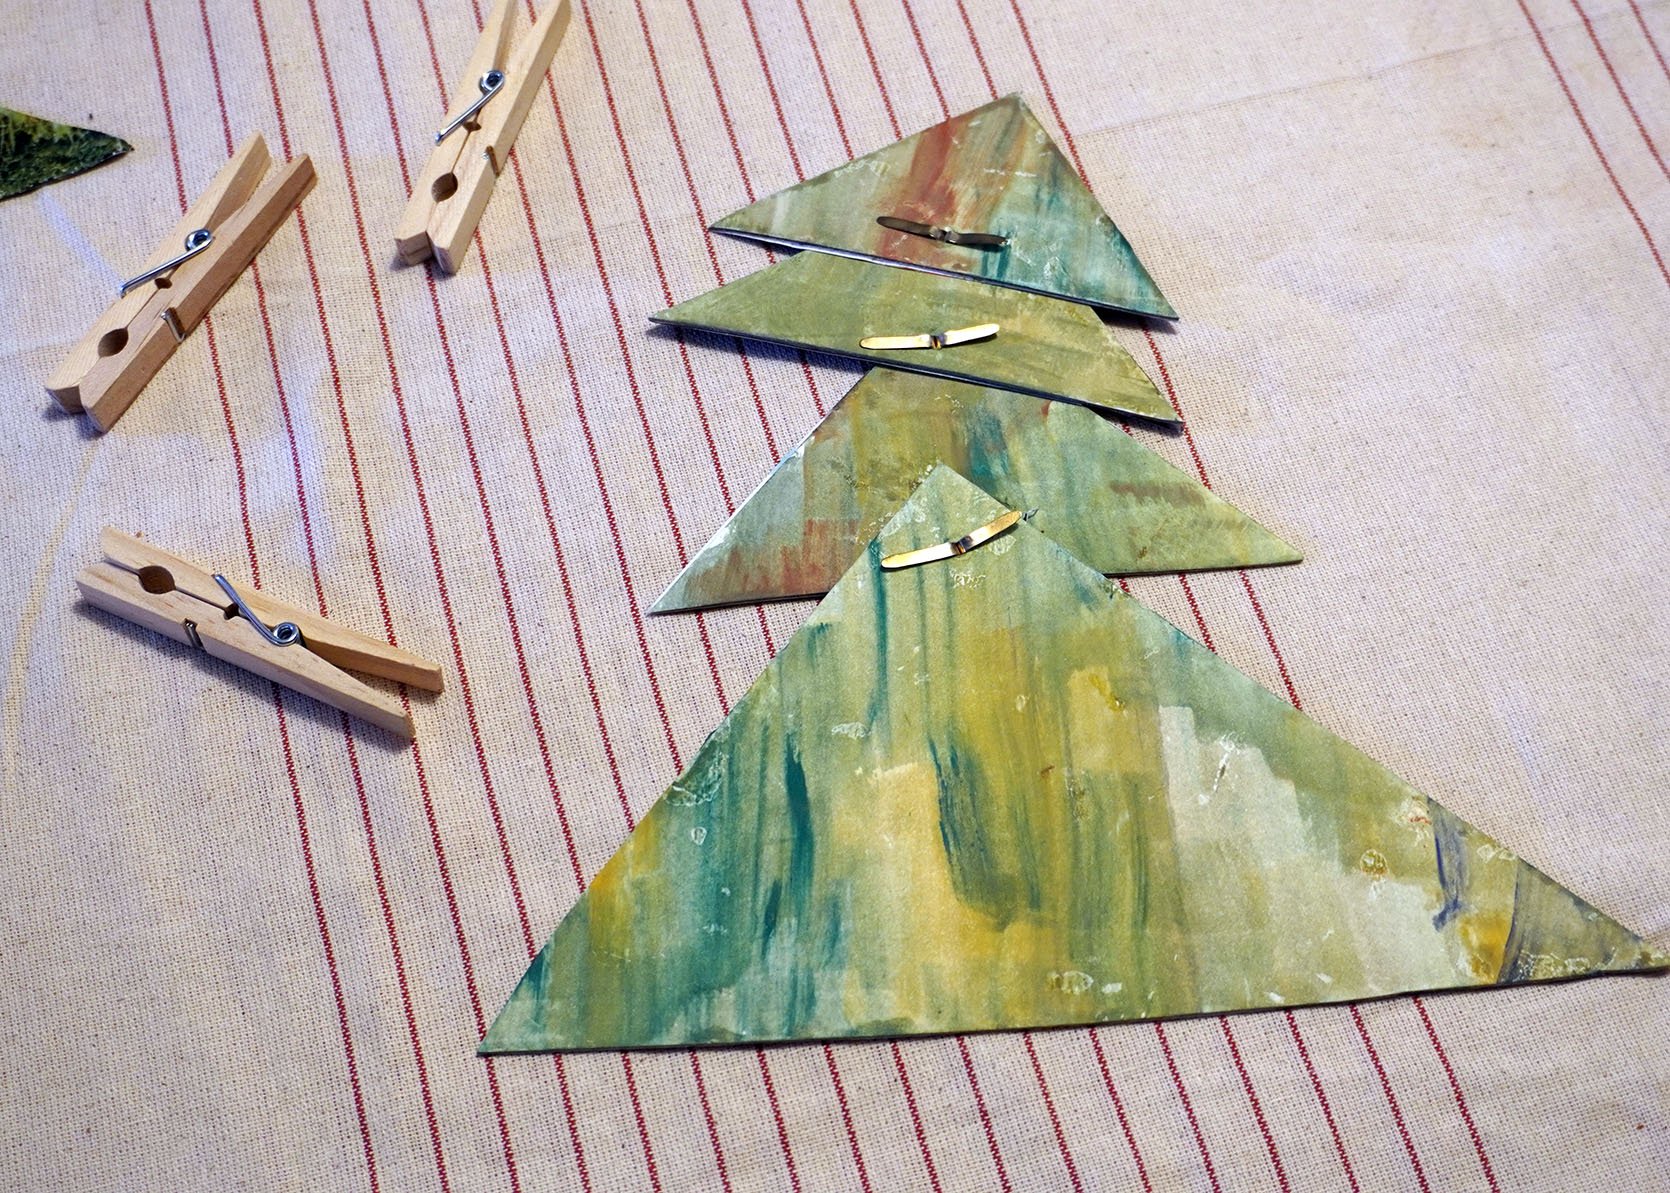
For the backs, I just painted them with some watercolors I had on hand. You don’t need to do this if you are going to hang them on a wall, but since I wanted to hang them from my window curtains, I wanted both sides to feel somewhat “complete” and separate.
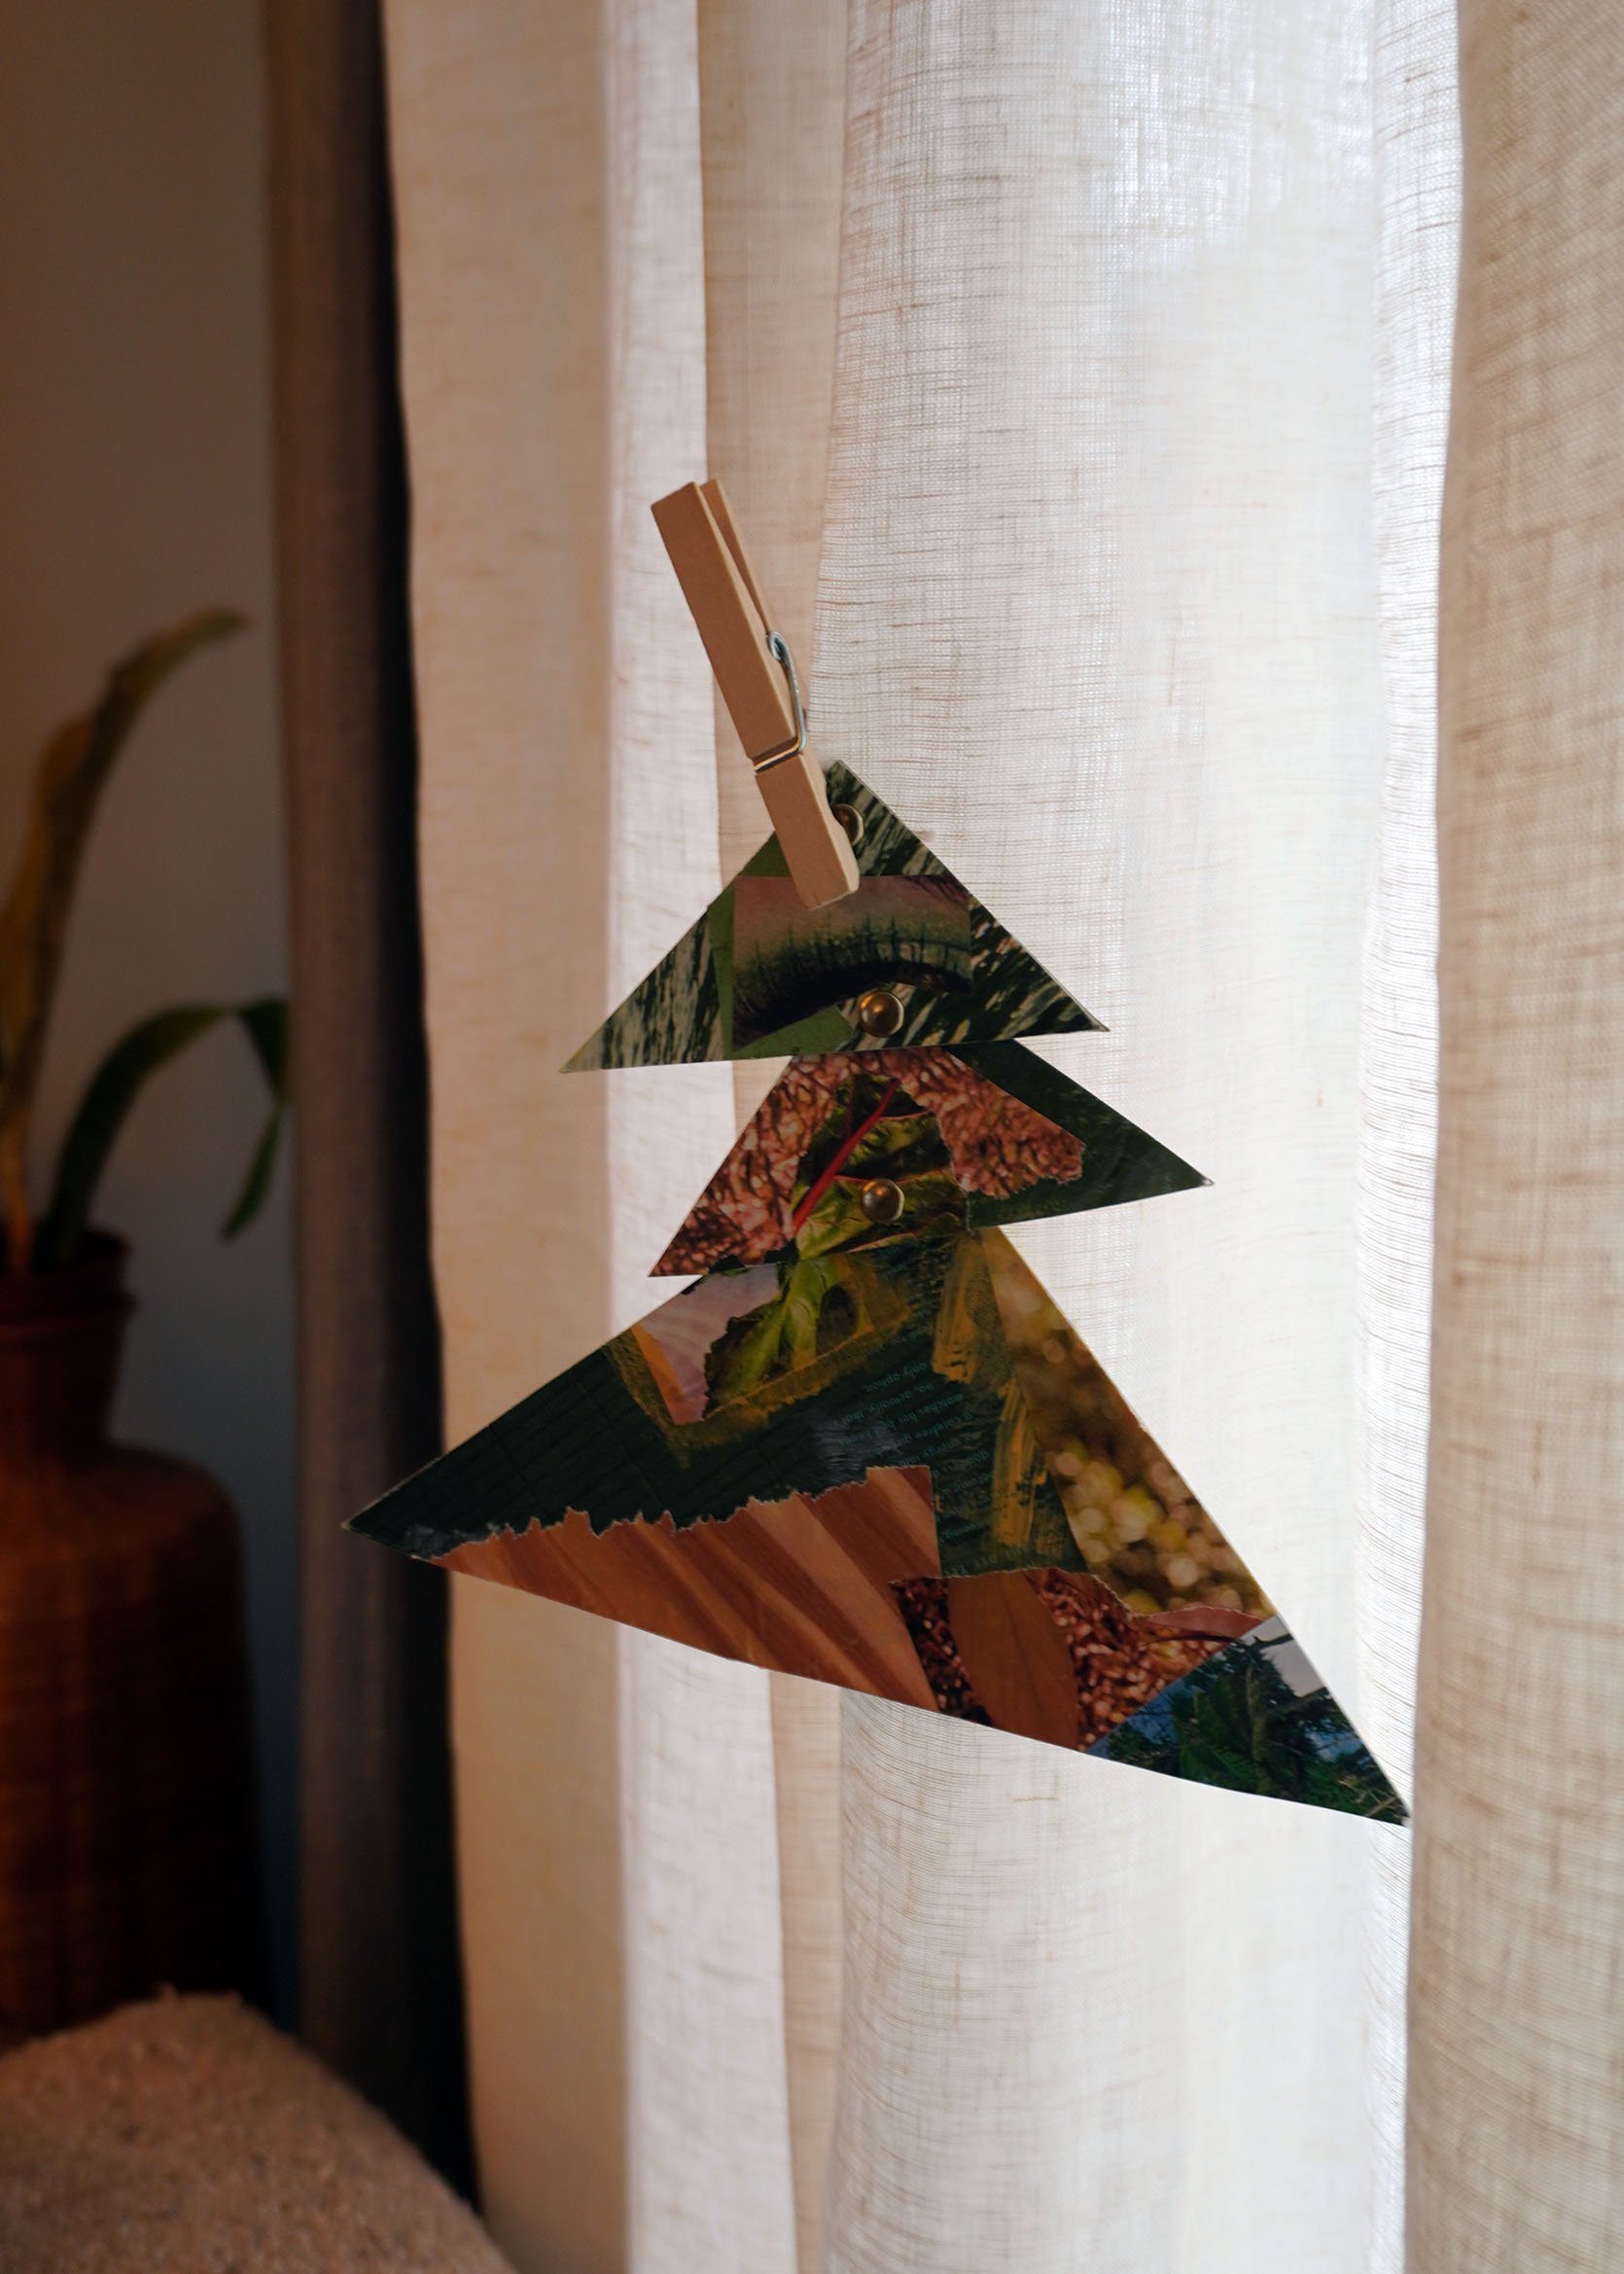
Once enough trees were made, I attached them to my sheer curtains with a fabric needle. These are super easy to move around and style as per your liking!
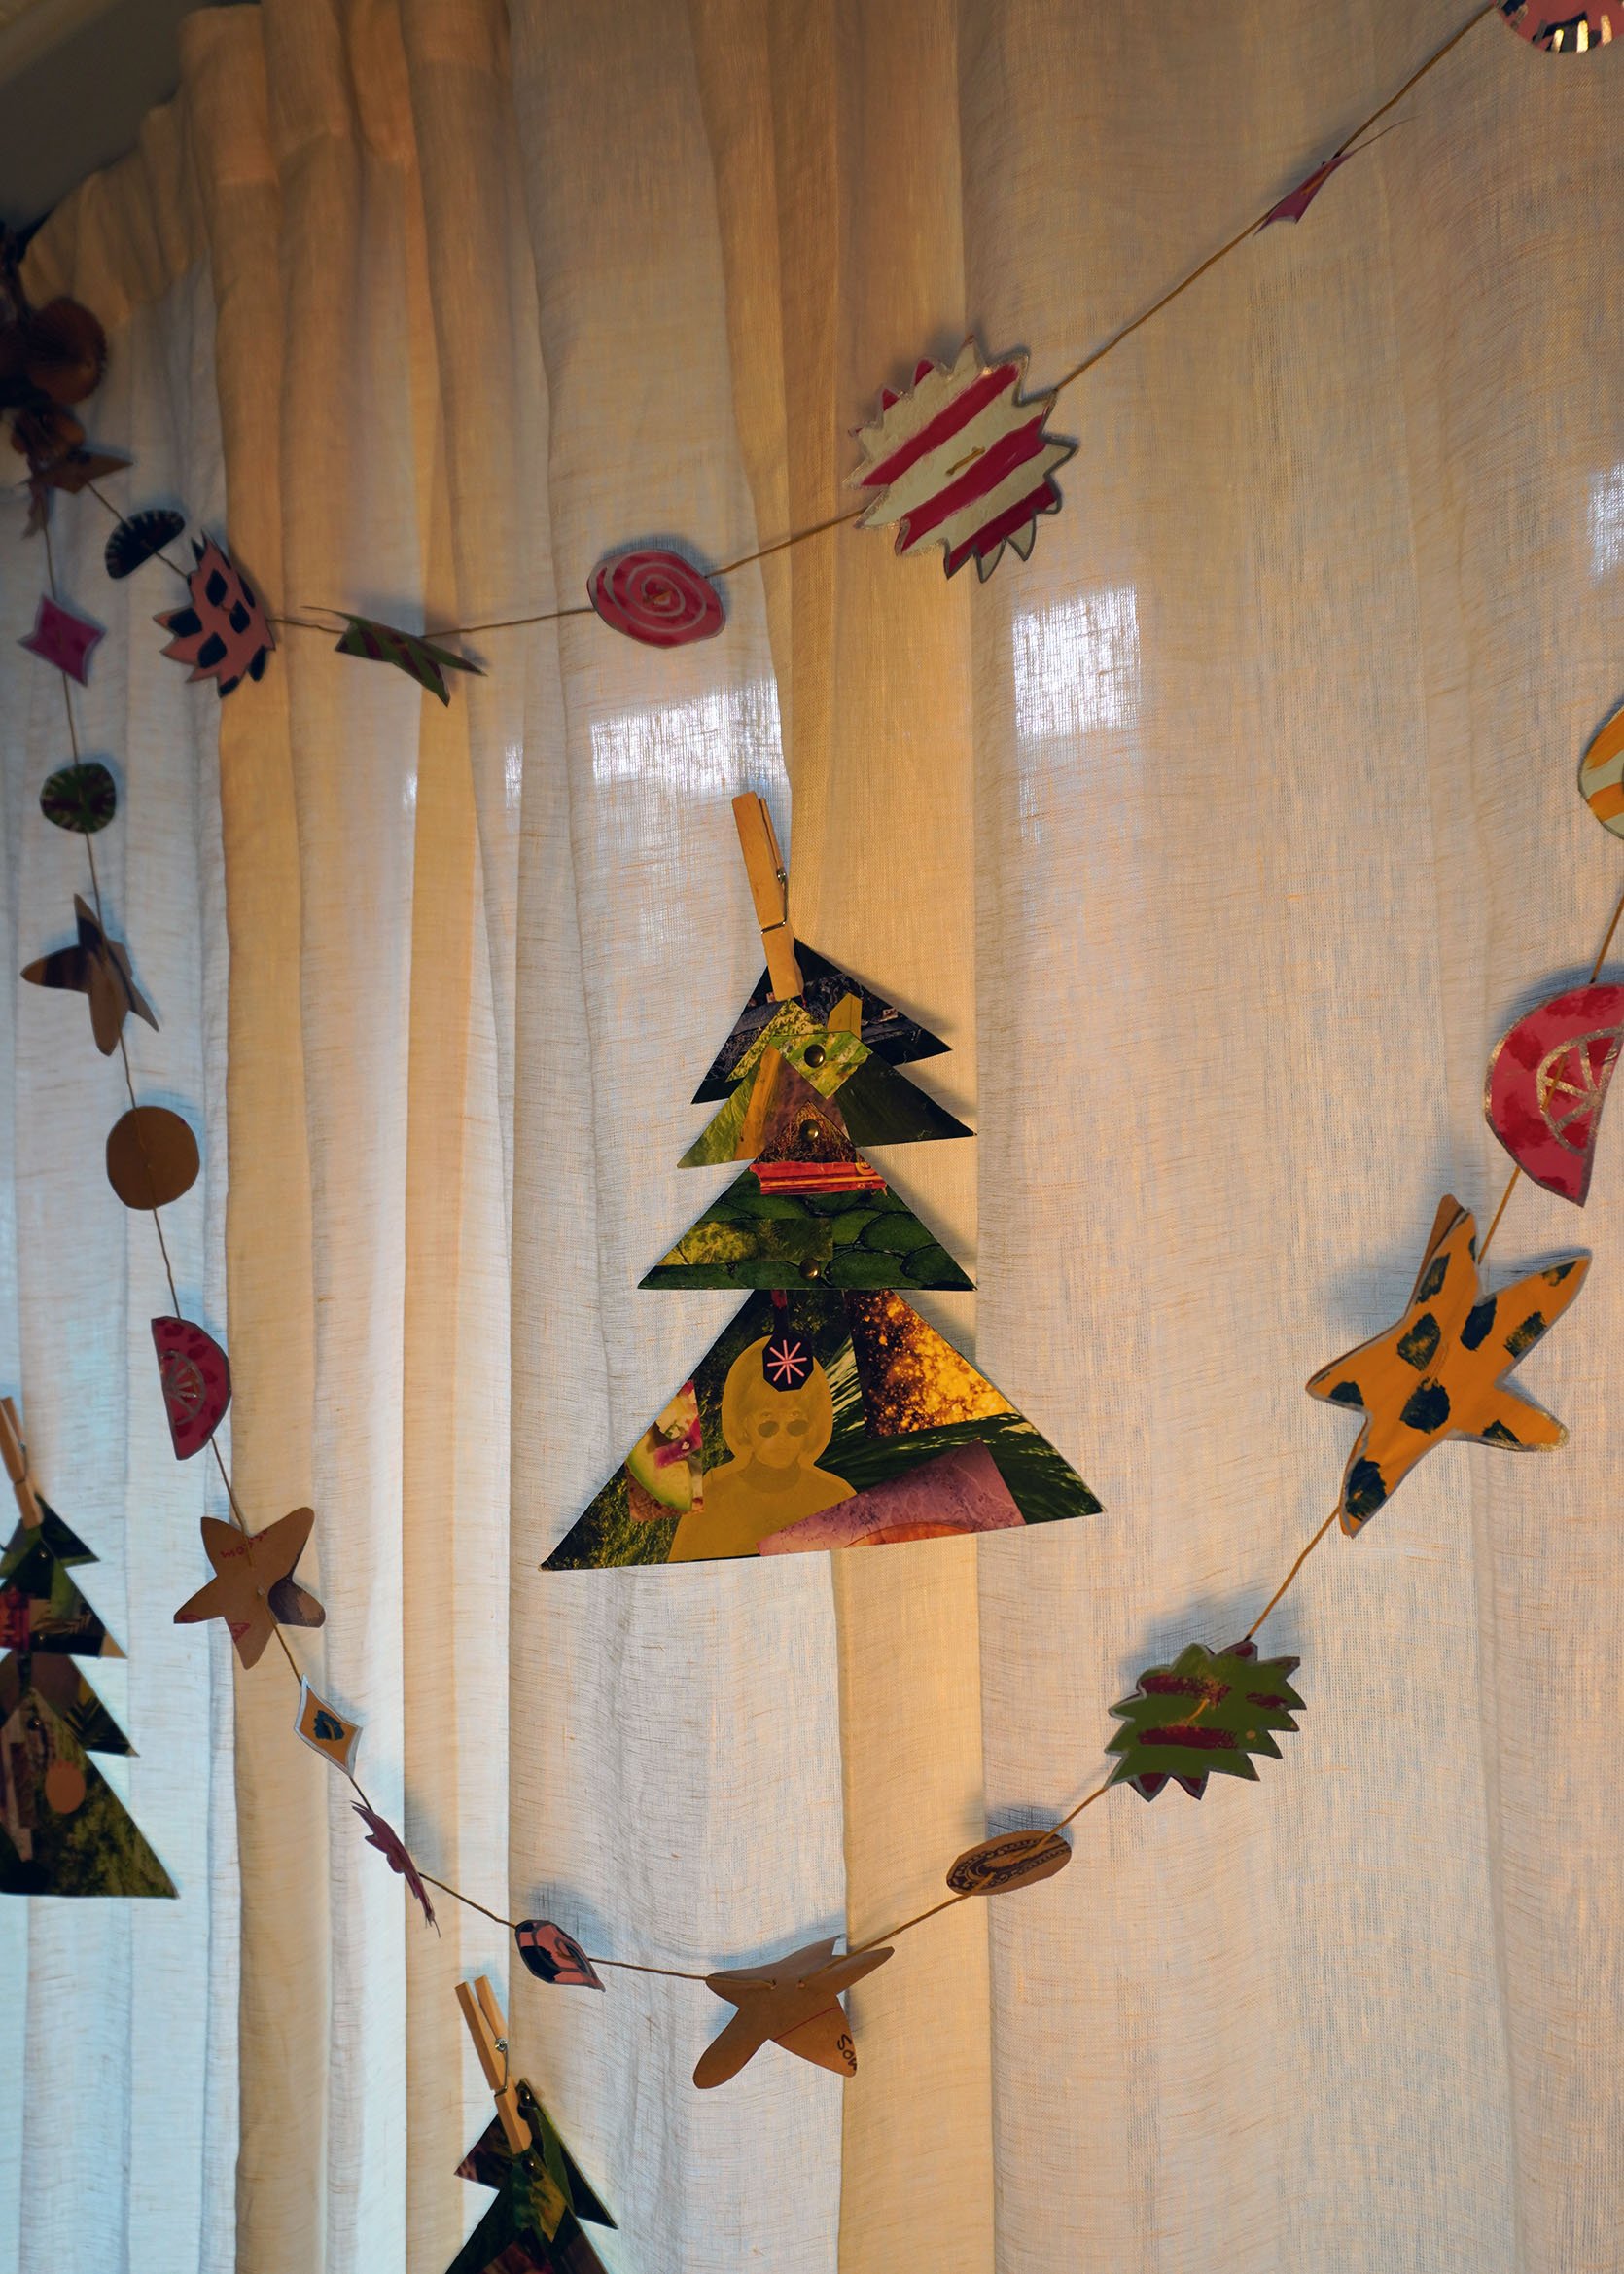
You may also decide to make a garland with these trees, threading them together through their top holes, even clipping clothespins to the bottom to act as a “stem.” I’ve done this with these exact trees in years past, and it worked great. But as you can see in this picture, I’ve already made a garland… this is the DIY I want to show you next!
grocery bag garland
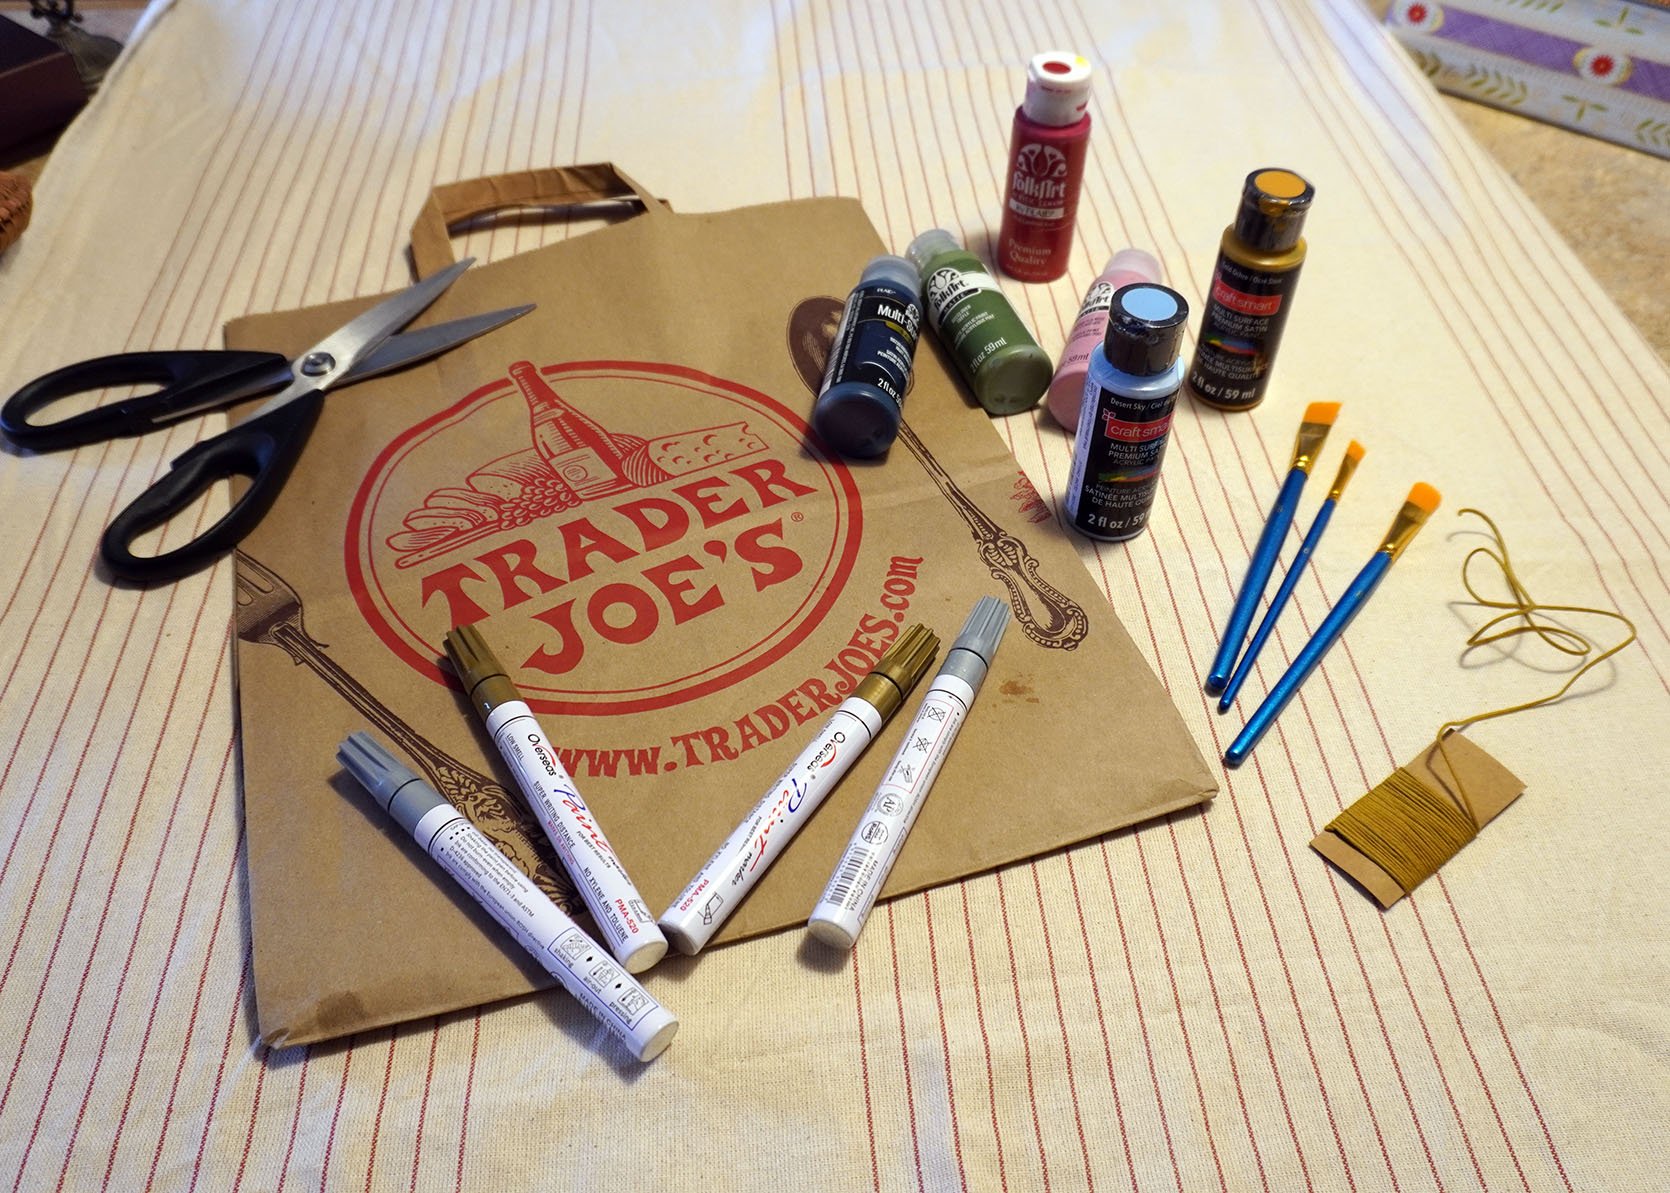
This holiday garland DIY was inspired by a TikTok. If you didn’t grow up crafting like I did, don’t fear. There are about a trillion quick, inspirational videos out there that show you how simple and fun it can be (I’ve gathered some of my favorites to show you for even more ideas, just keep scrolling).
This girl took her Trader Joe’s bag and decided to cut out the cutest star garland to hang around her house. She started by drawing shapes with Sharpie, then painted them, gave them cute little faces, and then tied them together to hang. over easy.
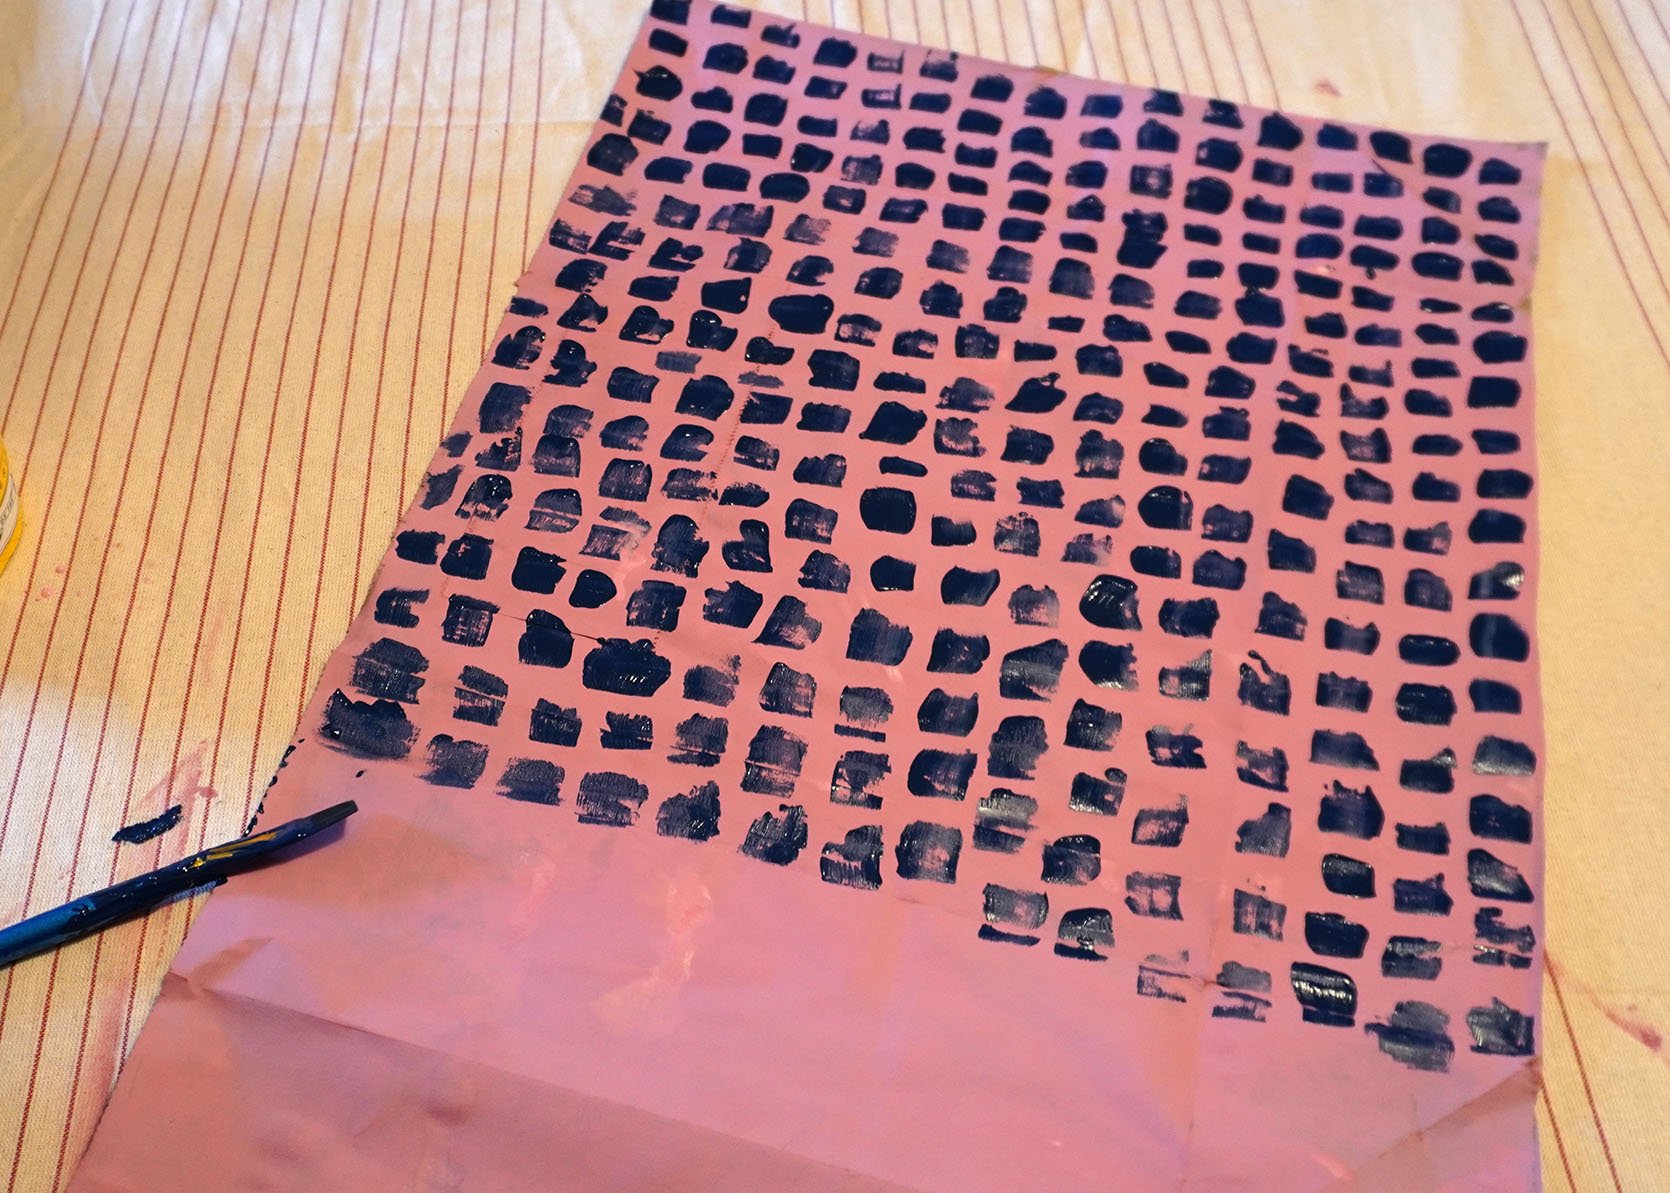
Well, instead, I decided to paint the entire bag. Actually, I painted a bunch of brown grocery bags with all kinds of different patterns and colors. You’ll want to cut up the bag to make the most of your materials, paint it a solid color with cheap craft paint or whatever you have on hand (doesn’t need to be perfect), and layer it with new colors – stripes, dots, squiggles, etc. Let’s be honest, the messier, the more fun!
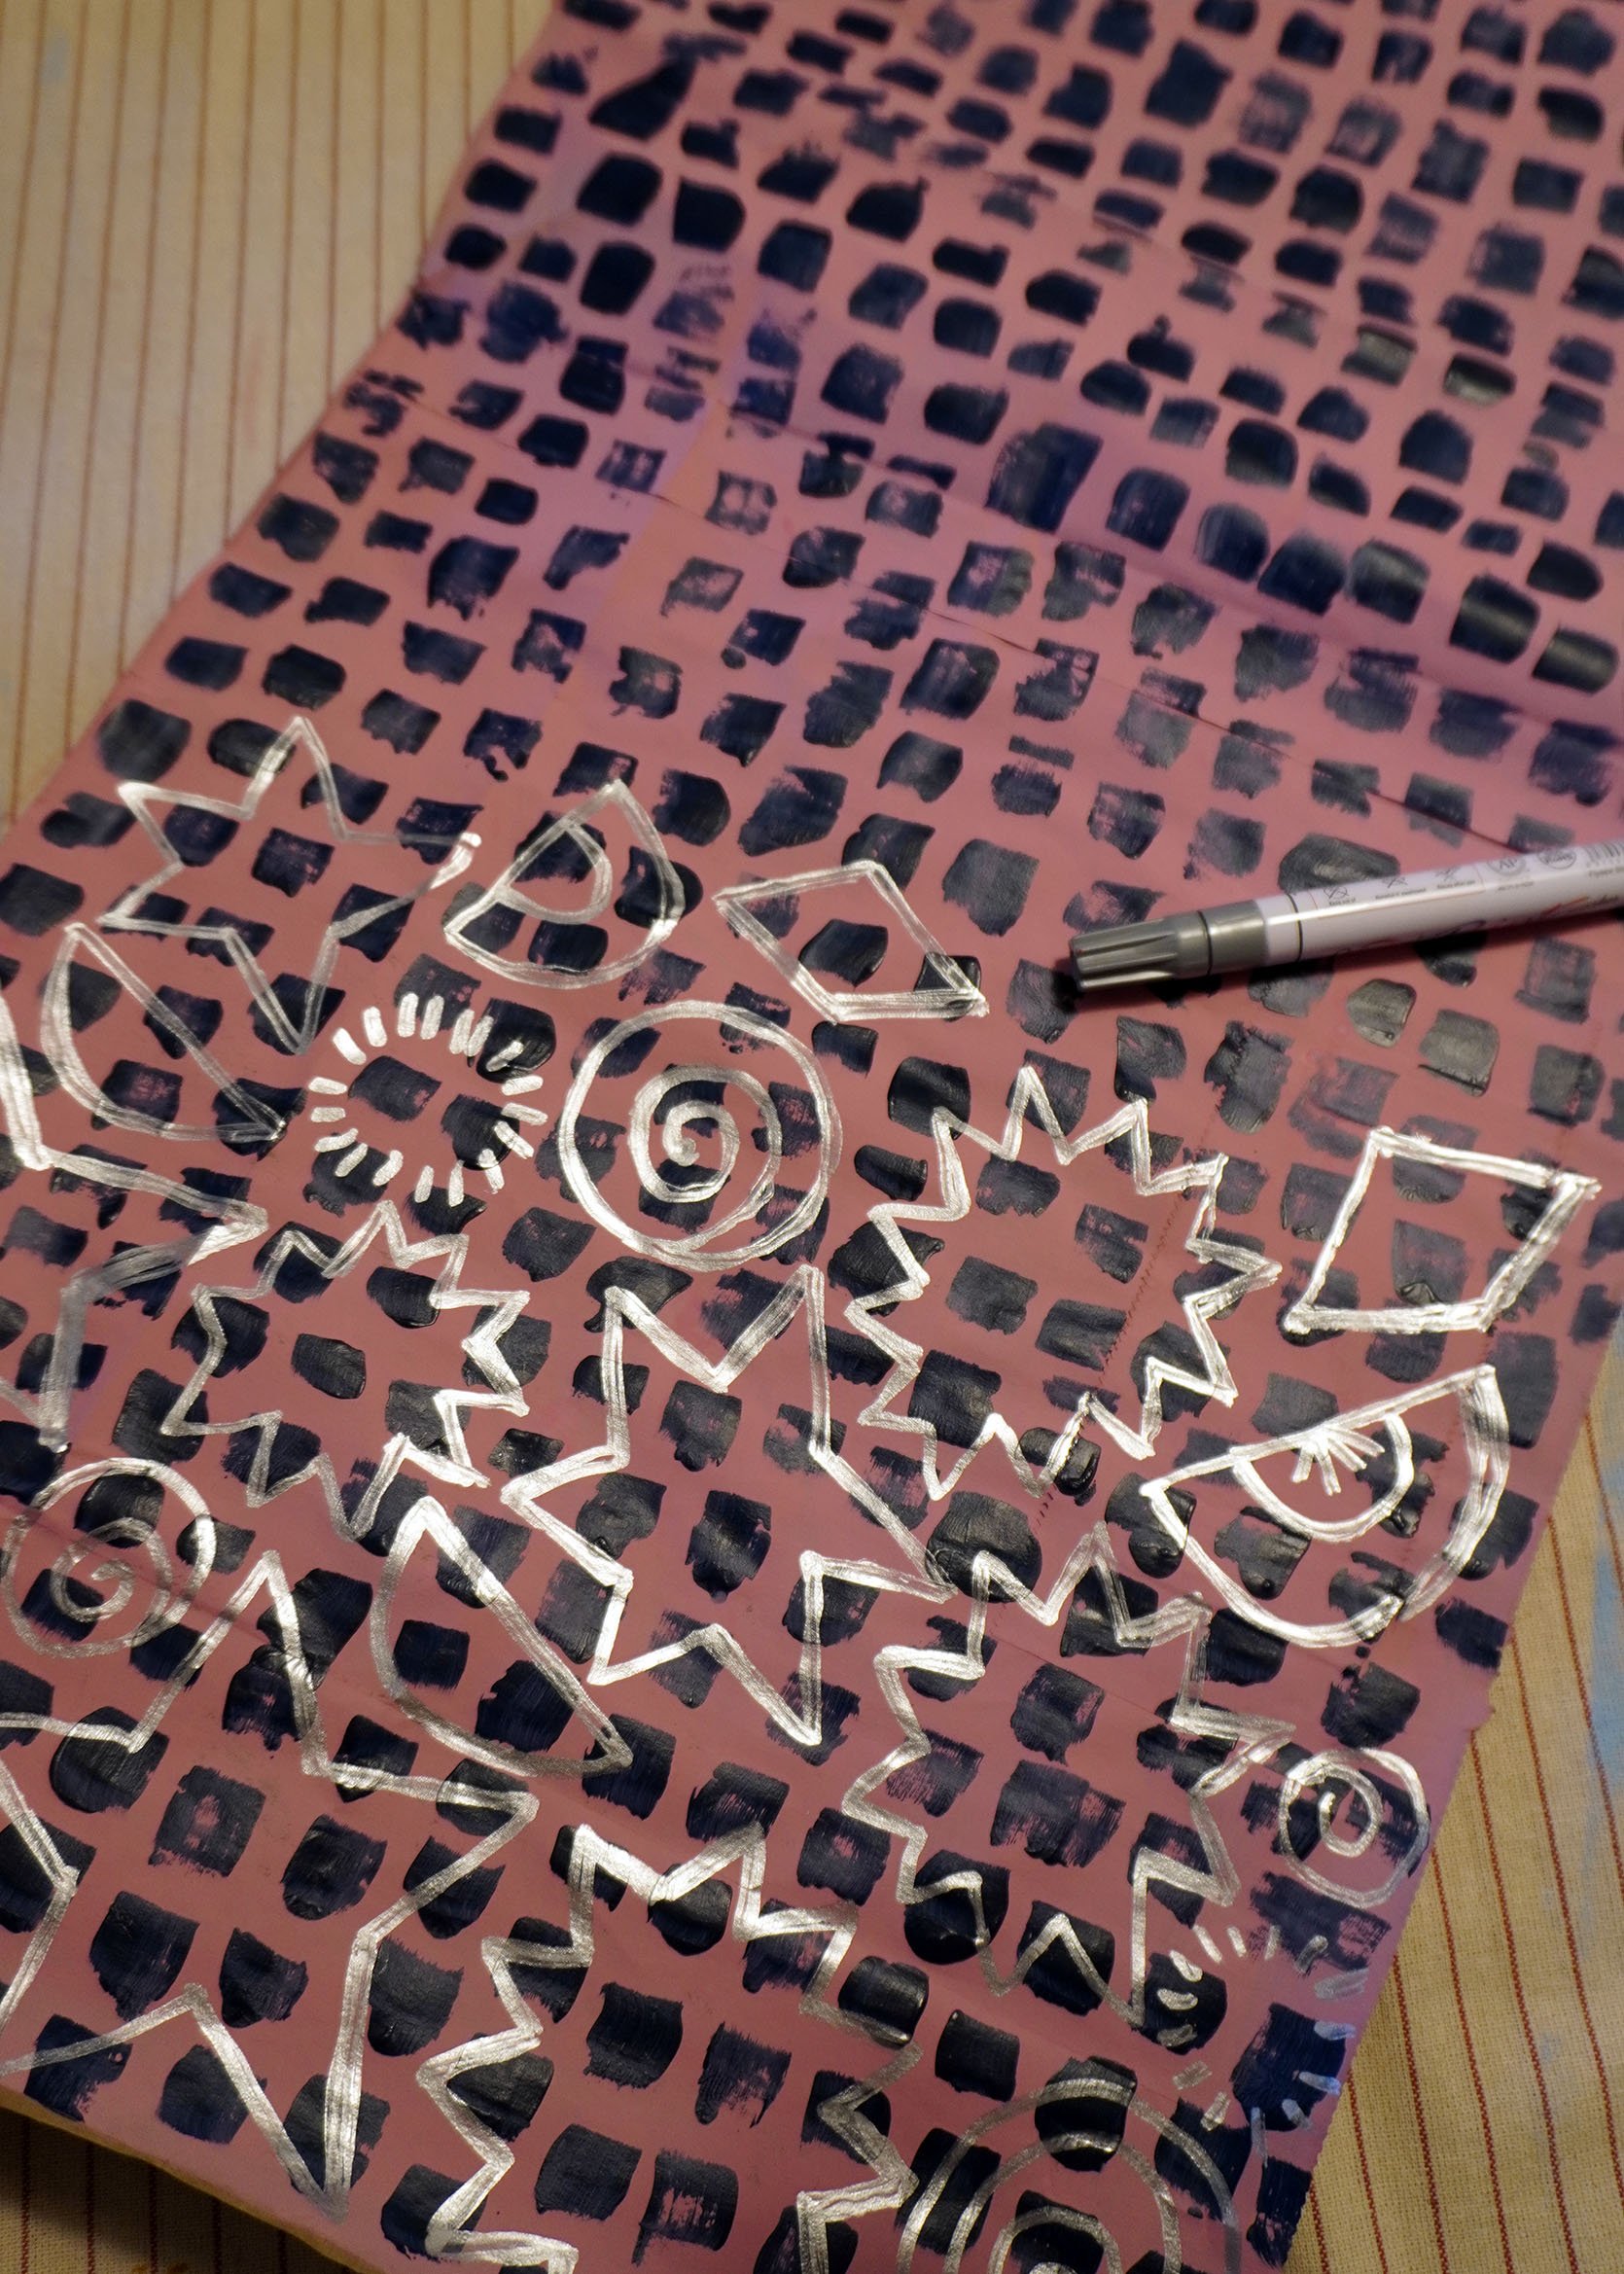
Next, I went in and drew shapes to cut out with my metal marker, because I wanted them to have a little “shine”. These are some of my favorite metallic pens to useI loved her basic simple stars, but I really wanted to see how many pieces I could get out of a bag, so I made stars, spirals, little explosions, diamonds, and even little orange wedges, Don’t know why, I thought it was funny, Go crazy here or stick to simplicity, it’s up to you!
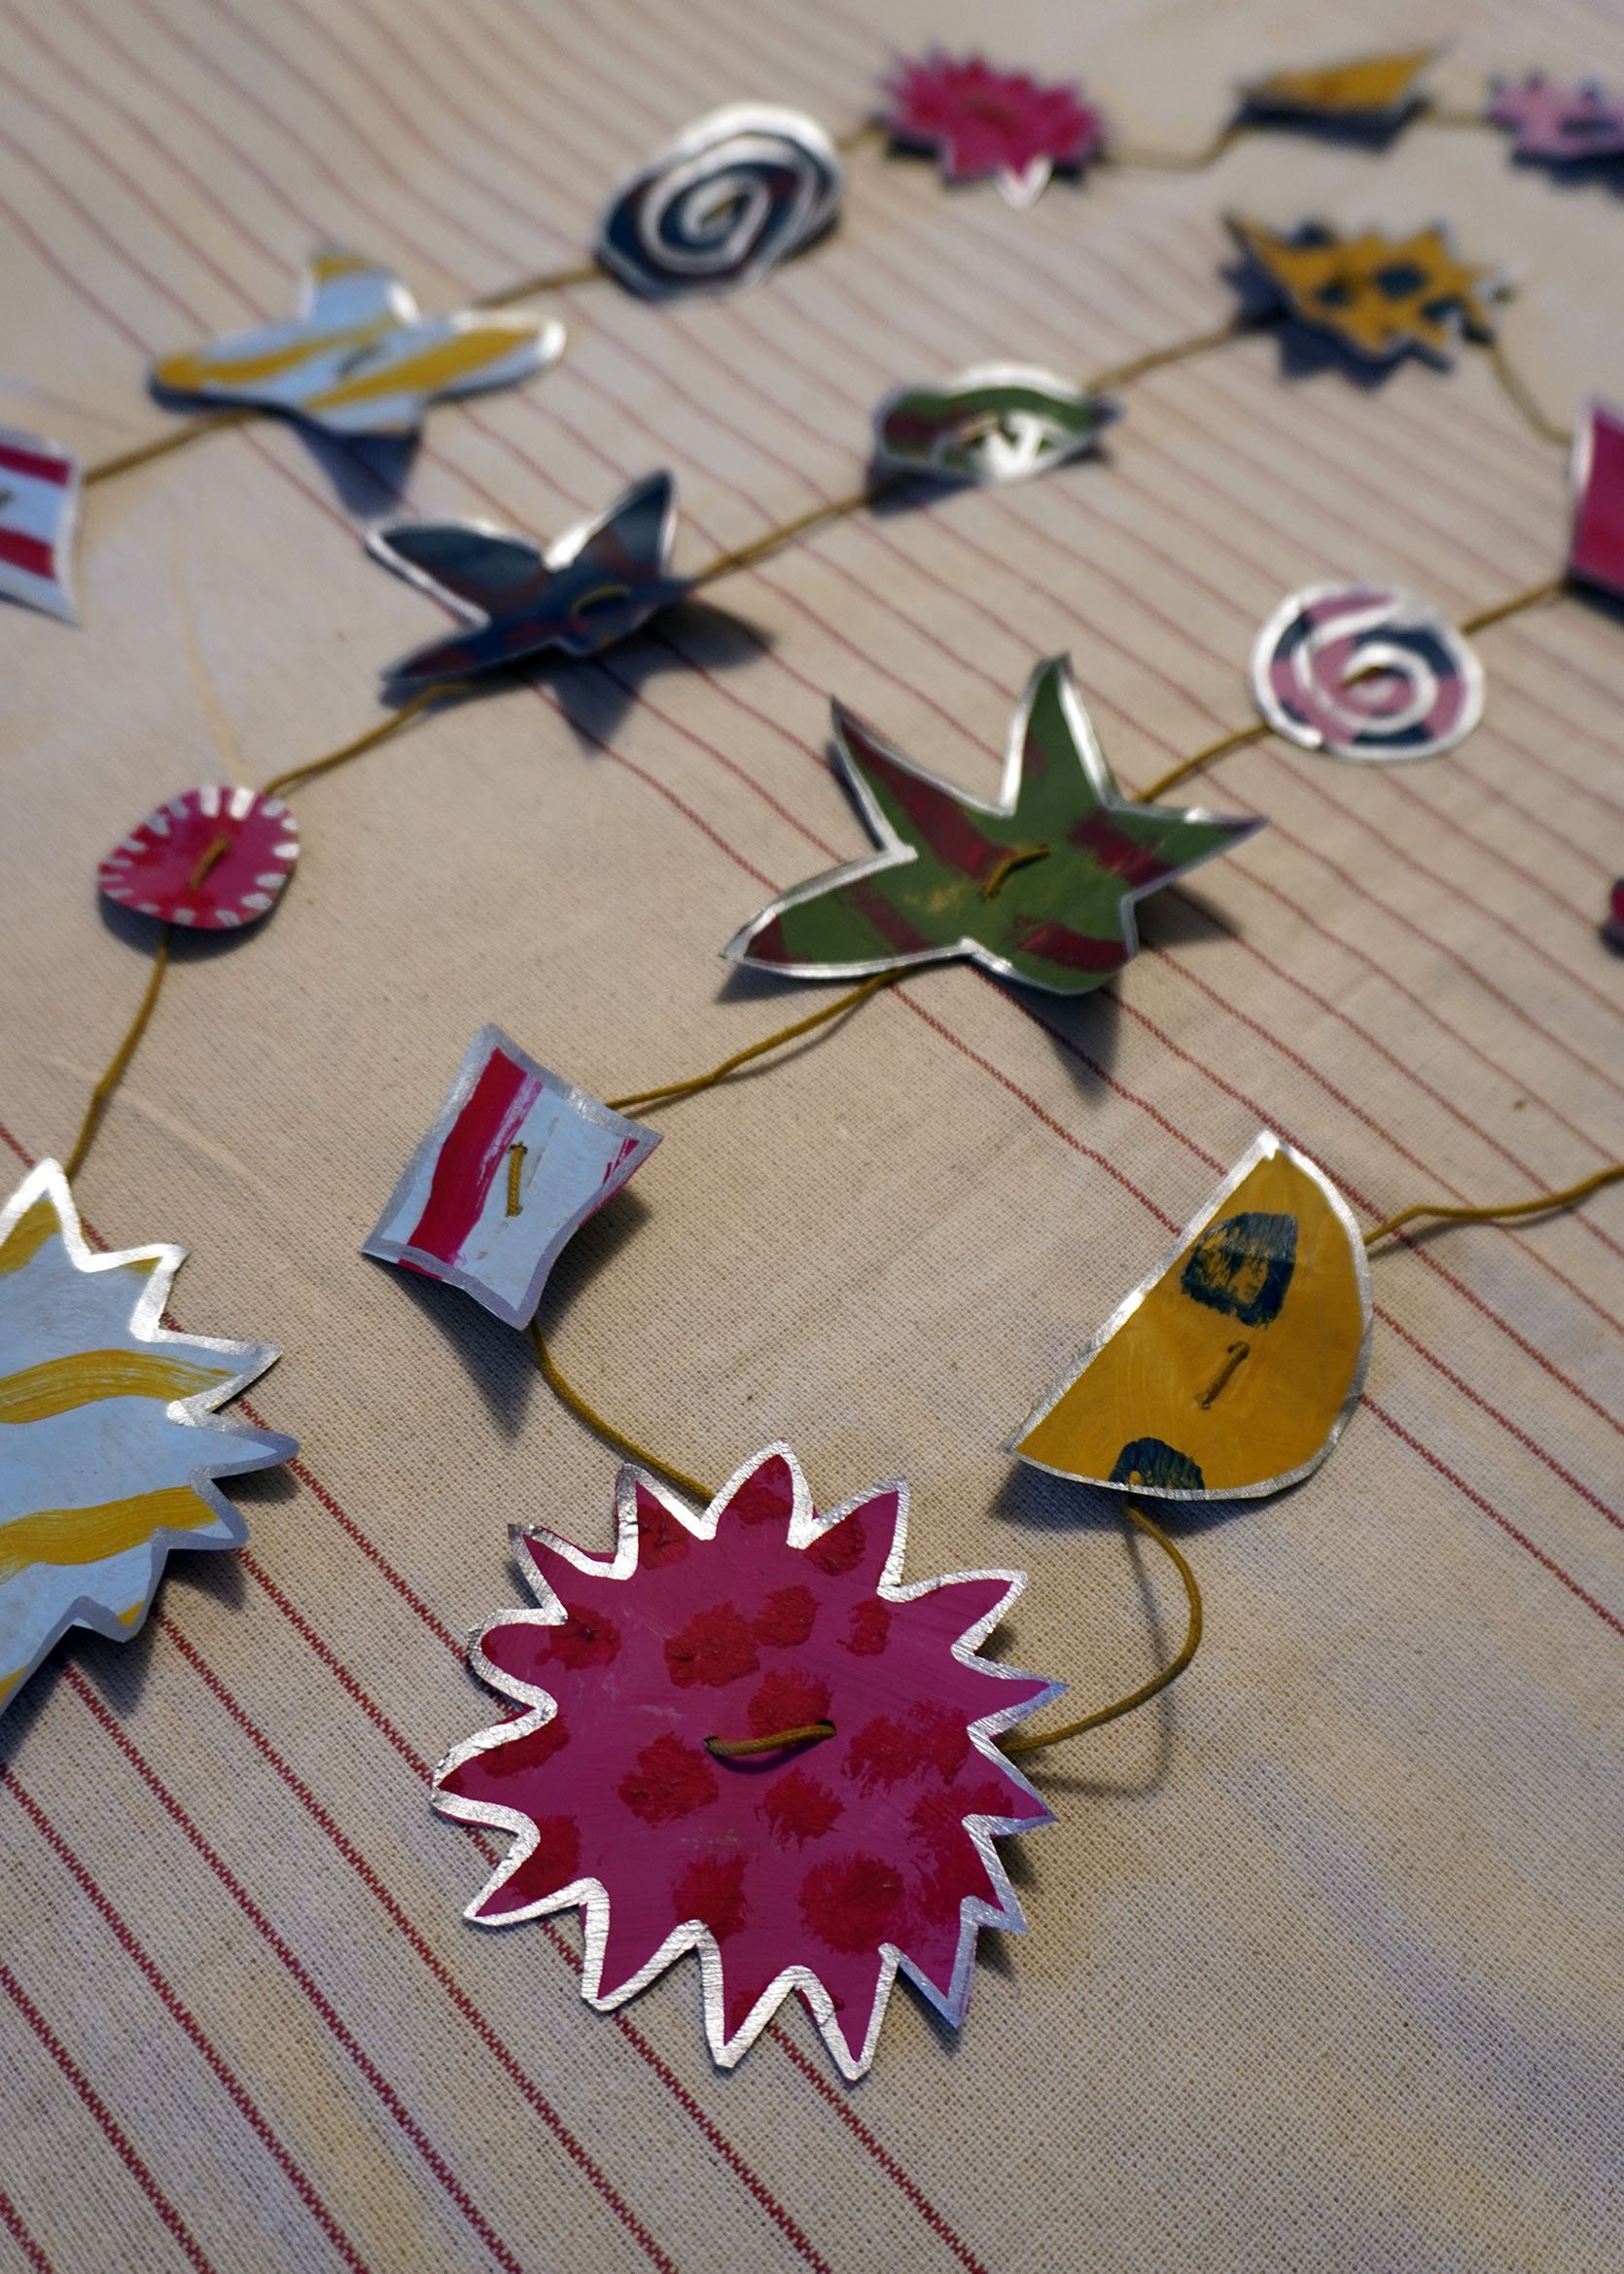
Drawing the pictures with metal markers made them even easier to cut out, and the variety of patterns and colors made piecing them together like a fun game. No two colors are next to each other. I made two holes with a large needle and threaded my string through them, just like the TikTok girl.
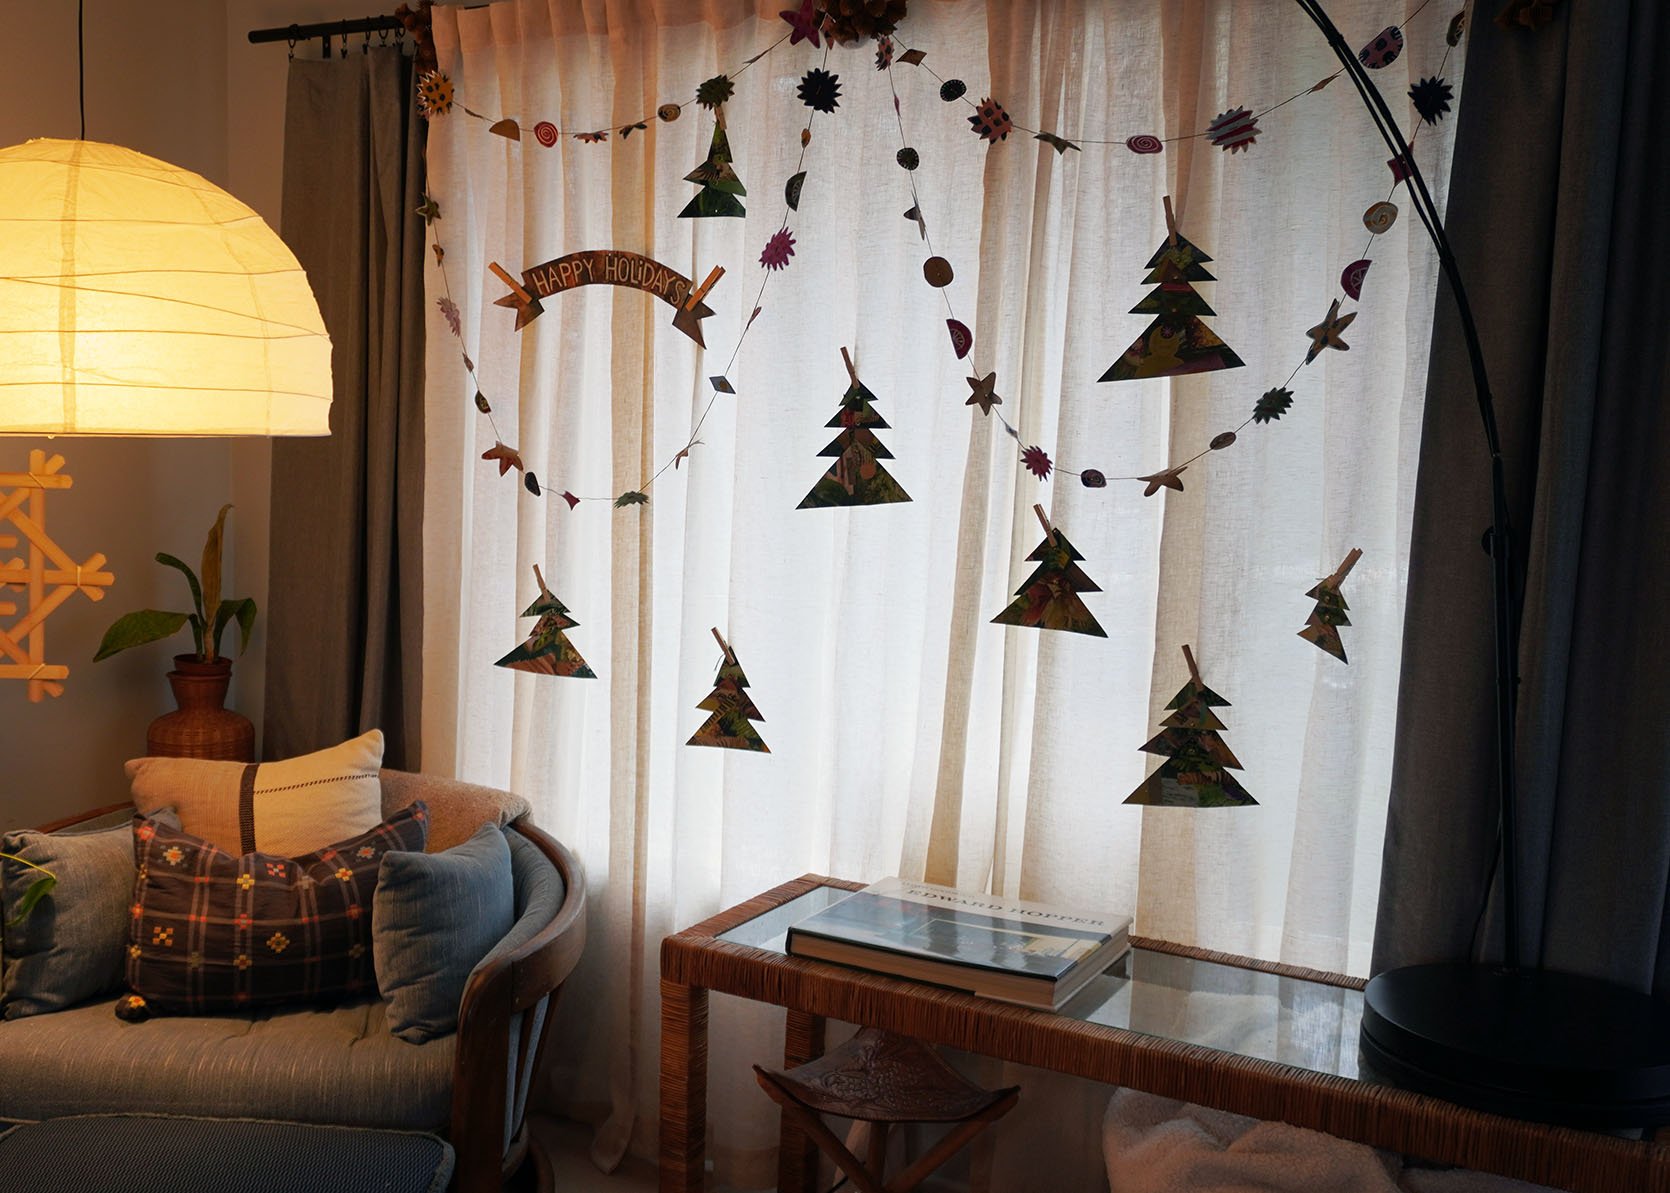
I added this to my already window full of trees and I love how they tie together! It’s a little hard to see the full benefits in these photos because they’re so backlit and I’m no Caitlin Green, but trust me they’re a lot of fun and colorful in person. The trees have lasted for years, and I plan to reuse the garland as often as possible. Nor are they so precious (or expensive) that I should someday decide to let them go. But the joy of seeing your hand-made holiday decorations all around your home? Priceless.
Here are some more easy ideas I’m saving for next year (or this weekend if the mood strikes).
paper stars
These have been a hit on my feed lately. I love that they are so colorful and easy and there are so many styles and ways to make them. If you decide you want to make them reusable, use paper clips or Velcro dots to secure the end pieces so you can fold them flat again for storage!
paper snowflakes
Like the paper stars, these snowflakes follow a similar technique, and I’m not really sure if I can classify them separately other than as cut-outs. I’ve made lunch bag versions over the years and loved them, but I recycled them after one use. I think the beautiful version is just to die for! M actually showed me that. The colorful ones will add a nice pop to any large display, and the twisty ones are a fun…twist on the classic snowflake look.
paper chain garland
It really is a classic. Low lift with big payoff. Em and her kids made some paper chains for their tree this year from old wallpaper samples (what a cute idea), and lots of people on the Internet have been linking up with their own colorful chains.
This girl shows you three ways to make them, each with its own specialty. I am an extreme advocate of short and thick bodies.
gingerbread garland
I have to try this. What a simple idea, but oh so cute. I think it would be fun to extend this idea with a garland. It would be much easier to make 3D “gingerbread” houses out of cardboard and white paint, and they will last much longer in my house than the real, edible version. I can’t help myself from immediately closing the chimney every year.
So what are some of your favorite holiday crafts? Did you grow up making garlands or string popcorn from dried orange slices? Are you the classic folded paper snowflake type? Have you tried making any of these fun paper crafts yourself? Or have you made other festive crafts this year that I need to know about?? Let us know in the comments 🙂 I’m always looking for new inspiration!