
Onion Raita is a simple and creamy side dish made using onions, curd, green chillies, coriander and salt. It is mostly served with biryani, pulao, paratha and even plain rice. It is very popular in hotels and restaurants as a side dish to biyani. It’s cool, slightly crisp and refreshing in taste. Recipe included with step-by-step pictures and videos.
Making onion raita is very easy and simple but if it is made properly then it tastes very good. It goes great with spicy gravies and rice dishes. It tastes great with hot rice and makes the meal complete. This raita is a little different because salt is added before adding the onions. That small step changes the entire taste.
jump to:
About Onion Raita
Onion Raita is a basic Indian raita that is common in many households. It is made by mixing chopped onions with whipped curd and a few simple ingredients. No biryani is complete without raita. Onion raita is called Vengaya Thayir Pachadi in Tamil and Perugu Pachadi in Telugu and Onion Raita in Hindi.
There is no need to cook it and yet it tastes great. Mostly it is served with biryani or pulao. The curd cools down the spice of the biryani and gives balance to the food. Variations include Onion Tomato Raita, Onion Cucumber Raita, Onion Mint Raita, Cucumber Onion Tomato Raita etc. but what I am sharing is a very simple onion raita which is the best side dish for biryani.
The texture of onion raita is mild and creamy with crunchy onion pieces. Onion gives a slight crispiness and curd makes it cool. When salt is added to onion, its pungent taste reduces. This makes the raita soft, easy to eat and light on the stomach, even children like it due to the creaminess of curd and mild spices.
There are many small changes you can try like adding roasted cumin powder, a small pinch of sugar for balance, or using mint leaves in place of coriander. Even small changes give a different taste. It’s quick and always works. Even when guests come over, this raita is easy to make and always suits the menu.
I usually make this on weekends when biryani is on the menu. Sometimes I also make it with plain rice for lunch. I make it often because it takes very little time and requires no cooking at all. Gugu loves onion raita and he needs it when I make biryani.

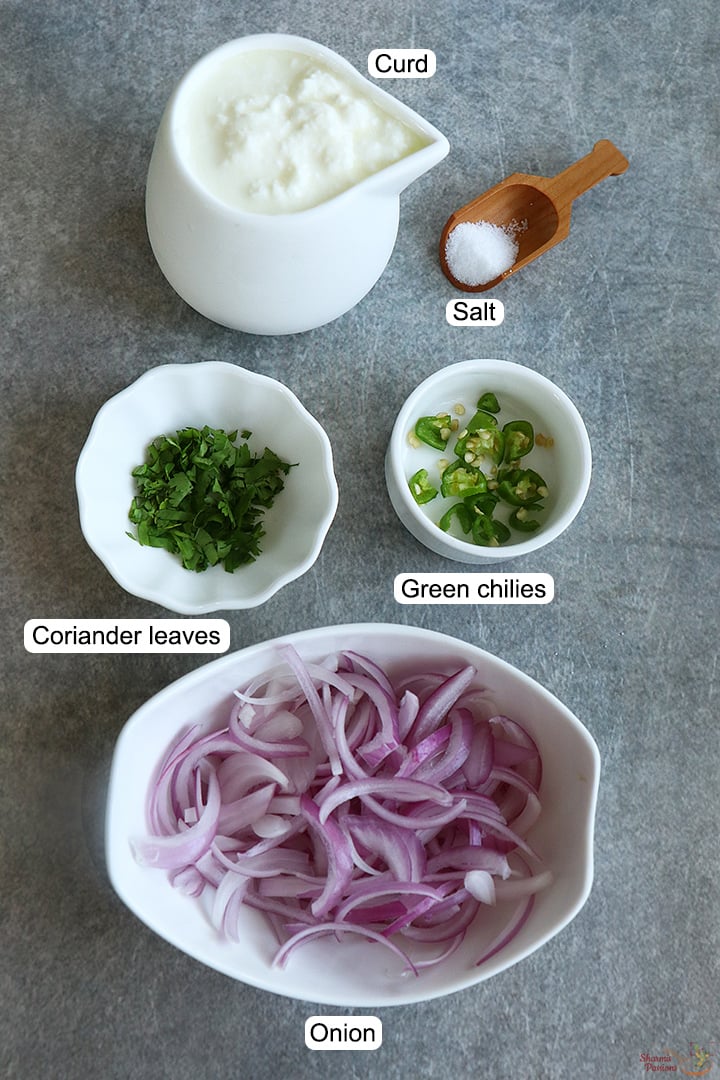
Onion Raita Ingredients
- thick curd/yogurt – I have used it as a base for raita, it makes everything creamy and cool. Fresh thick curd works well. Curd should not be thin, it should be thick.
- Onion – I have used thinly sliced large onions for crunch and mild sweetness. You can also use chickpeas. I cut it into thin pieces, you can also use a slicer to cut it.
- Green chilly – I added it for mild spice. It balances the taste of soft curd. If you don’t want spice then you can reduce or leave it out.
- coriander leaves – I added it for refreshing smell and mild taste. It also gives freshness to the raita.
Why does this recipe work
- It is very easy and uses only basic kitchen ingredients.
- This recipe cools down the spicy food and makes the meal balanced.
- Soft onion makes the raita light and not too spicy.
- It takes very little time and does not require cooking.
- You can easily change it by adding vegetables or spices.
similar recipe
How to make onion raita step by step
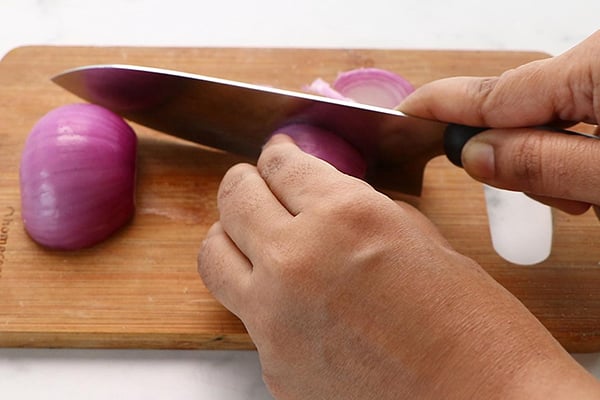
1. Take 1 medium sized onion, peel it, cut it in half and slice it lengthwise as thinly as possible. You can also use a mandoline slicer to slice it thinly.
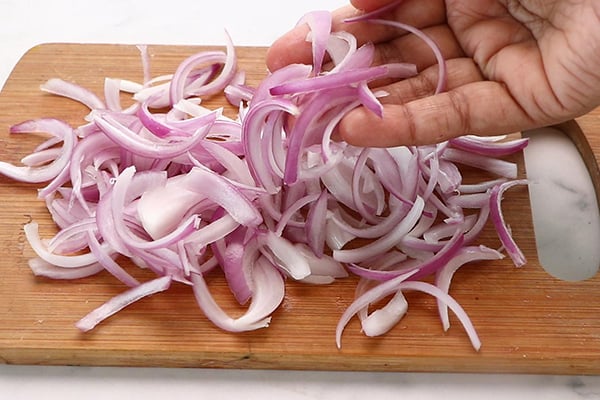
2. Separate the layers.
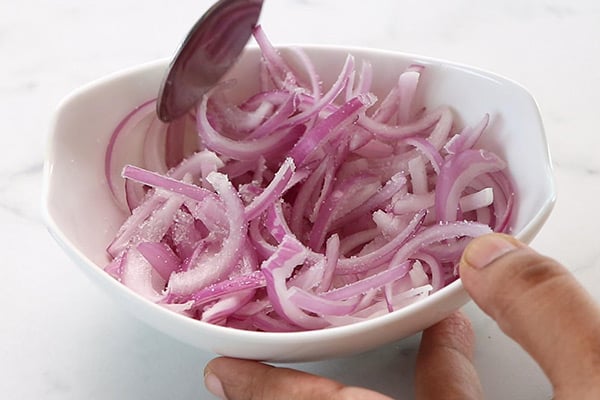
3.Take it out in a bowl, add salt as per taste and mix well. Before adding, check whether the onion is releasing too much water or not, then add it to the curd, otherwise you can add it the way I did.
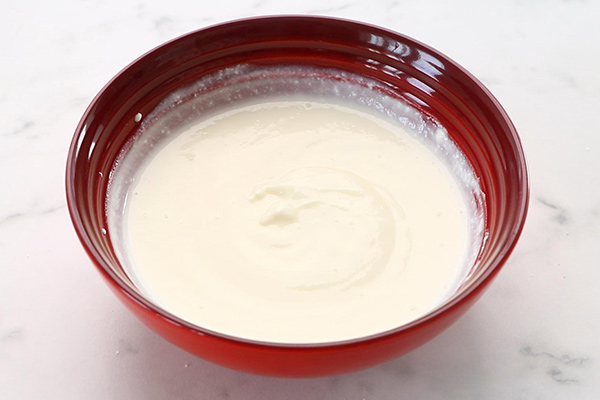
4.Take 1 cup thick curd in a bowl. Beat it well until it becomes smooth and creamy.
5.Add onion, 1 finely chopped green chilli and 1 tablespoon green coriander.
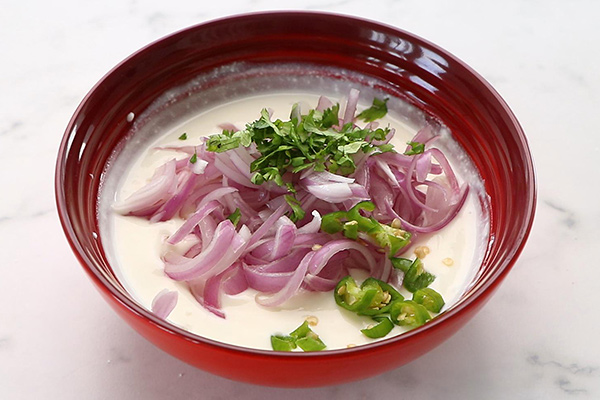
6. Mix it well.

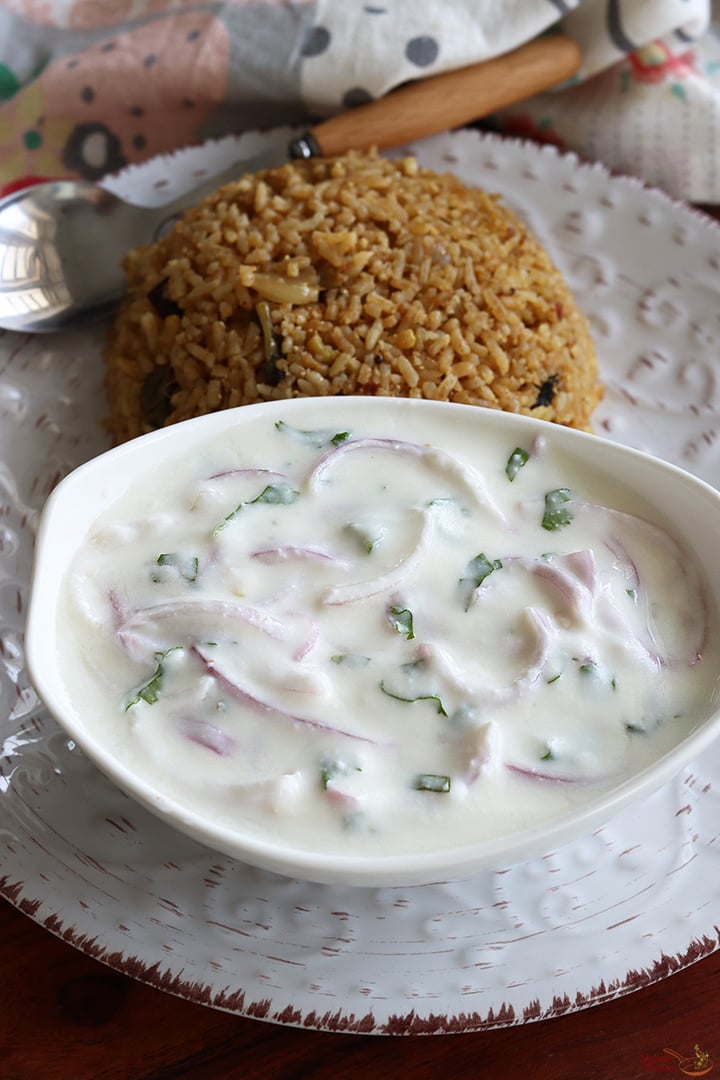
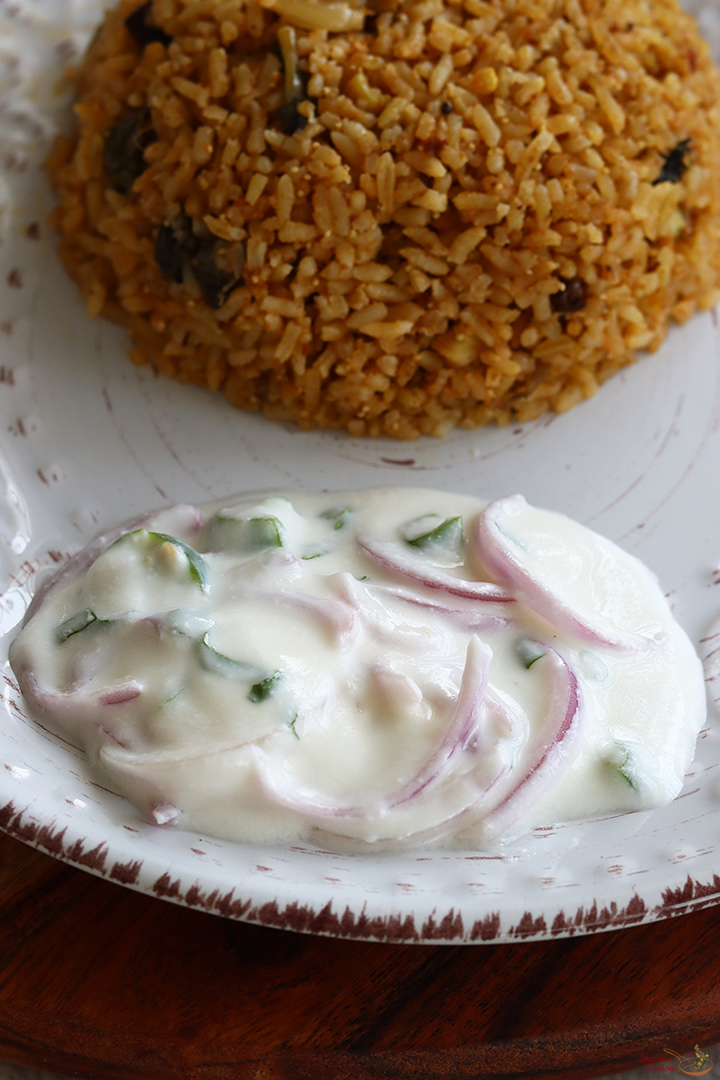
Onion raita is ready!
Expert Tips
- chopping onions – Cut the onion lengthwise as thinly as possible. You can also use a slicer to cut it thinly.
- mix with salt – I add salt and the rest of the onion before mixing, this removes the raw smell and excess water. Do not try to skip this step.
- texture of curd – I usually use thick fresh curd so that the raita does not turn watery. Do not use runny curd.
- light mix After adding onion, mix everything gently. Mixing too much will spoil the texture of the curd and make it thin.
- extra flavor – You can add very little roasted cumin powder or chaat masala. Do not add too much as it will spoil the raita.
- add more – If you want, you can also add pomegranate or cucumber in it. You can also add finely chopped tomatoes and carrots.
serving and storage
Serve them hot with biryani, veg pulao or masala rice. It also goes well with spicy gravies and dry curries. Always serve onion raita fresh for best taste. Keep leftovers in the refrigerator and use within a day. Mix once before serving again.
general questions and answers
1.Can I not add green chillies to onion raita?
Yes, you can skip it completely. The raita will still taste good and be light for kids and adults.
2.Can I make onion raita in advance?
You can make it a few hours in advance and keep it in the refrigerator. Mix well and check the salt once before serving.
3. Why does my onion raita become watery?
This happens when onions release too much water. In such a situation, check the water and filter it and then mix it in curd.
4.Can I add other vegetables to this raita?
Yes, you can also add chopped cucumber or tomato or carrot. Make sure they are fresh and finely chopped.
5.Which curd is best?
Fresh thick curd works better. Curd that is too sour will change the taste and will not taste good.
If you have any further questions about this Onion Raita Recipe Mail me at sharmispassions@gmail.com. Also, follow me Instagram, Facebook, pinterest, youtube And Twitter ,
tried this Onion Raita Recipe Do let me know how you liked it. Tag us @sharmispassions on Instagram and hash tag #sharmispassions.
📖 Recipe Card
Onion Raita Recipe
Onion Raita is a simple and creamy side dish made using onions, curd, green chillies, coriander and salt. It is mostly served with biryani, pulao, parathas and even plain rice. It is very popular in hotels and restaurants as a side dish to biryani. It’s cool, slightly crisp and refreshing in taste. Recipe included with step-by-step pictures and videos.
Material
- 1 medium sized Onion
- 1 cup thick curd
- 1 Small Green chilly finely chopped
- 1 tablespoon coriander leaves finely chopped
- salt to taste
Instruction
-
Take 1 medium sized onion, peel it, cut it in half and slice it lengthwise as thinly as possible. You can also use a mandoline slicer to slice it thinly.
-
Separate the layers.
-
Take it out in a bowl, add salt as per taste and mix well.
-
Take 1 cup thick curd in a bowl. Beat it well until it becomes smooth and creamy.
-
Add onion, 1 finely chopped green chilli and 1 tablespoon green coriander.
-
Mix it well.
-
Onion raita is ready!
notes
- chopping onions – Cut the onion lengthwise as thinly as possible. You can also use a slicer to cut it thinly.
- mix with salt – I add salt and the rest of the onion before mixing, this removes the raw smell and excess water. Do not try to skip this step.
- texture of curd – I usually use thick fresh curd so that the raita does not turn watery. Do not use runny curd.
- light mix After adding onion, mix everything gently. Mixing too much will spoil the texture of the curd and make it thin.
- extra flavor – You can add very little roasted cumin powder or chaat masala. Do not add too much as it will spoil the raita.
- add more – If you want, you can also add pomegranate or cucumber in it. You can also add finely chopped tomatoes and carrots.
nutrition Facts
Onion Raita Recipe
Quantity per serving (50 grams)
calories 103 Calories from Fat 36
% daily value*
thick 4g6%
saturated fat 3g19%
polyunsaturated fat 0.1 g
monounsaturated fat 1 g
cholesterol 16 mg5%
sodium 172 mg7%
potassium 271 mg8%
carbohydrates 12 grams4%
fiber 2 g8%
sugar 9 grams10%
protein 5 grams10%
Vitamin A 136IU3%
vitamin C 7mg8%
Calcium 161 mg16%
Iron 0.2 mg1%
*Percent Daily Values are based on a 2000 calorie diet.