
")
Welcome to the smallest, ugliest room in my apartment (what used to be)! When I moved in, I knew the kitchen was less than ideal, but with the apartment price, location, and roommate (hi Jade!) everything aligned perfectly, I knew I could make it work. When I first visited my apartment, I knew it had amazing potential, but it needed a lot of love. The building dates back to the 1950s and still has plenty of adorable original details intact, but it was definitely given the “landlord special” a few times. Every apartment has its pros and cons, and for this place the pros were that the living space, dining room and bedroom were all quite large, but the major drawback was that the kitchen was very small. Well, at least small for LA standards…the kitchen in my New York apartment would be so jealous they’d probably block this kitchen on Instagram. But considering that my roommate and I both love to cook and are often both in the kitchen at the same time, this room is very, very small. Especially because of the initial fridge placement…let me show you.
First

fridge malfunction
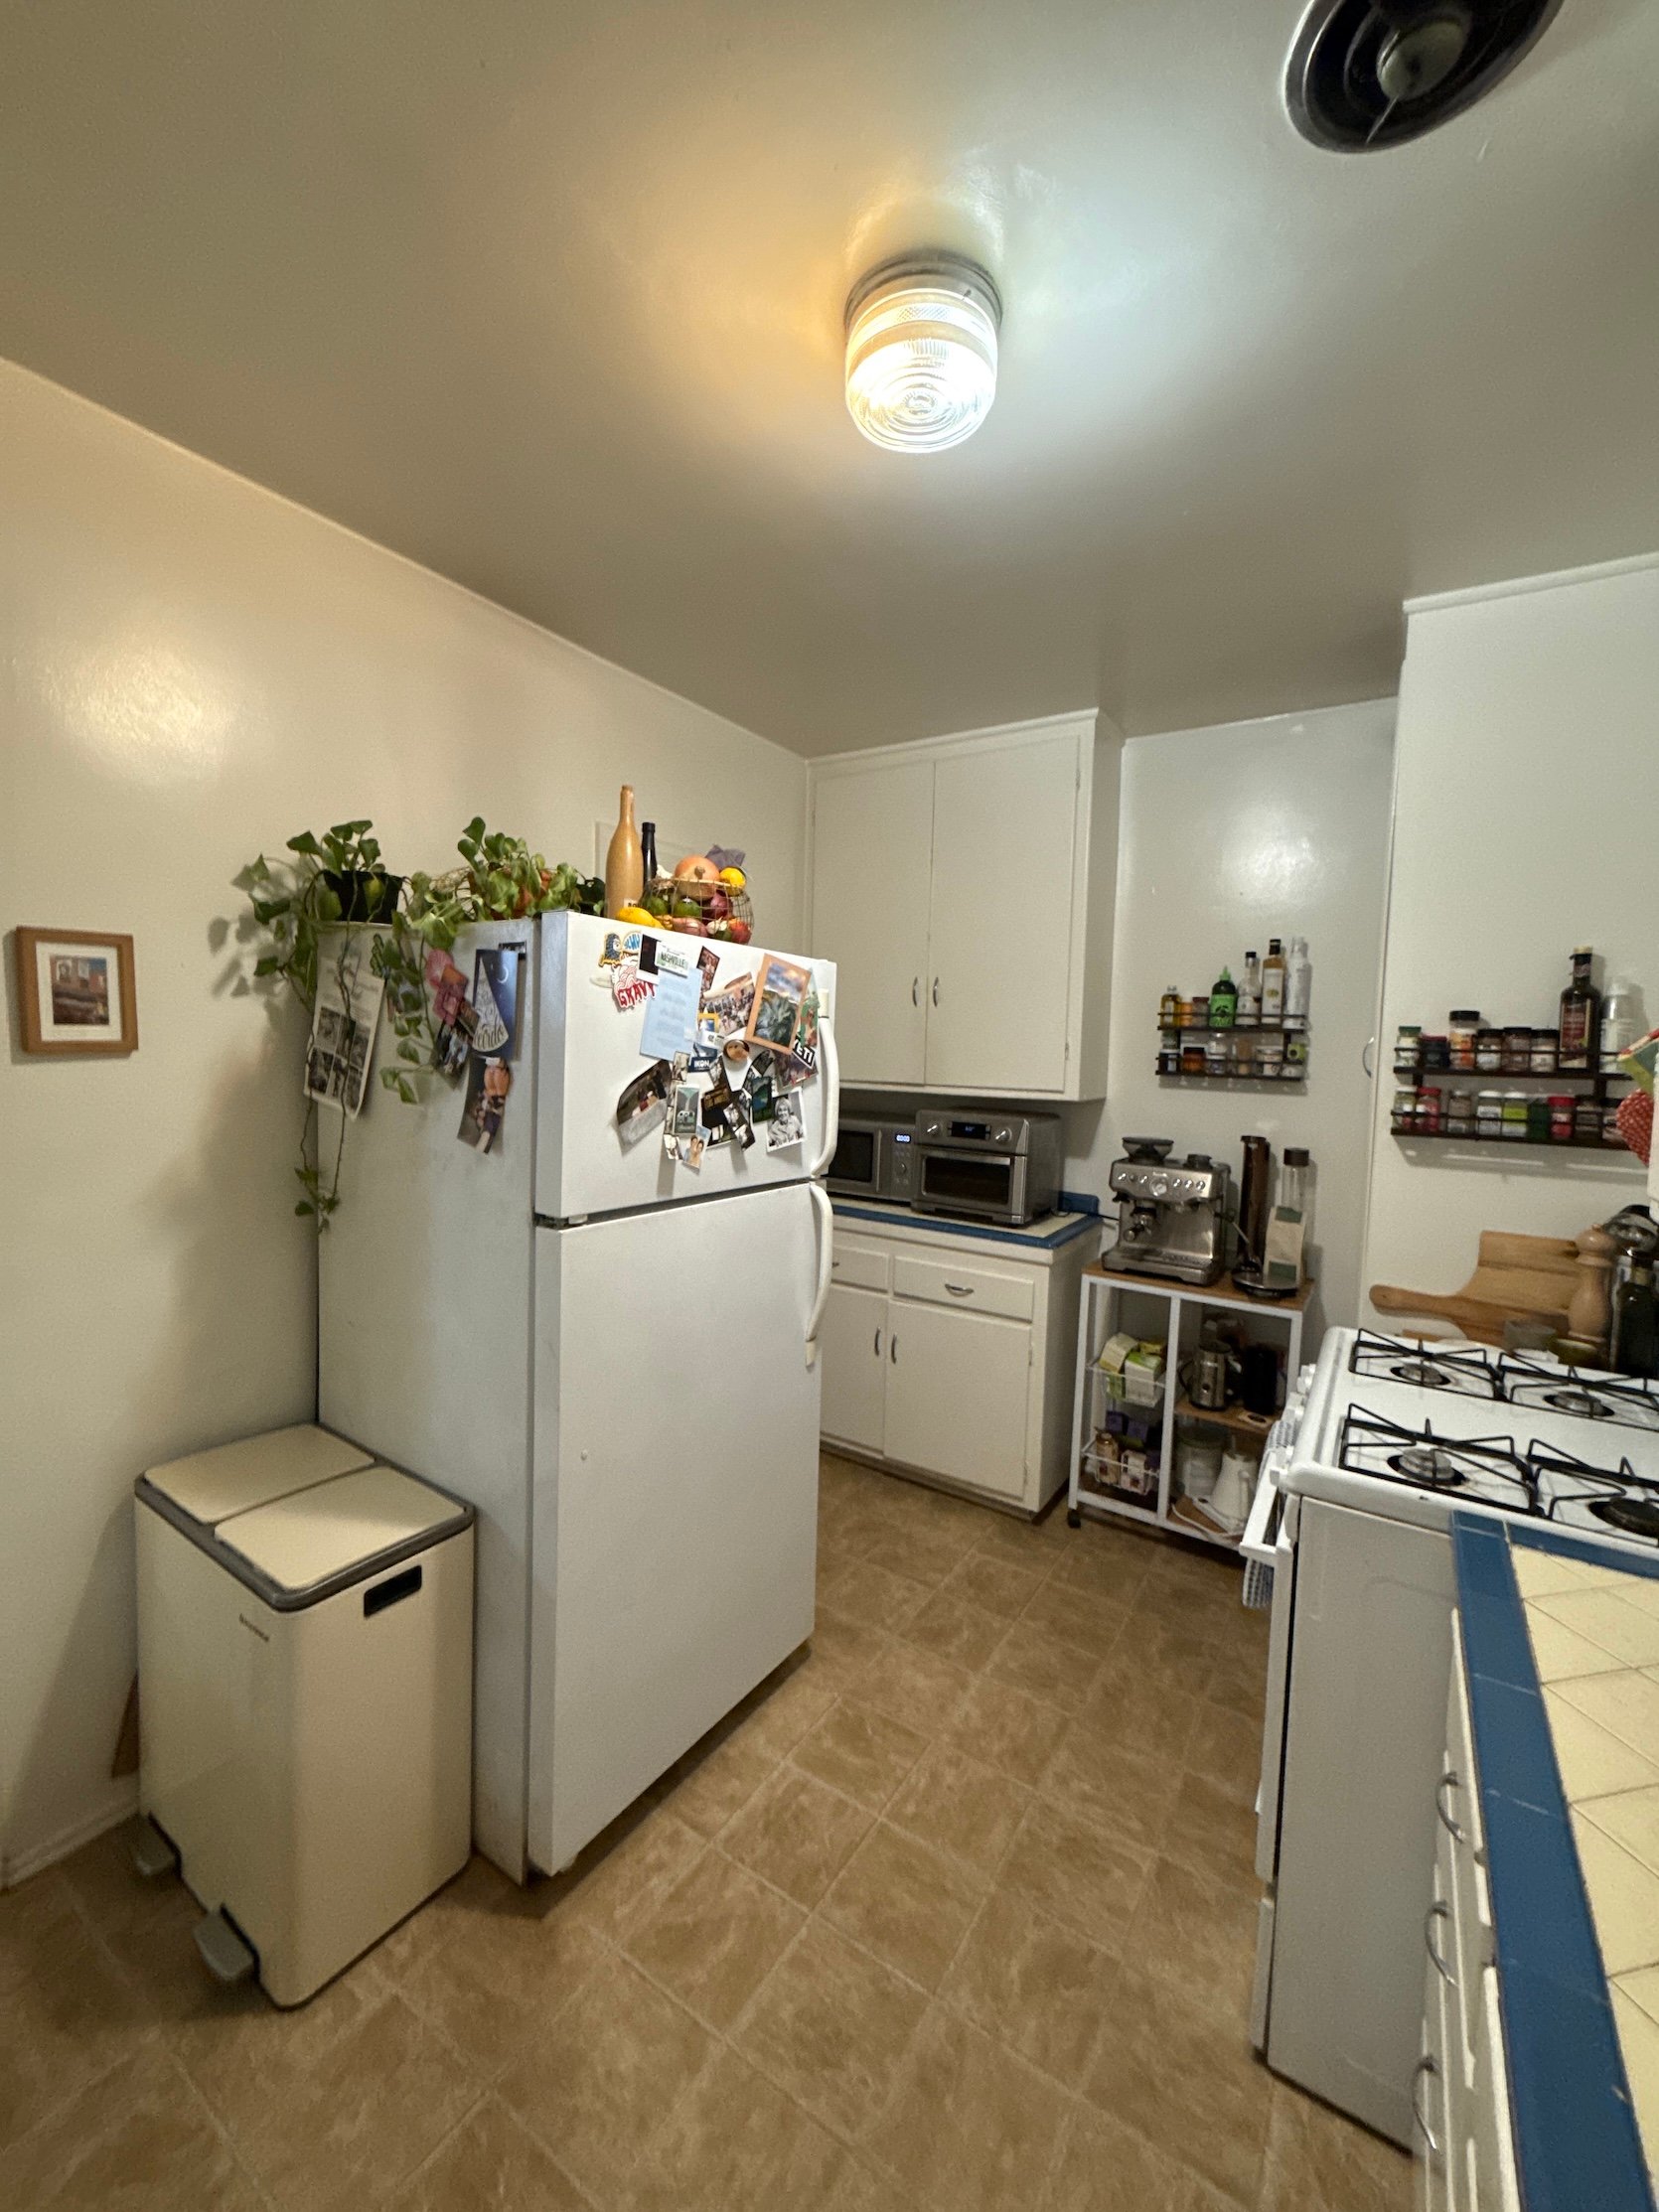
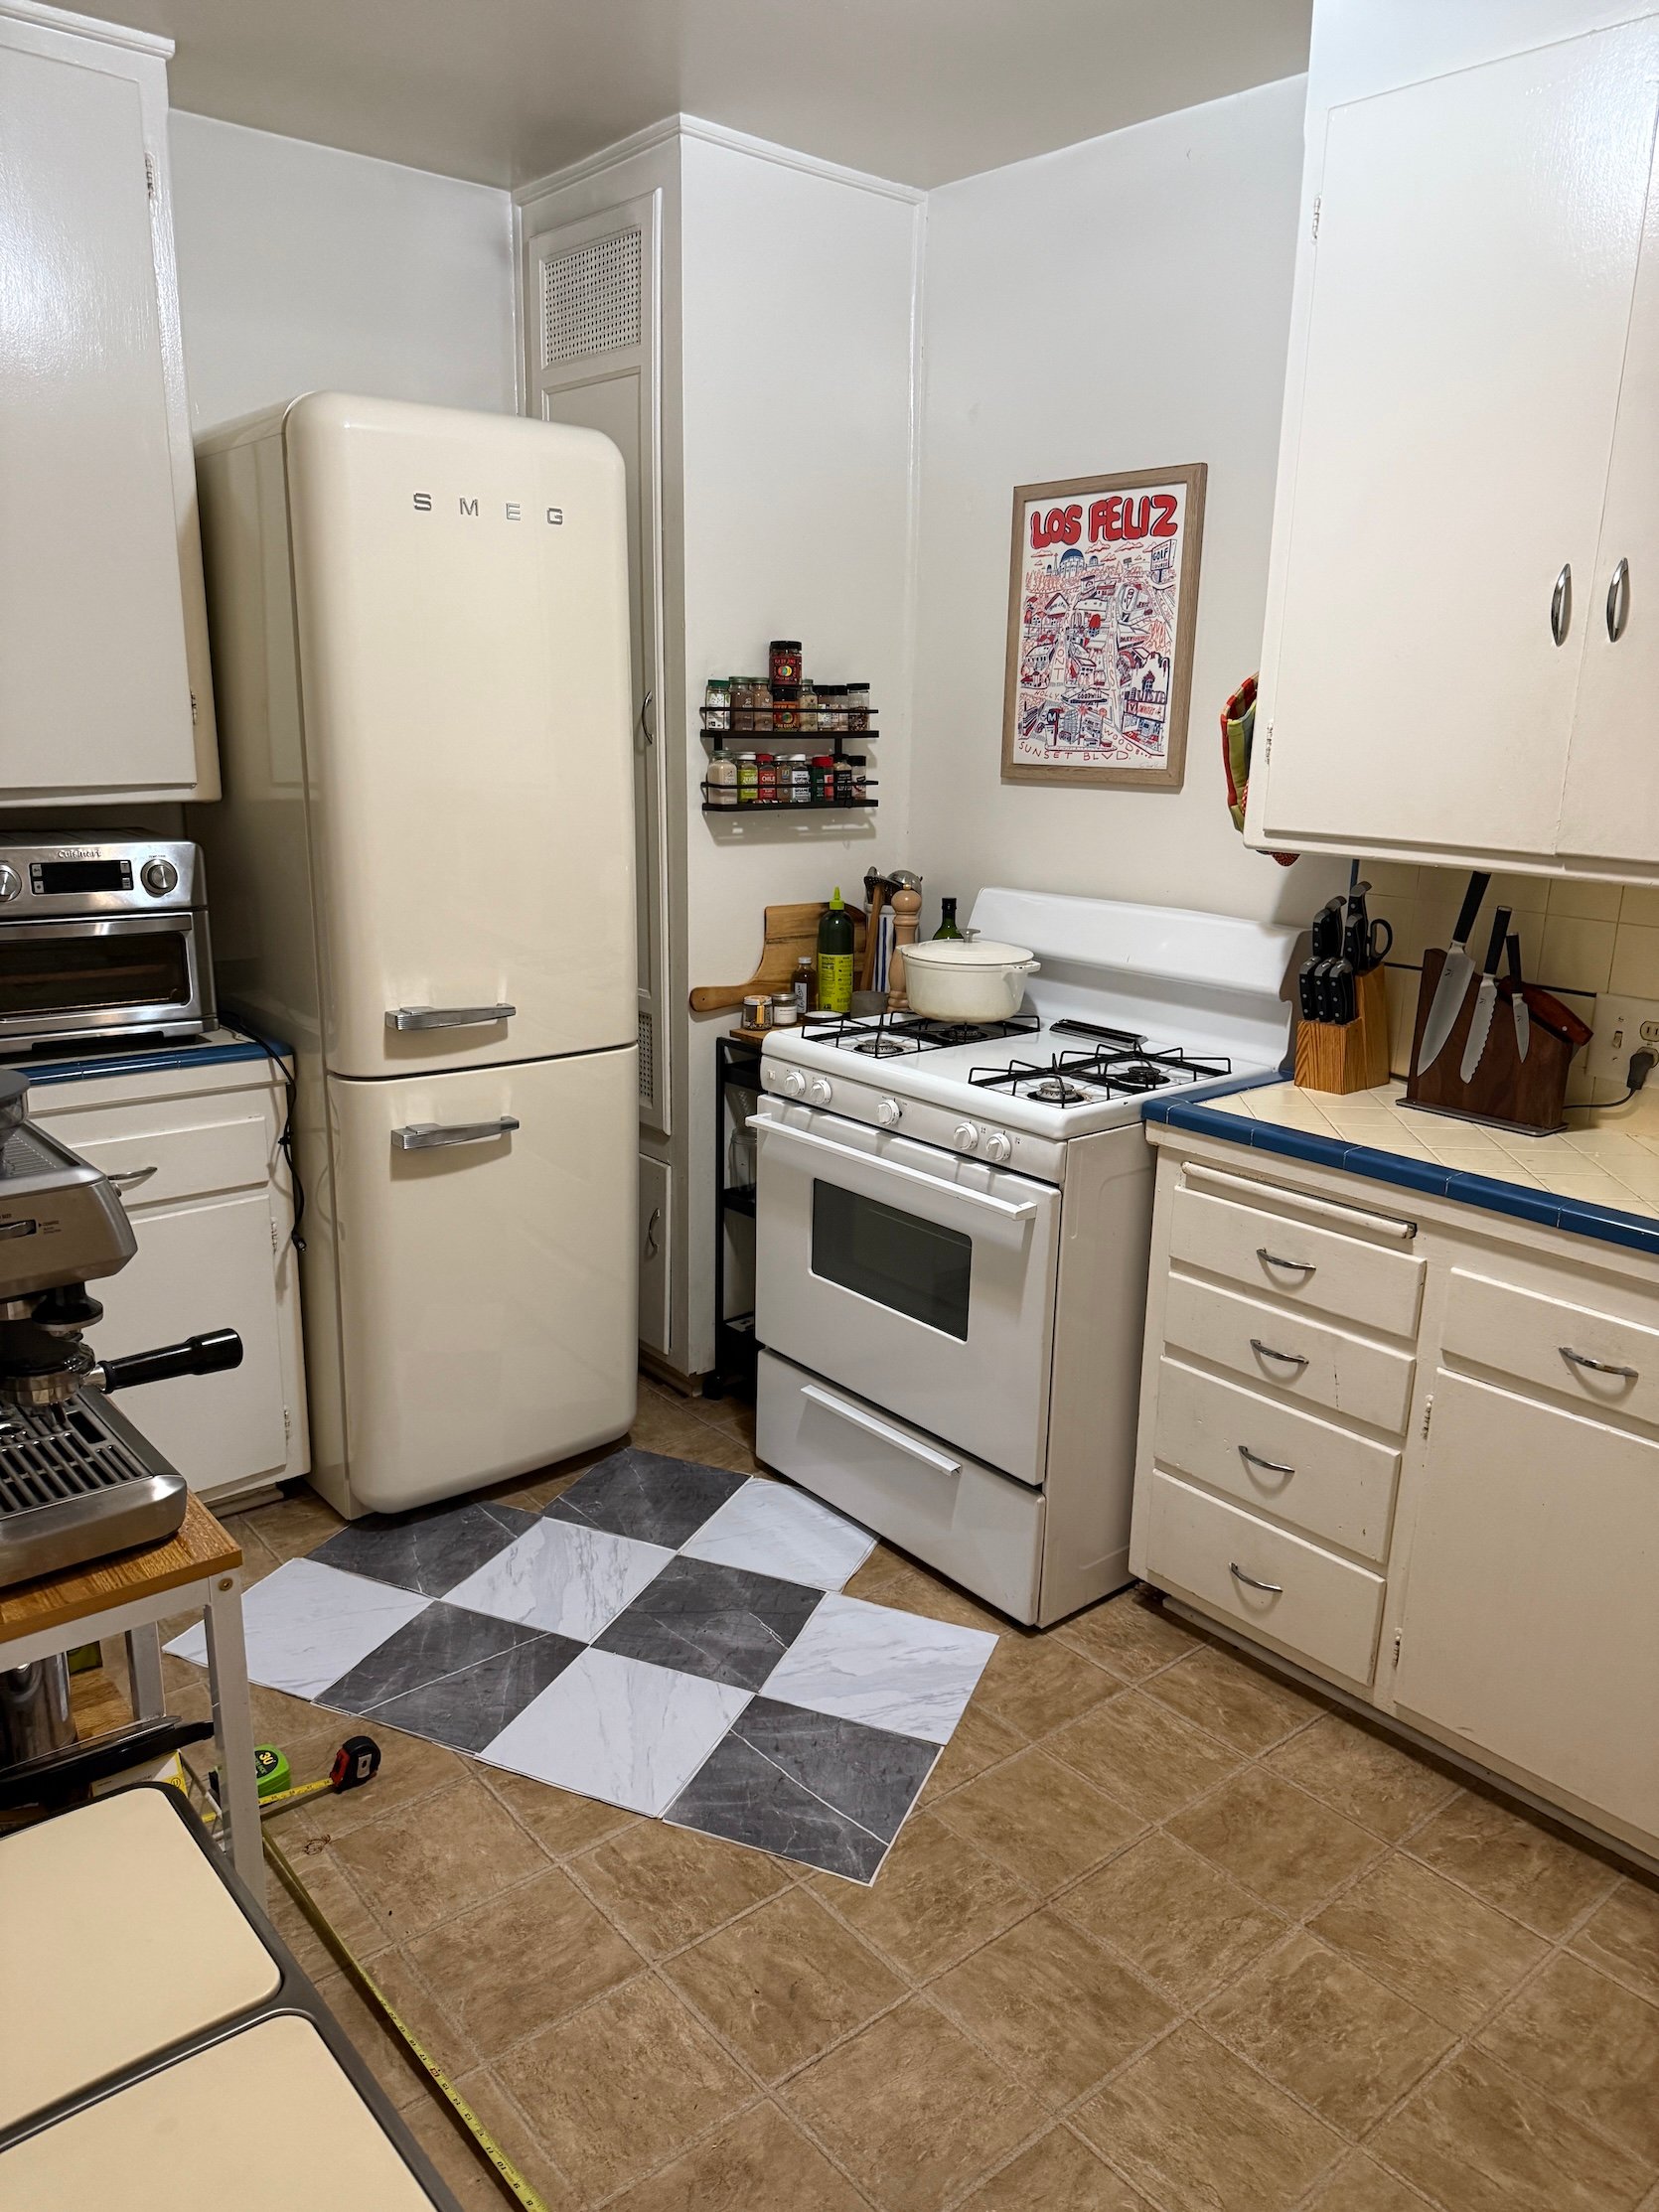
My favorite fact about this kitchen was that it didn’t have a fridge (considering CA it was perfect at the time). Now! A law was passed after I moved in that landlords now have to provide fridges to tenants…cheers!). So this fridge you see in these “before” photos was an old one that our friend’s boss was trying to get rid of. It was no looker, and it leaked puddles and puddles of water daily, which was a little worrying, but it was mainly the size and location of this fridge that was the biggest problem. It was too big for the space, so it made the room seem even smaller, especially when you were cooking on the stove and needed to get something out of the fridge; When the doors were open, you could barely fit one person in here.
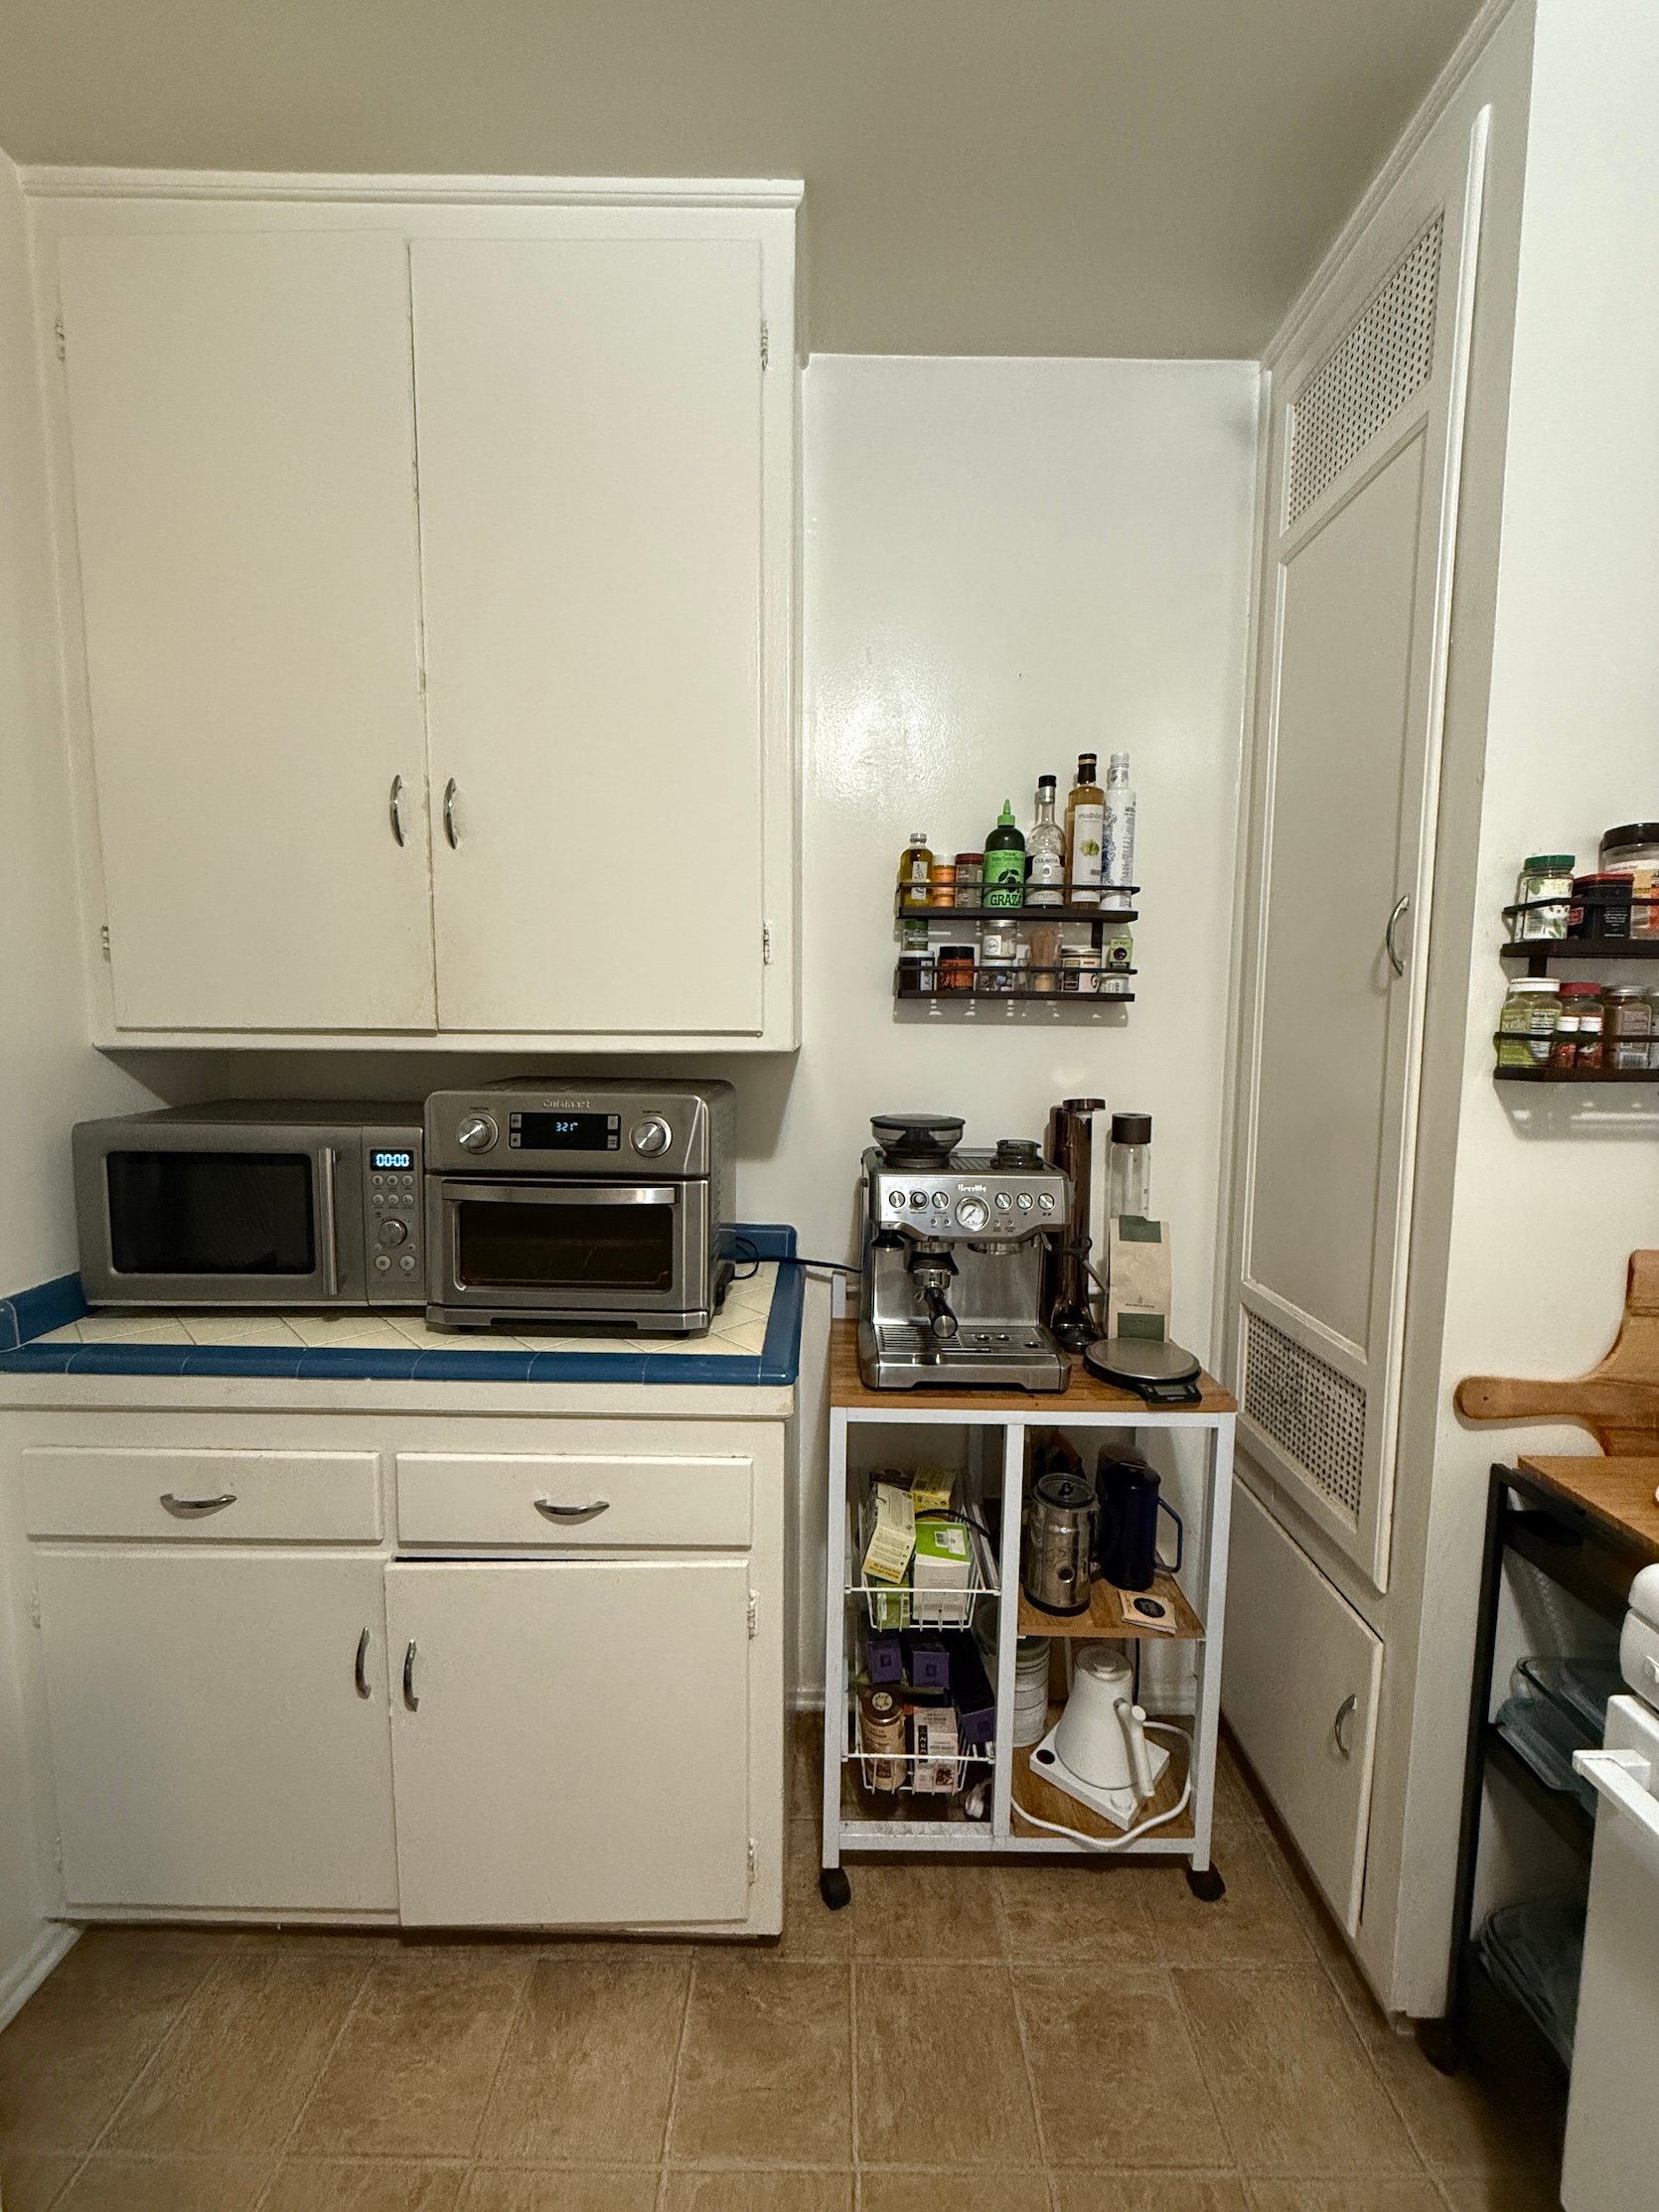
This was the first wall I wanted to tackle because I knew if I moved a few things around here, I could make this space work better for us. Not only was the fridge spread out in the middle of the room, but we were also seriously short on counter space. The deep countertops (the ones you see here to the right of the fridge) were housing our microwave and toaster because they had nowhere else to go. So the only useful cooking prep space was on the opposite side of the room – and those countertops are so shallow we couldn’t fit cutting boards on them. Also, the upper cabinets are very low, which made things a little tricky, so all together, this kitchen was my personal hell for cooking dinner (which was very sad because I love to cook).
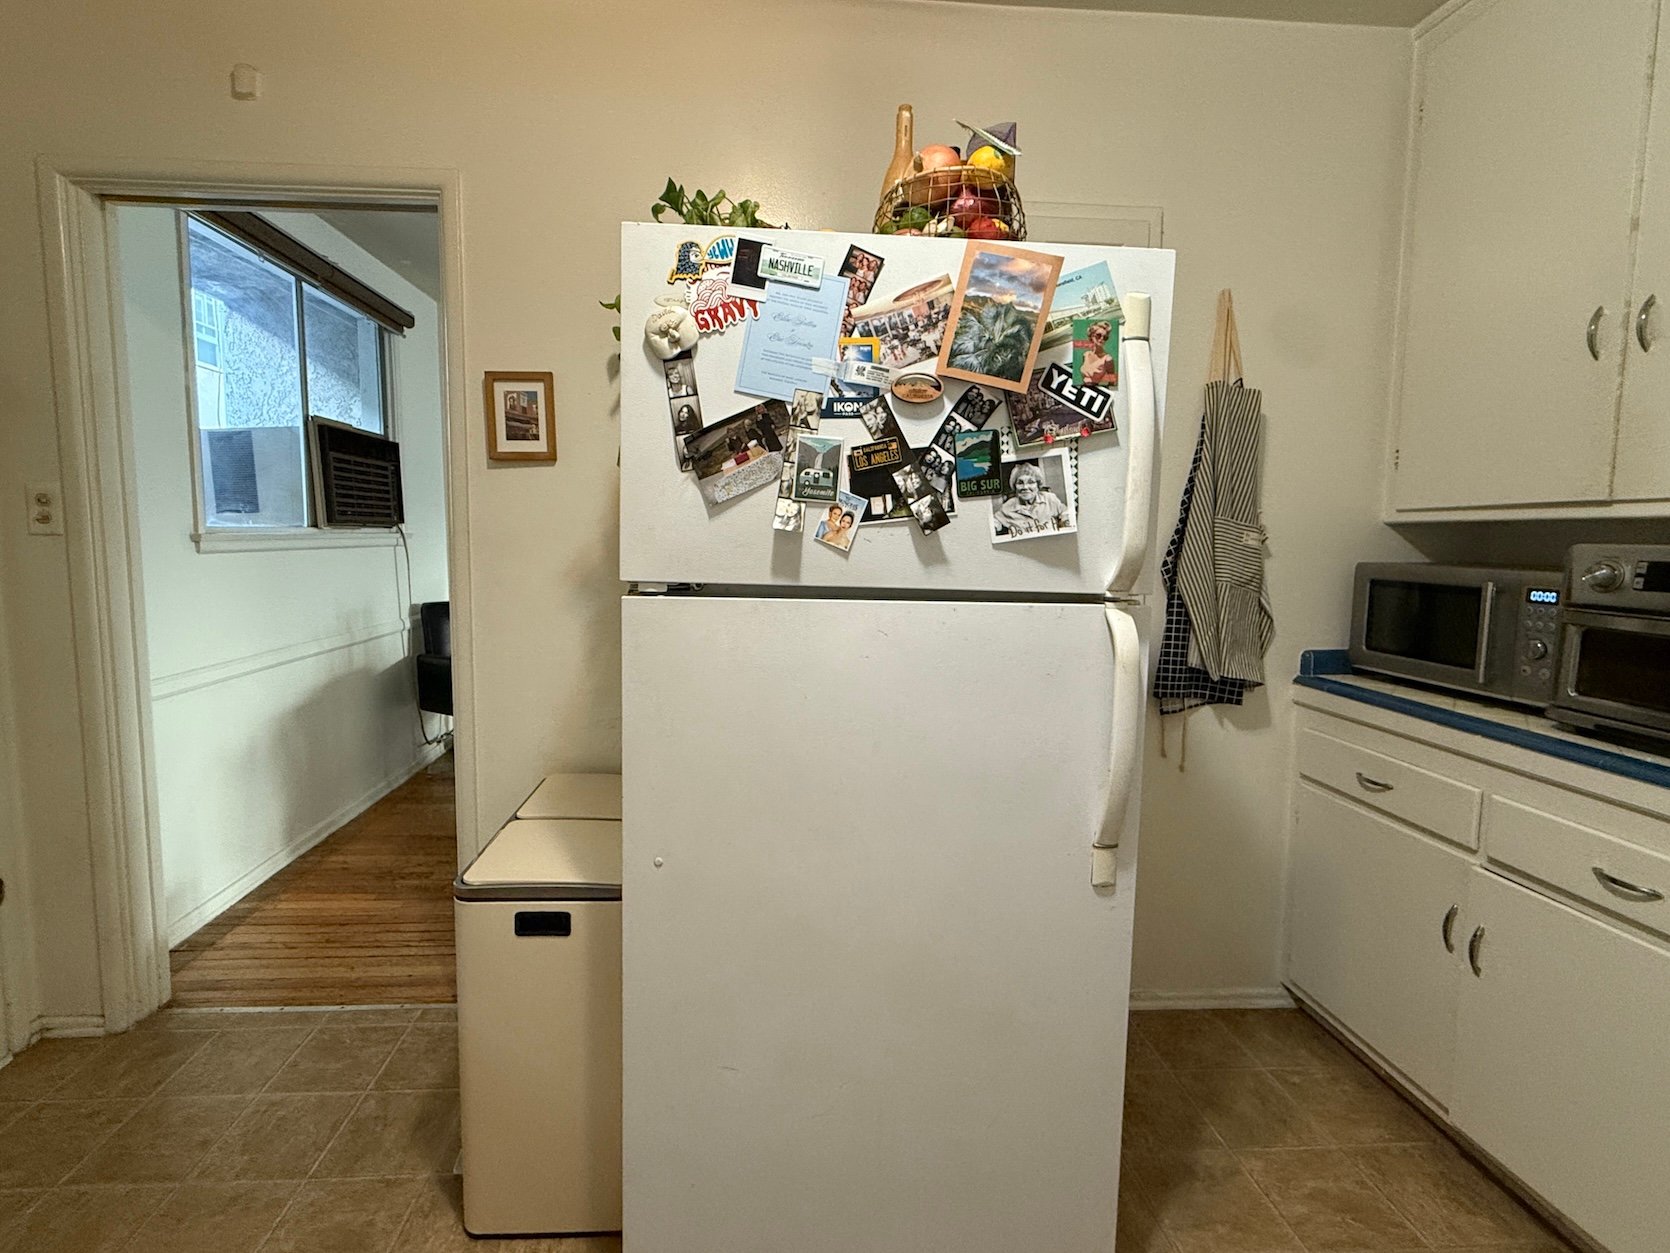
Determined to make this space more functional (and beautiful), I took out the leaky, broken old fridge from the kitchen door (which used to fit in less than an inch of space). And you won’t believe what I found…
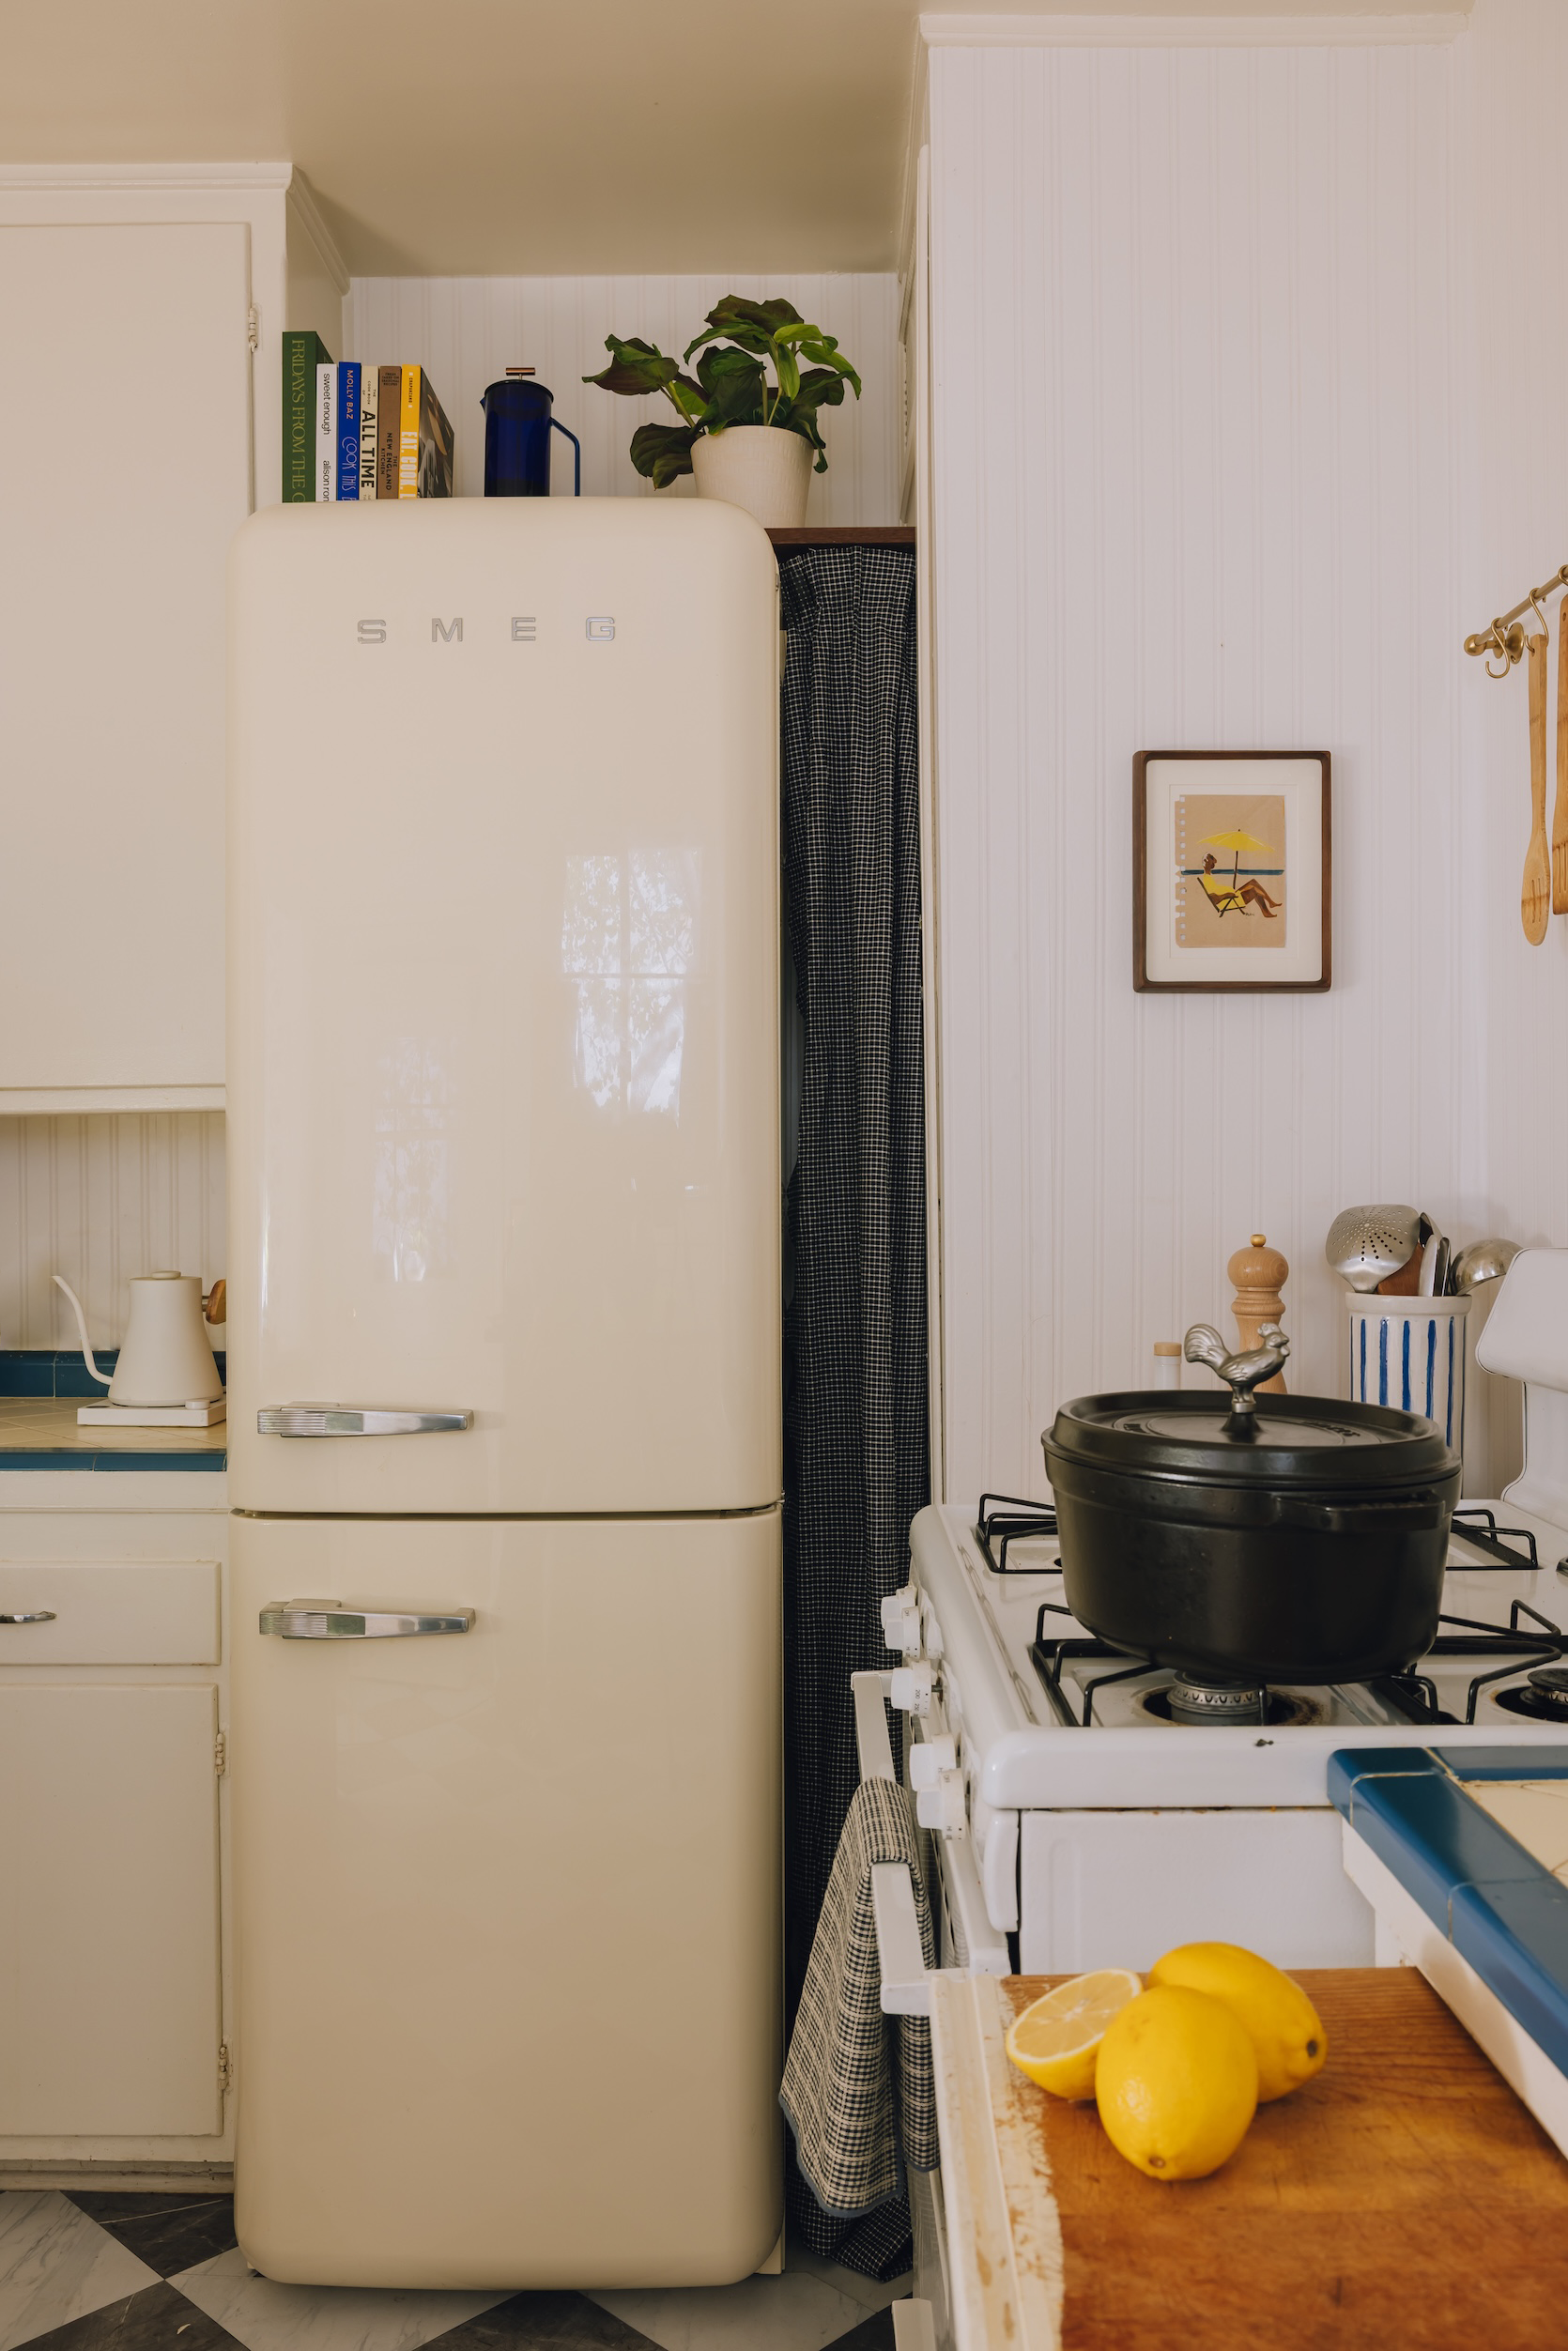
OK, everyone, say it with me – FIRE HAZARD! Cold! It was really scary to watch, but in this moment, I knew immediately that I had made the right choice in getting rid of this Horner. Our apartment is largely month-to-month rent controlled, and is in the perfect location in Los Feliz – within walking distance of all the shops and restaurants. So I went in knowing that I would probably have to get a new fridge to make the kitchen actually usable, but that was a cost I was willing to pay, given that my monthly rent was such a good deal, and the location was perfect, too. Plus, since this place didn’t come with a fridge, I could invest in the fridge I’ve always wanted, since I can take it with me to my future homes. And the one I always wanted?! a cream smeg Absolutely!
And the fridge fit perfectly into this corner, freeing up a lot of space. Oh, and if you’re wondering what that cabinet next to the fridge is for – it’s completely unusable, so don’t worry, we’re not wasting cabinet space (Lord knows we need it). By the way, if you’re thinking about investing in Smeg, you should definitely do what I did and use Caitlin’s Wayfair hack, which is: 1) Join Wayfair Membership Program And then b). Get $200 back in credit. The subscription pays for itself, and you get a good portion back!! This was really genius, and I never knew about it until she posted about it, so thanks to our girl Cait for the tip! And no, it wasn’t sponsored (although that would have been cool, hahaha) – it was really worth it! The Wayfair delivery team was also awesome and wore white gloves, which was a real dream (because I have no idea what I would have done if I was here alone).
As you can see in the photo above, the next thing I did was cover the terrible linoleum floor. Chris loves Julia x Floorpops Peel-and-Stick TileAnd I was extremely impressed. I won’t lie – it took a little trial and error to get clean, straight cuts, but the weight of these tiles was shocking, and the quality was absolutely amazing. The entire installation process took me about 3 hours from start to finish, which was pretty fast IMHO. I would totally do it again!!
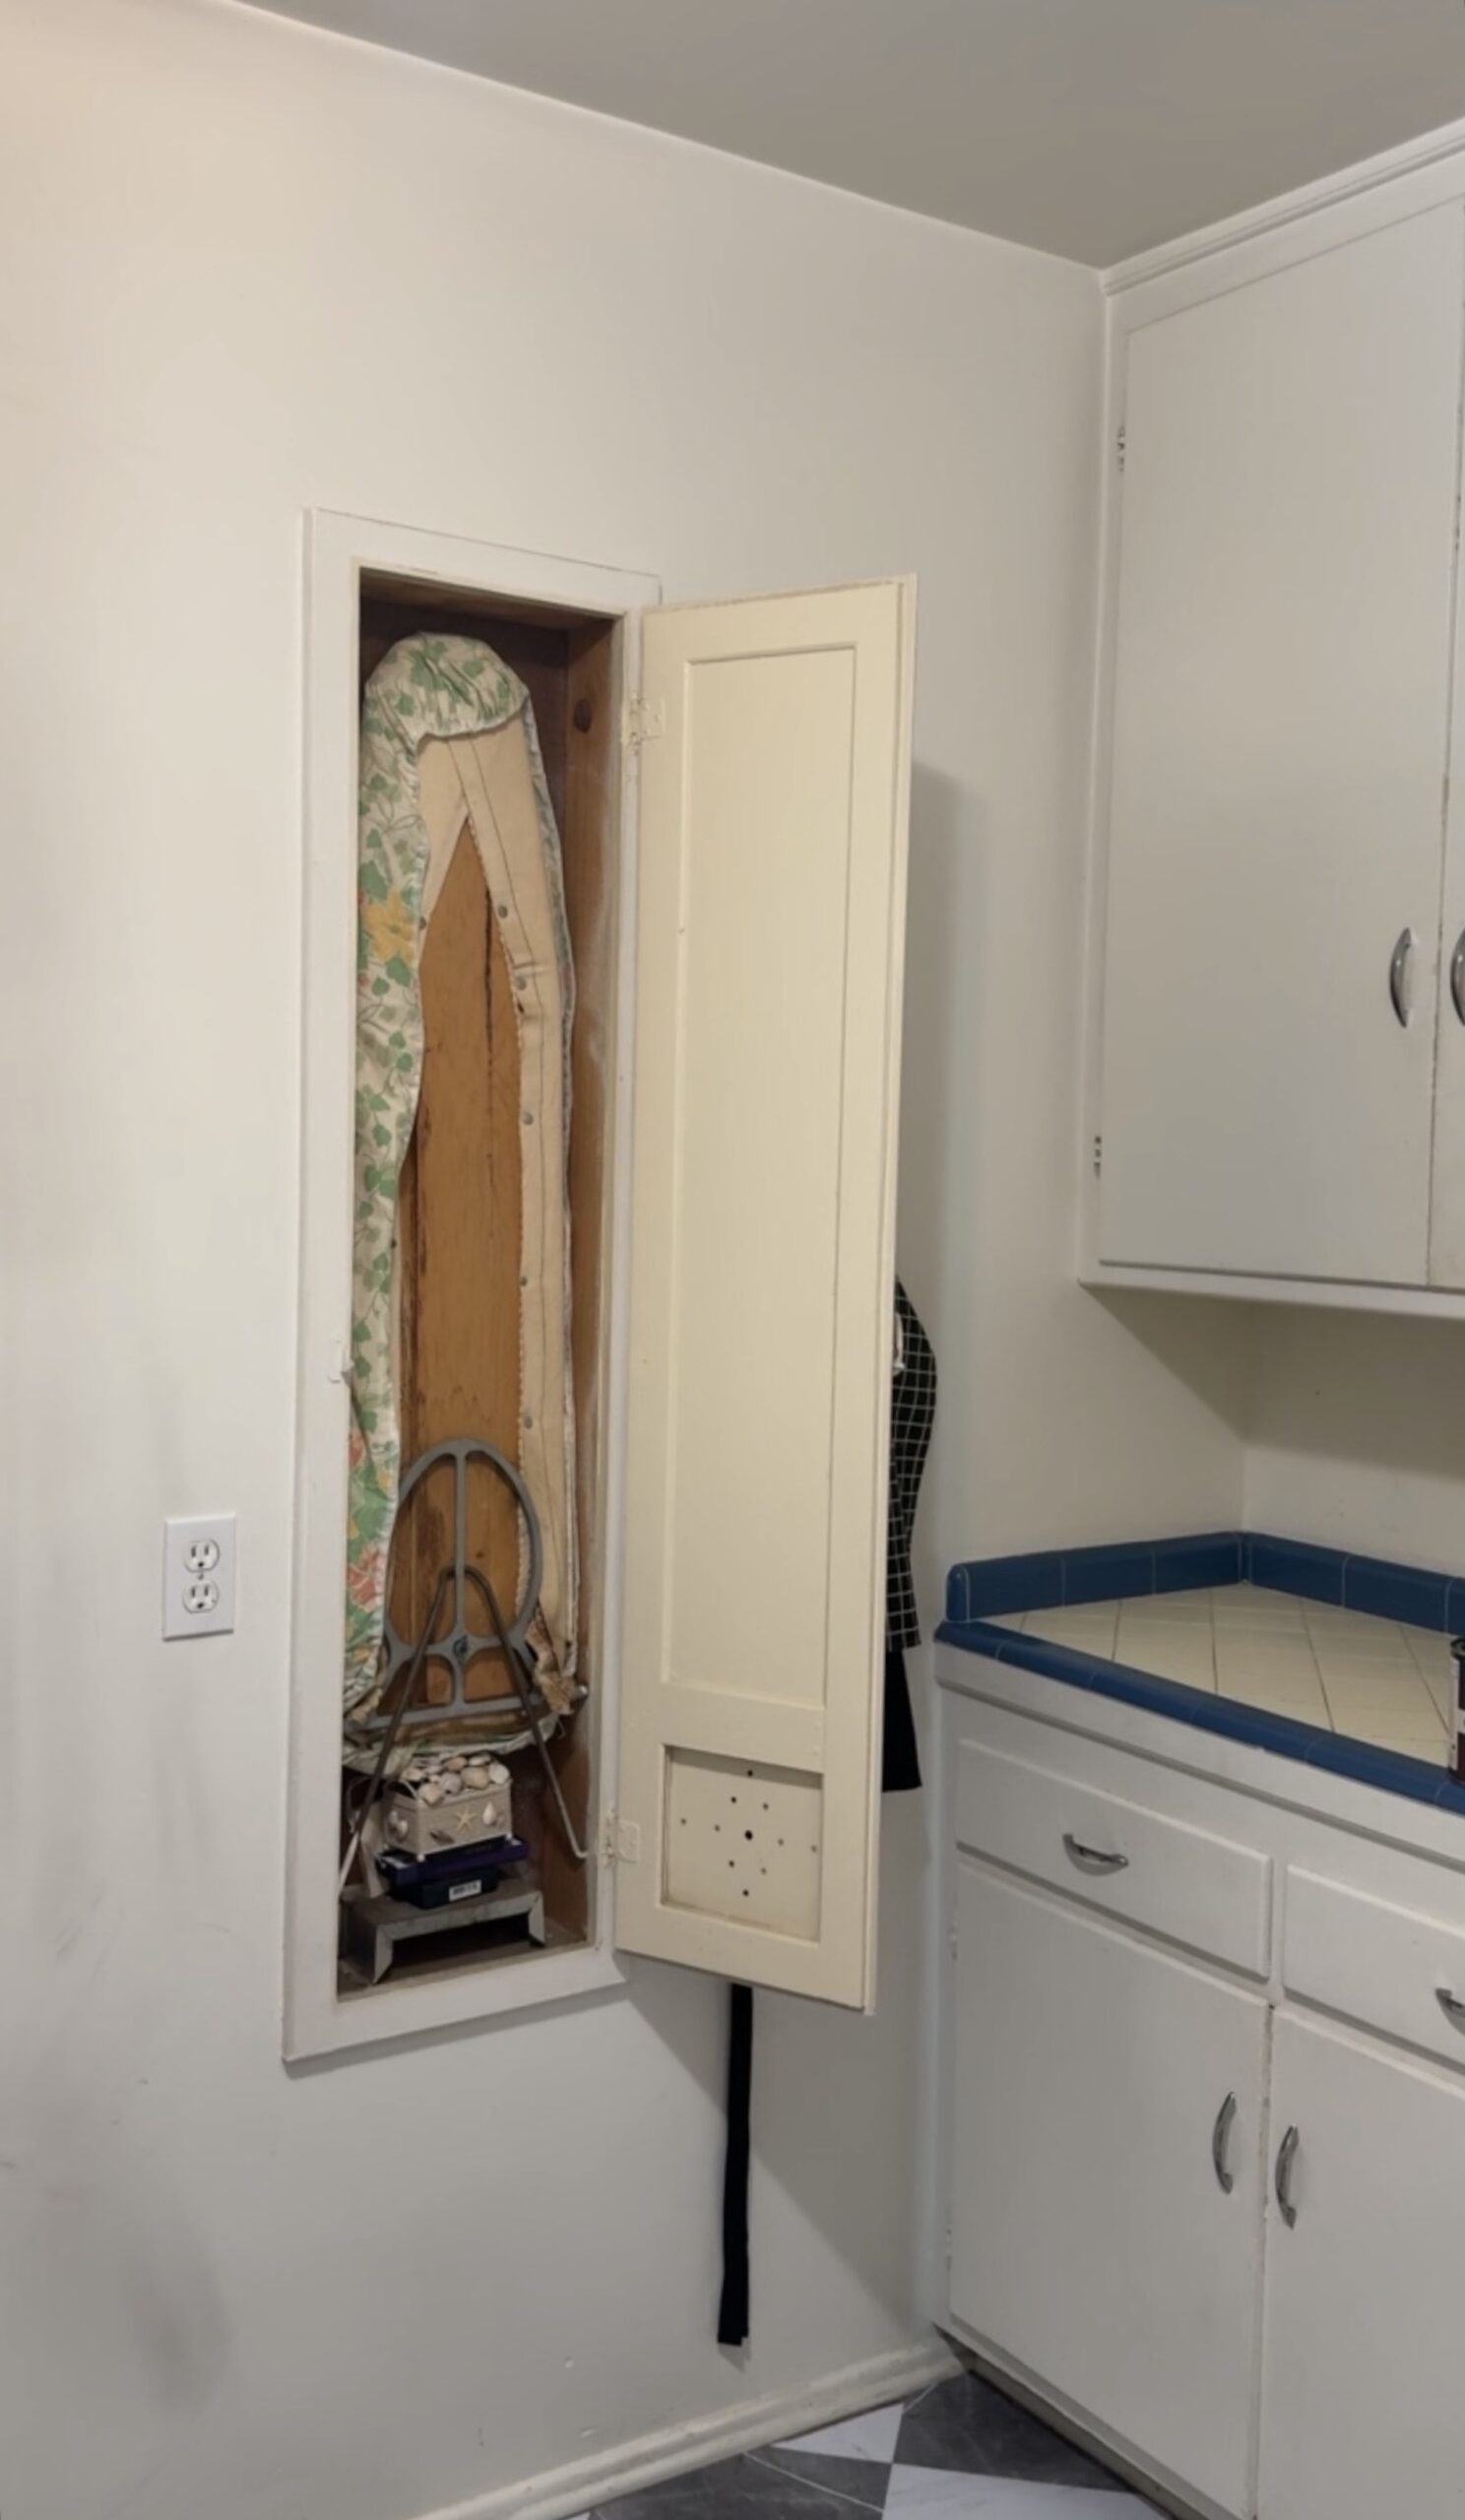
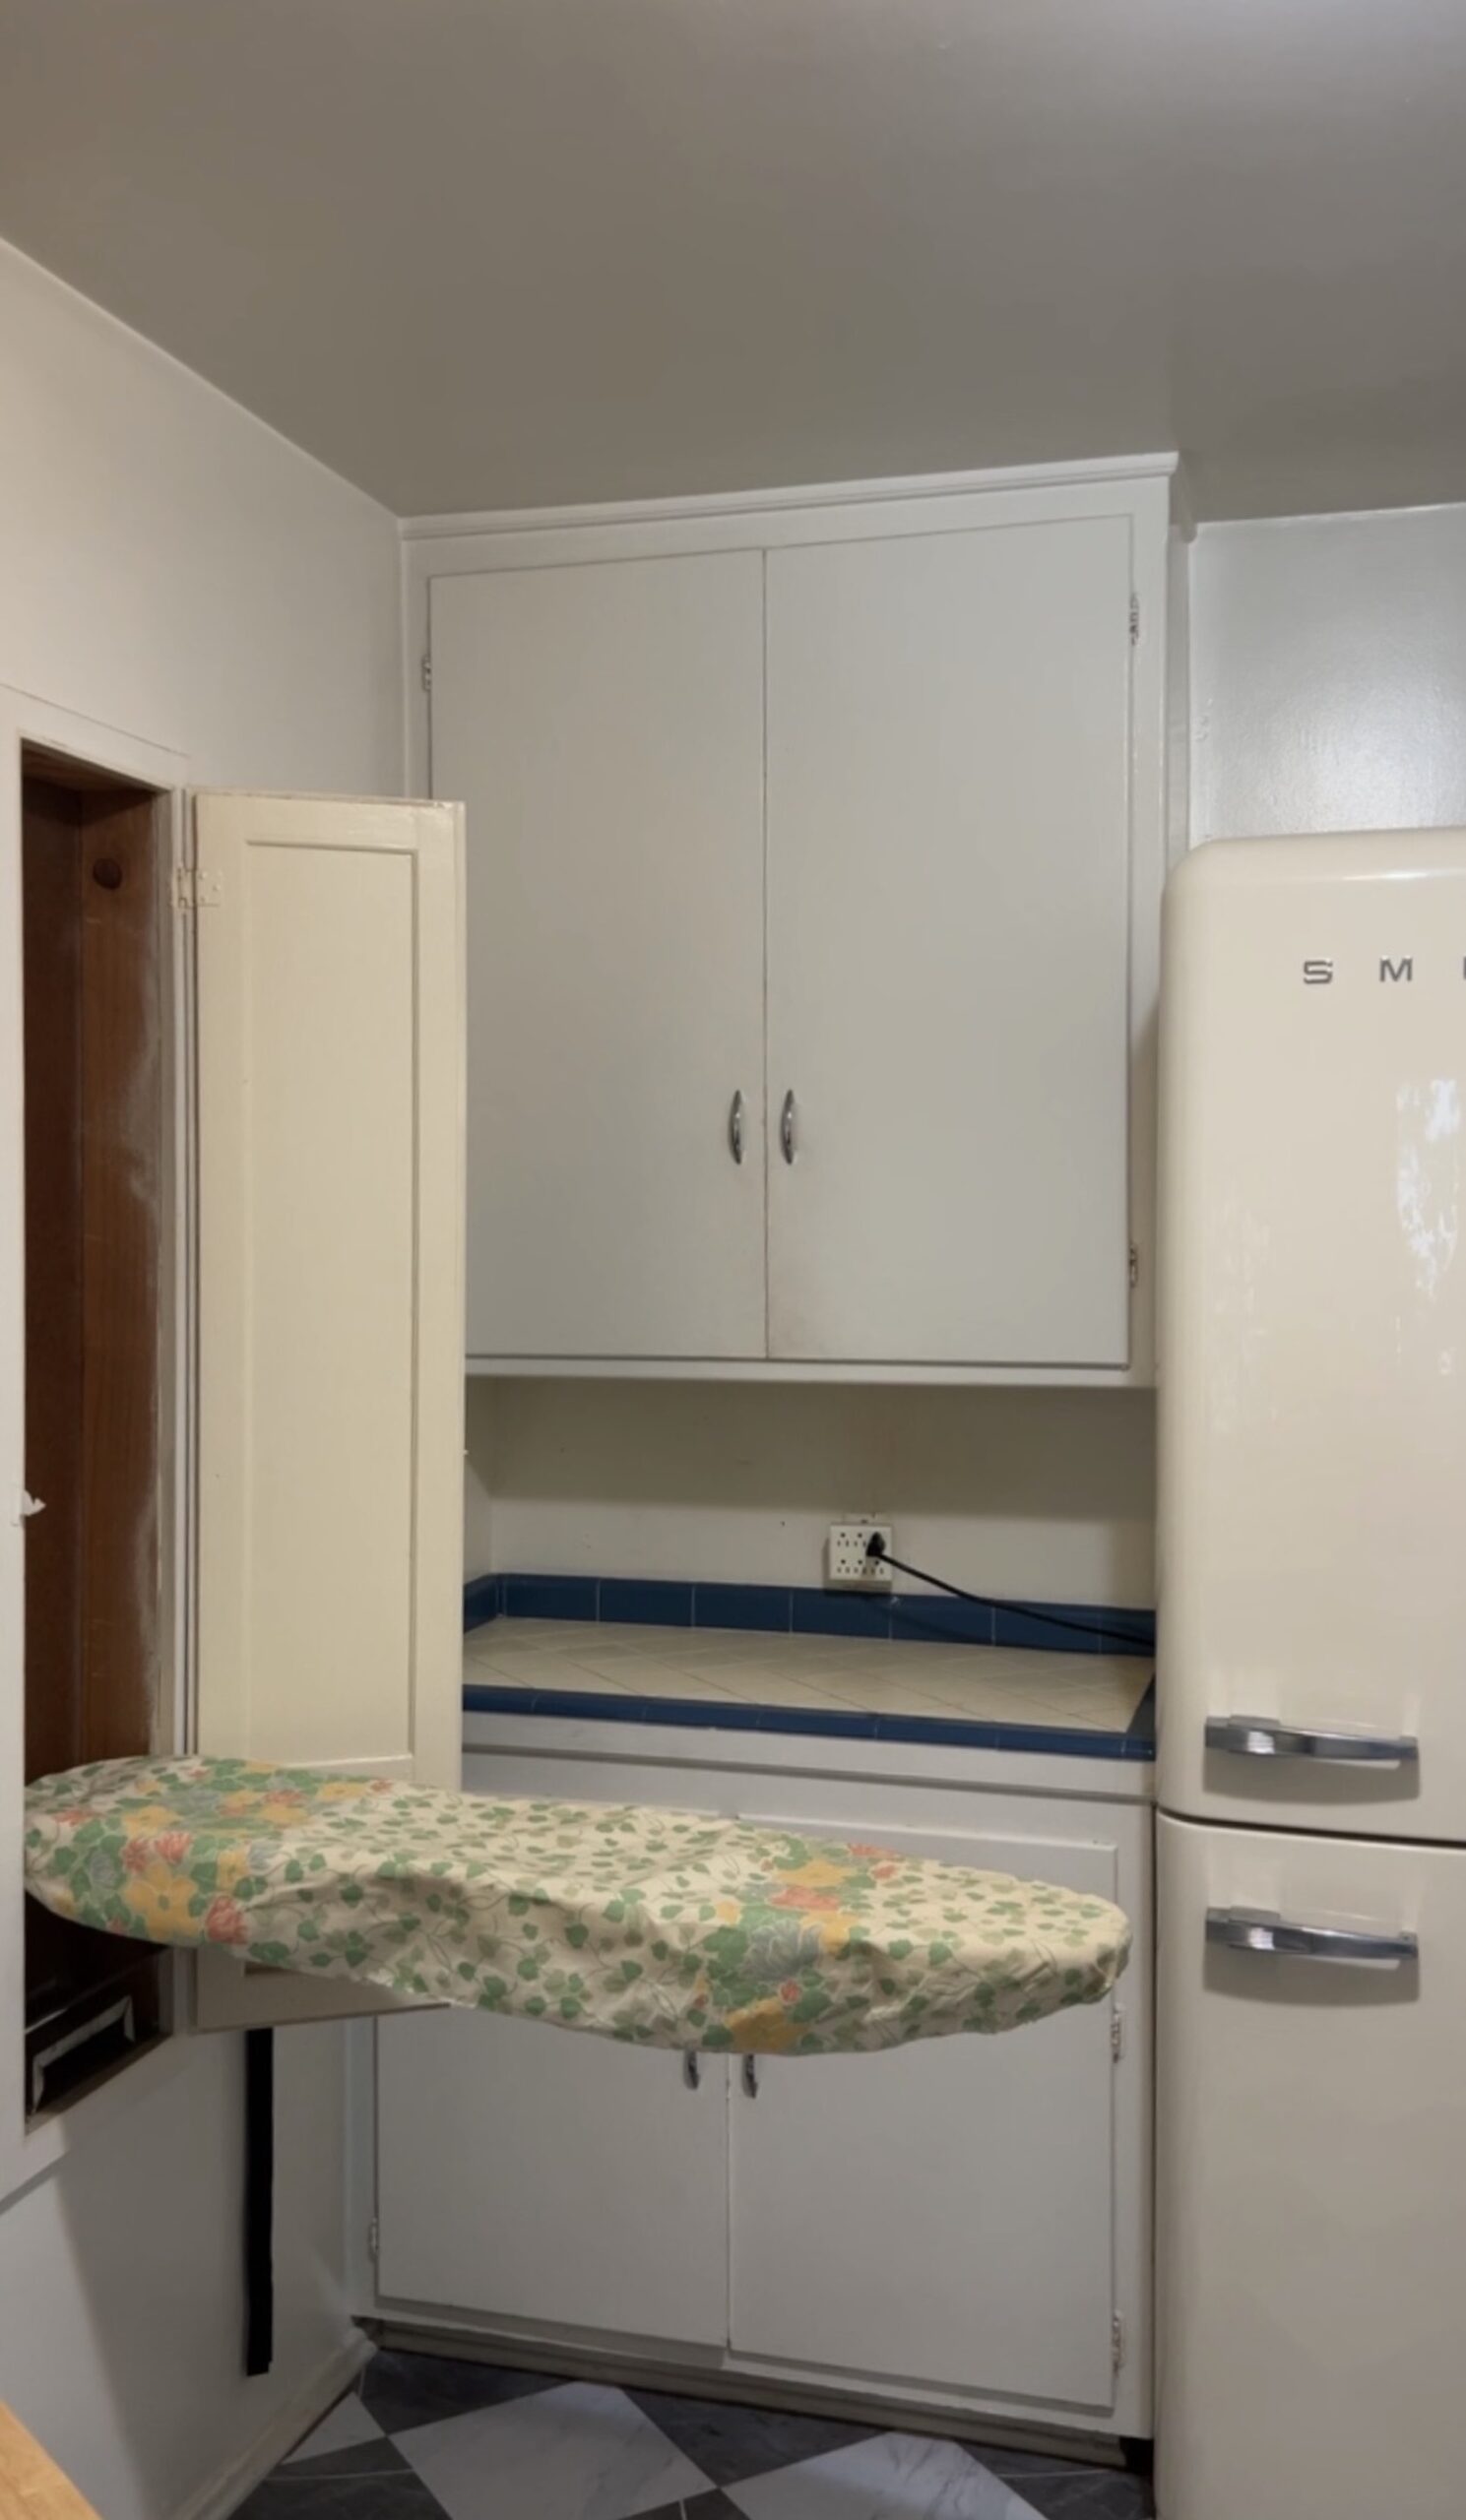
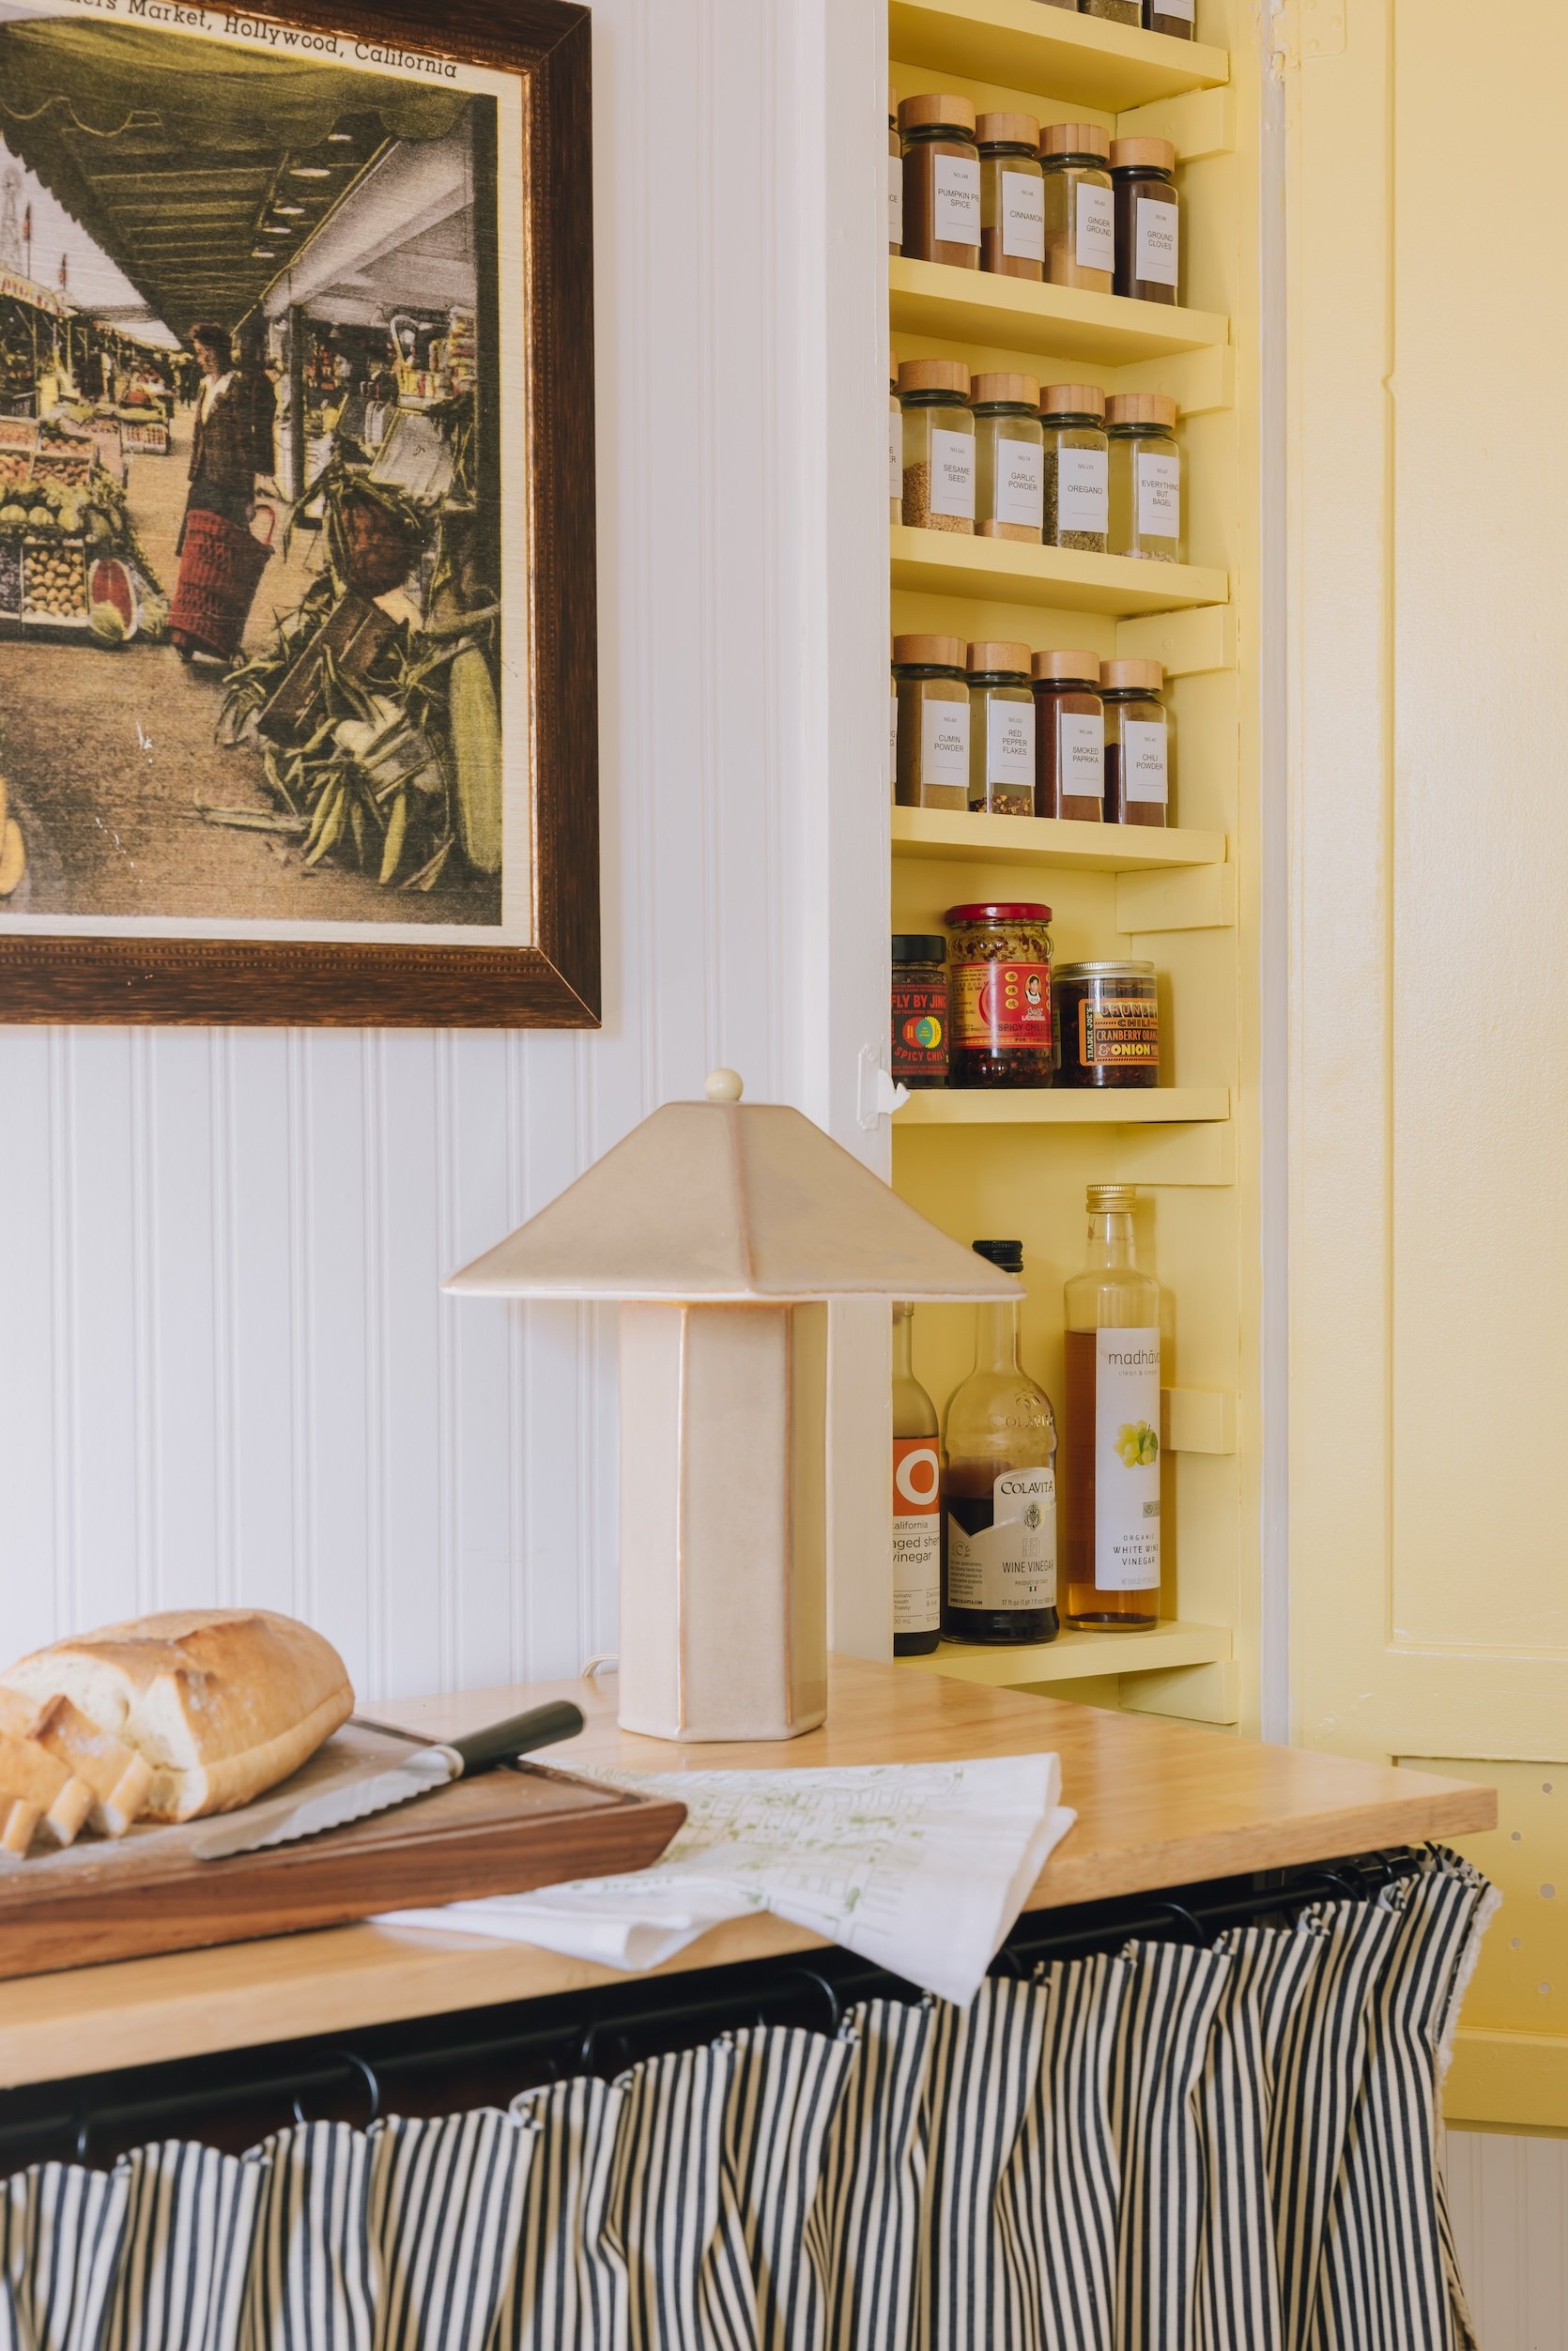
Next, I had this vintage ironing board, which is objectively wonderful, but we never used it, and to be honest, the fabric on it was very dirty and old. As a Steamroller enthusiast, I knew this area would be better used as something else, and we were very eager to have more storage space, so I transformed it into a fun yellow spice cabinet!!
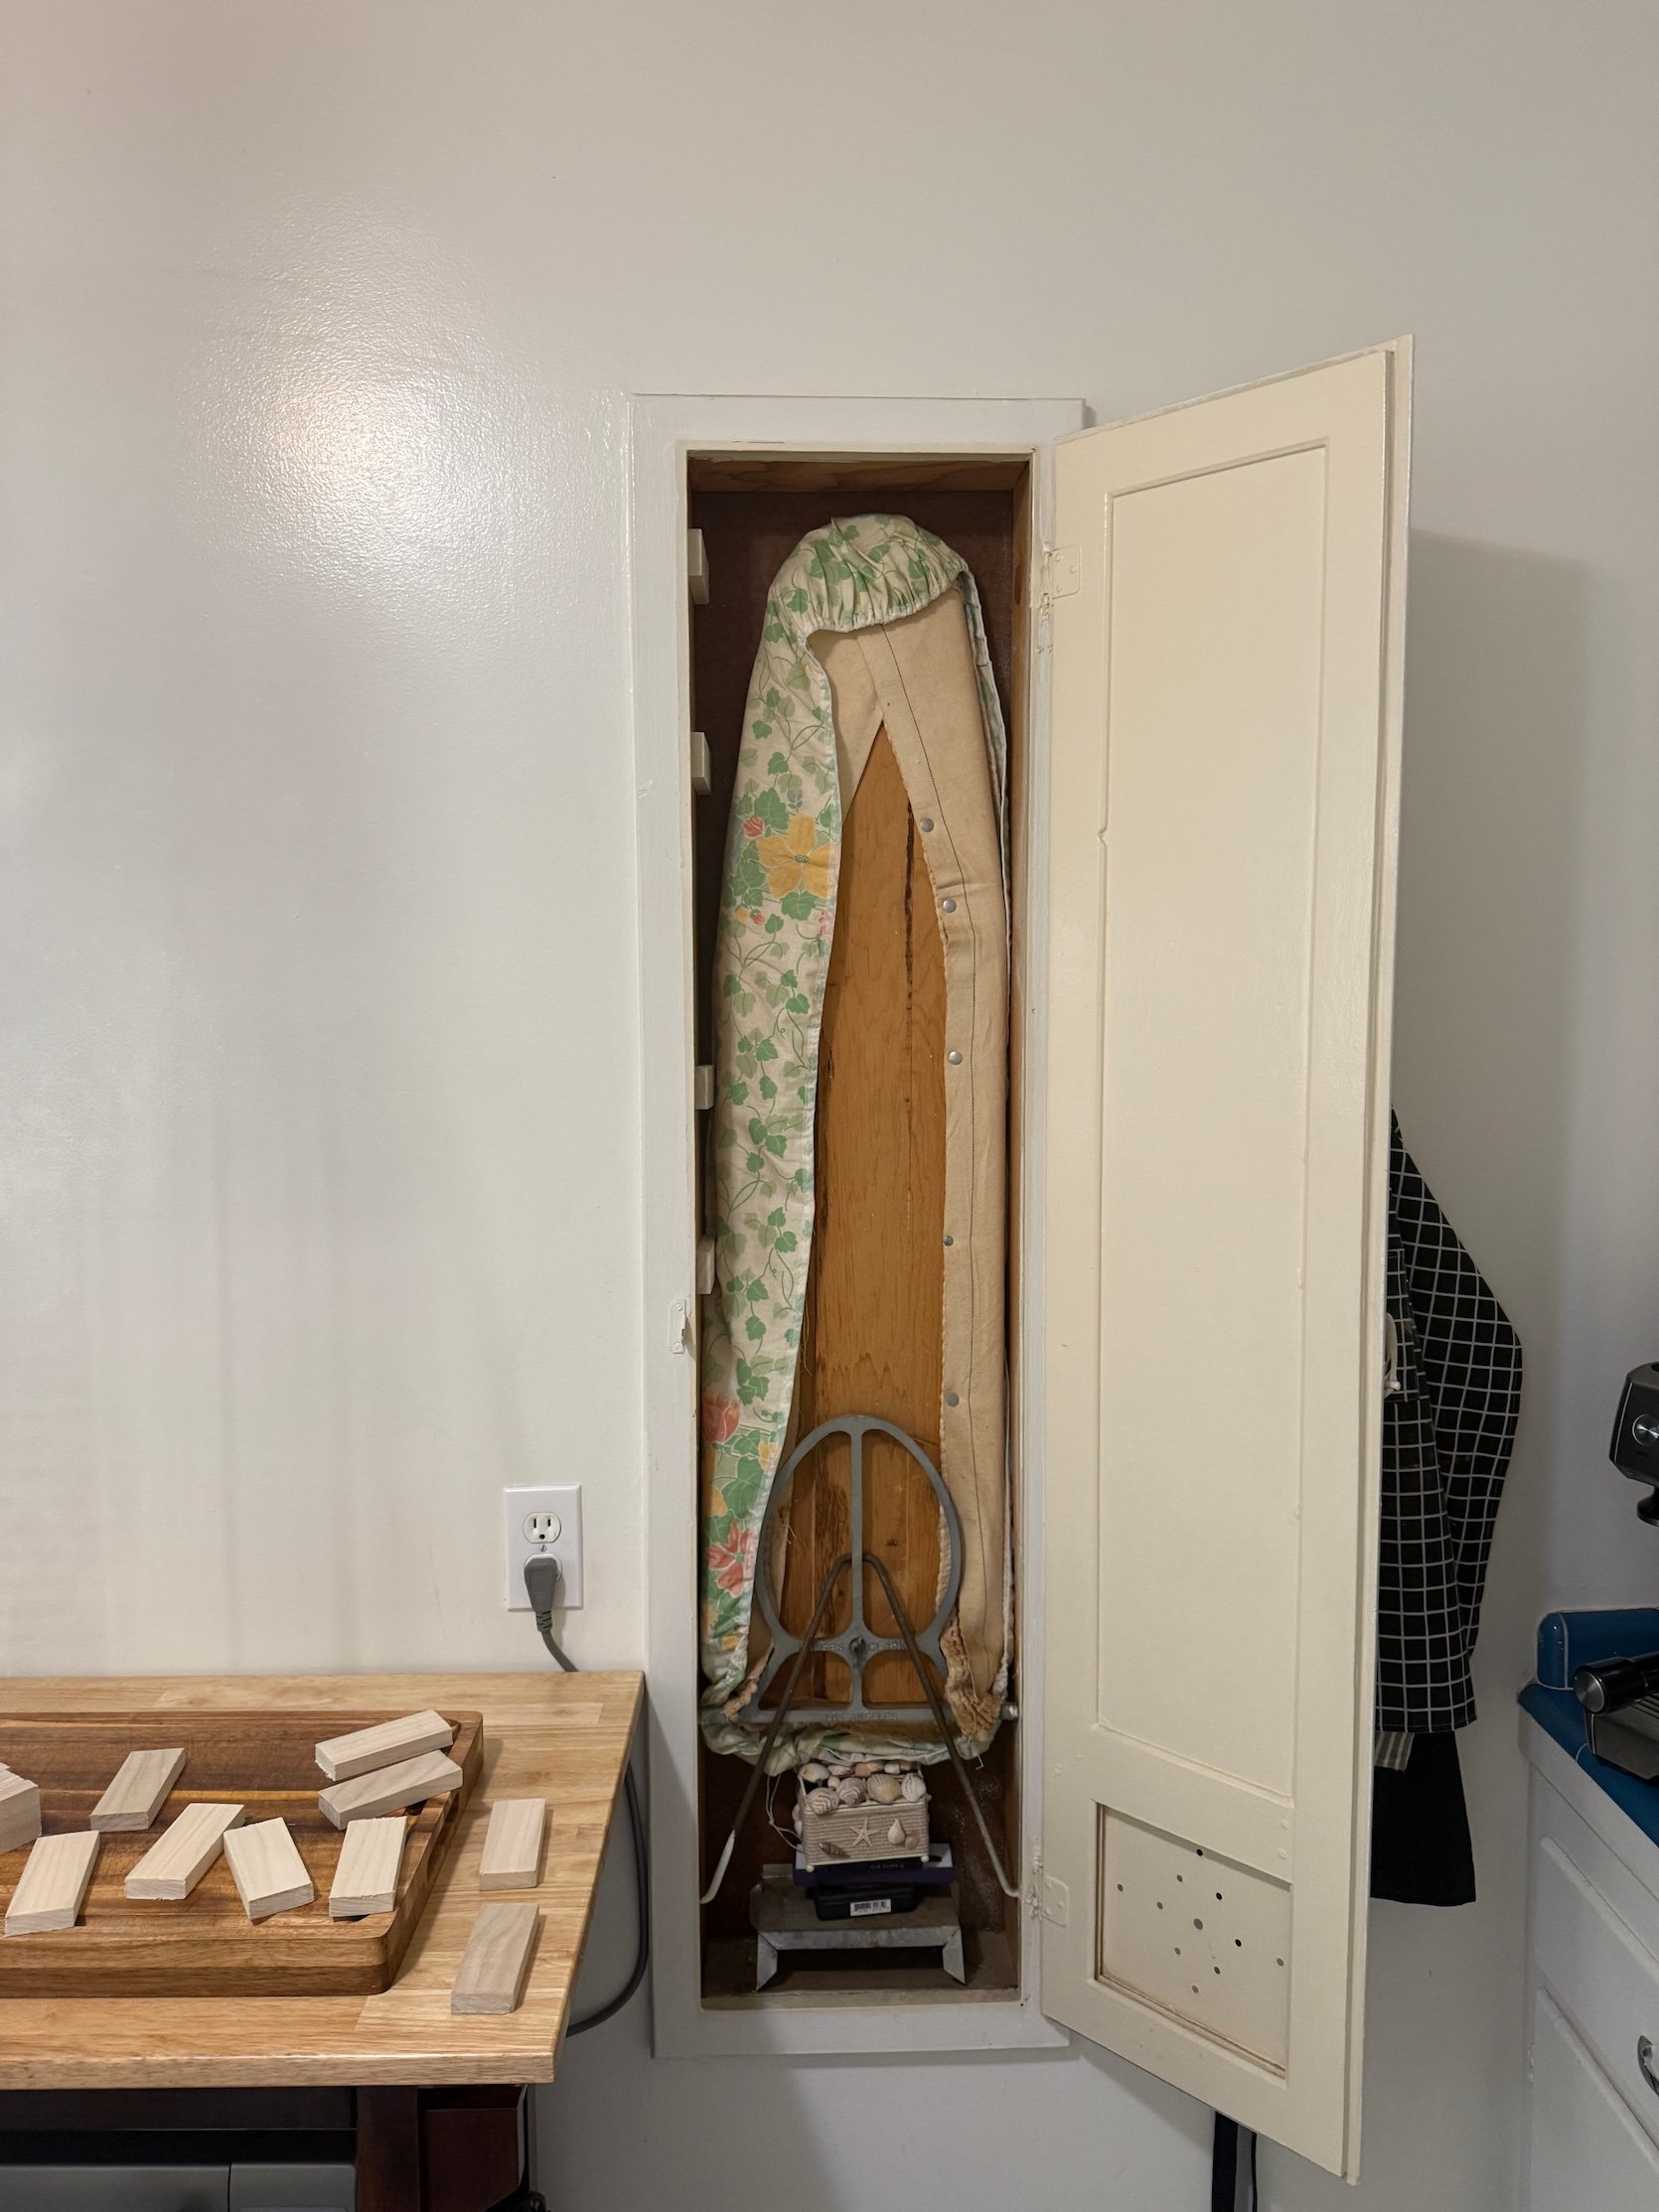
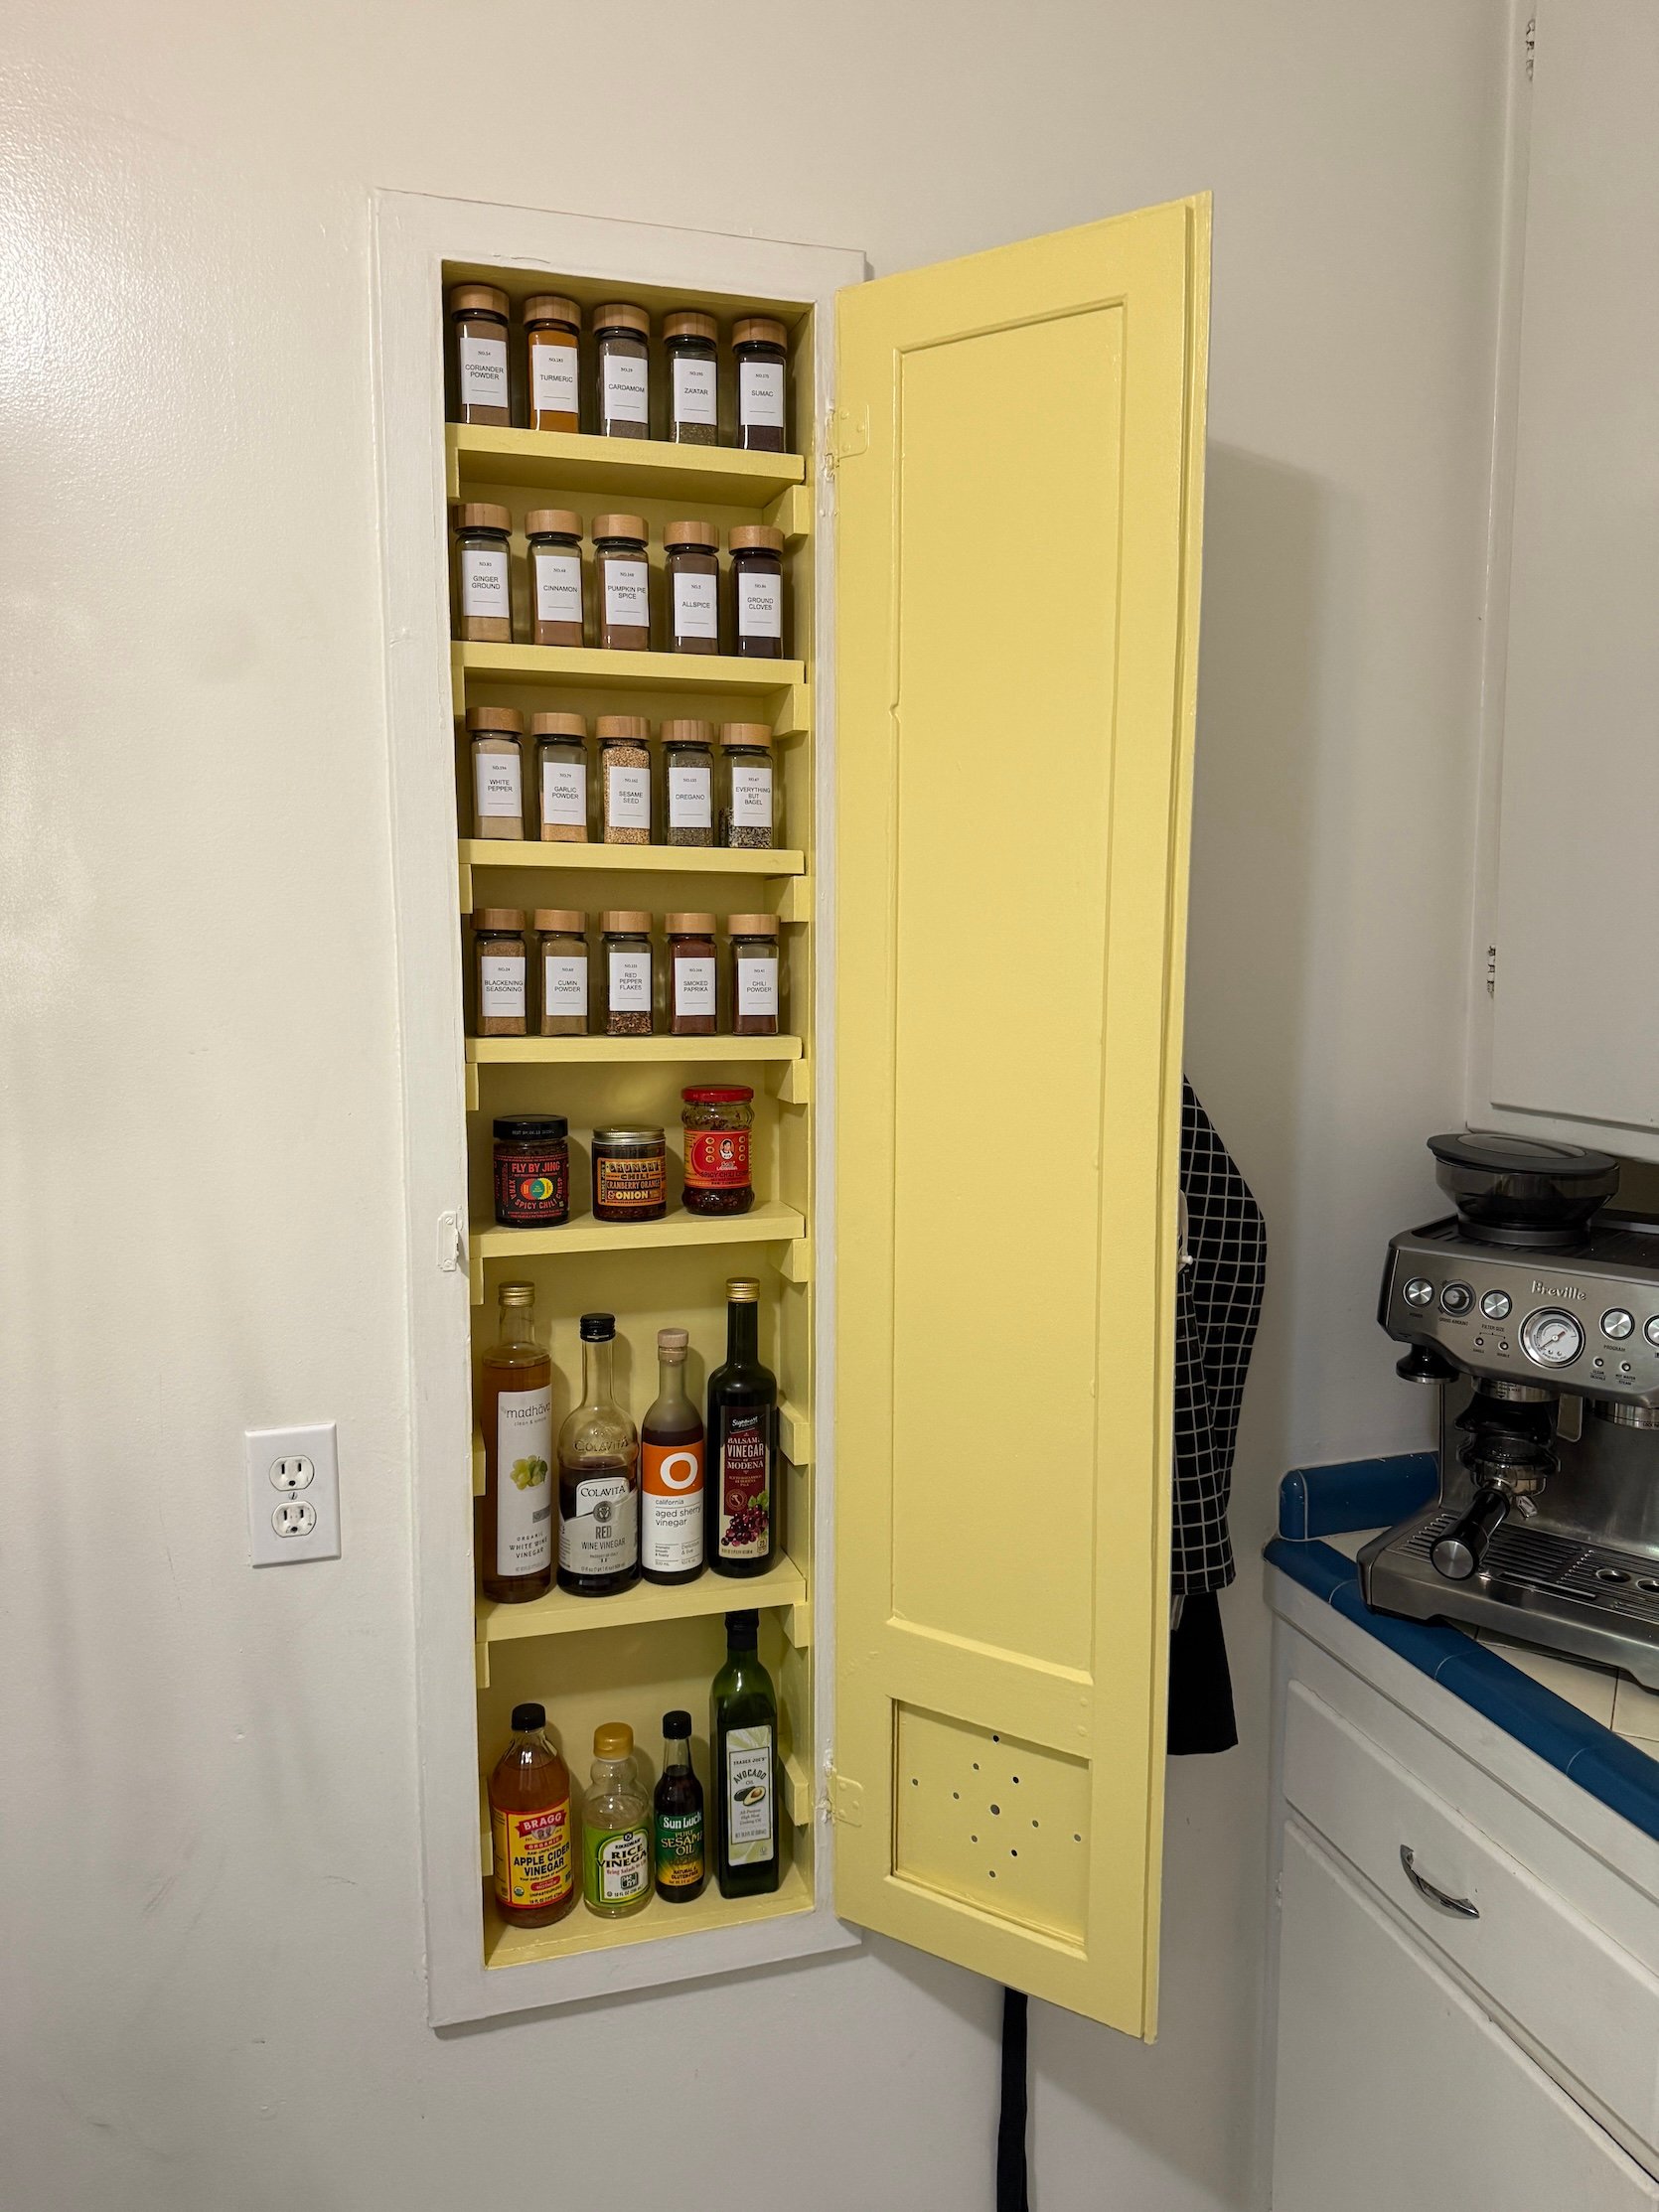
You can see how I did it step by step Here And HereI loved this DIY and it was super easy. Plus pop of yellow The yellow matches the vintage tile and makes me so happy (it’s my favorite color!).
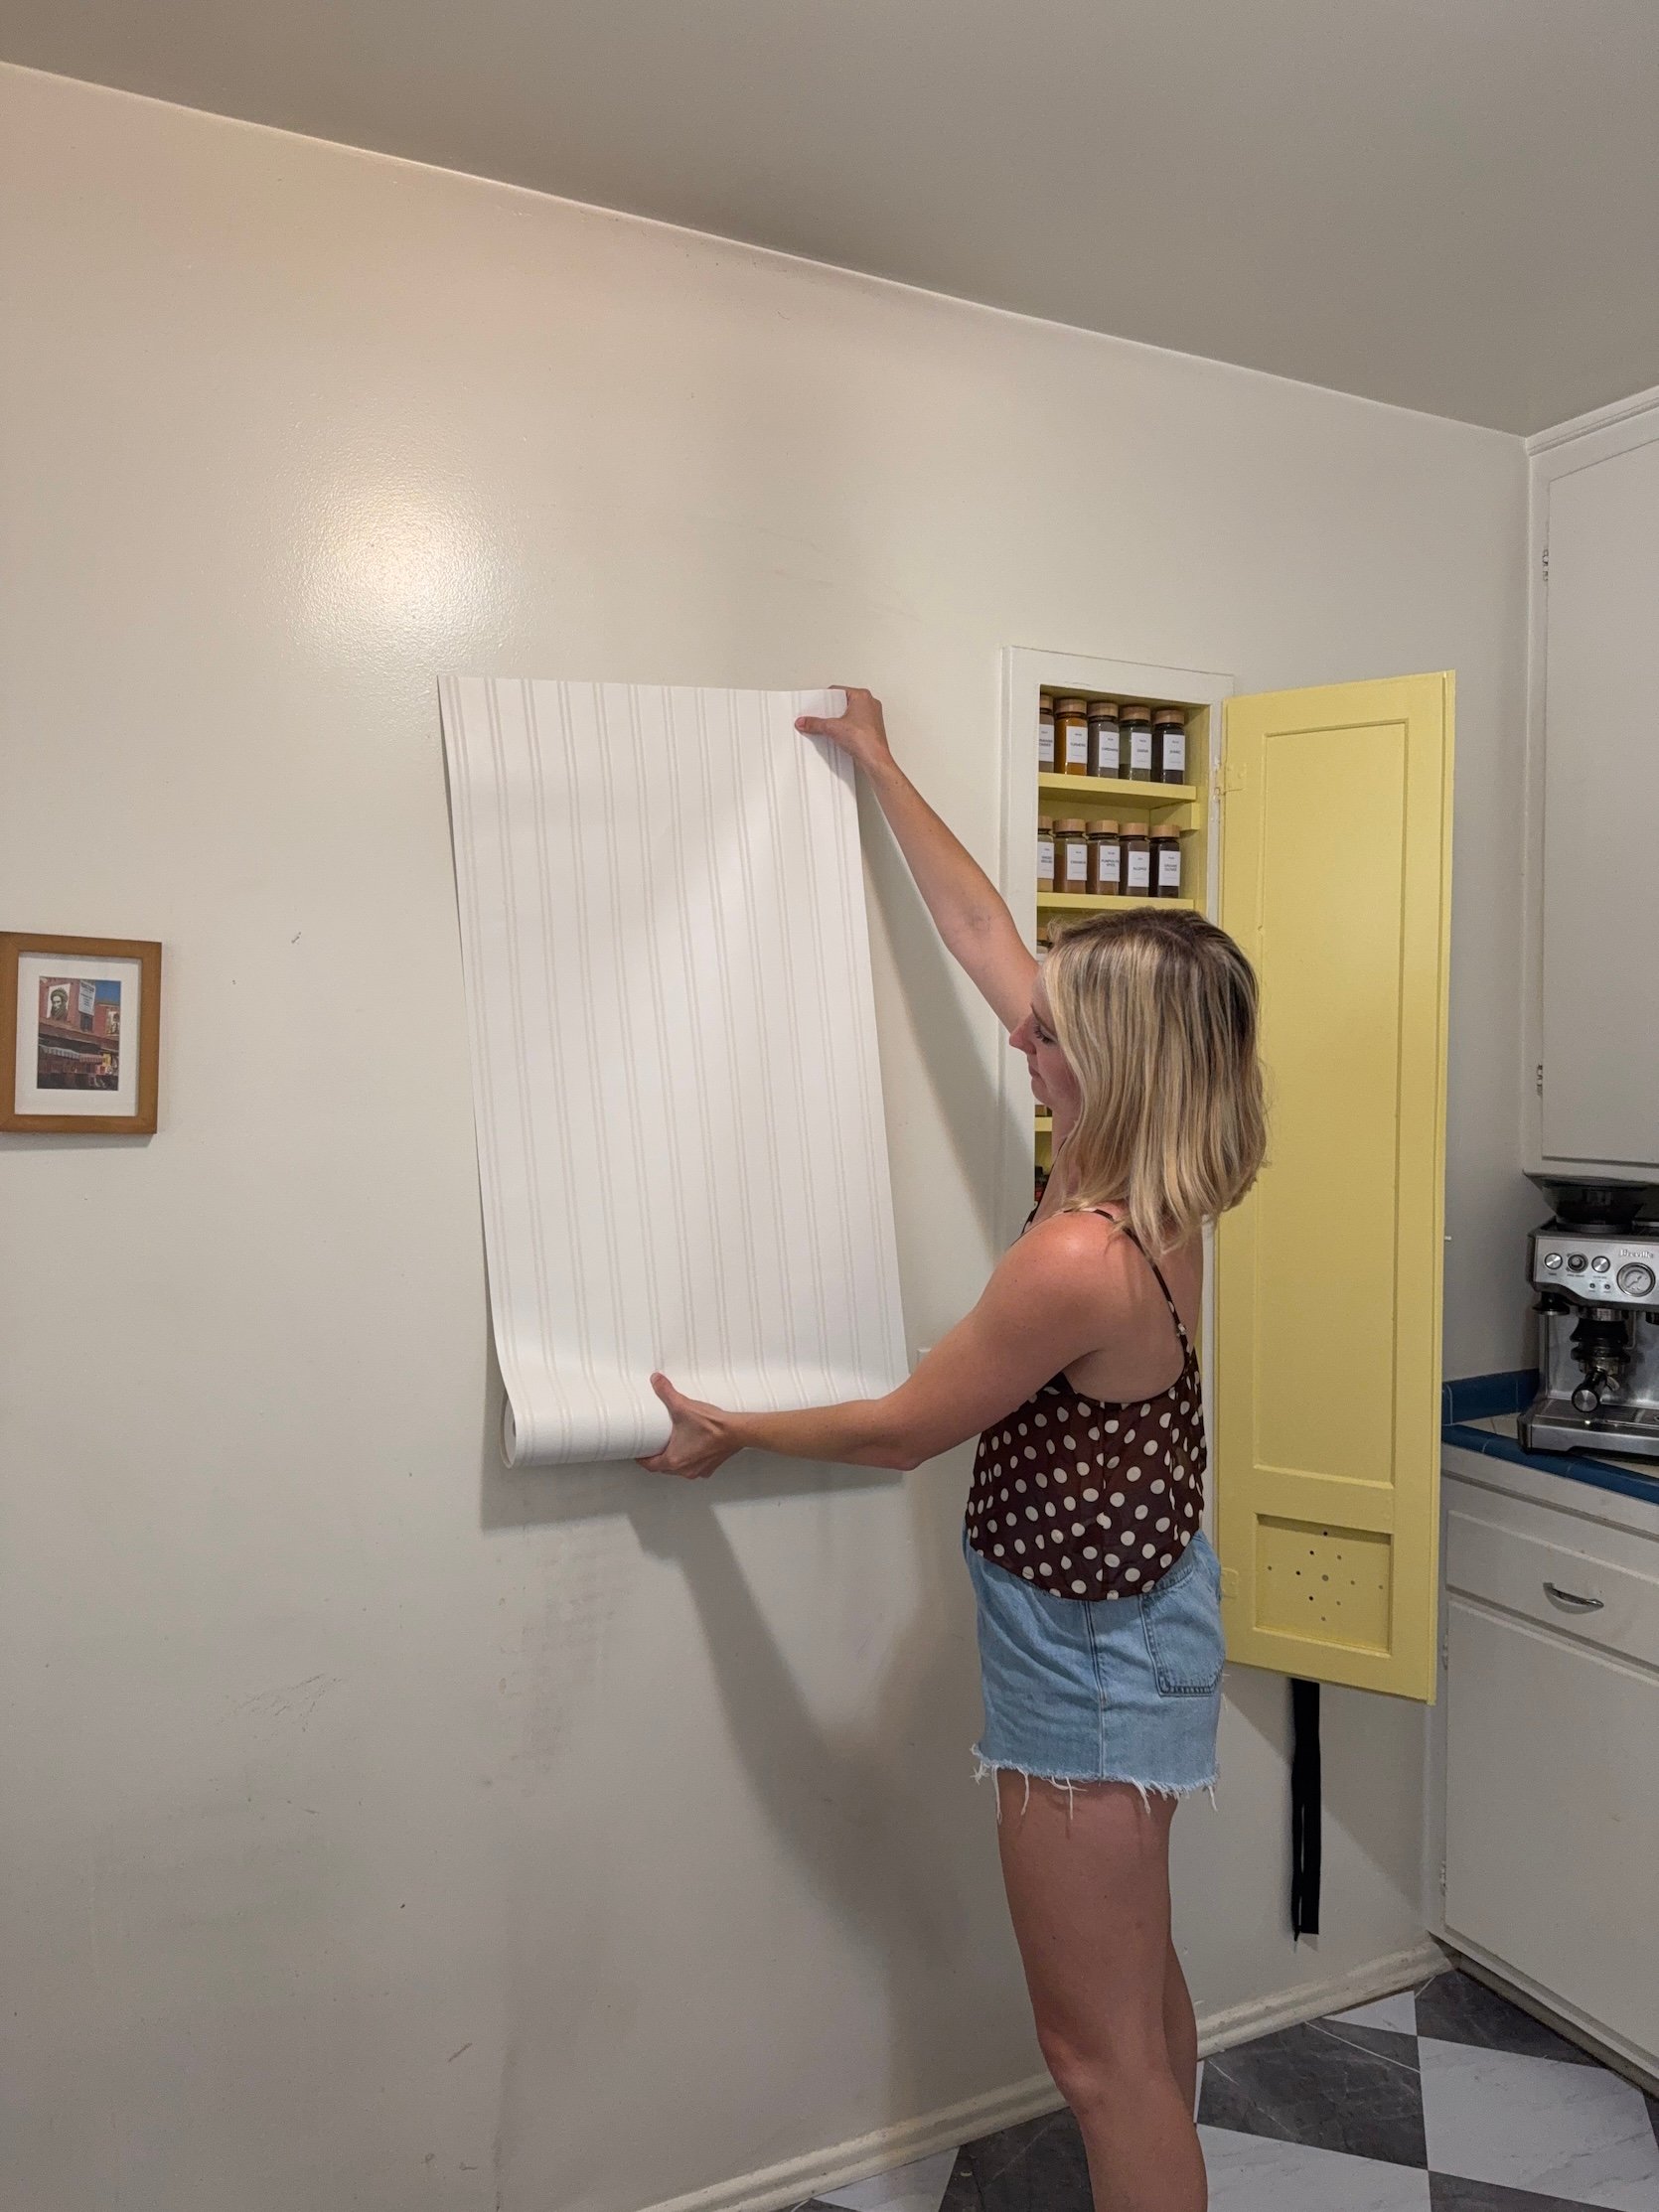
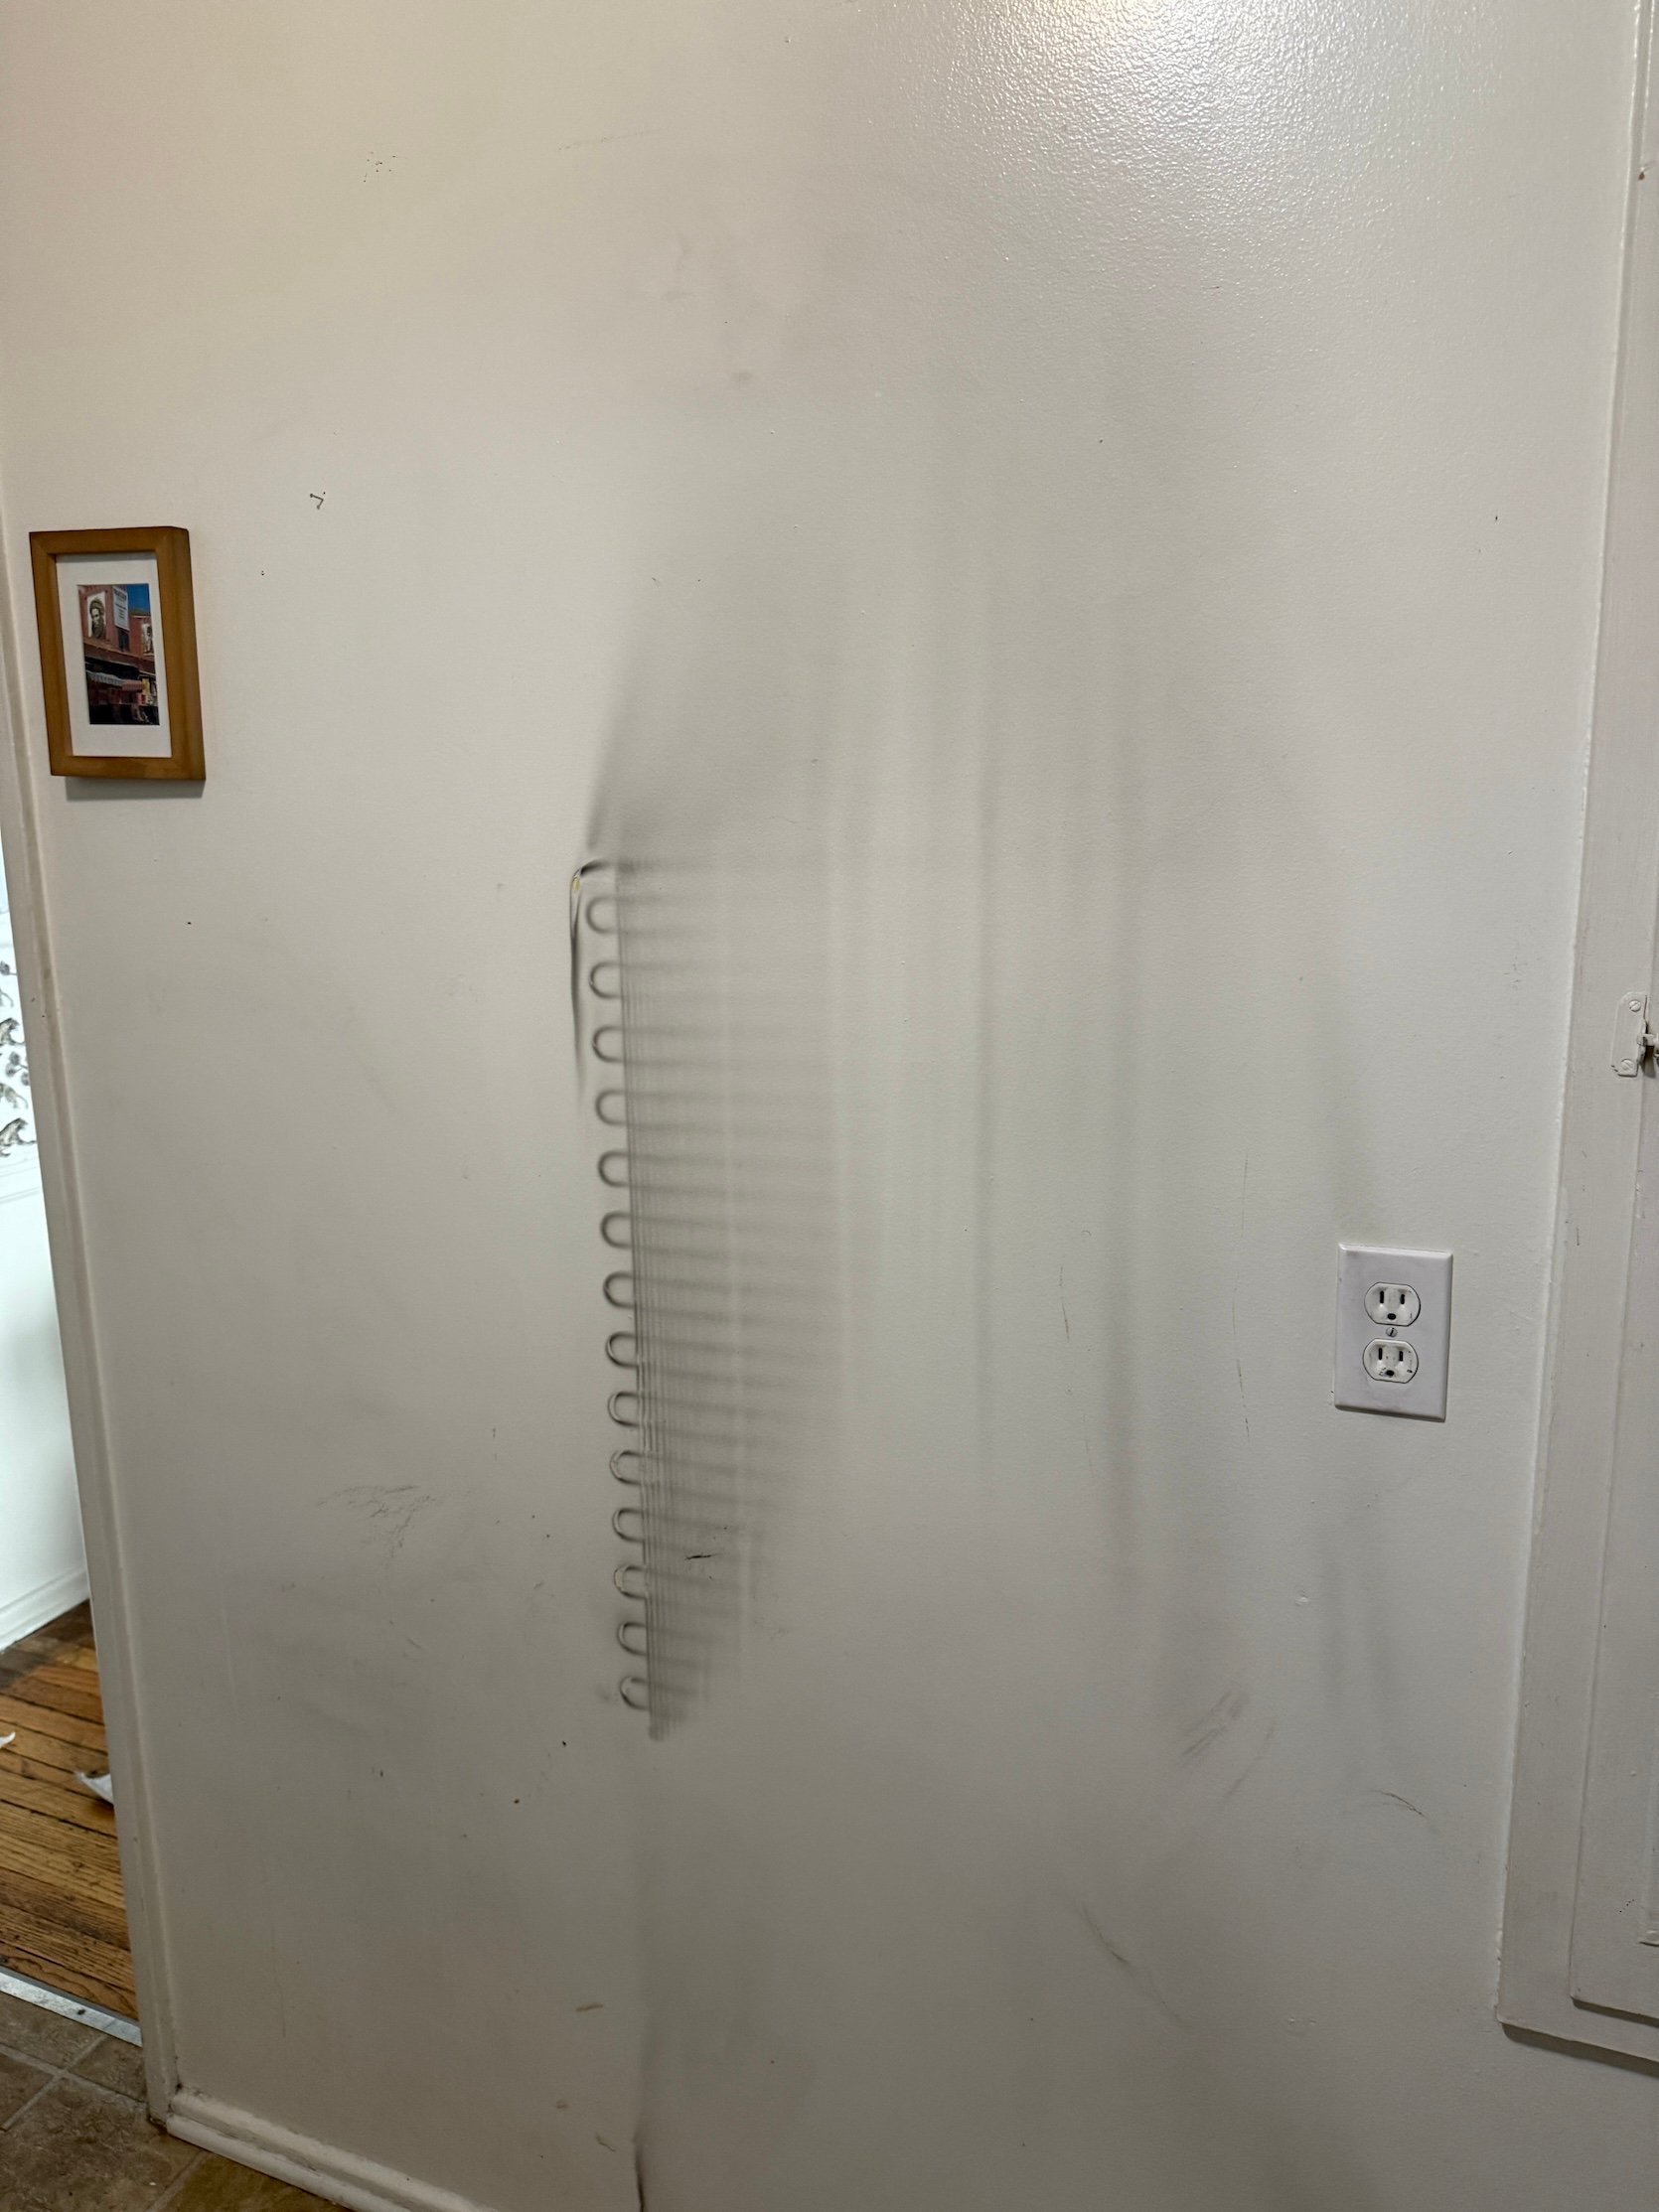
I tried repeatedly using a magic eraser to remove that big stain on the wall, but with no success in actually making it disappear completely (although it did help). So my options were to paint it or wallpaper it…so it was beadboard wallpaper! i found This one For $30 a roll, that’s not a bad price at all – plus it’s paintable!
Ok with process pictures…who wants to see some beautiful reveal pictures!?! Jade’s boyfriend, Lyle, is an incredible photographer, so he came over to shoot the space, and I can’t wait a second to share these photos!! Move that bus!
Wallpaper , Head , paint color , floor tiles , cookbook stand , bowl , candle , tea towel
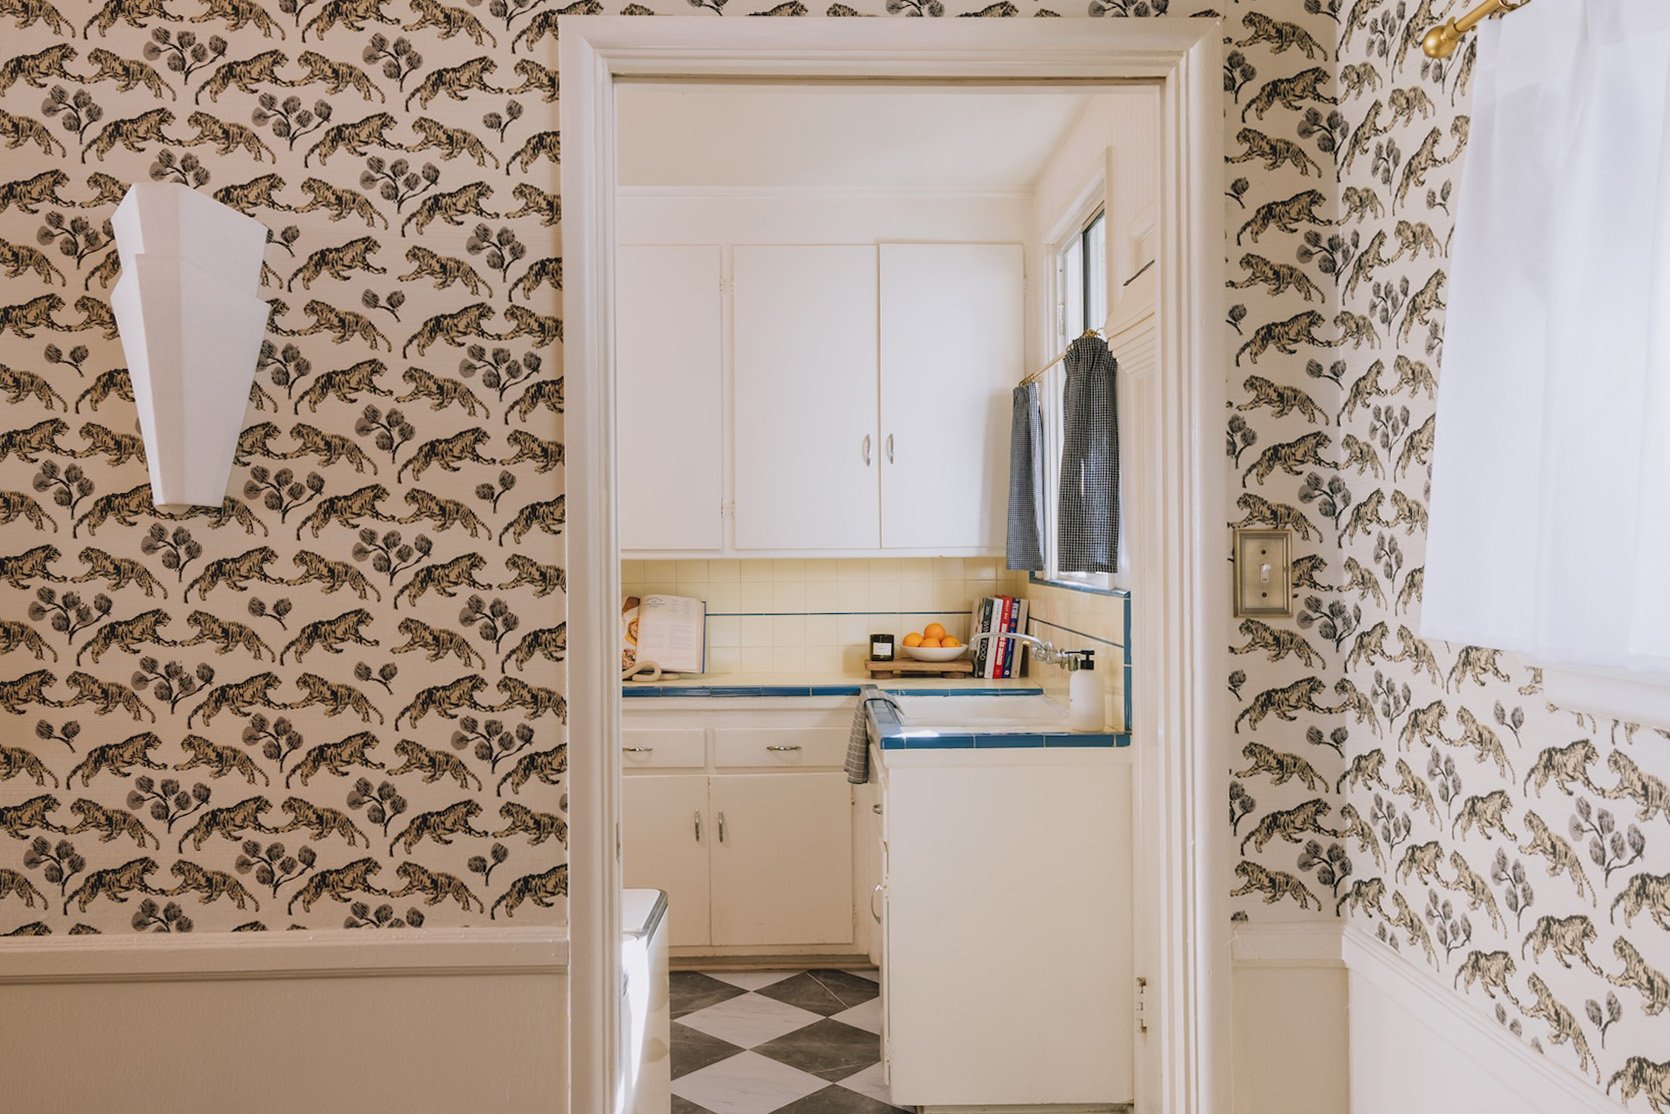
So to give you an idea of where we are in space, the entrance to the kitchen is behind my dining room – which you can see in full here, in case you missed it!
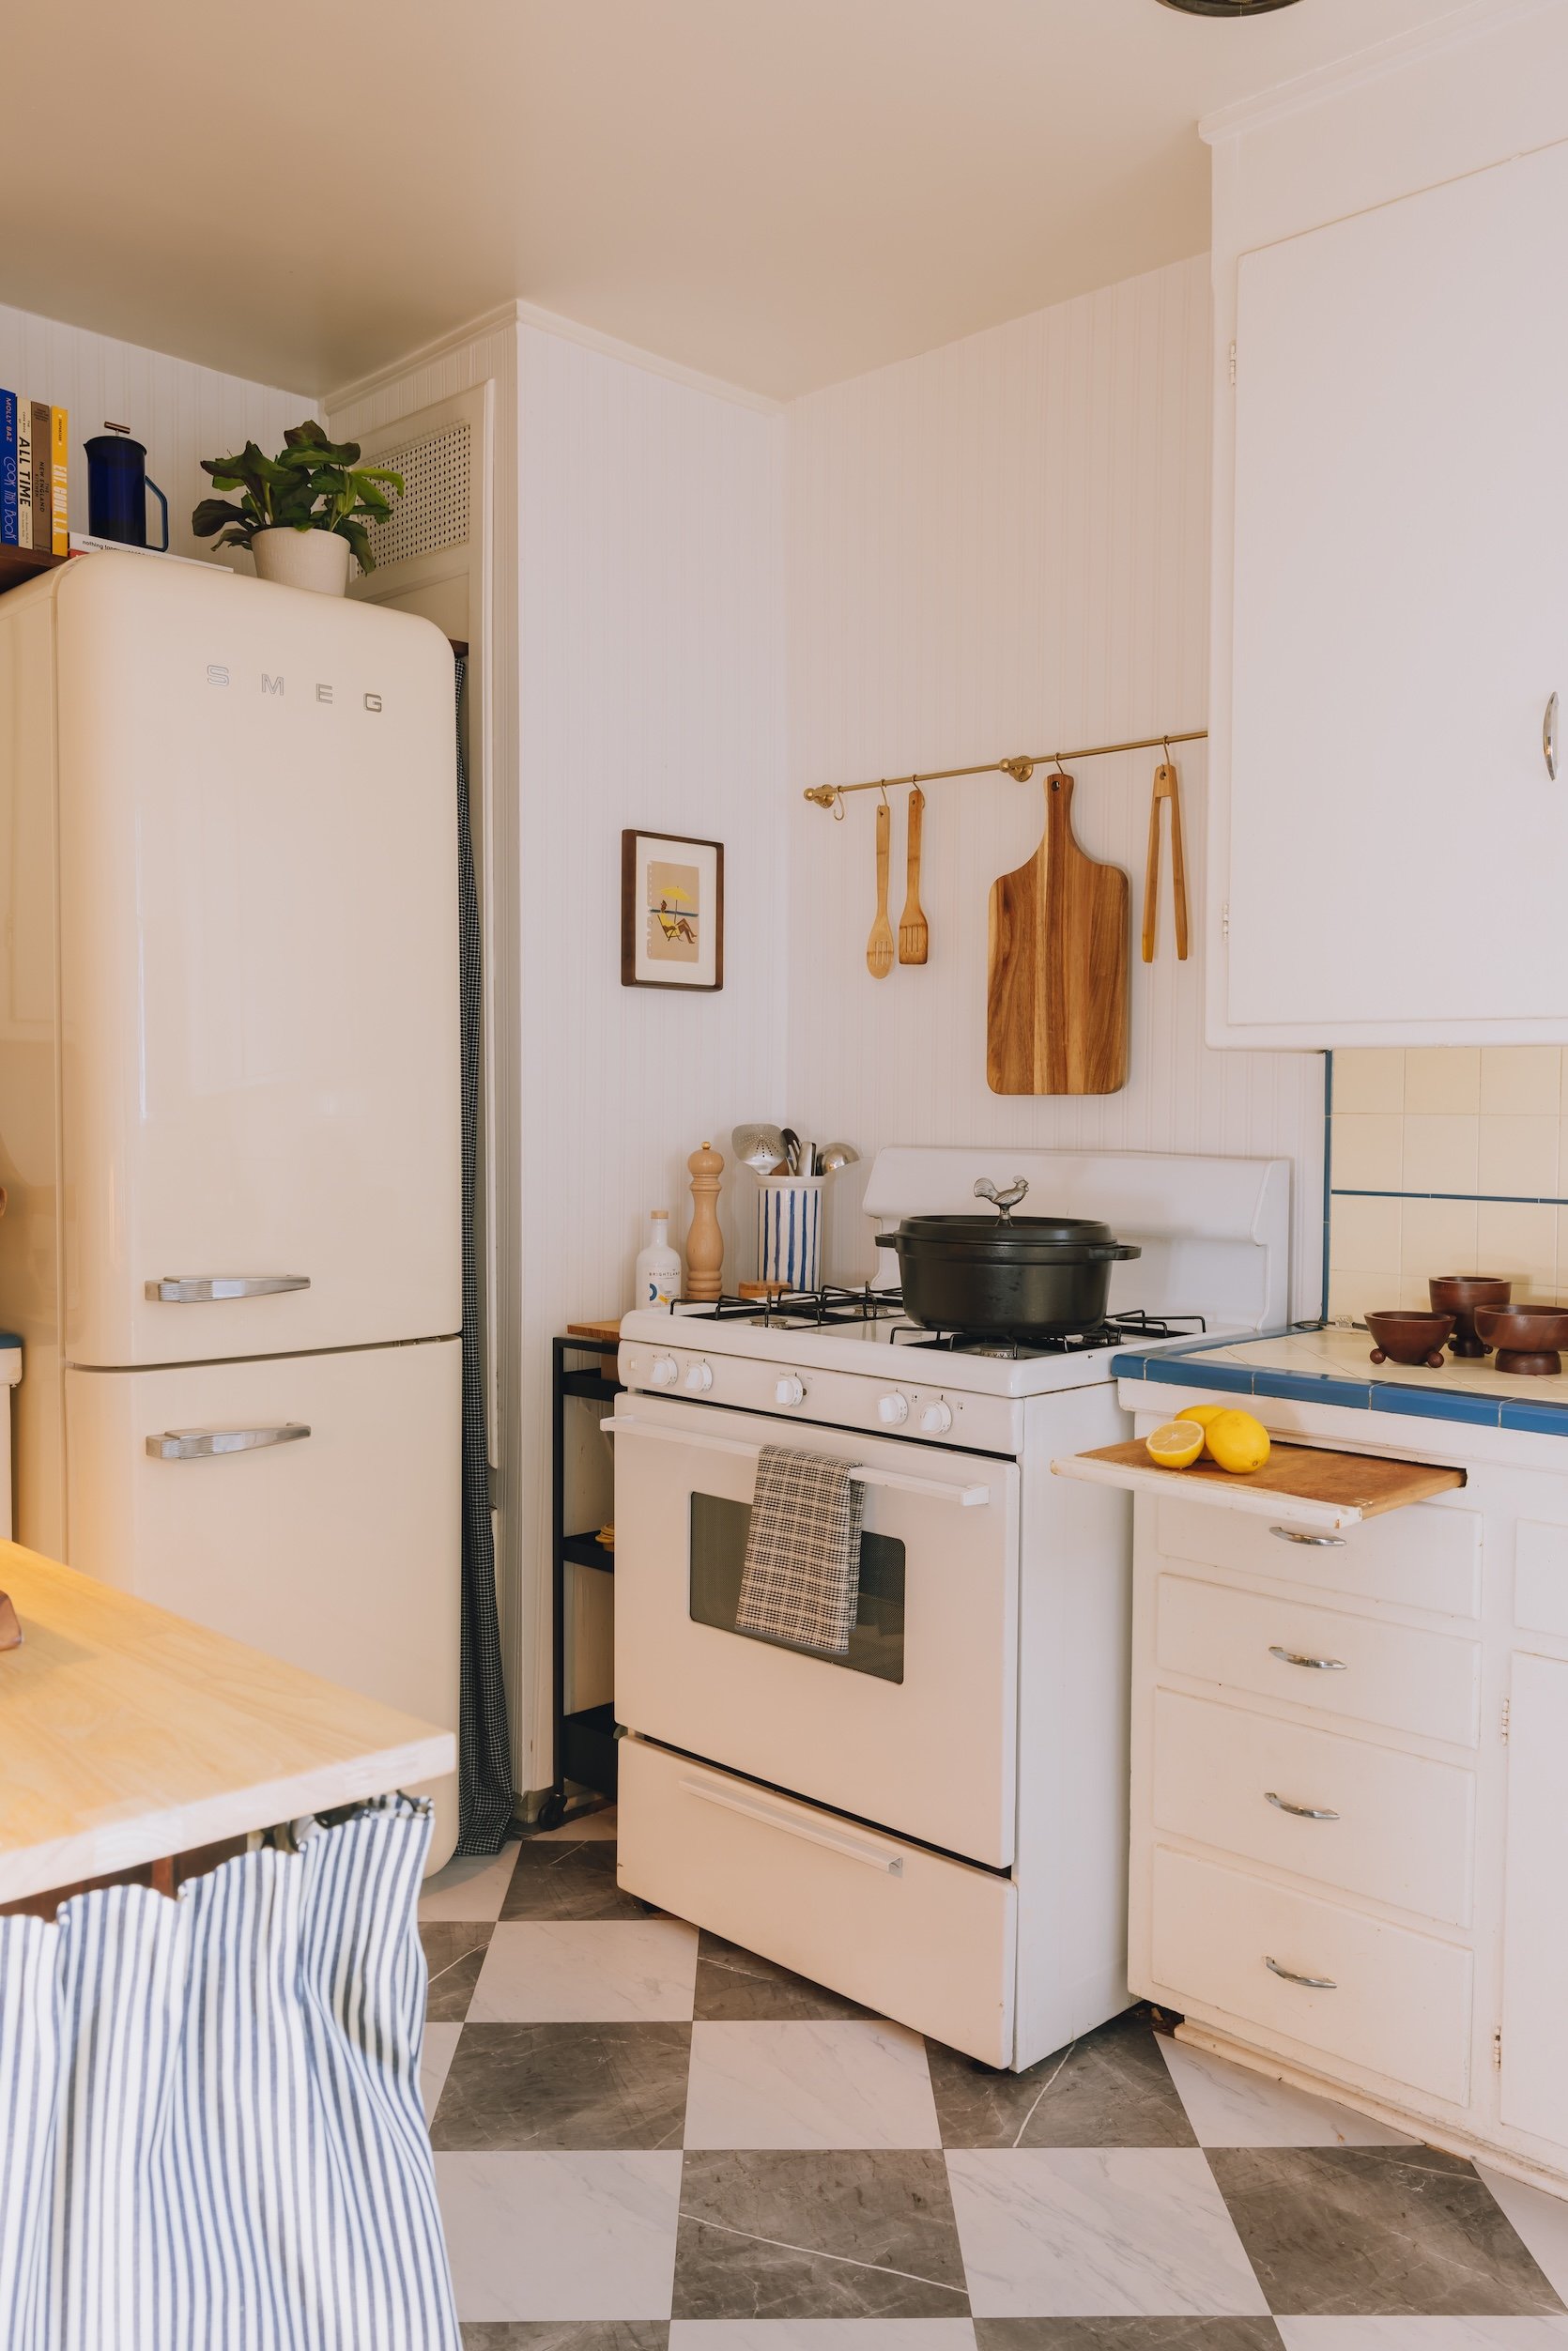
floor tiles , smeg fridge , tea towel , Dutch oven , pot rail , pepper grinder , wooden bowls
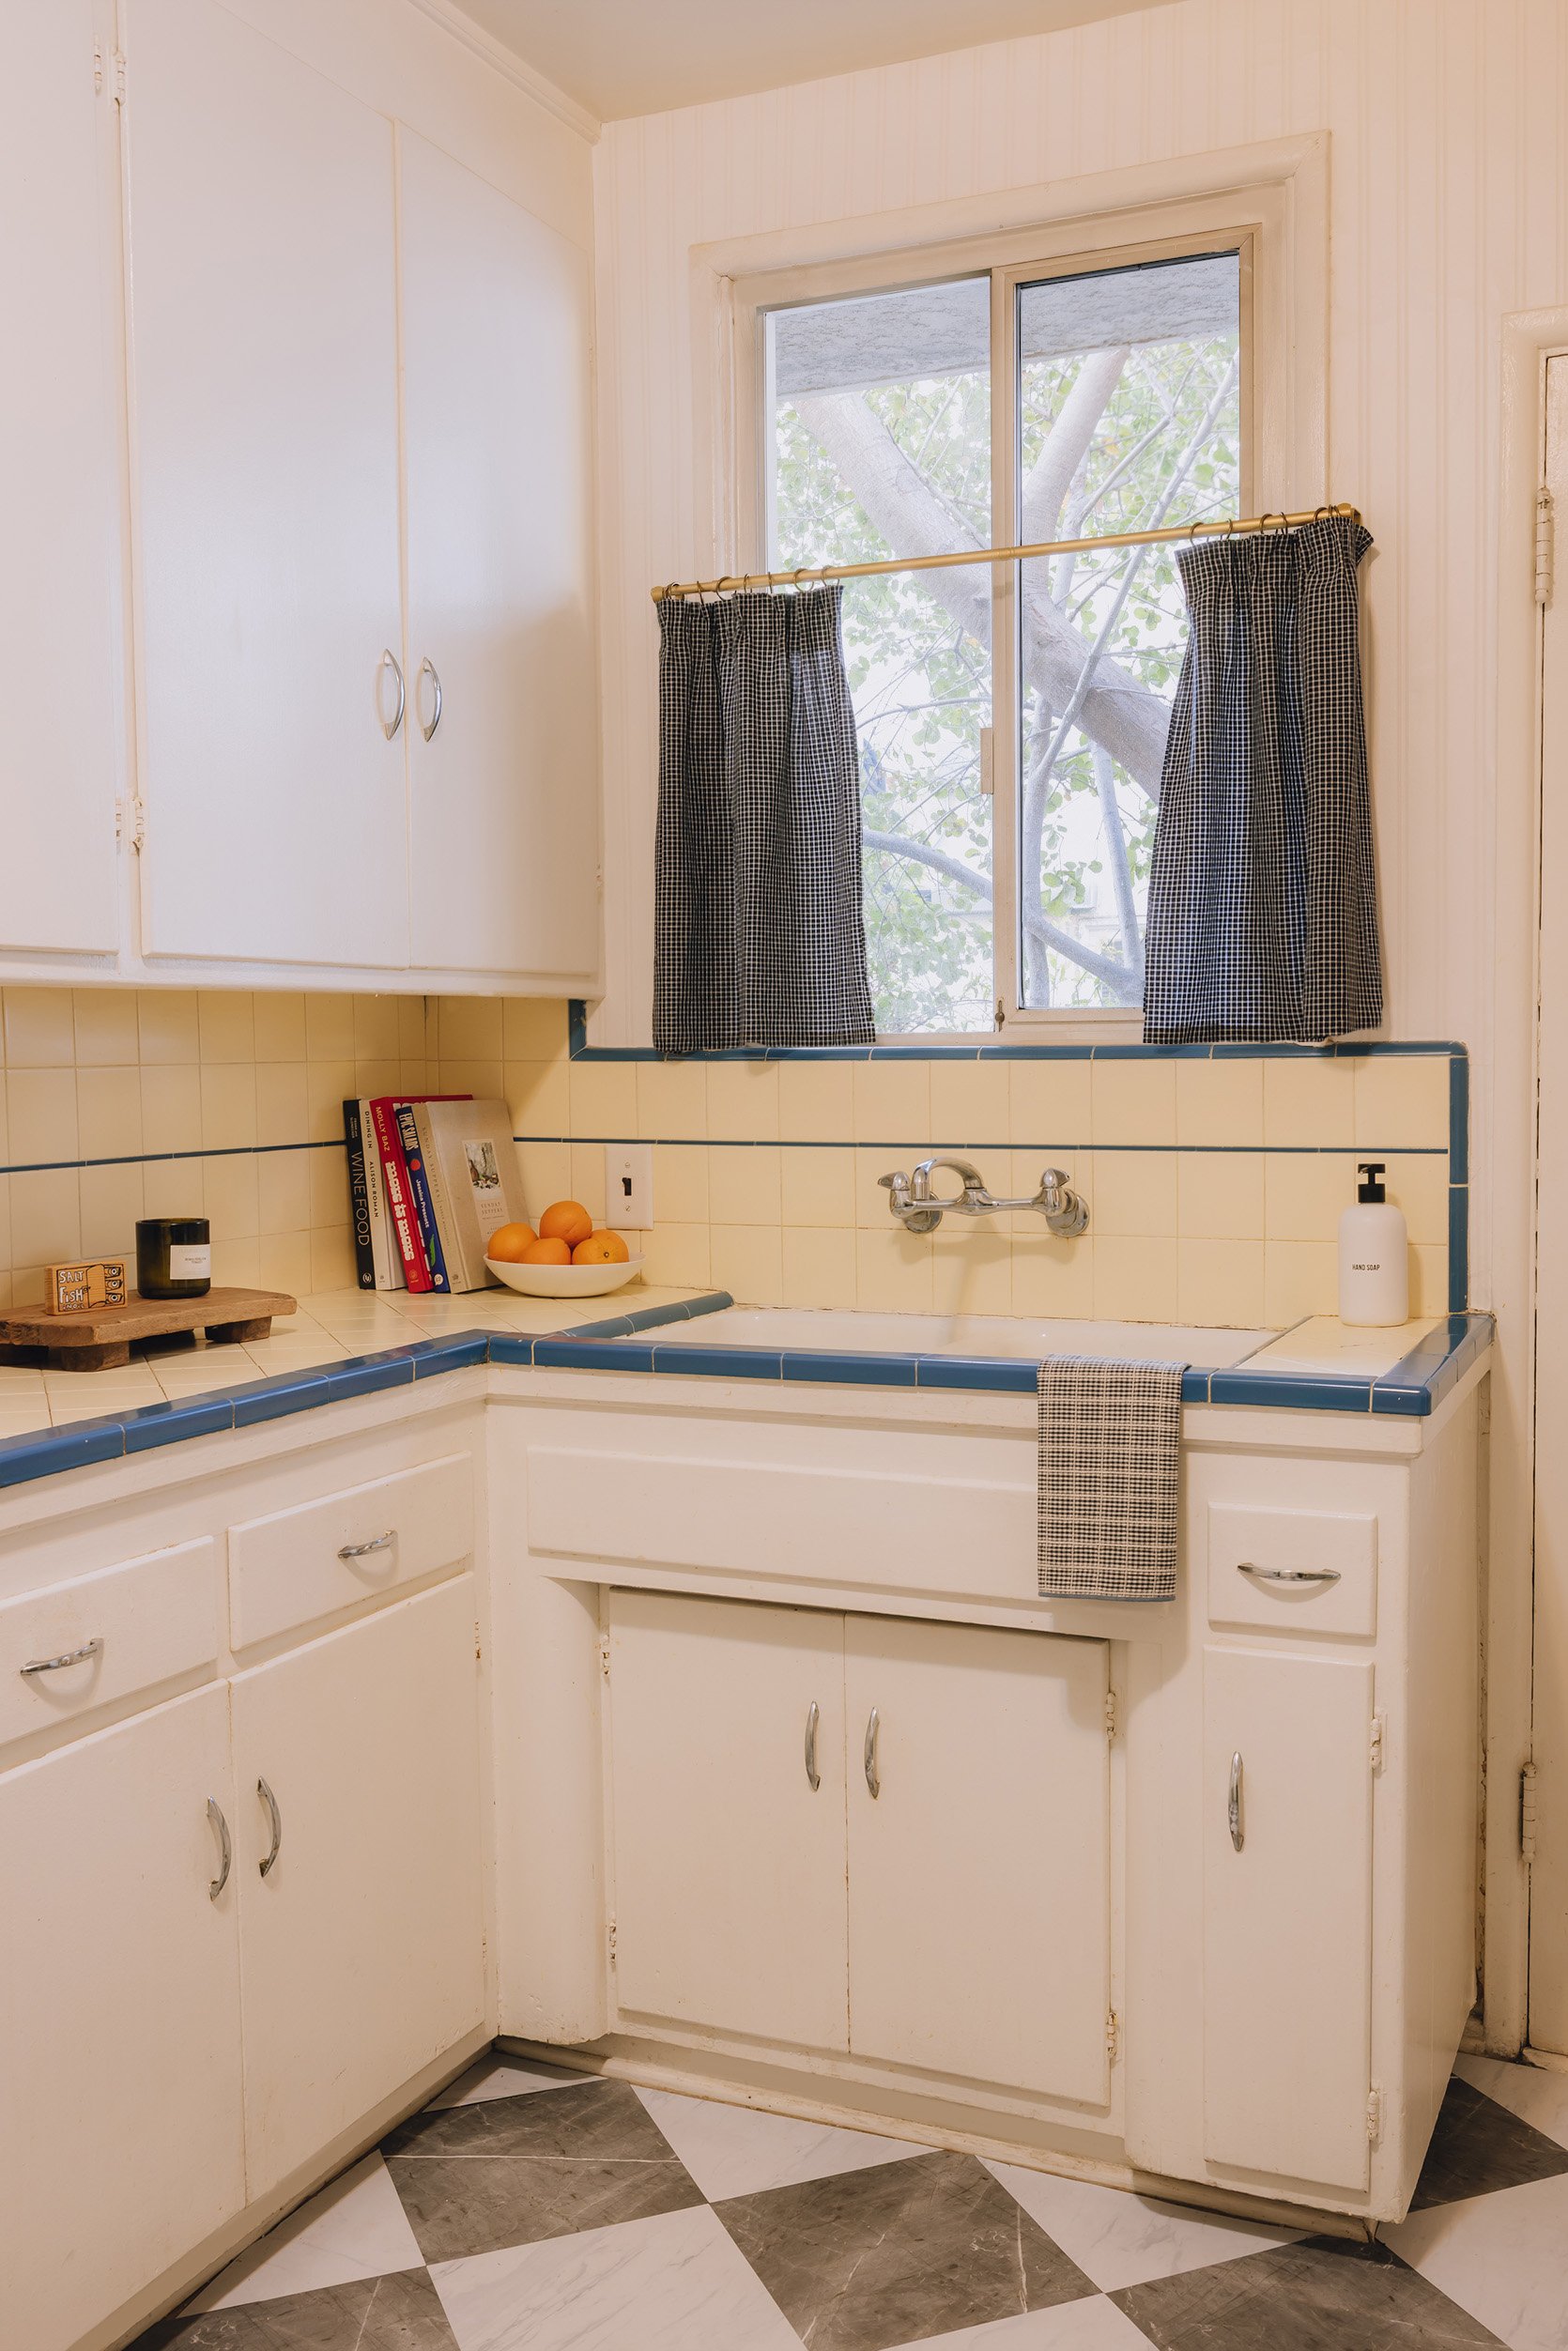
Here is my finished kitchen!! That fridge nightmare was really worth it, and I can’t wait to take it with me to my next place and beyond. And check out that little glimpse of the prep table?! Houston We Have Counter Space! I didn’t do as much replacing the hardware or painting the cabinetry as I initially planned (at some point in the rental, you’ll realize spending the time and money isn’t worth it) – all the DIY I did here was so high-impact and worth it and I really love how light and bright this space is. It went from cooking hell to cooking heaven!
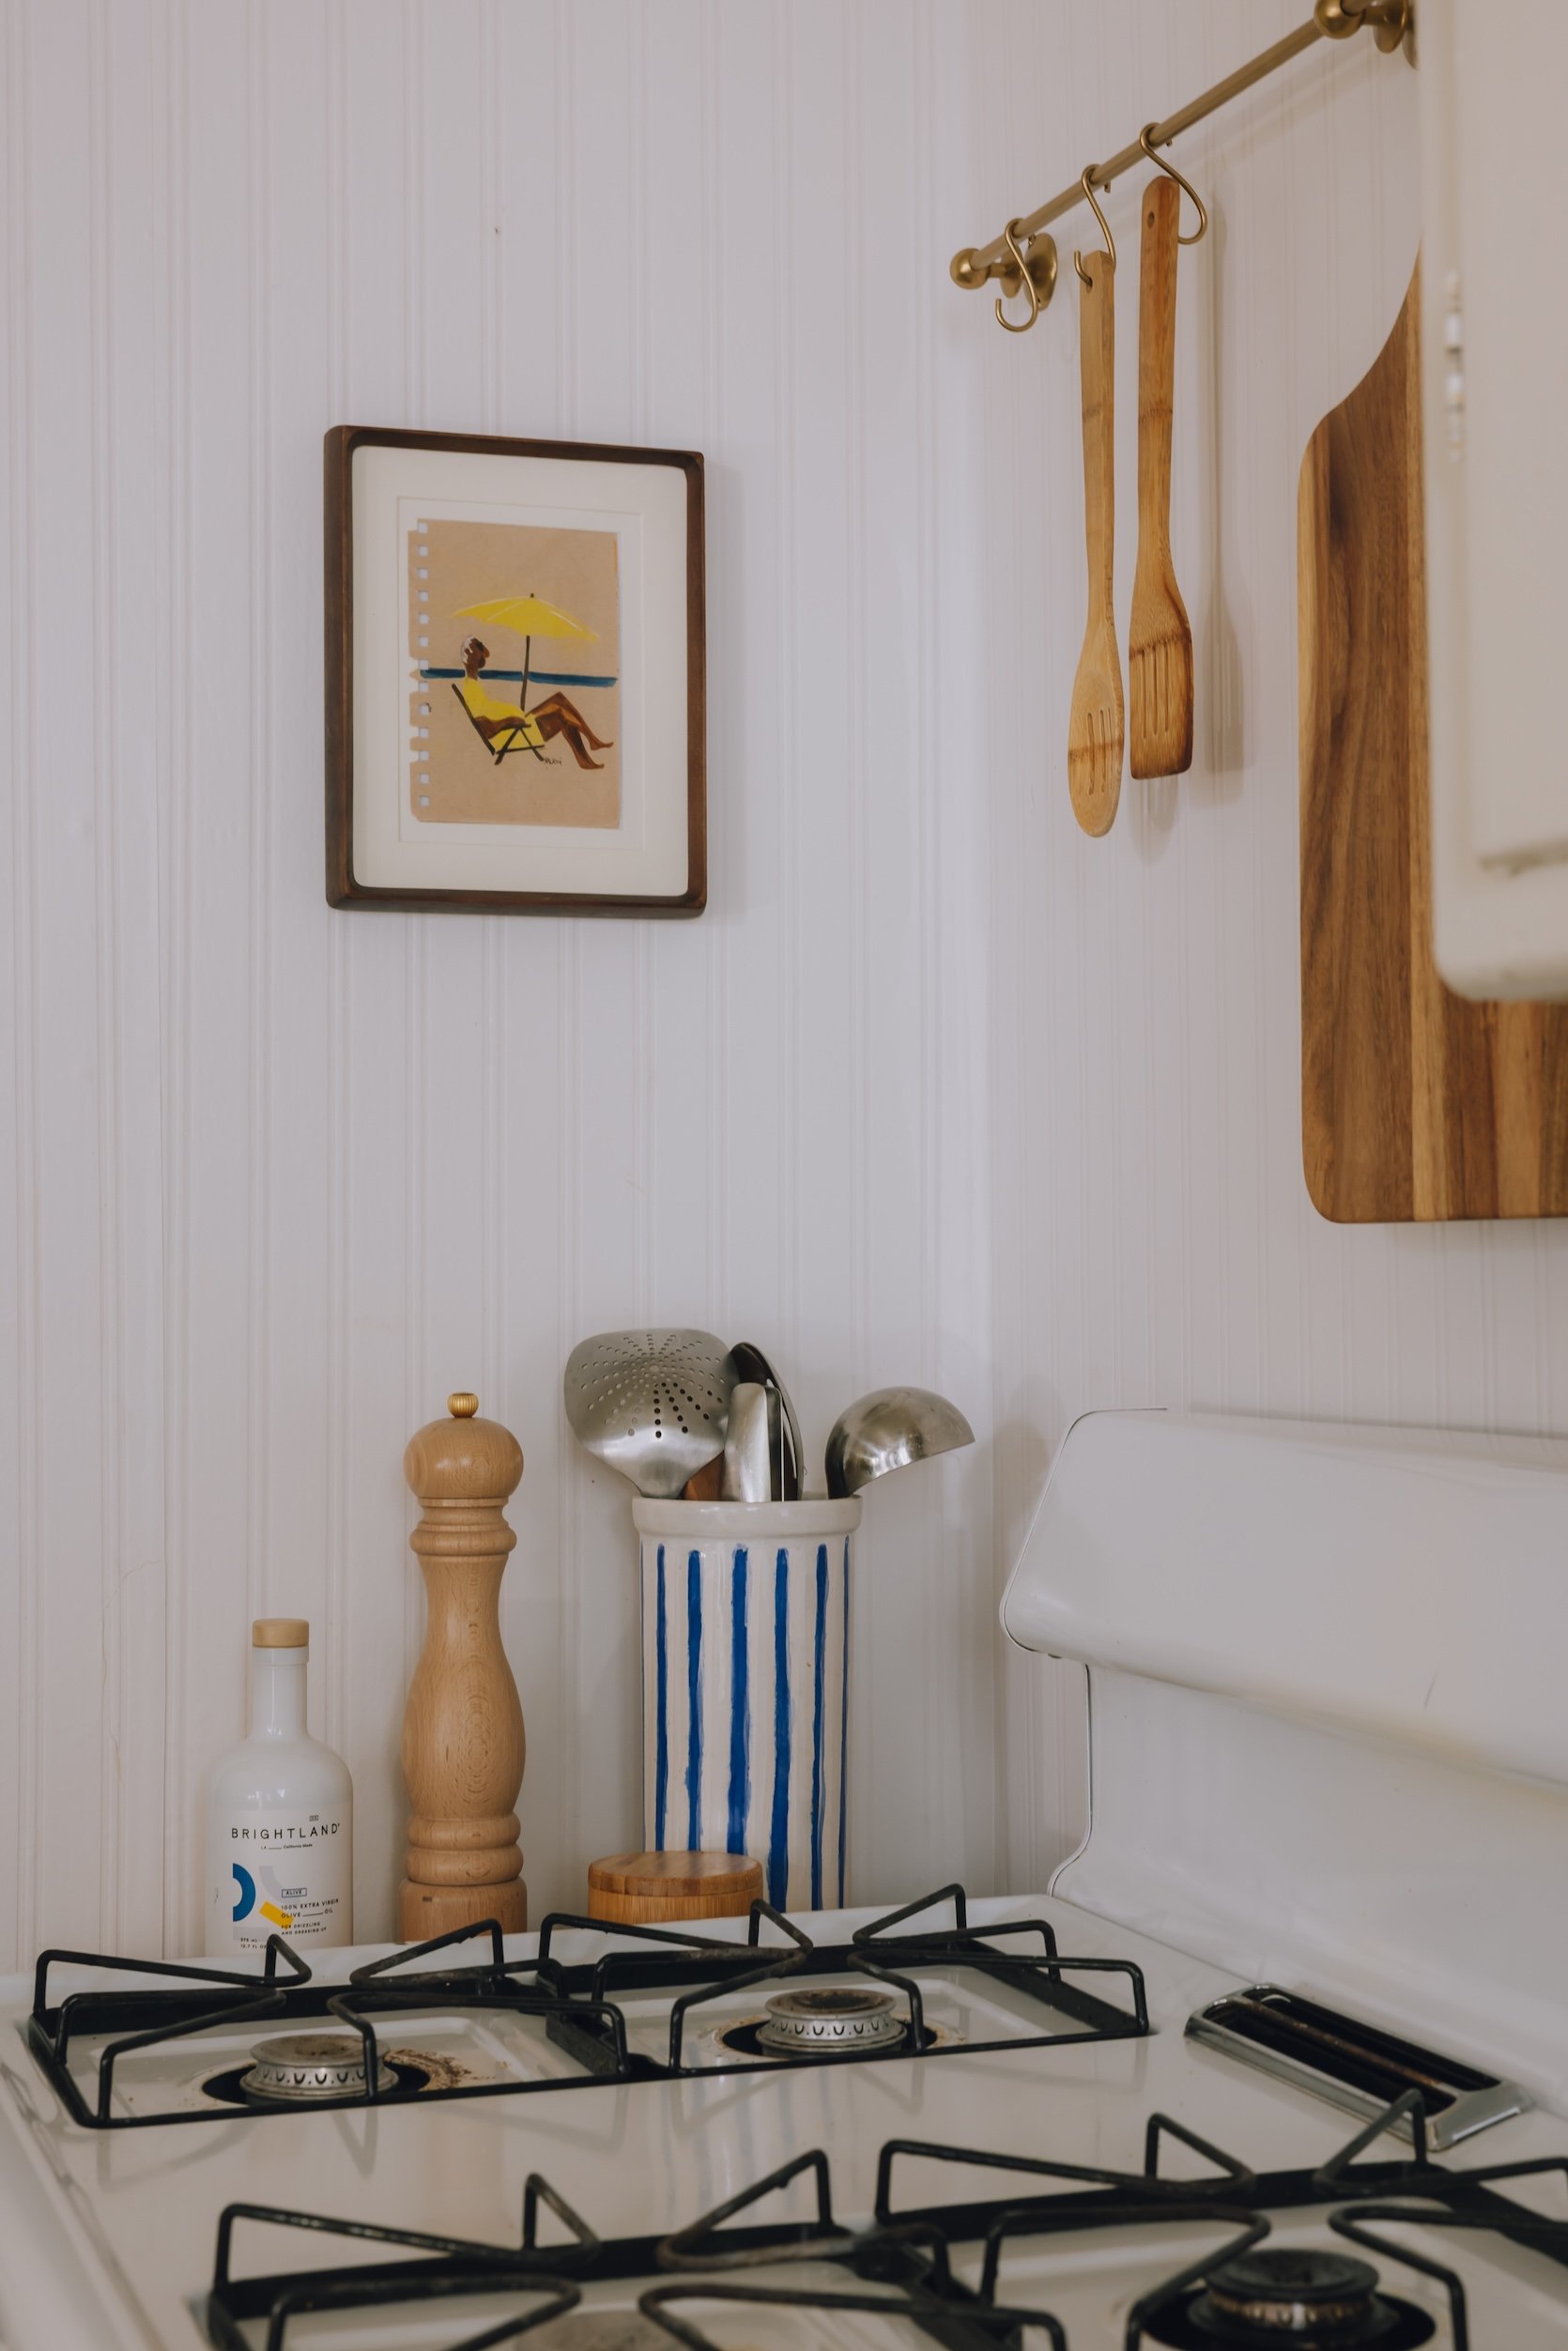
Take a better look at the beadboard wallpaper here – it added so much charm to the space, it was insane!! And since it was pre-glued, I just had to spray a little water on the back, so it was very easy to install. Now let’s all turn our attention to my favorite piece of art, shall we?? You may already know this, but one of my favorite places to find art is the Sawdust Festival in Laguna Beach – it can be hit or miss, but last time I went, I found this amazing animator and artist who works for Cartoon Network. mukkiHe was selling some of his drawings and artwork from his sketchbooks, and I came across this and fell in love with it, It cost $100, but since it was real and it spoke so much to me, I knew it was worth it, and I will treasure it forever,
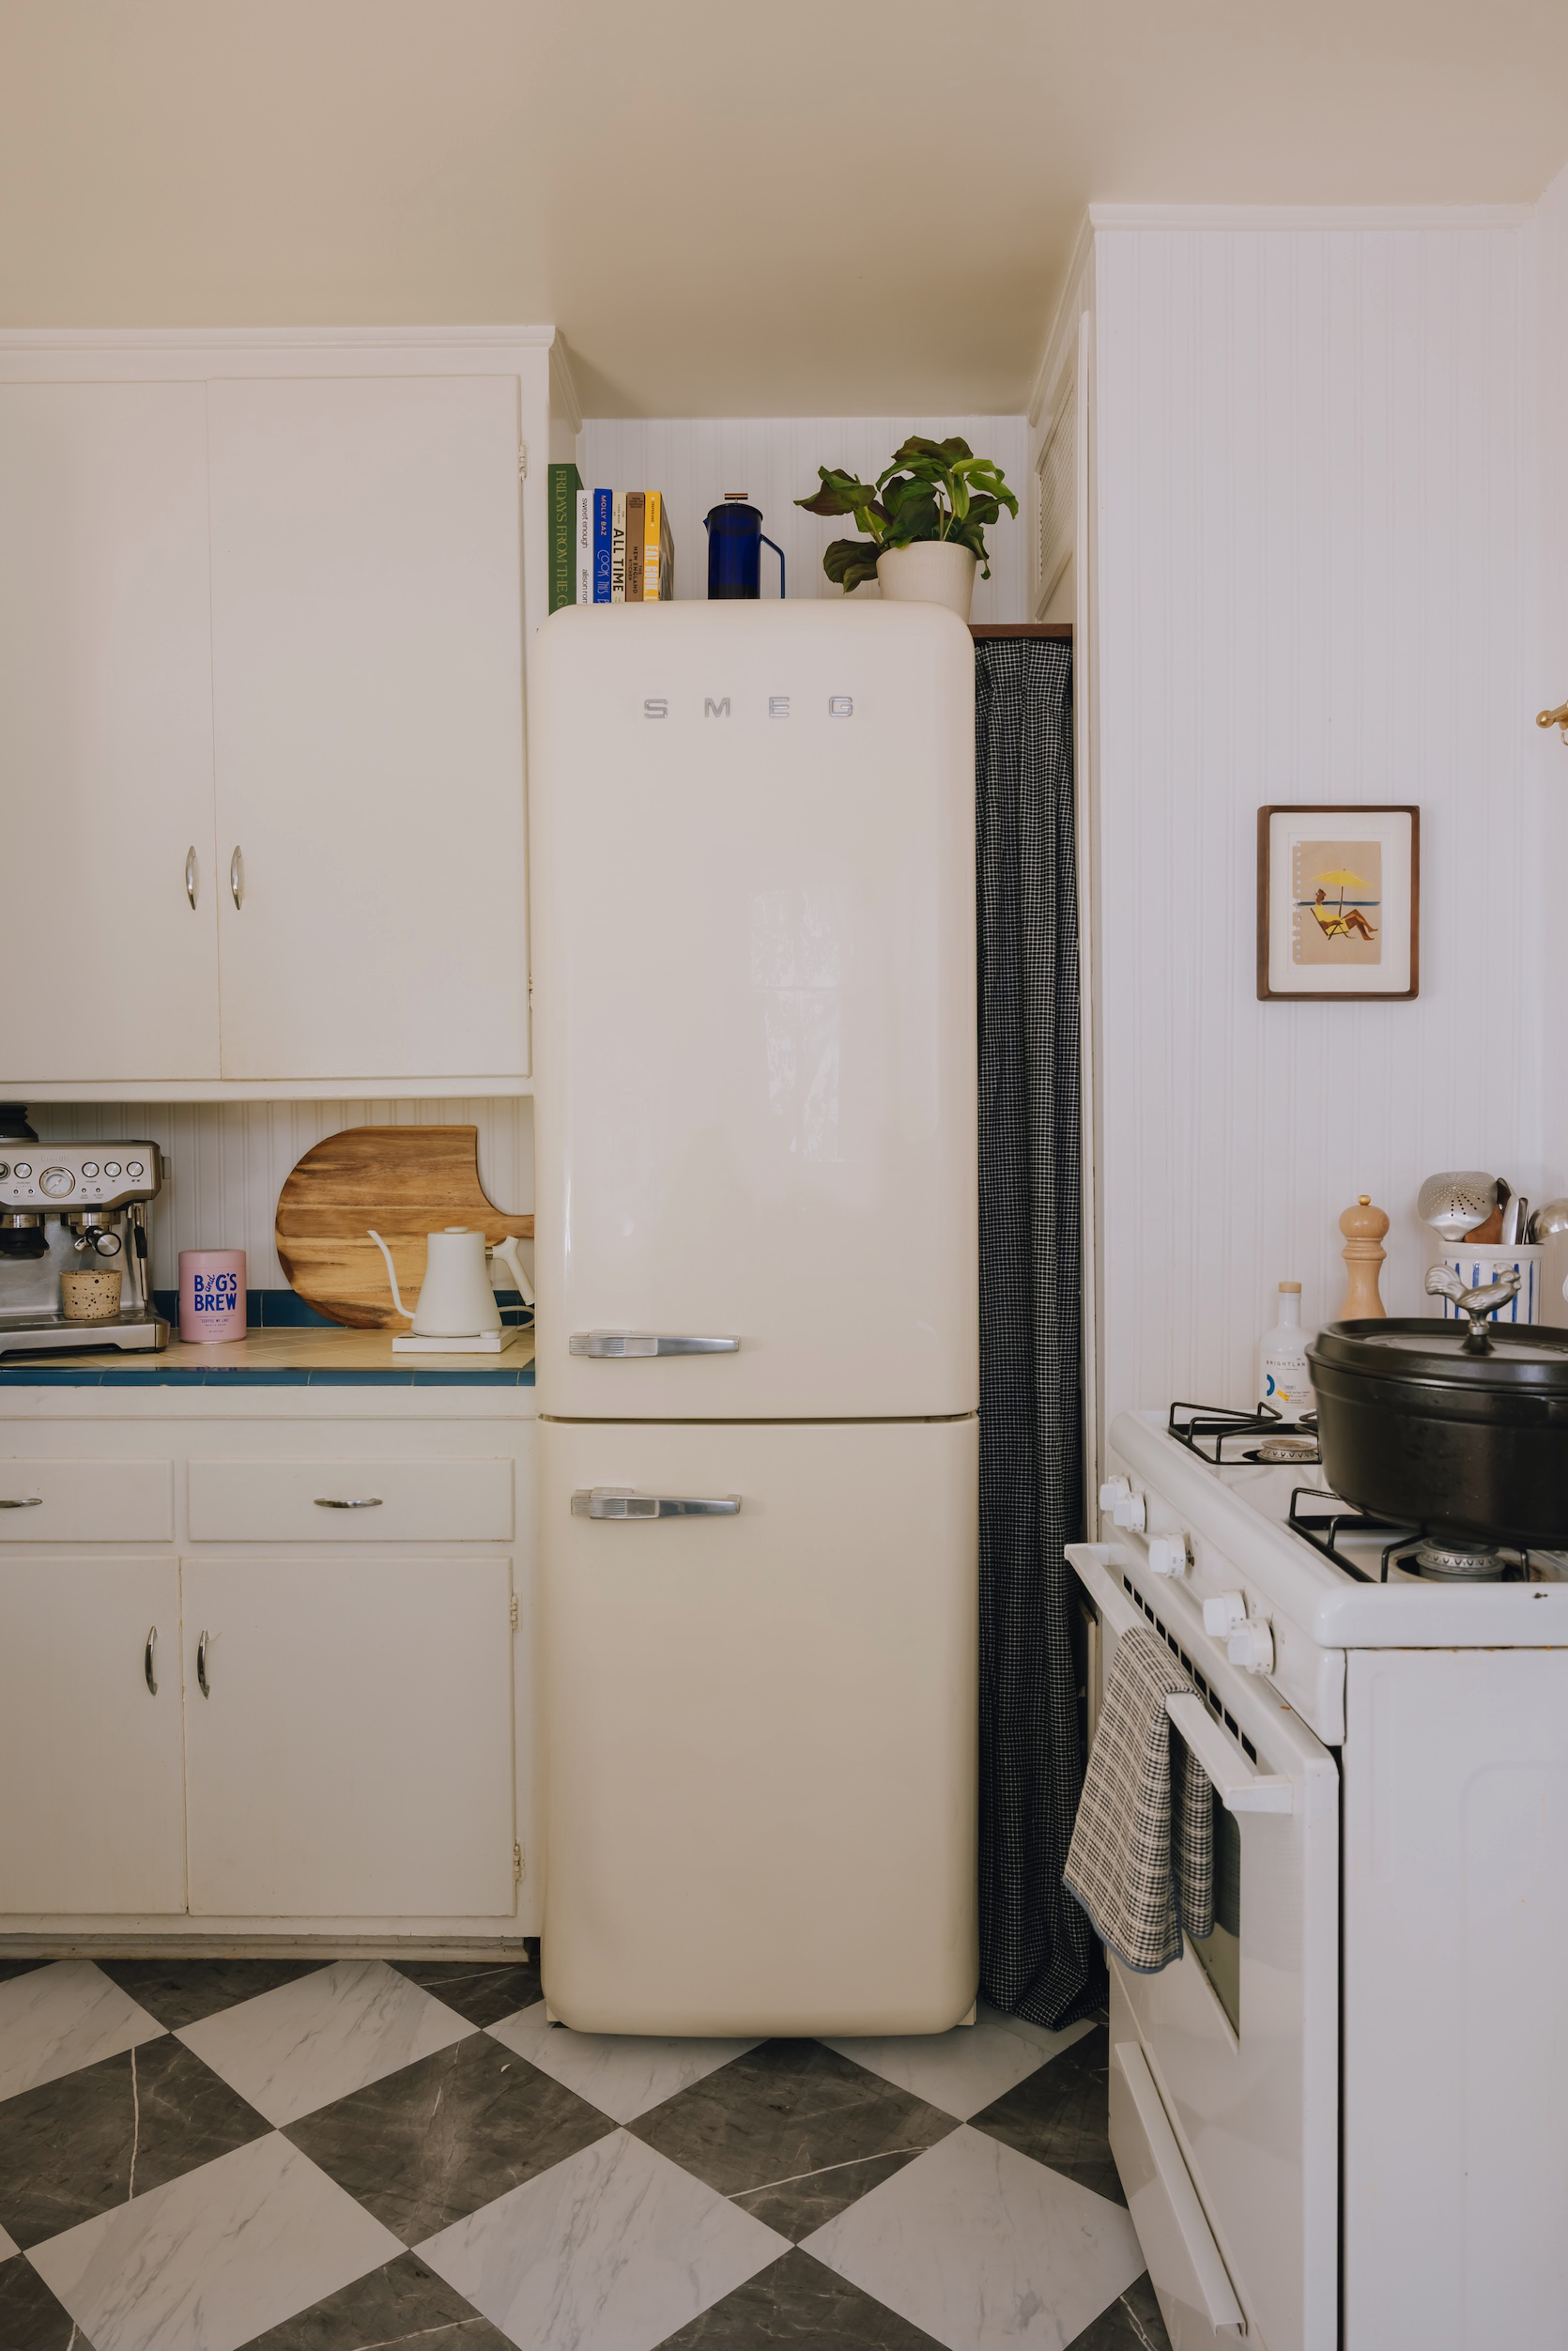
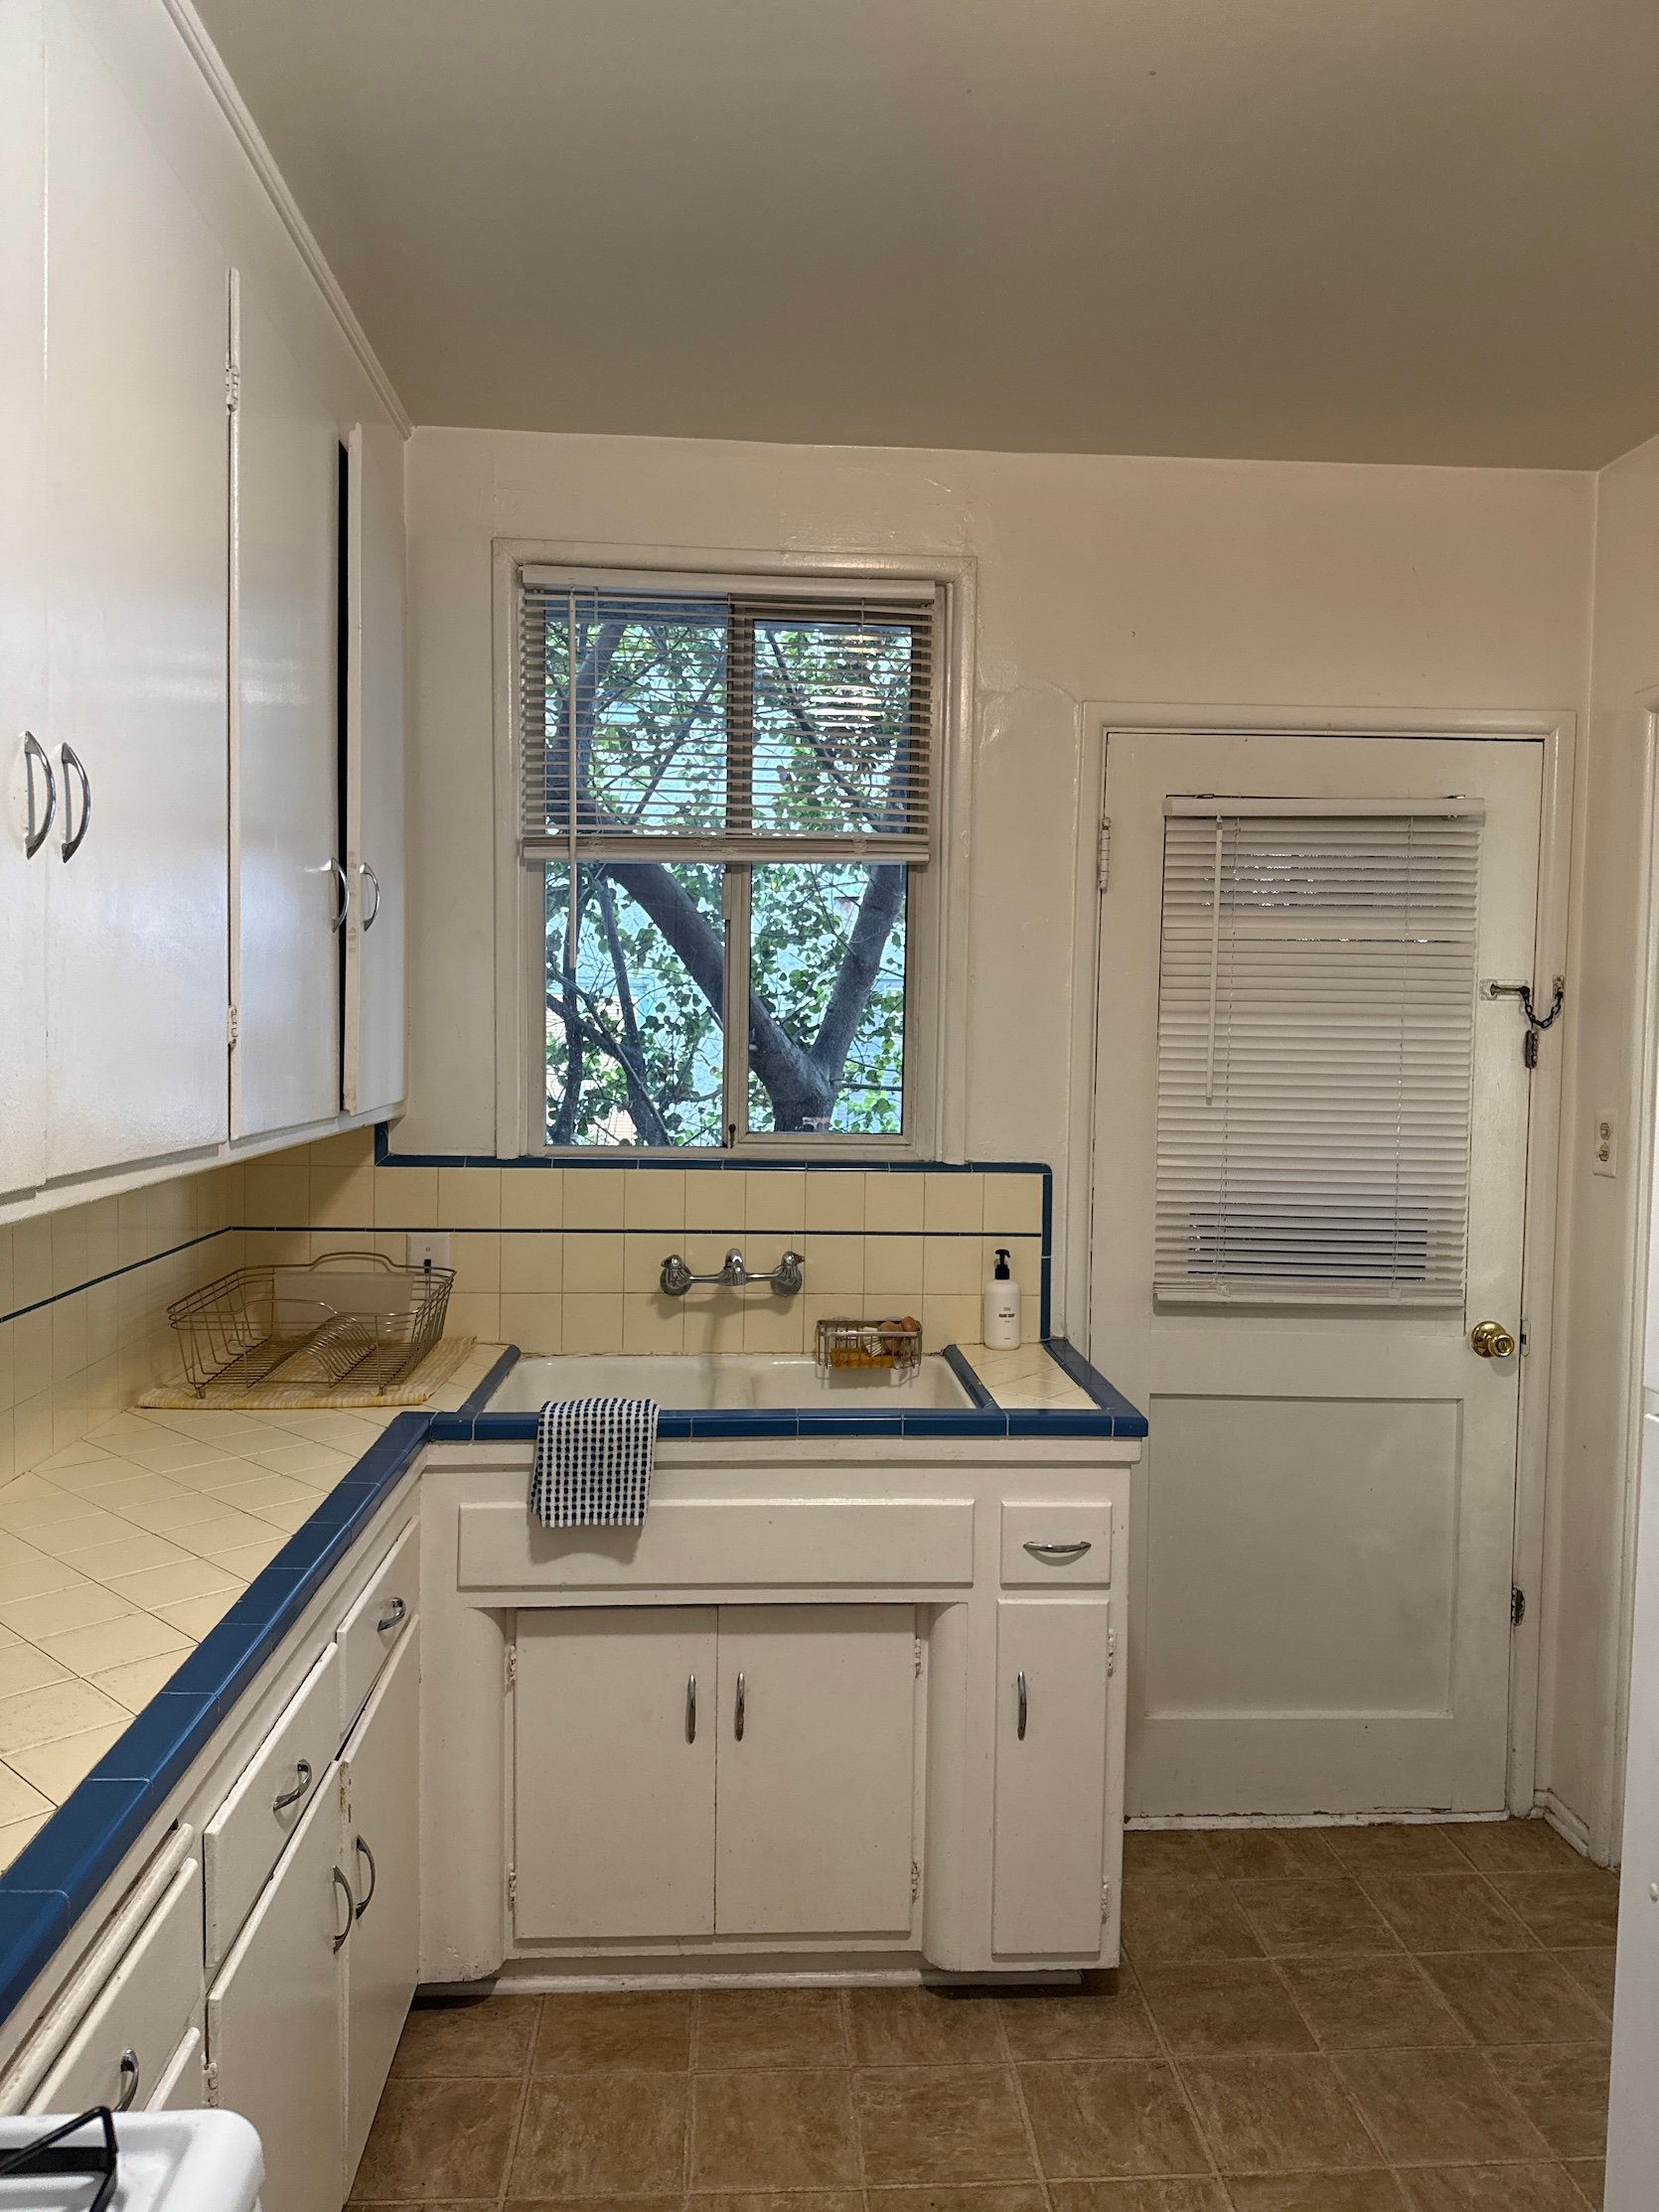
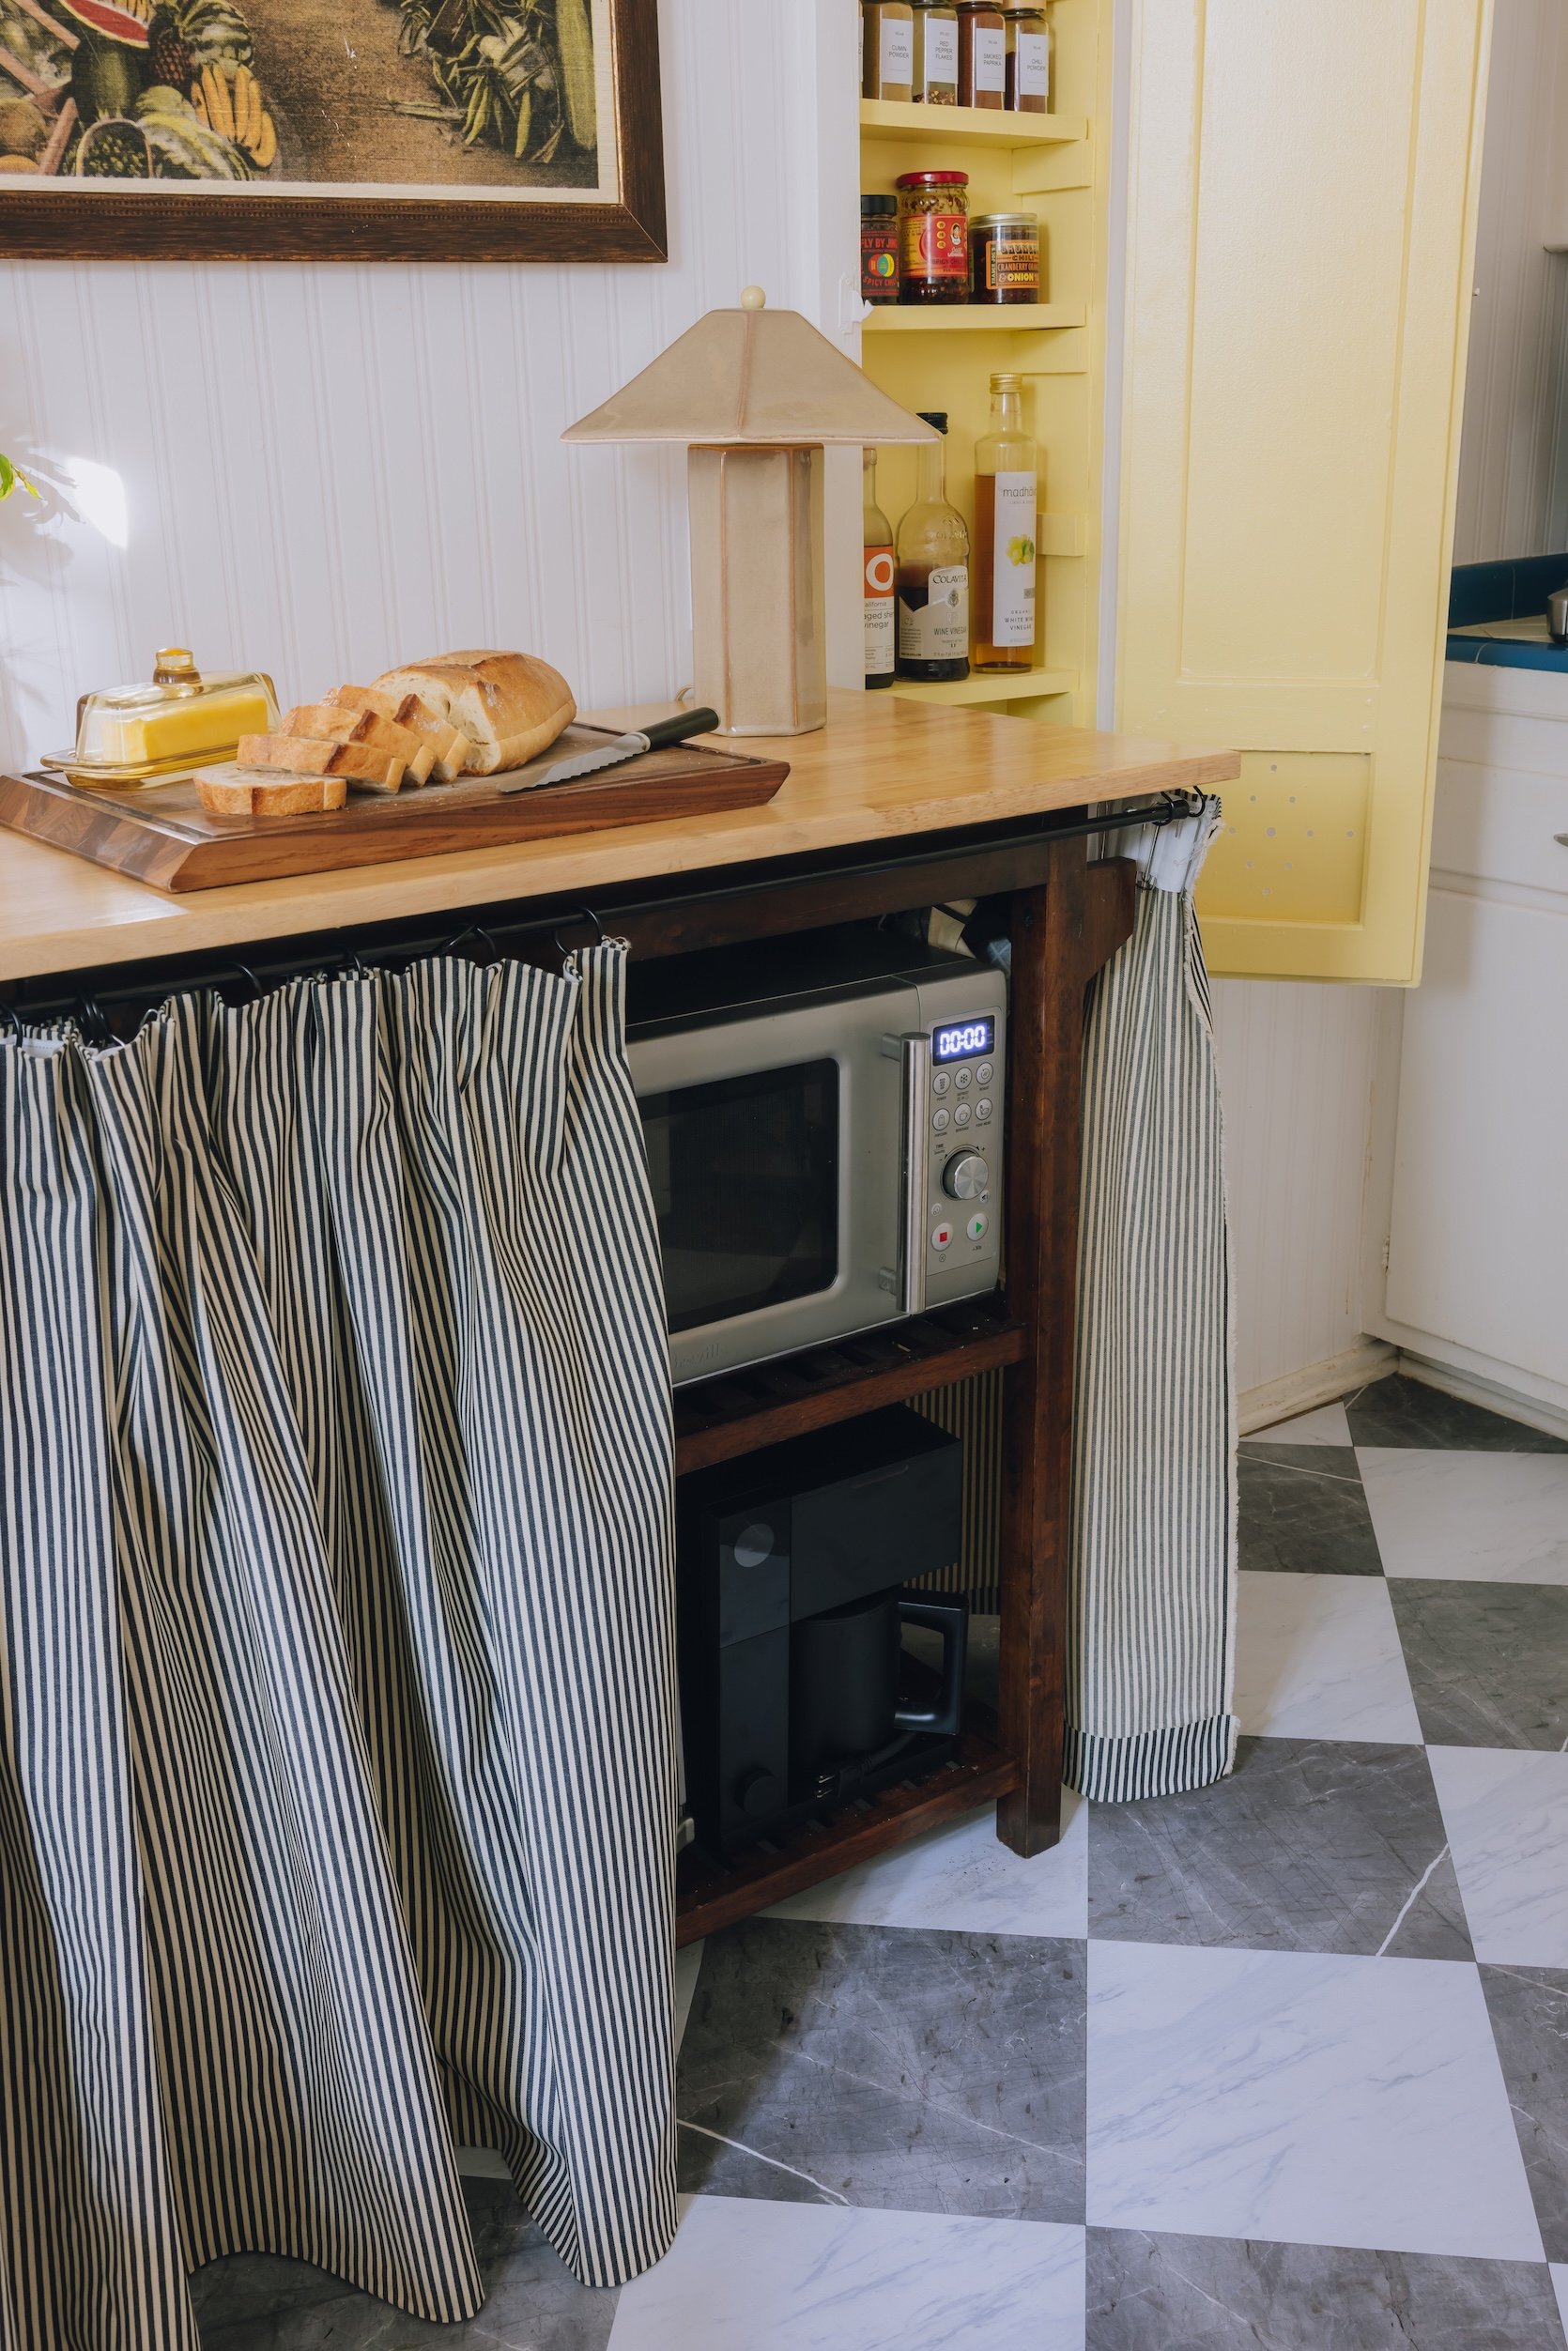
Did you notice the small screen in the first picture?? I made a little makeshift broom closet, haha! I hated the gap between the fridge and the cluttered non-usable cabinets, so I used some leftover fabric From my DIY cafe curtains (those are near the sink on the other side… I’ll give you a closer look at them in a bit!)
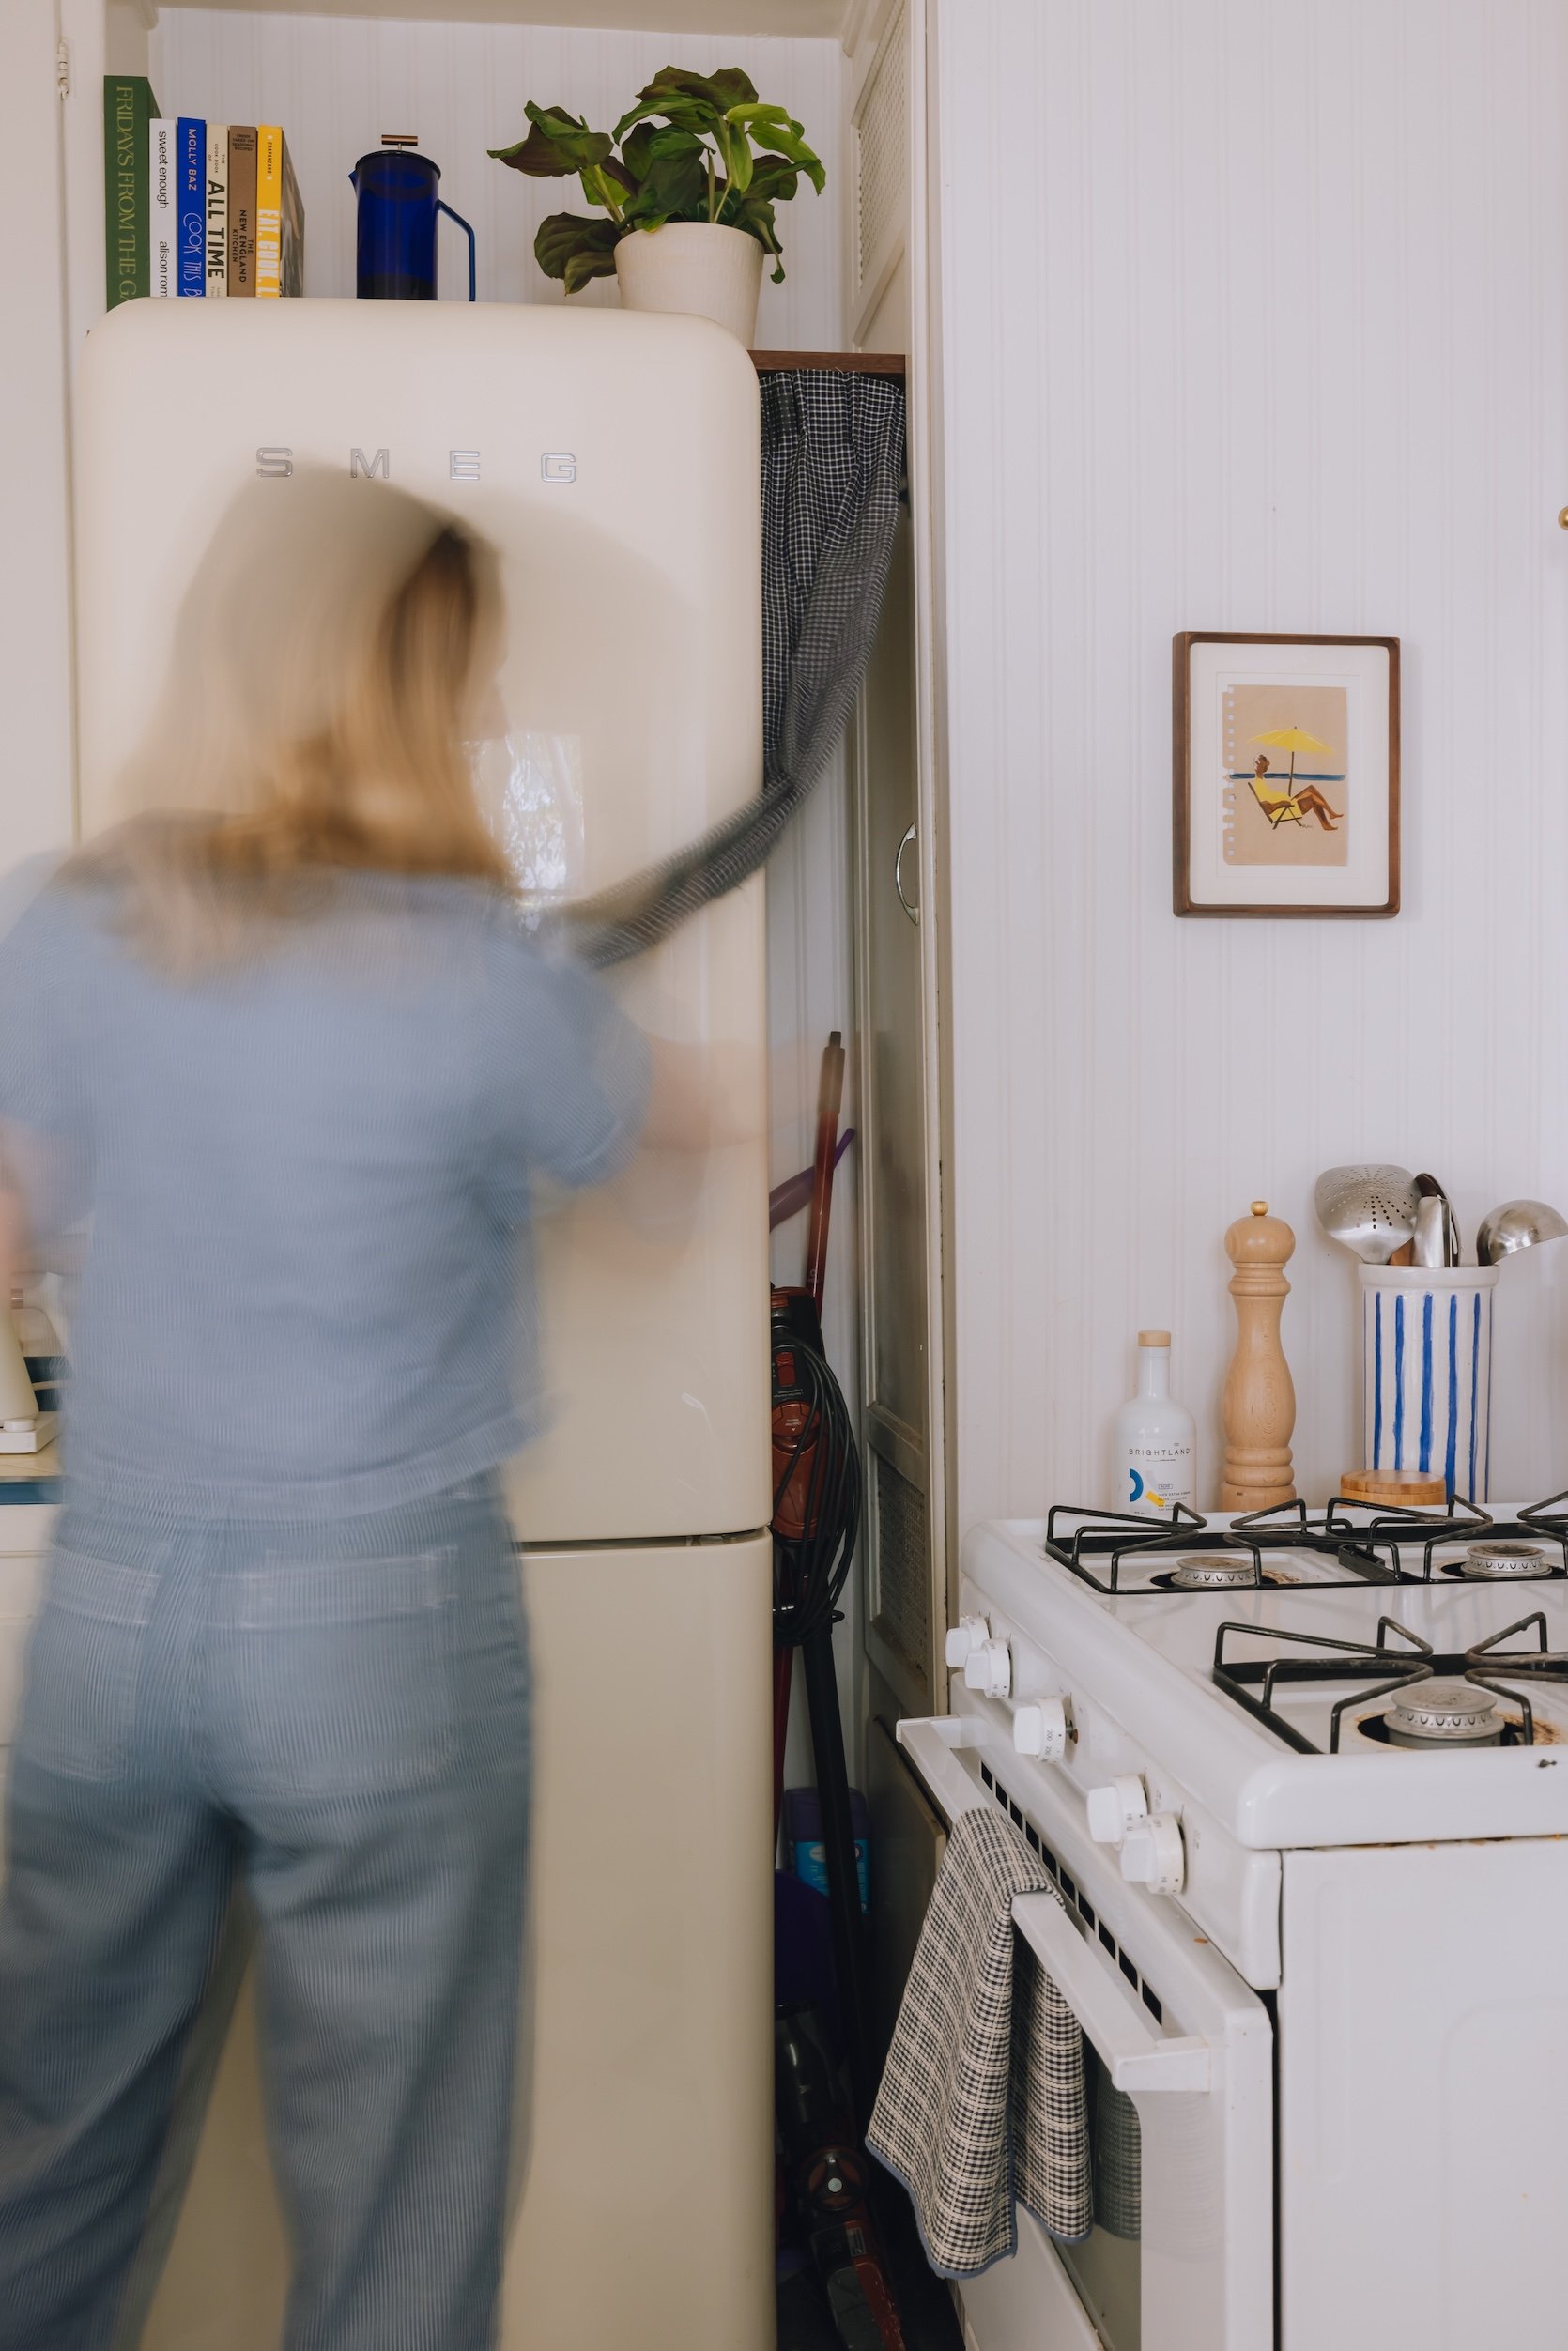
I needed a place to keep my stick vacuum, broom, and mop because I turned my coat/broom closet into a speakeasy (which was totally worth it, by the way).
cafe curtain fabric , curtain rod , curtain rings
Take a look at those DIY café curtains here! If you recall from before, these were horrible, sticky little vinyl blinds, and I couldn’t hate them more. I have also changed the Roman shades on the door window, which you can see Here,
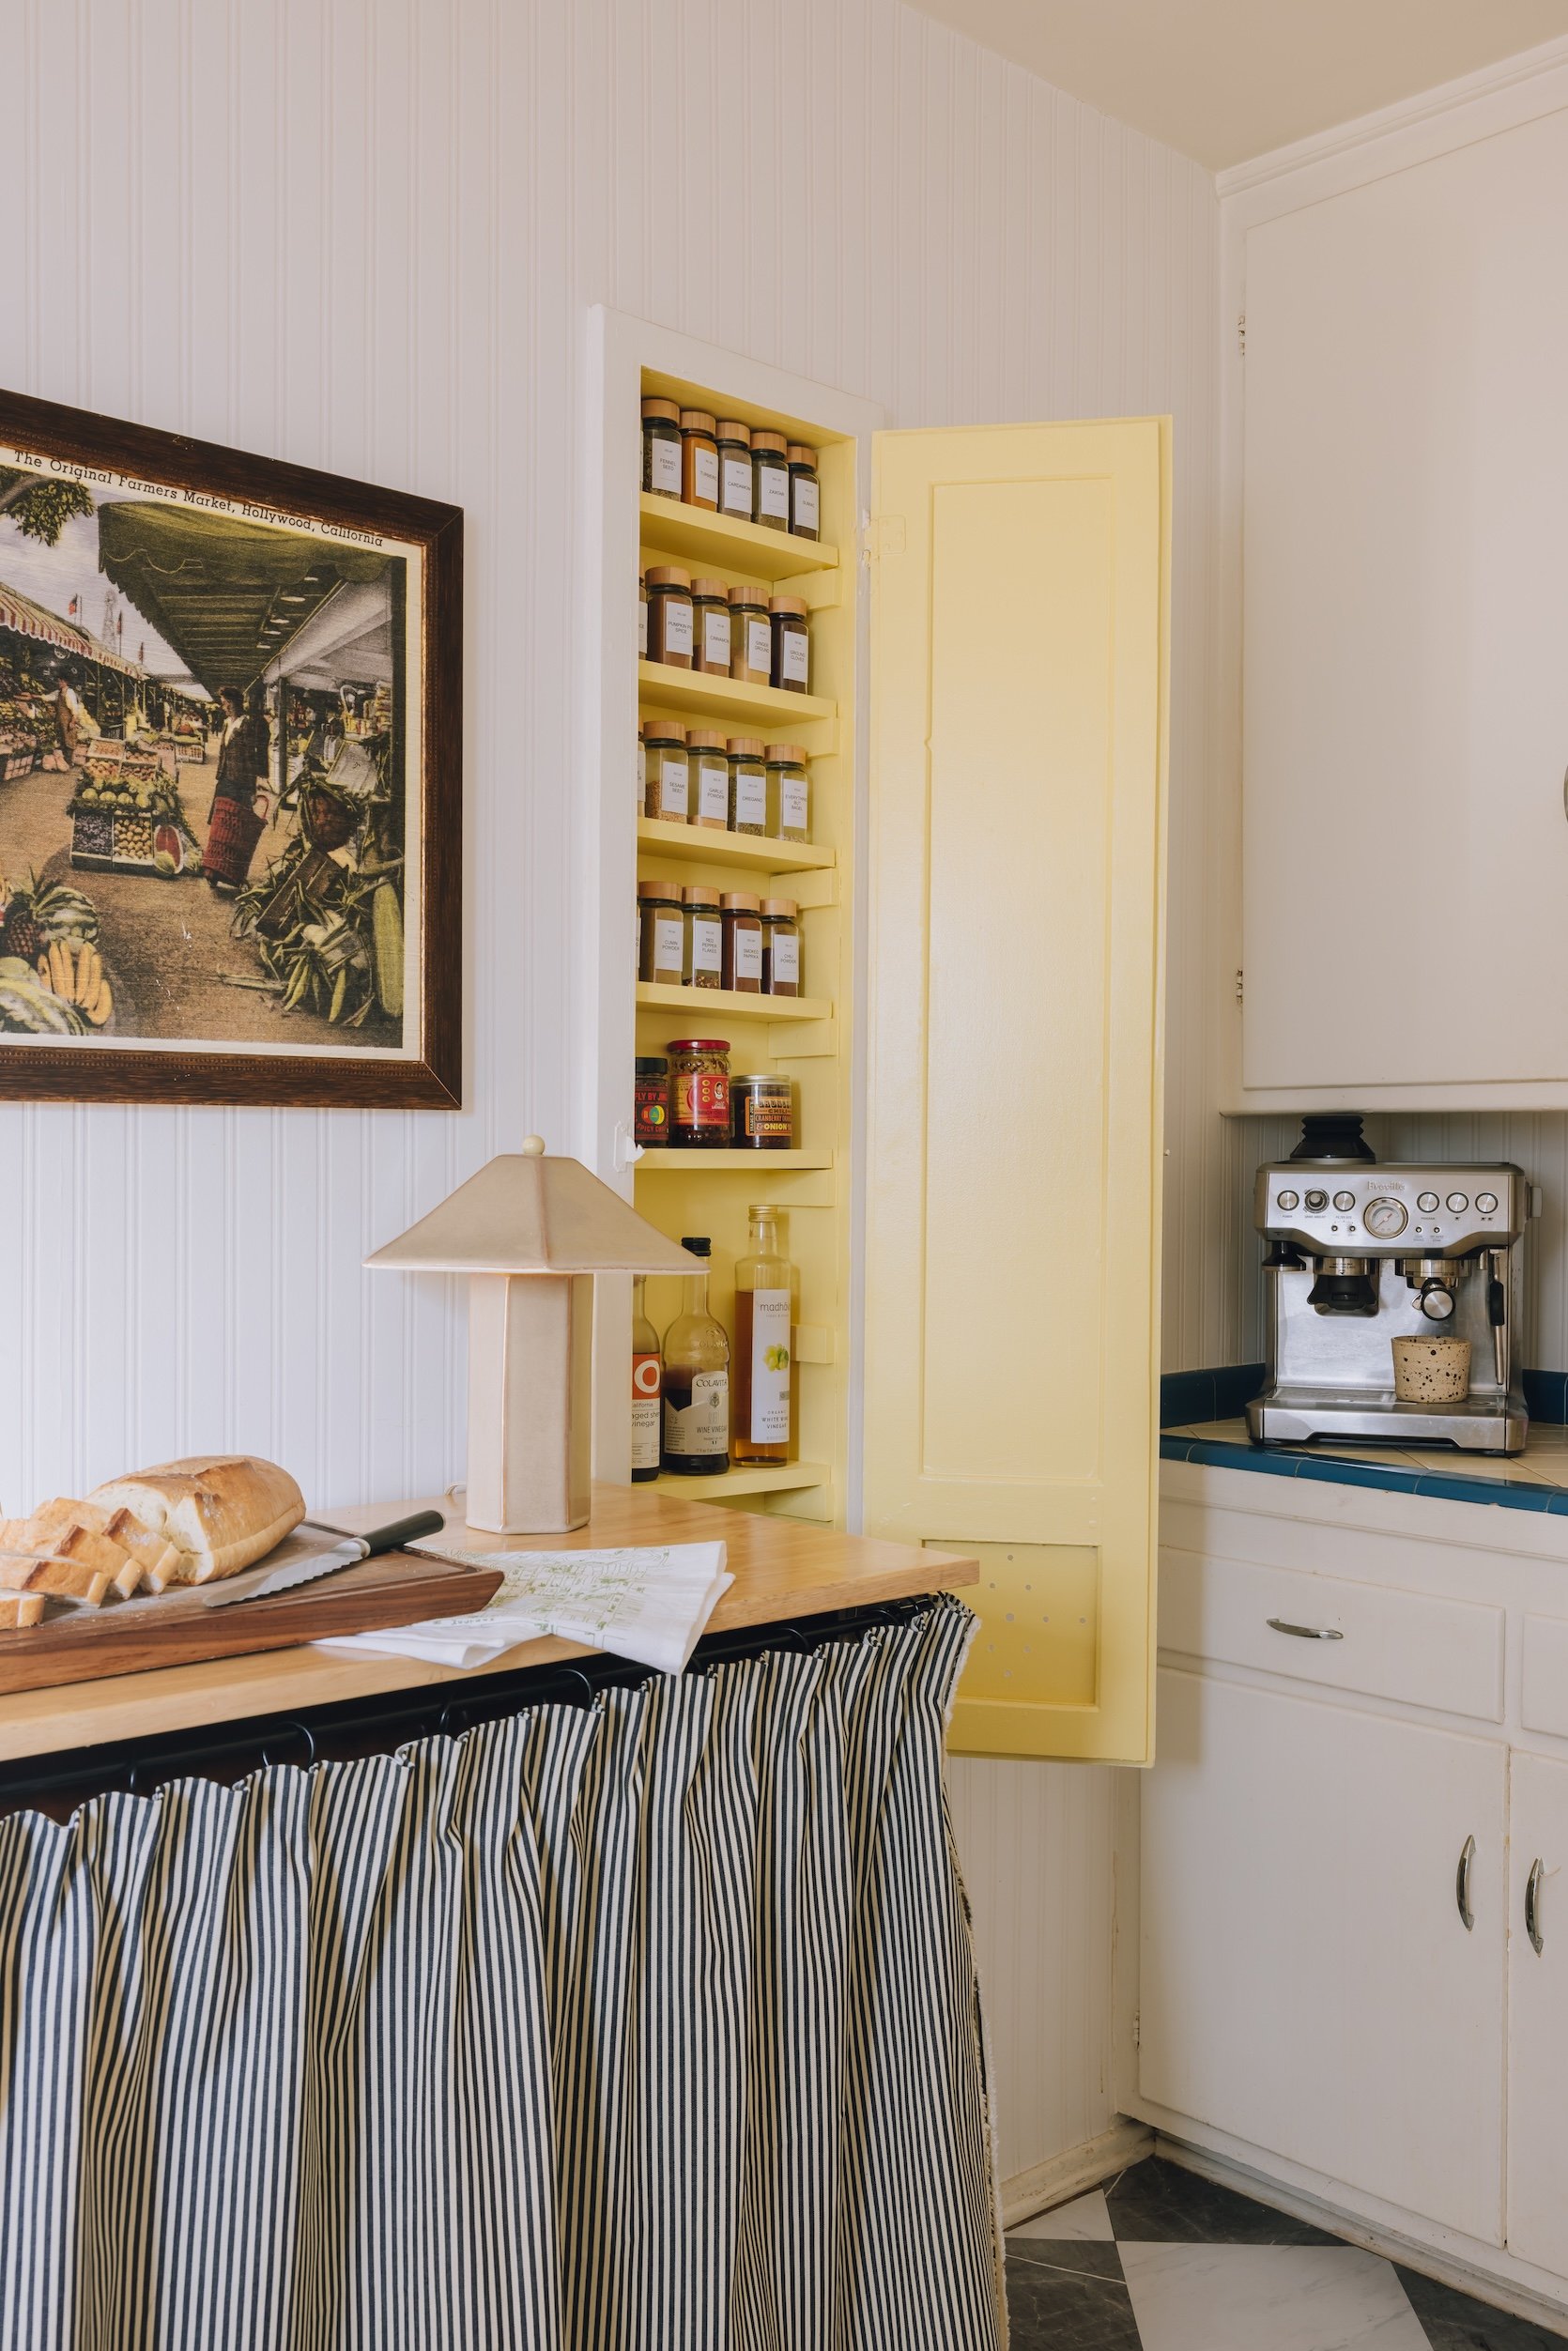
spice cabinet paint color , Spice jars , Chirag , cutting board , preparation table , skirt fabric , breville , Breville Single Dose Hopper
The spice cabinet at its finest!! I absolutely love how it turned out – the pop of color makes me smile every time I open it. I put up my beloved prep table, which gives us the counter space I’ve been dreaming of (I’ll get to more details in a second), and then I put this vintage Grove farmer’s market art piece above it (which I bought at a vintage store for $40 bucks!). I also love that this entire kitchen has been designed in such a way that we can fit it as per our breville over here – although I had to switch to single-dose hopper (Which is actually better for bean freshness, I learned), but mainly I did this so it could fit under our low cabinets.
Too, that lamp Actually from Target, and it’s…so good. It also comes in a burgundy color, which is sold out everywhere, and people are trying to sell it on FB Marketplace for exorbitant prices, which is crazy to me. But it’s cute, I’ll be honest…
preparation table , skirt fabric , companion coffee maker , pleat tape , curtain rings , tension rod , sea hook
I know what you’re going to ask…”But Mallory, where did your microwave and toaster oven go?” Celebrate your eyes! I found this super affordable prep table that was the perfect size to put our heavy equipment down on, and then DIYed this skirt for it! i broke it all Here If you’re curious about how I actually did it. Hot Tip – I got it glide tape To lay on top of the rod, which made a huge difference in allowing the curtain rods to slide onto the adjustable rod (this is also wonderful for curtain rods that are adjustable!).
So this is what I did in my rented kitchen!! I hope this has inspired you and proved that even the ugliest place in your house can be beautiful with just a little grease!! (Well and Smeg definitely helped too, haha). I’ll also be revealing my bathroom soon – it’s the last space I’m going to be in before I move out of here and share it with my boyfriend (which is so exciting!!) I’ve loved every moment of living here, making this apartment a home and sharing it with all of you. Thank you very much for reading this post, and good luck in 2026! I’ll see you in the comments 🙂
,design by Mallory Wackerman
**Photography by lyle nelson