
")
occurred. I have (basically) met my deadline to address the curtain issue in my dining room by the end of January. To say I’m proud of myself is an understatement – yes, even though I actually, technically, started this whole project on February 2nd and didn’t take a very good photo on February 3rd (more on that below), even though I knew a post about it was going to go live on February 4th. And while I don’t recommend that kind of pressure for anyone, especially when it’s your birthday, your child is sick, and your family is dealing with some unexpected stressful situation. Circumstances, it proved to me that a project I had been working on for months, even years, took only a few hours to finish. Typical.
But first, I’d like to speak again for those of you who are joining us late on this topic.
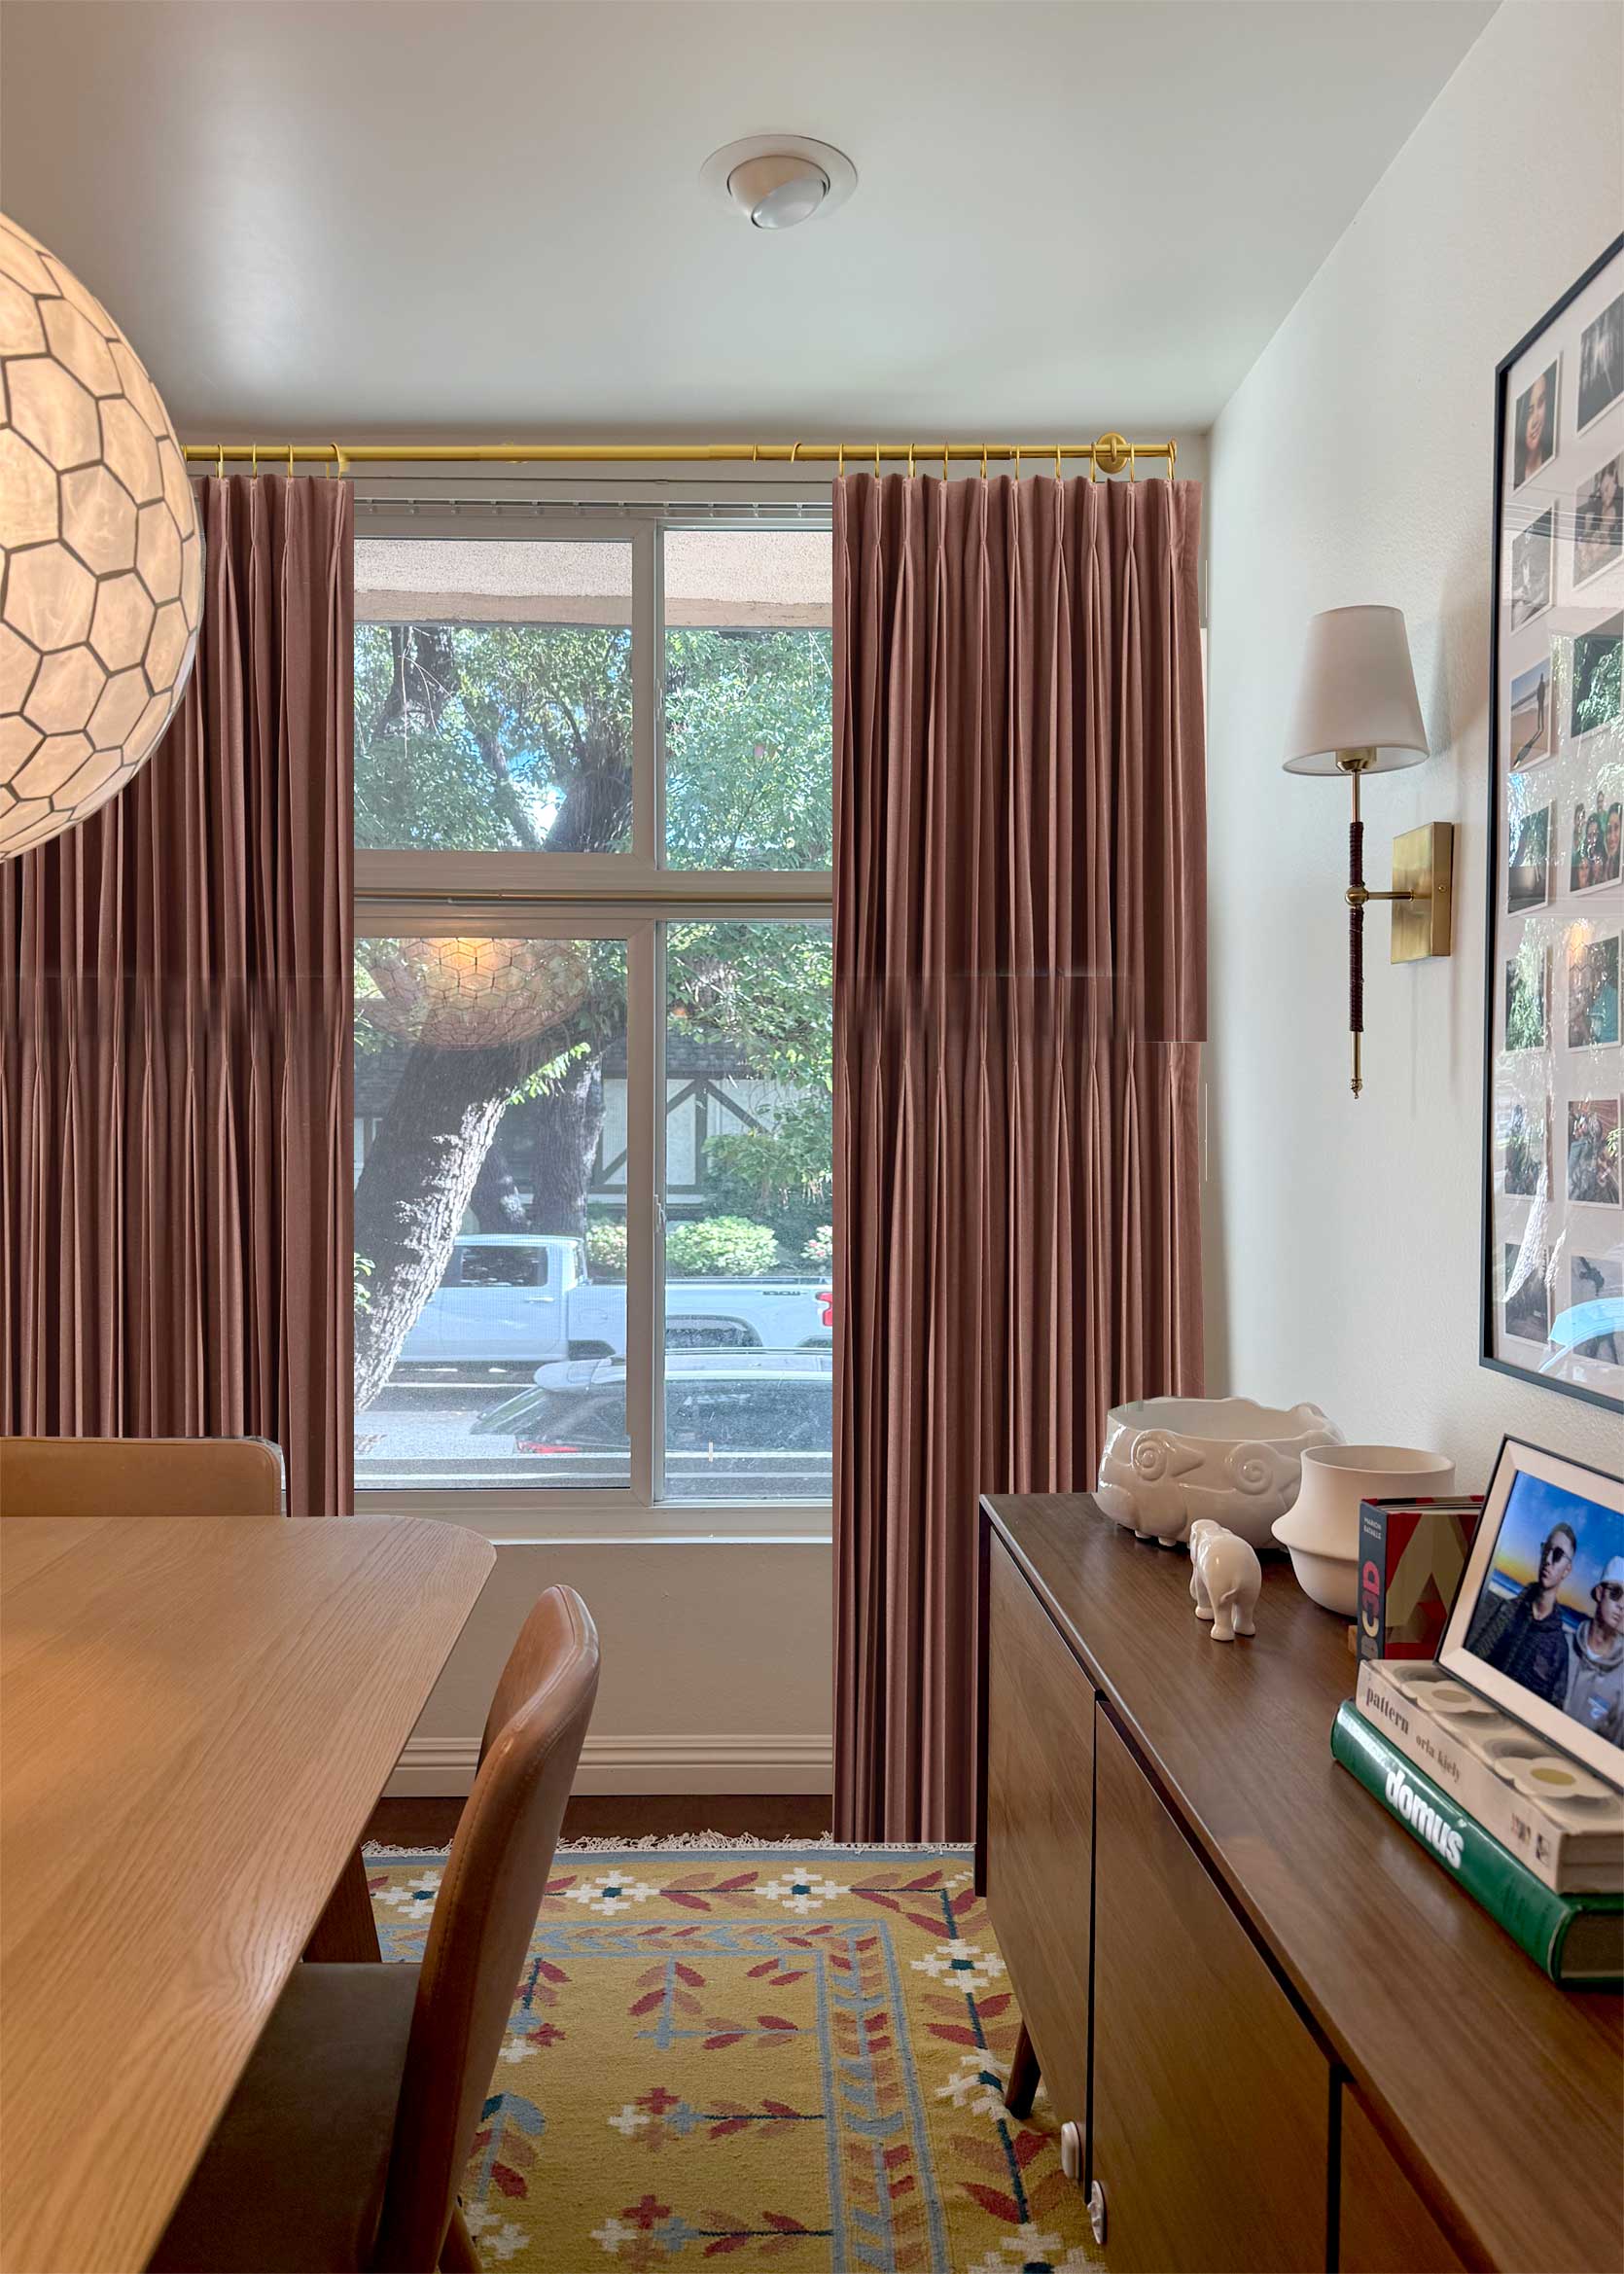
This was my dining room until yesterday morning. This is absolutely fine, but the curtains I made after visiting the café weren’t working for me for several reasons. In short, they were too small, stiff due to poor fabric choice on my part, and not suitable for this size window.
I went on a journey in search of possible solutions in this post, and in the process, unexpectedly came across one that I really liked. Of course, this was just a Photoshop mock-up, and I knew the real-life version would be slightly different, but it was exciting to have a plan after being limited in style for two years.
Here’s what I mocked up using These curtain panels from West Elm In mulberry color:
From the warm wood tones in the furniture and flooring to the color palette of the rug, the soft, earthy pink looked like a good bridge. They matched the light blush petals well. As I mentioned in the post, we probably won’t be here much longer, so I didn’t want to invest in expensive curtains, and a new DIY presented itself.
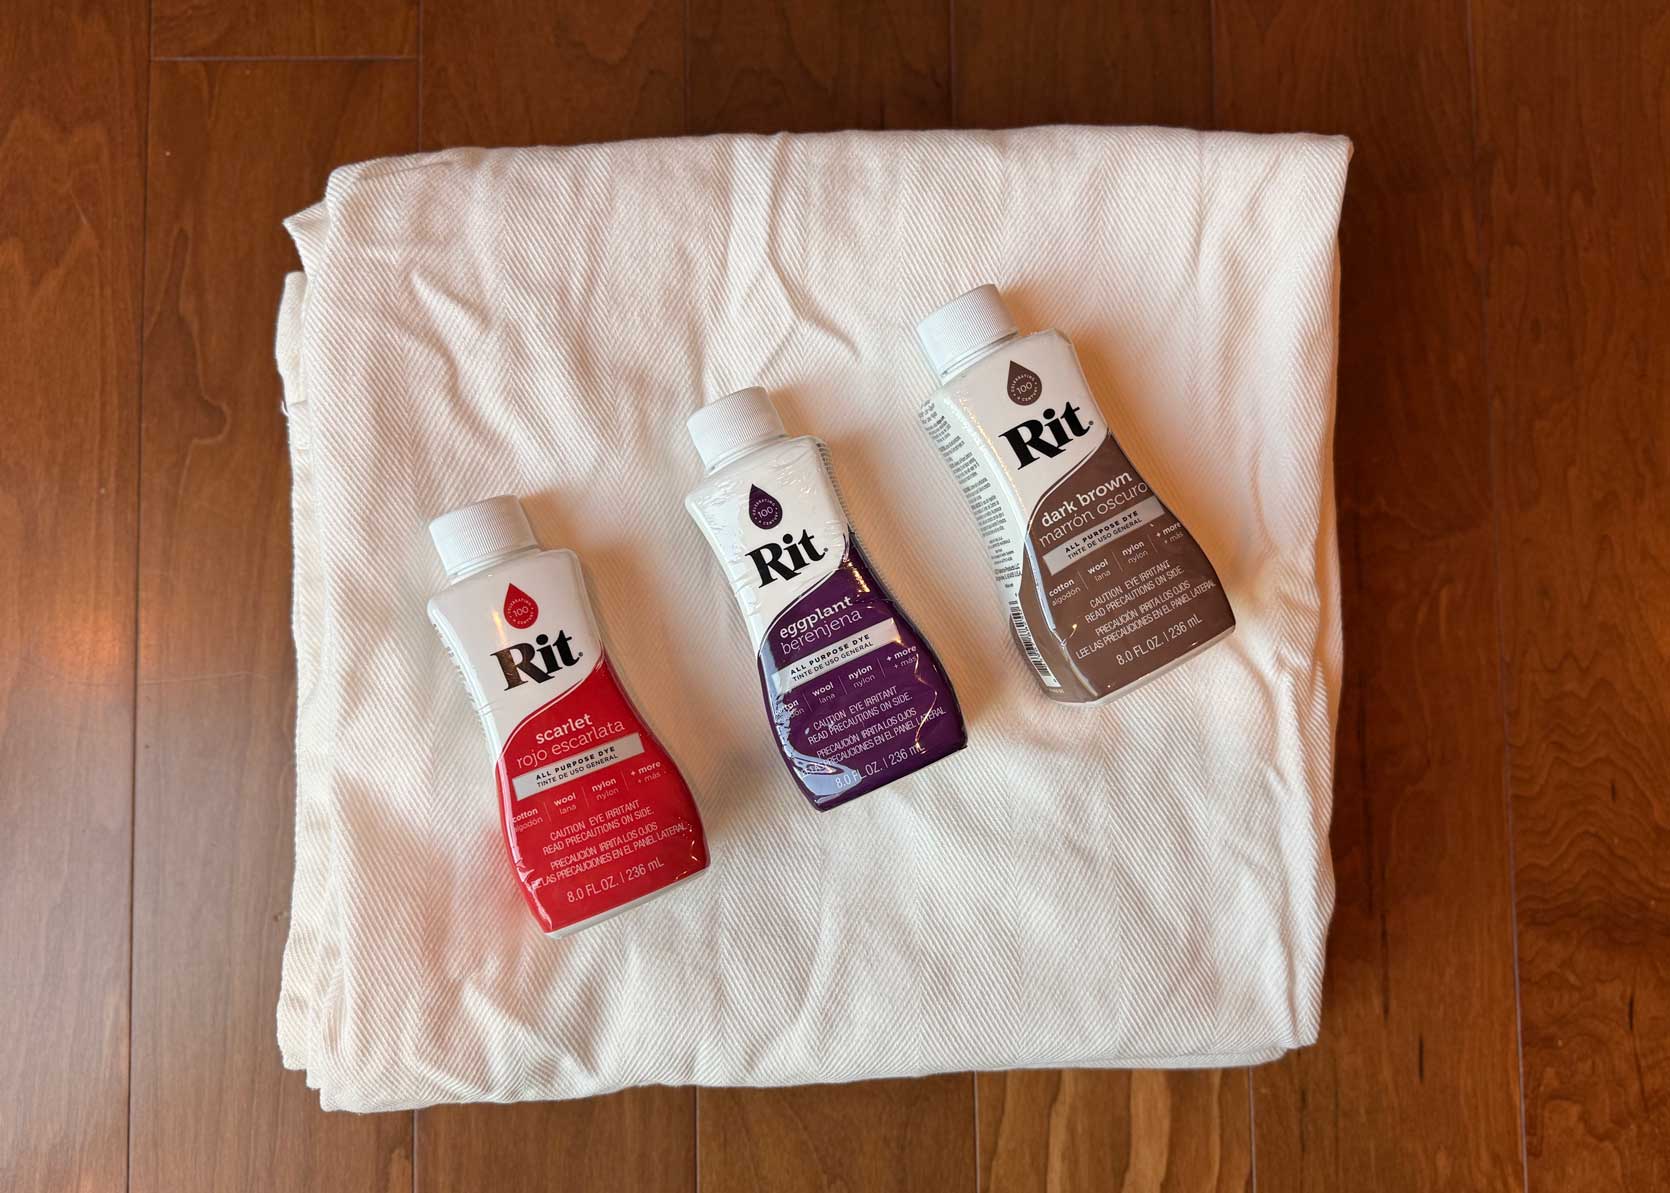
This was the plan: Take the white cotton curtains I had stashed away in the closet, paint them a similar color and hang them from a curtain rod I also had in the garage. Spending $30 on dye and a few hours of my time to save $300 on finished panels seemed like a worthwhile experiment.
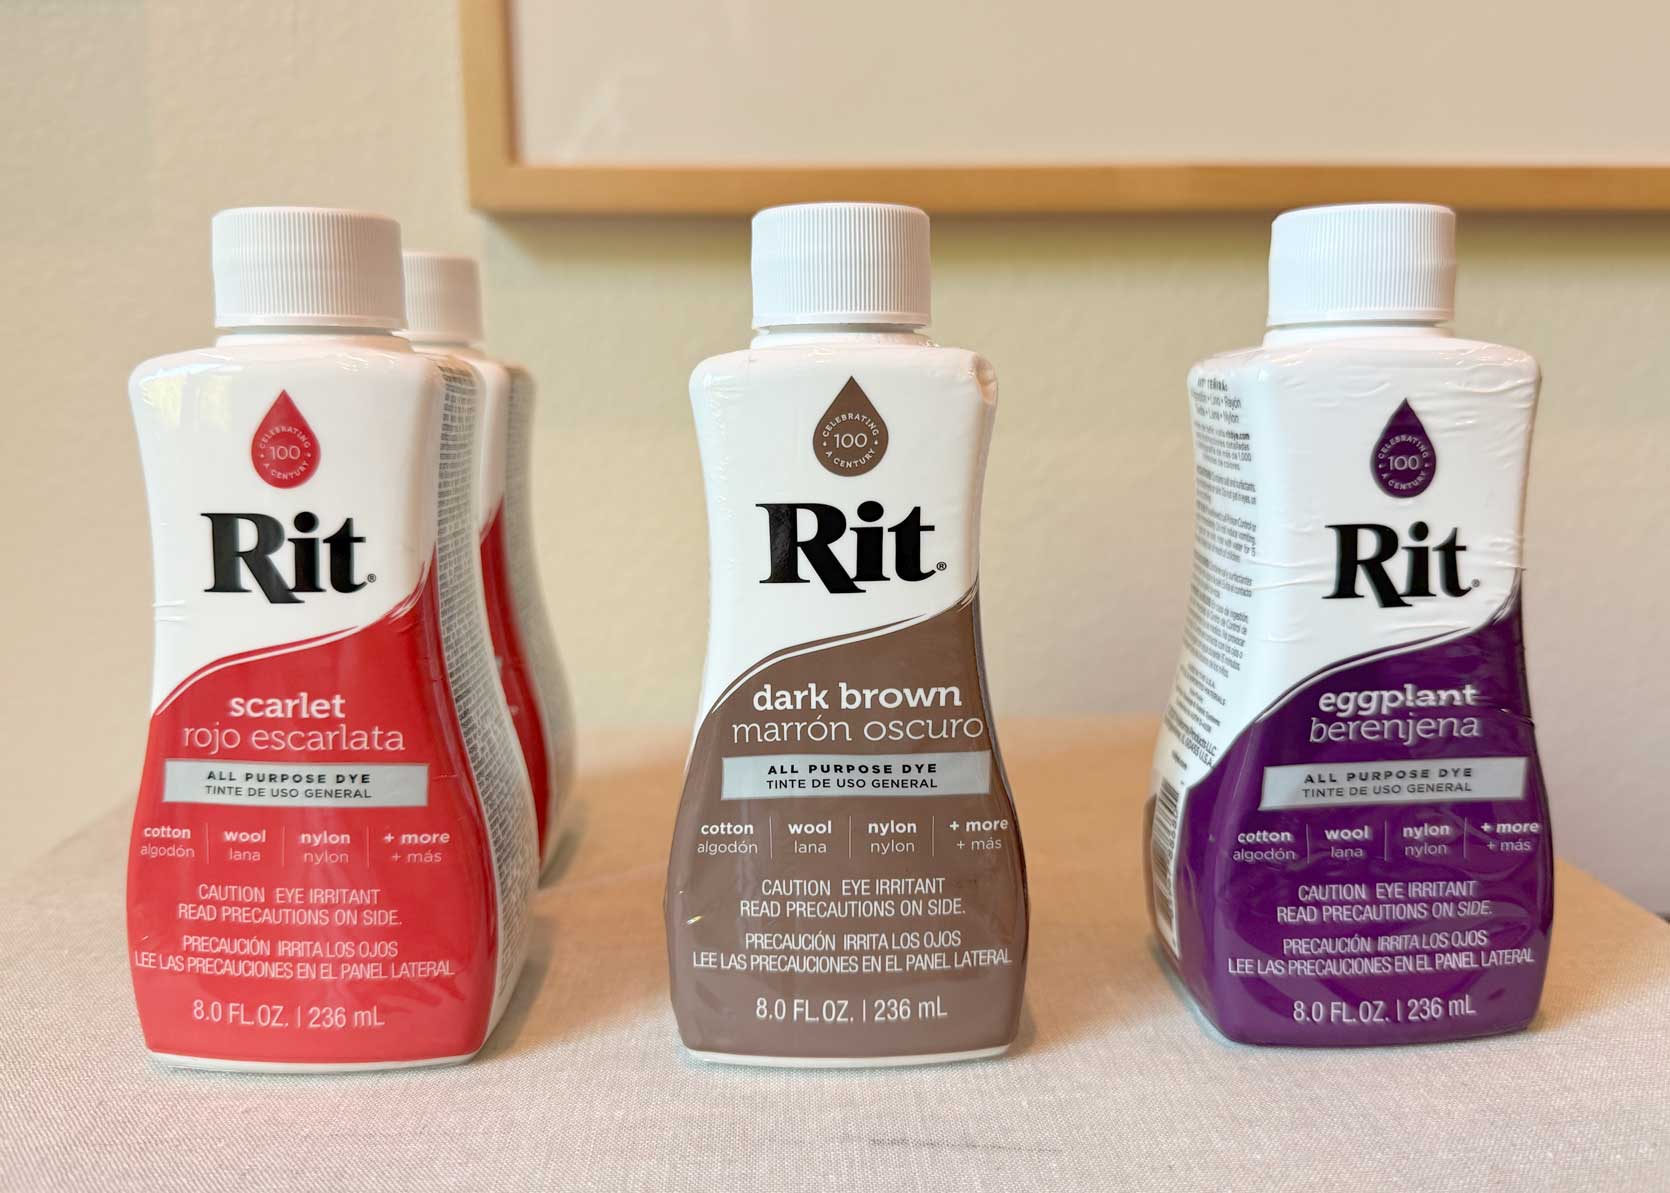
dye color options
Rite Die’s website has one great section Where you can pick a very specific color, and it gives you the exact dyeing formula to get there. I searched for pinks, reds and browns to find something to match the West Elm curtains. I should note that I took and used a zoomed-in photo of the fabric from the brand website, which was actually much more terracotta than the pink seen above.
These were the four colors I considered. I liked the balance of the Ruddy Red, the subtlety of the Sangria, and the depth of the Mahogany. End of the Road seemed a little too brown to me, but SPOILER, looking back I think it was a better color. Let’s keep going, and you’ll see why.


So I went to Michael’s to pick up some bottles, and while I was there, I decided to be a little wicked and pick up a bottle of Colorful Eggplant too. I relied on Rit’s color combo instructions, but thought a little eggplant might add a touch of plum to the finished result, and that sounded appealing to me.
My curtains were cotton, so I was able to use an all-purpose product, although note that if you’re coloring anything synthetic, they have a separate dye for that. I also planned to use my top-loader washing machine because I didn’t know of any other way to change the size of the draperies. I would also like to add that I have never done this before and I was a little scared.
This terror kept me from starting the project for two weeks. Whenever I thought about getting my supplies together, I would stop and then find something else to do. For better or worse (mostly for worse) avoidance is my coping mechanism. Every time I saw these bottles sitting where I had kept them on my dining table waiting, my heart skipped a beat in a very funny way. Look, I am quite capable. I can sew, paint, cook, make crafts, make furniture, wallpaper, etc., but fabric dyeing is incredibly permanent, and it freaks me out for some reason.
But then February 2nd came, and I knew it was do or die (die = missing my deadline and disappointing my sweet Jess, who needed this post for today). I took a deep breath, pulled up the curtains from the upstairs linen closet, and got to work.
Finally, painting the curtains
I’m not going to go into every detail of the dying process as the step-by-step on the Rite website is unbeatable (see) Here), but I’ll talk in broad strokes.
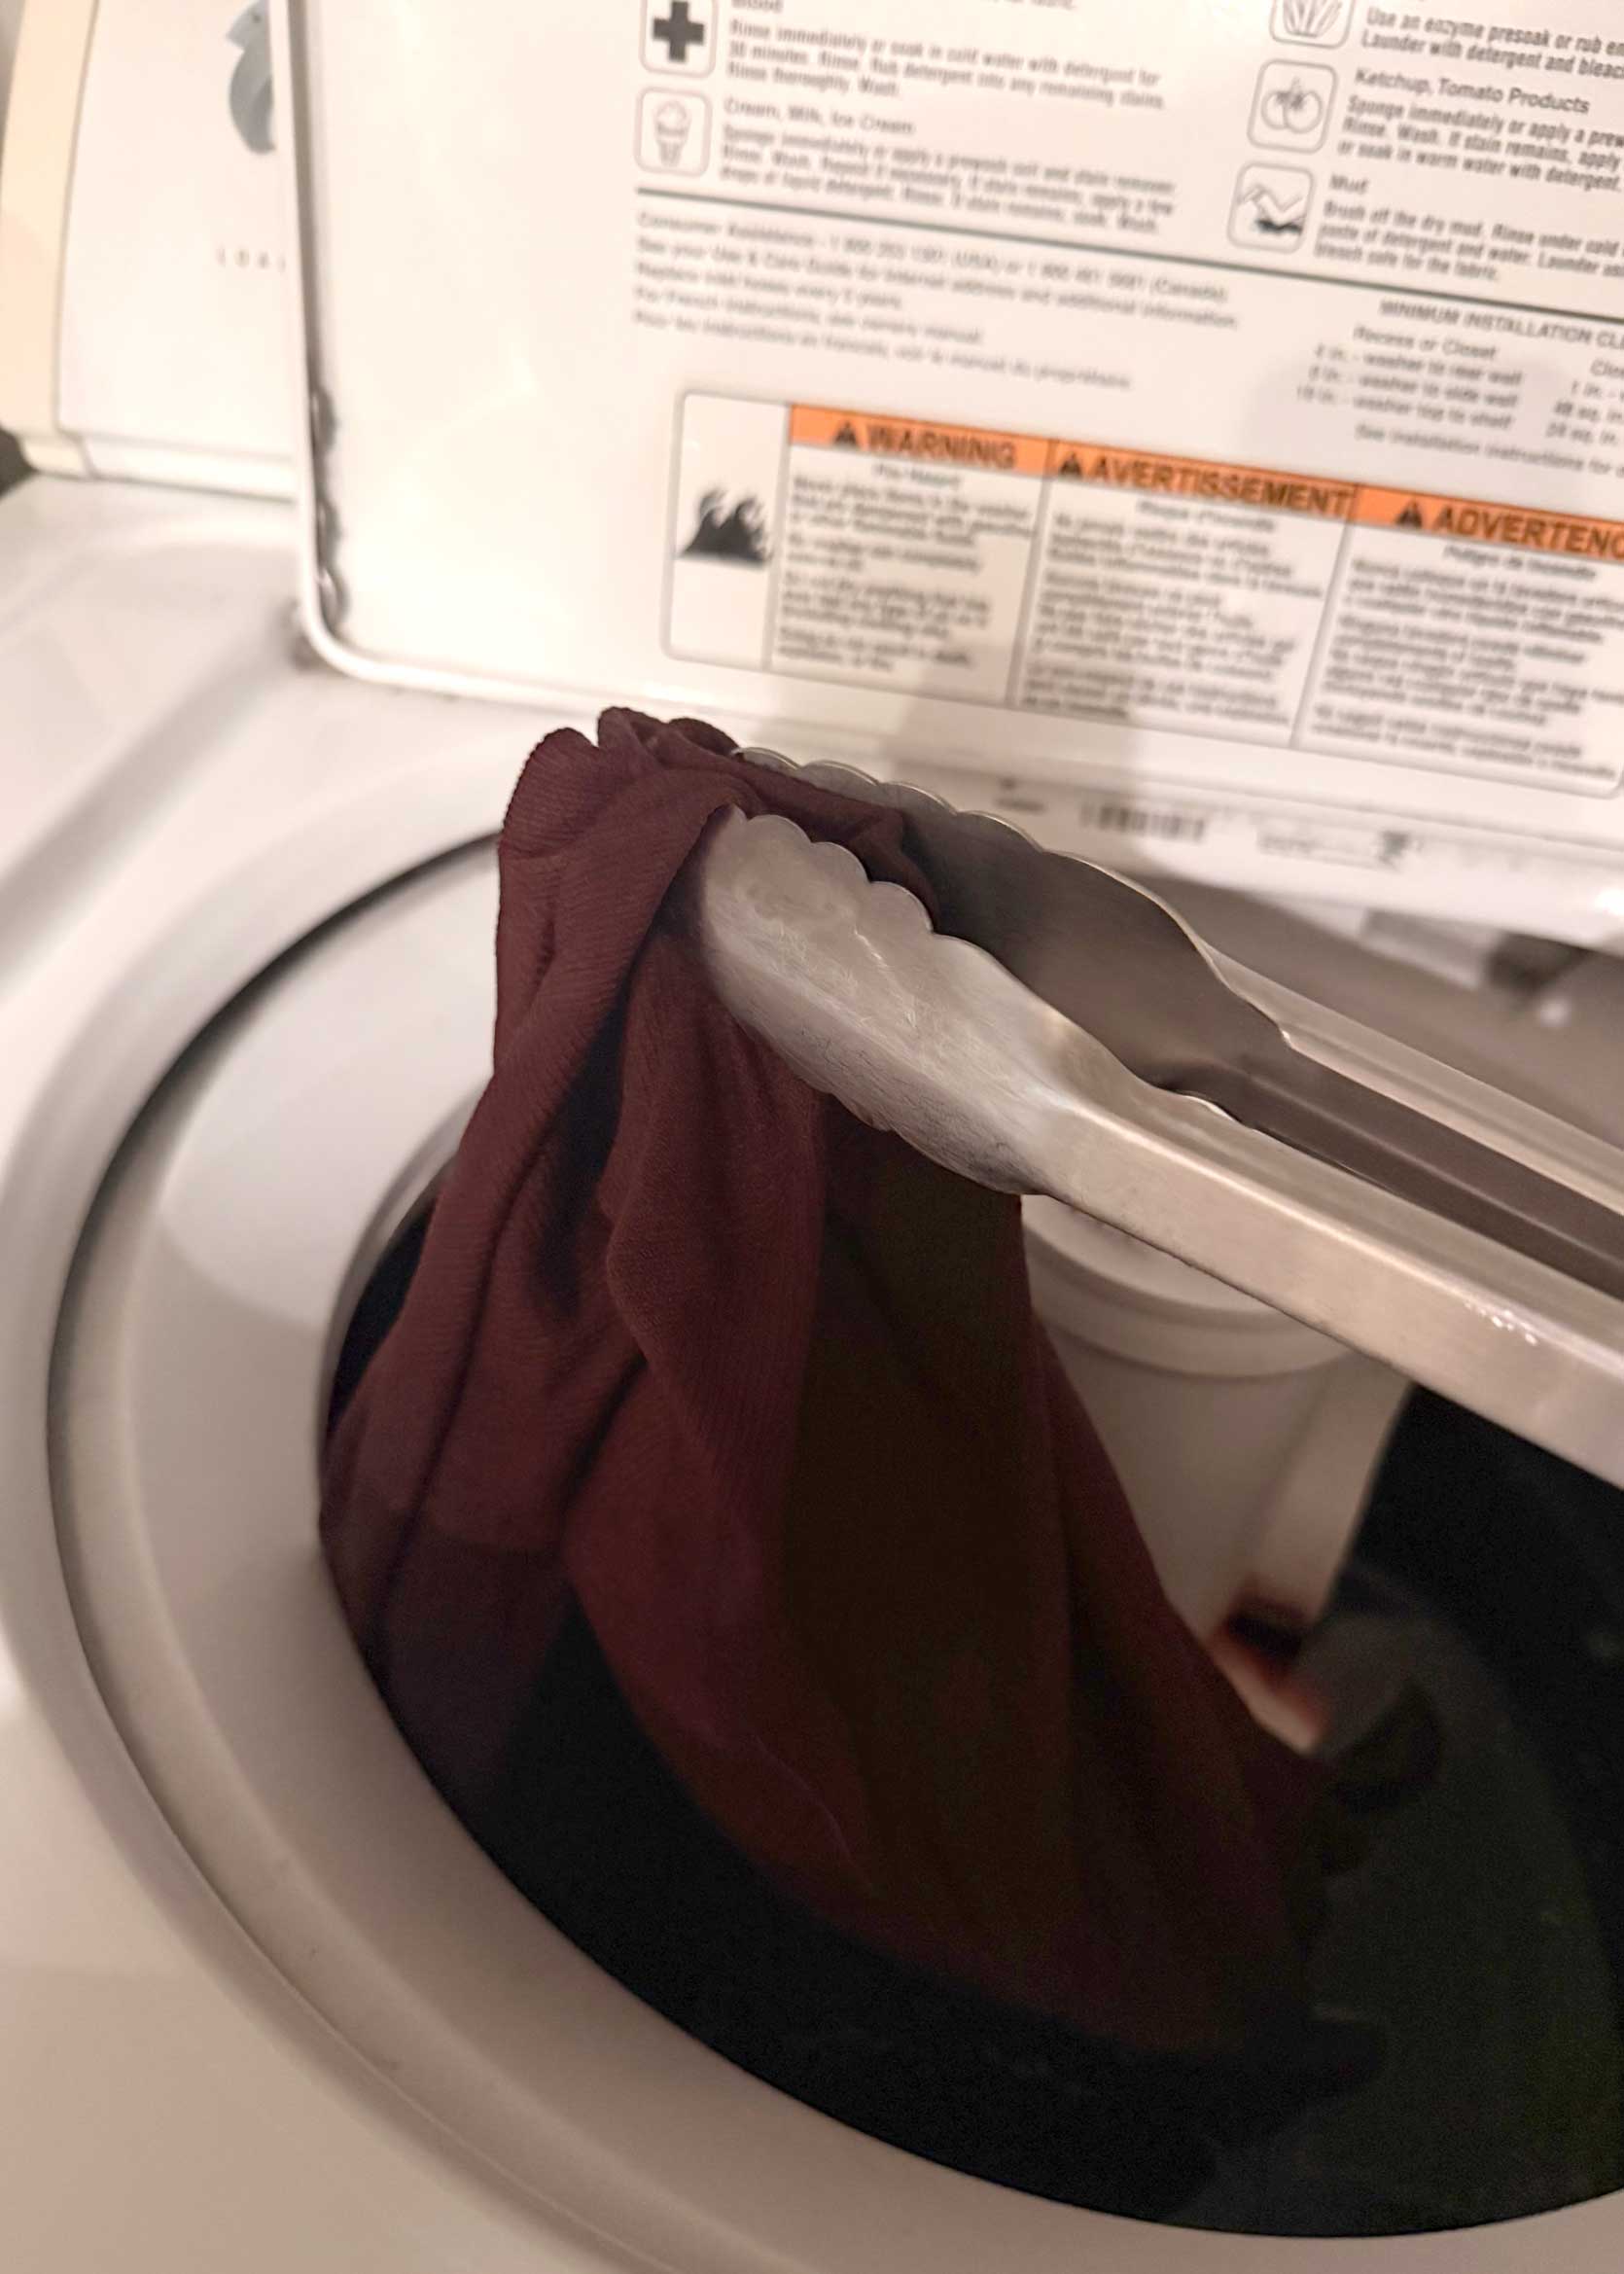
I started by washing the curtains in my previous home to remove any dust or dirt that had hung around for years. Additionally, it is best to use a wet or damp cloth to apply the dye evenly.
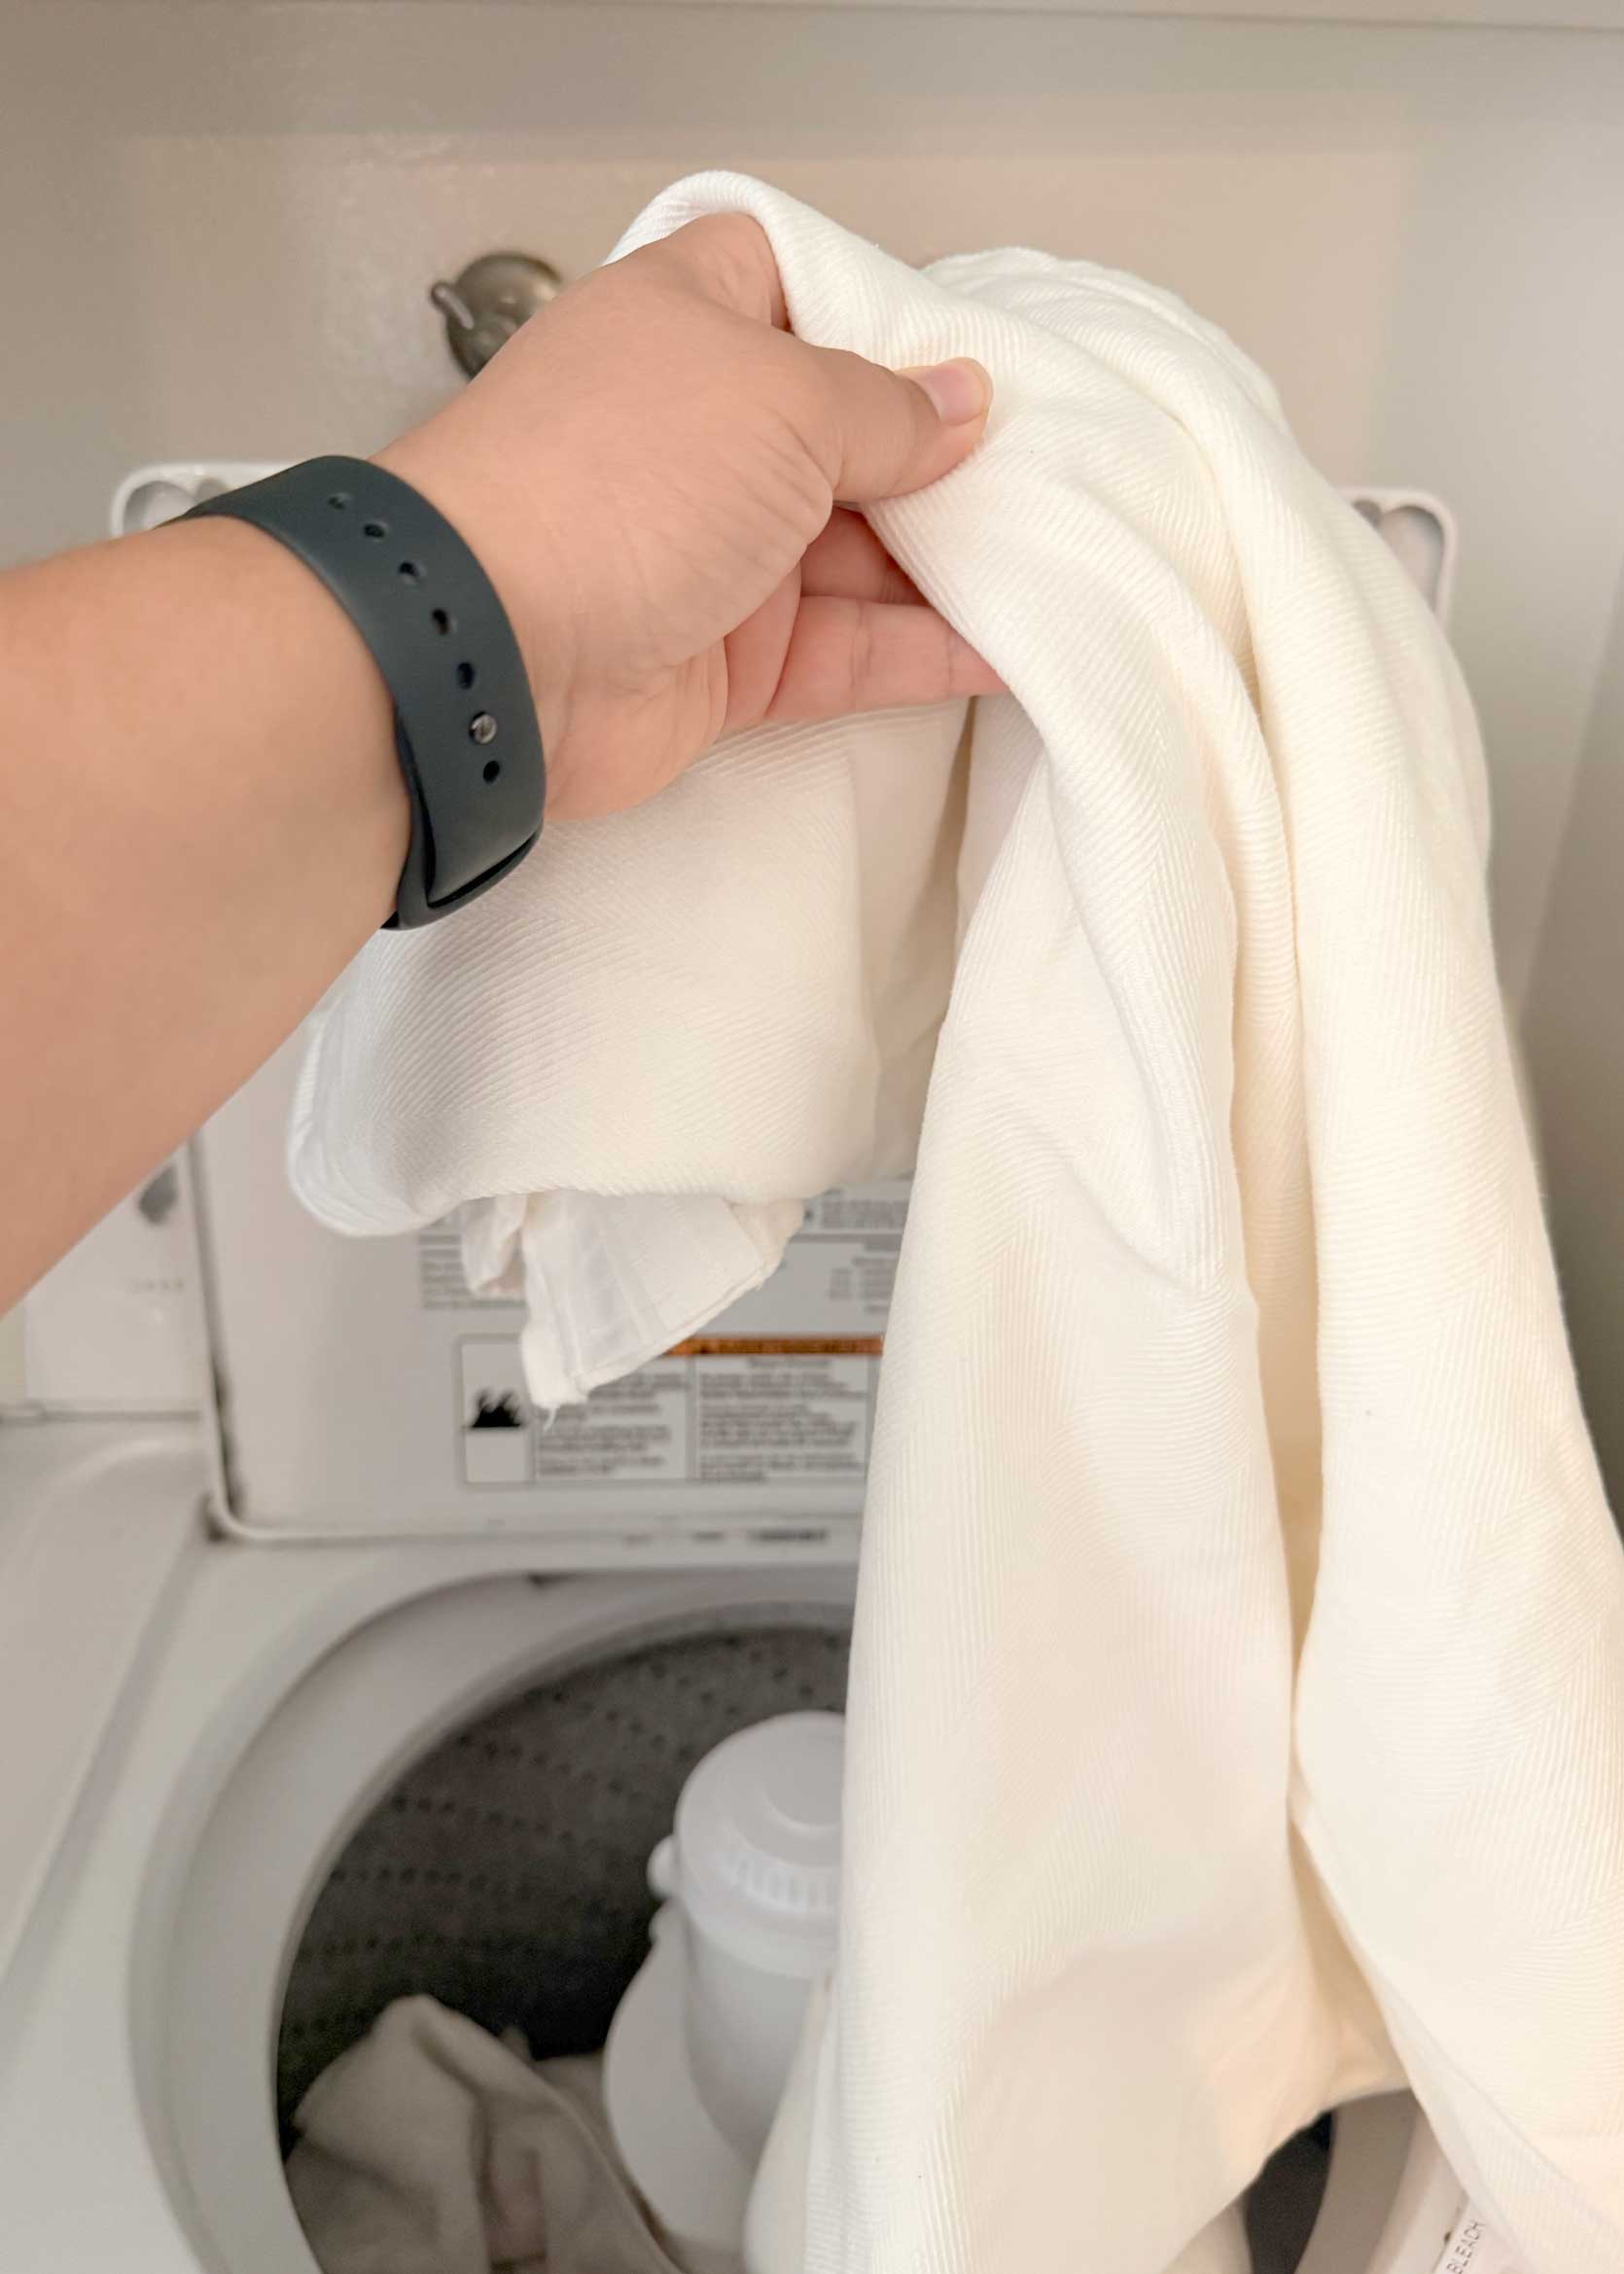
They went inside. Once the cycle was complete, I removed them, started a new cycle with hot water and waited for the drum to fill completely. I followed the instructions to dilute the dye with boiling water in a stainless steel bowl before pouring it into the drum. You will also need to dissolve a cup of salt in another bowl of boiling water for washing clothes. I missed this fact in my preparation and had to mix some pink Himalayan sea salt with some coarse brown salt I had in my pantry. Not ideal, but it’s what I had, and I didn’t want to run to the store in the middle of the project.
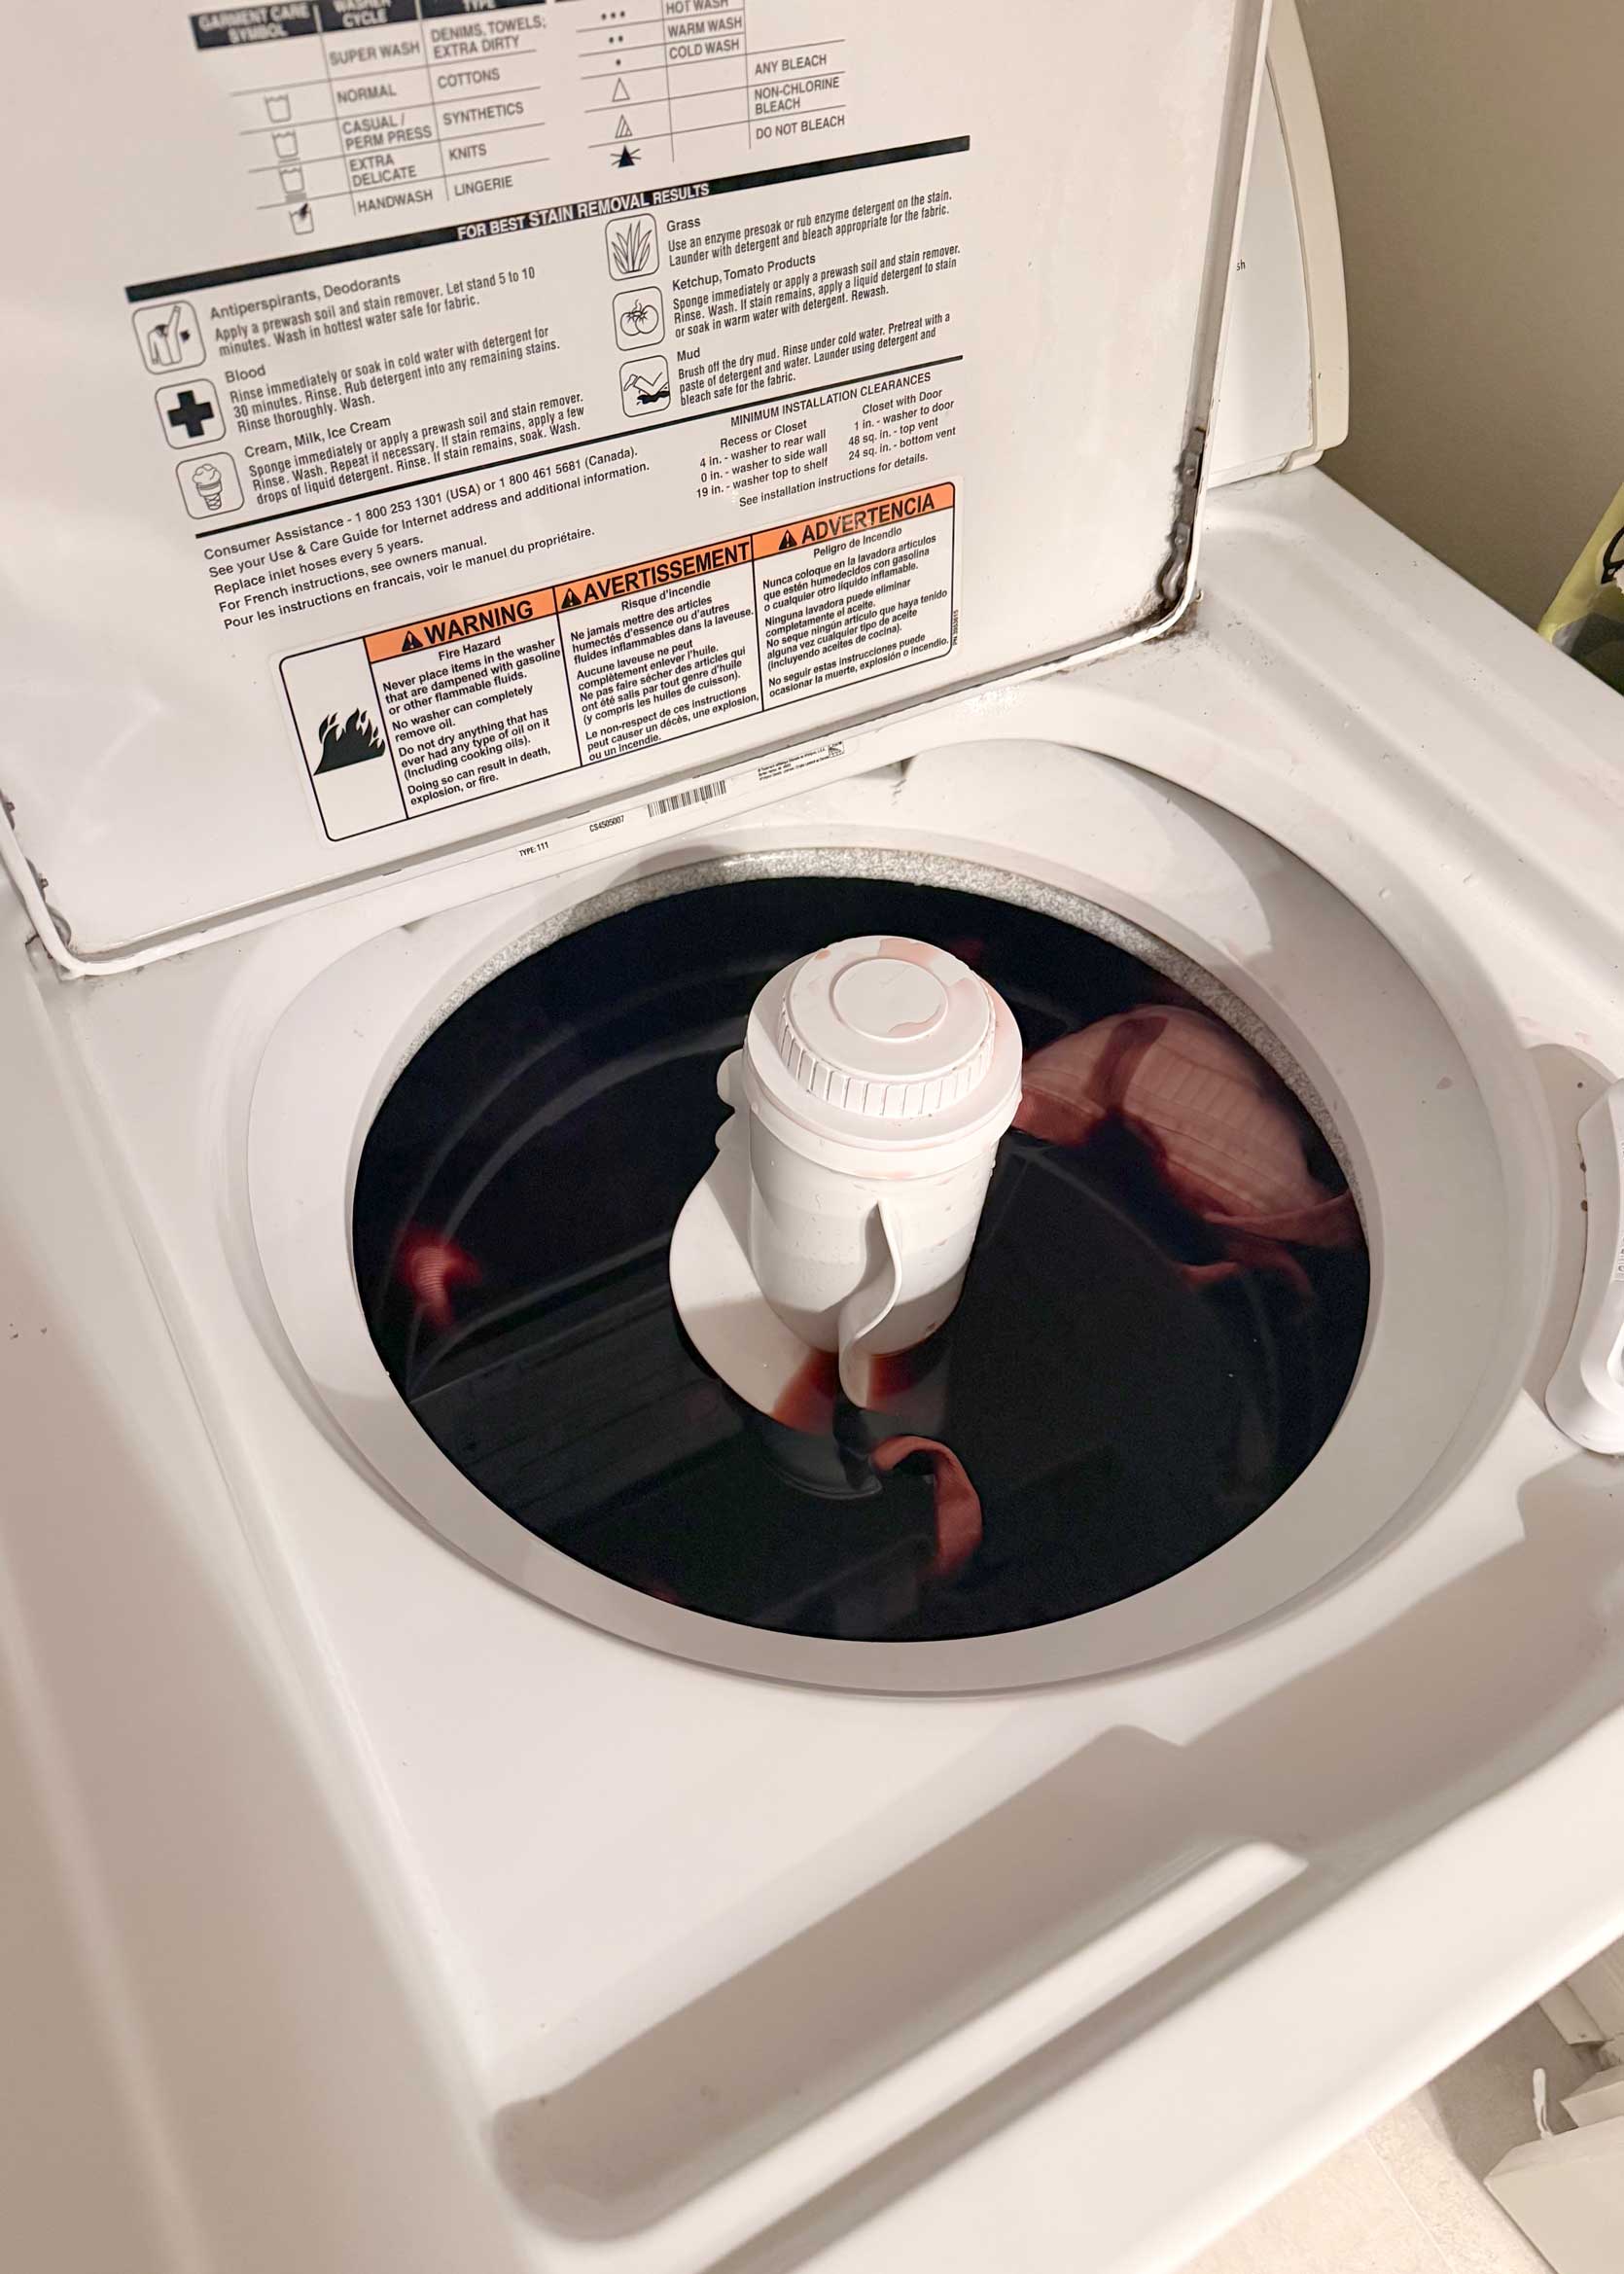
Putting such a concentrated dye in my washing machine was nerve-wracking, but the website swore it wouldn’t stain. I let the curtains sit in the dye water for about 15 minutes before closing the lid to start the cycle. They will have to stay in the solution for a minimum of 30 minutes, a maximum of one hour. Right before the rinse cycle, I turned off the machine and allowed 5 to 10 minutes for the color to really set. The longer they sit, the darker their color will become. For me, it was like what it feels like to sit in a chair at a hair salon with the sole intention of getting a trim, and suddenly you hear yourself telling the stylist to “take it all off.” Like…why do I do this kind of thing? More is not always more.
In the picture on the right they looked wet after the first wash. You should wash again with a mild detergent, which I did. I wasn’t sure how much of the dye would wash out, so I was nervous. At this point, I kept telling myself “trust the process, trust the process” over and over again. While mixing the colors together, I added three lids of eggplant, and wondered if I should have done more because they looked quite red.
big reveal
After drying, ironing, and hemming, here is the final result:
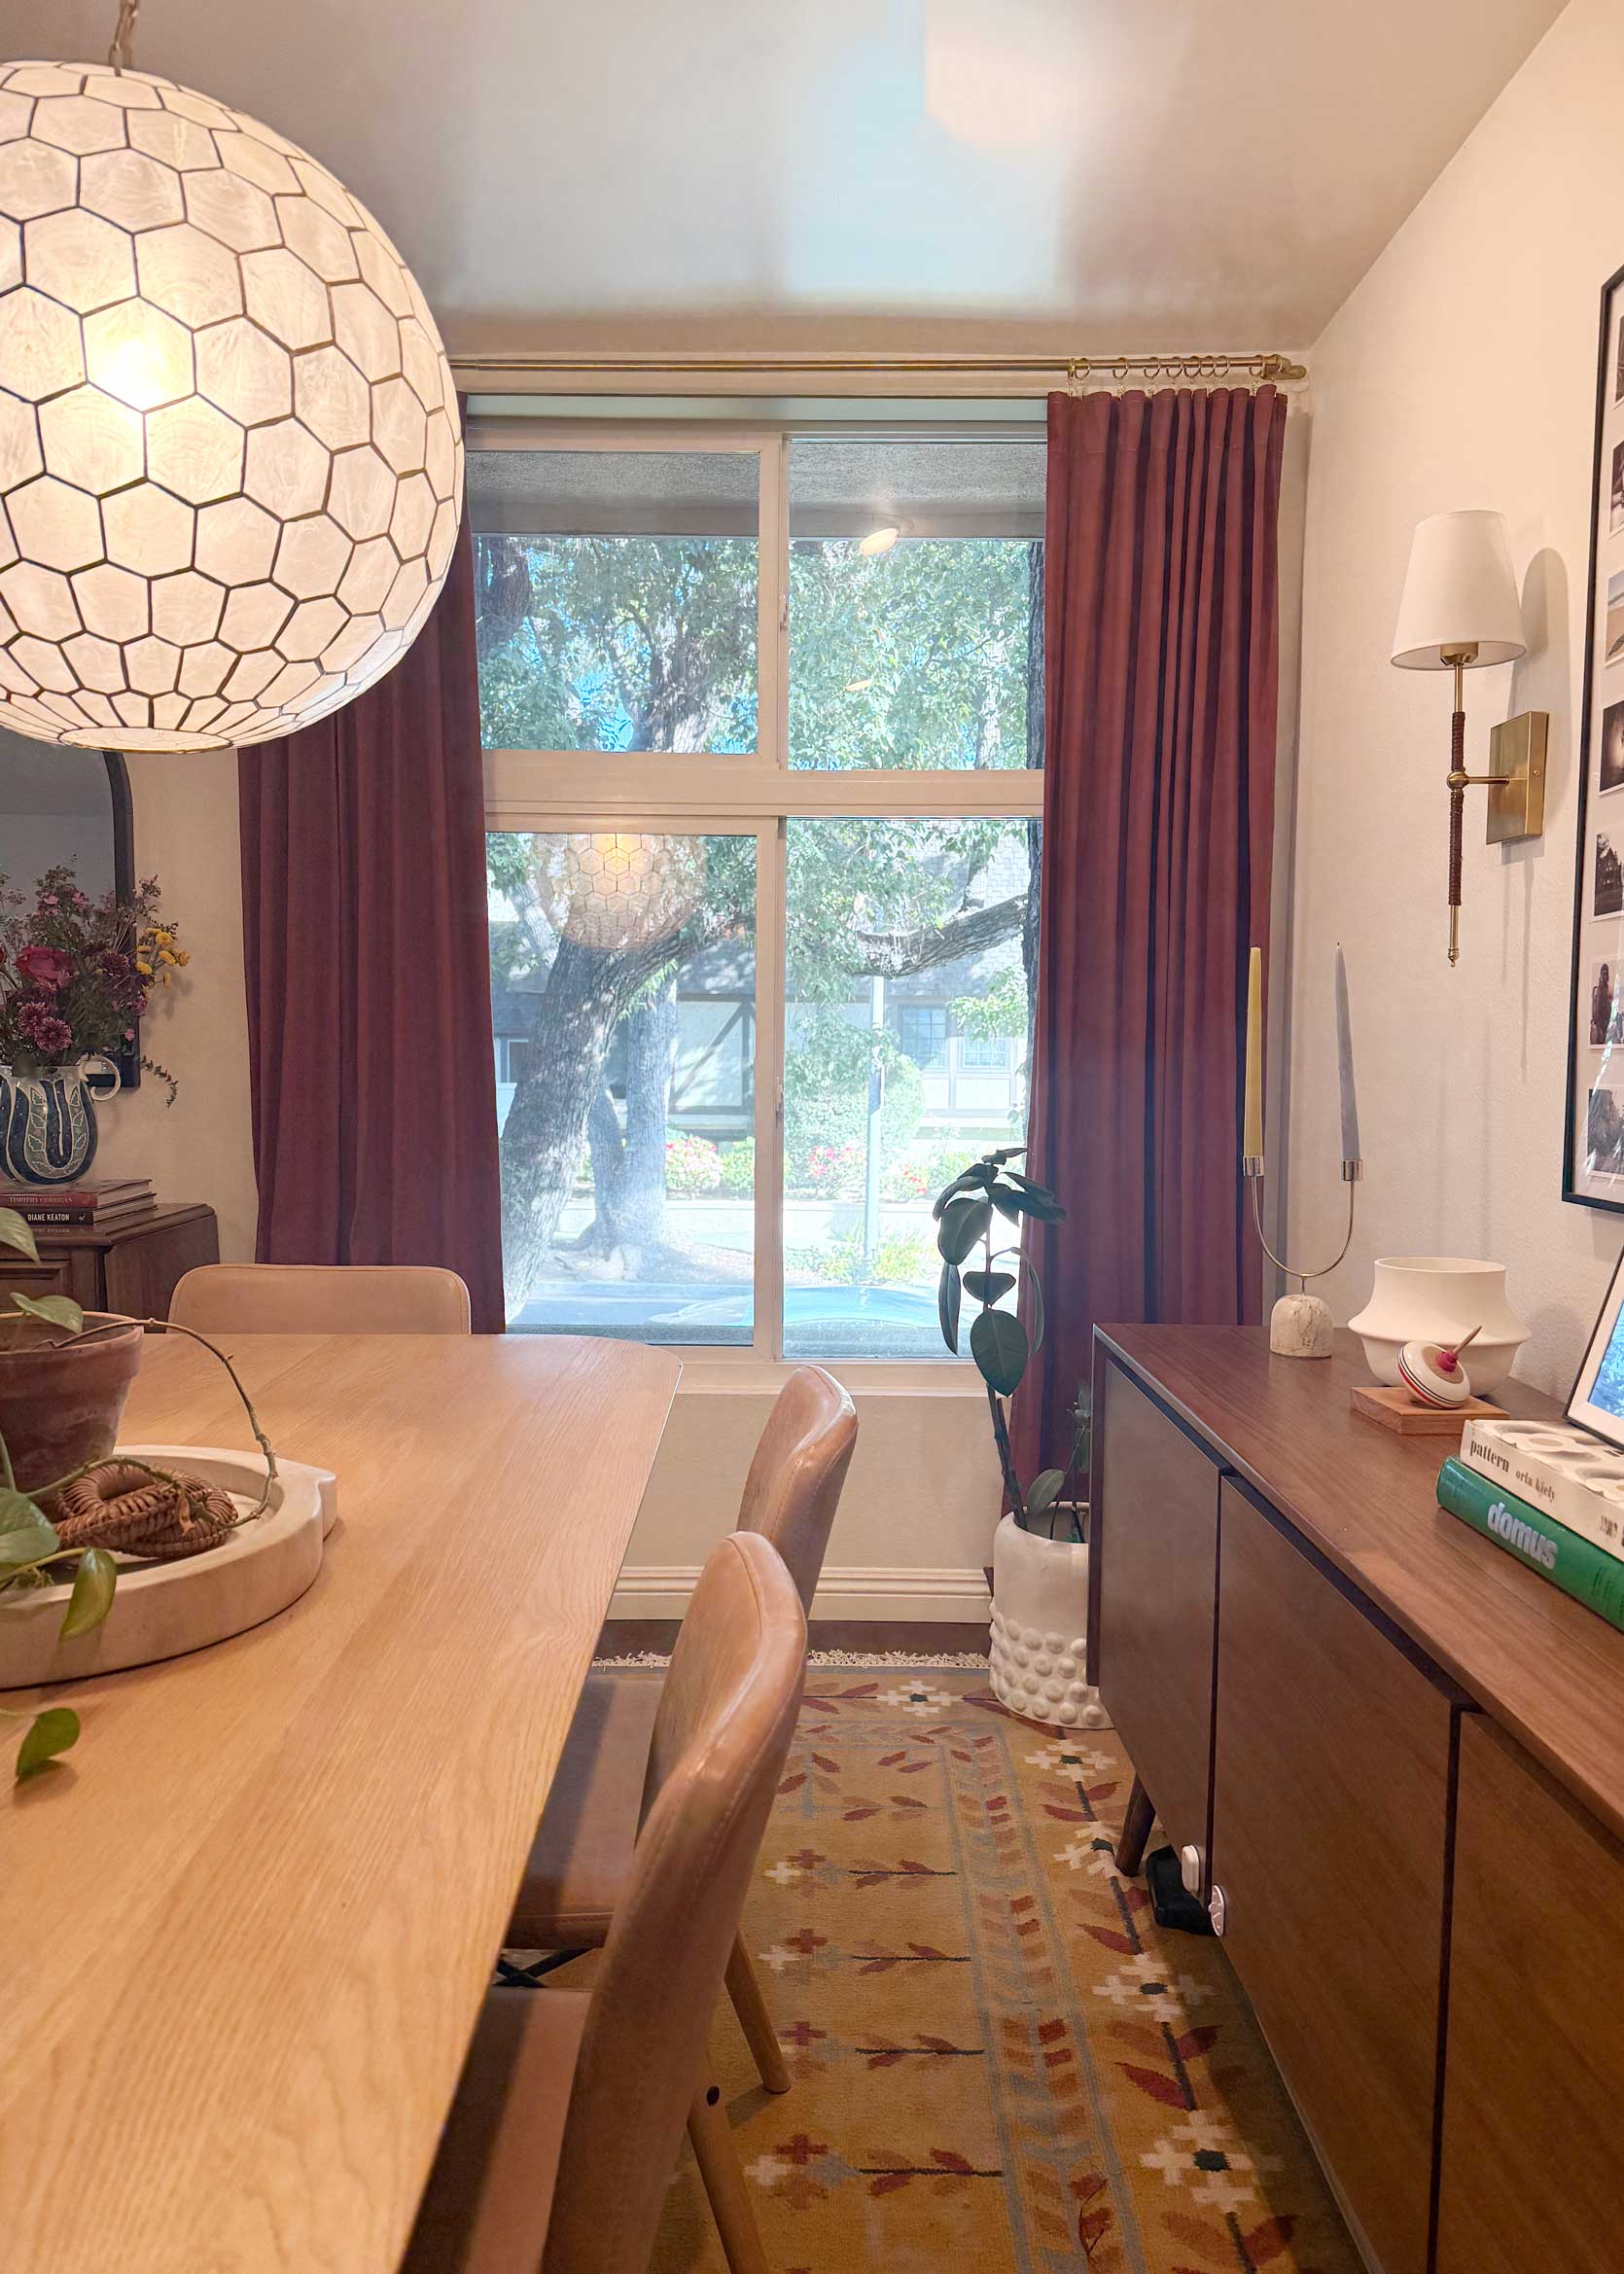
Please excuse the poorly lit photo. I really wanted to draw this with the beautiful morning light coming into this room, but I didn’t manage to get everything right until 2 in the afternoon, when we lose light because of the shade of the trees.
I cleaned up, but didn’t do much in the way of styling or mess, so this is definitely not so much a “reveal” as it is a “hey, look what I did” photo taken with my iPhone. You can see that the bracket of the French curtain rod is horizontal. Friends, it should be vertical; However, as I was putting it up, I realized that, for the love of God, I didn’t have enough room between the top of the window and the ceiling. There was no time left for mistakes, so I pushed them aside and moved on. However, this meant I couldn’t use the center support, and I was keeping my fingers crossed that the rod would be strong enough at this width to not sag without it. So far, it’s holding up and feels extremely strong, thank God.
So…do I like it?
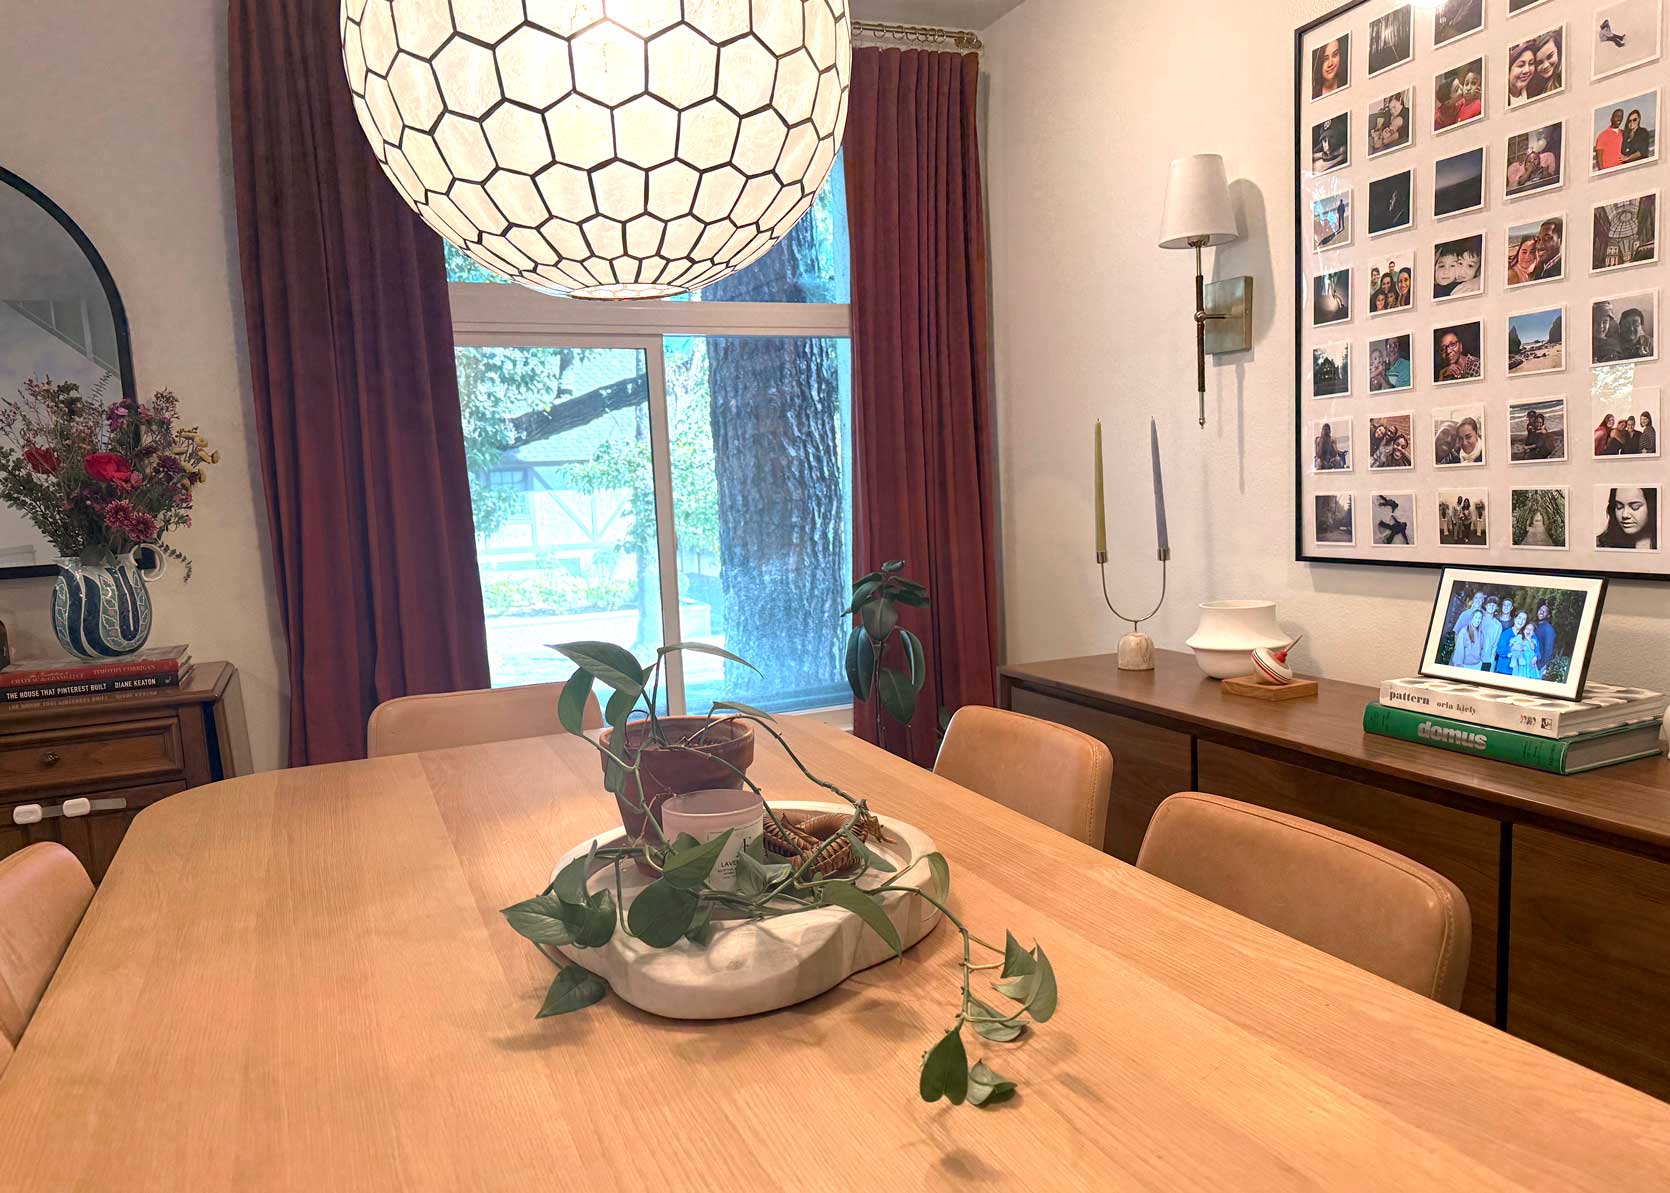
The big question here is: What do I think of the end result? Well…I’m honestly not sure. A few things I like: The length of the curtains seems much more appropriate for the size of the window, and the room feels more balanced. I can see now that I needed full-length draperies here the whole time, and the cafe curtain was a shortcoming that I tried hard to make up for but failed.
What don’t I like? Well, the color itself. Maybe it was the eggplant I mistreated and mixed something in that ruined everything, maybe I let them sit for too long, or maybe I picked the wrong color to begin with, but they’re super saturated and a little more red than I wanted them to be. Yes, I can admit that the color matches the sample on the Rite website quite well, but at such a large scale, it is a bit overwhelming. In a cool room, with less reddish wood tones, I think I’d really like them. But to my eyes, it all looks too red and hot. The room needs some cool-toned balance.
Ultimately, even though my end result is not what I wanted, I am incredibly impressed with the dye and the process. The panels are evenly tinted, saturated, and look as if they were always this color. I’d never look at them and think they were white before, which is great, TBH. I would definitely be much less afraid to repeat this process for another home project in the future.
The plan is to release them and let them be. They are so beautiful, this special place just has my eye on it. If we had stayed another year or two, I would have taken the two remaining white panels I had and chosen a light pinkish brown instead of this dark rusty red. But for now, at least it’s better than what I had (for me, and if you disagree, feel free to keep it to yourself).
So this is it. I would be happy to answer any questions you have about the dye or process, and any general information is also welcome. Thank you for coming on this curtain journey with me.
Until next time, friends…