

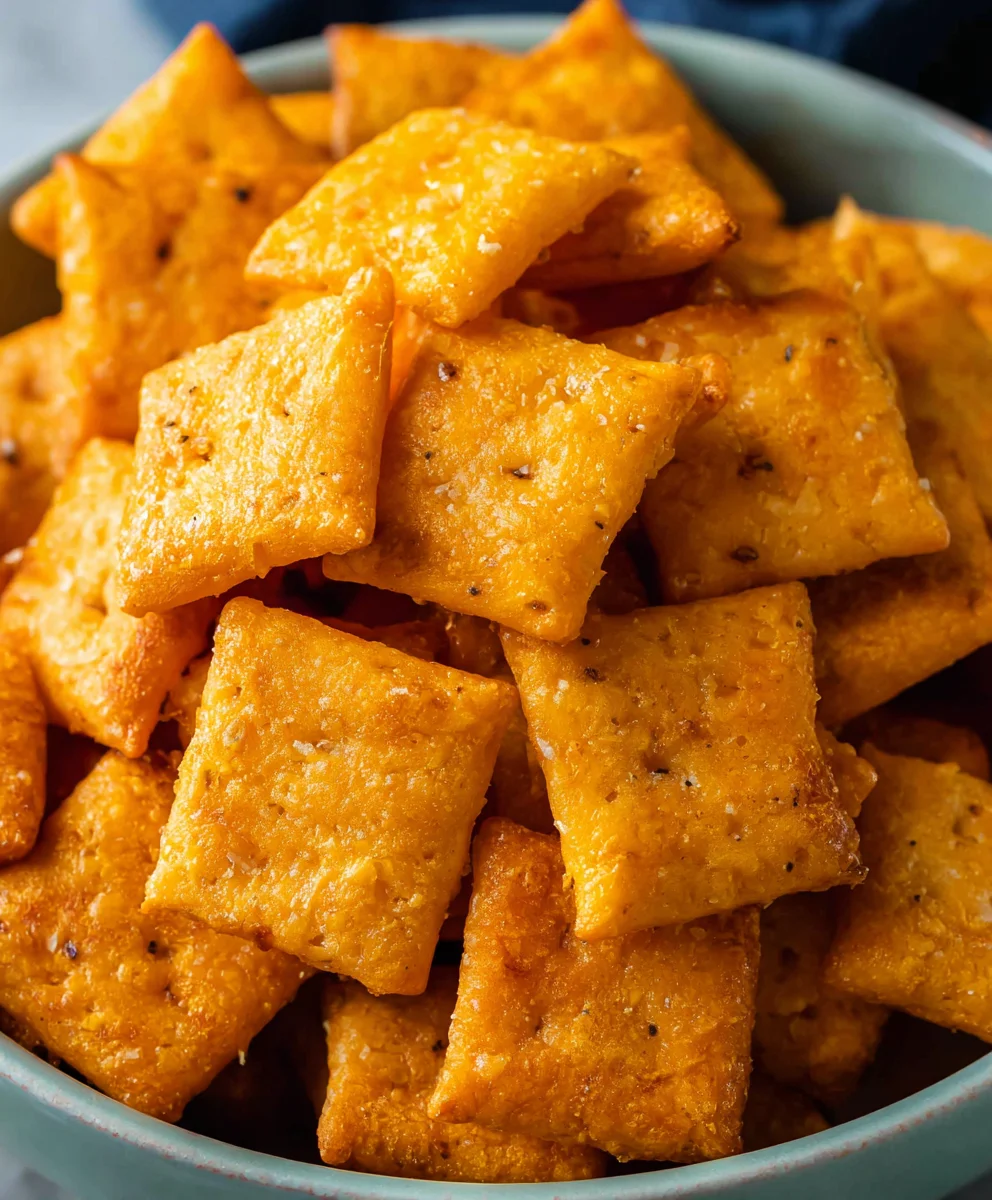
Homemade cottage cheese is much more than just a snack; They’re a delicious trip back to childhood, a crisp slice of pure comfort. We all have those nostalgic memories that instantly transport us to simpler times, and for many people, those perfectly cheesy, amazingly crunchy crackers hold a special place. What makes homemade cheese so unique? It has that quintessential, addictive cheese flavor and ability to capture that gratifying snap with every bite, but upgraded. Unlike their store-bought counterparts, making them yourself allows you to control the quality of the cheese, experiment with different flavors, and achieve a texture that is absolutely unique. Imagine the aroma filling your kitchen as you cook is a hearty invitation to indulge. This recipe unlocks that magic, giving you the power to create your own perfectly seasoned, impossibly addictive homemade cheese, right in your own oven.
Material:
- ¼ cup unsalted butter, softened at room temperature
- 8 ounces sharp cheddar cheese, finely shredded
- 1 ¼ cup flour
- 1 teaspoon kosher salt, plus additional salt for sprinkling on top
- 2-3 tbsp ice cold water
- 2 tbsp olive oil
making dough
Step 1: Rub the Butter and Cheese
The foundation of our delicious homemade cheese lies in perfectly balanced flour. Firstly, in a medium sized mixing bowl, combine softened unsalted butter and finely shredded sharp cheddar cheese. I like to use good quality sharp cheddar for the most intense cheese flavor, but feel free to experiment with your favorites. Using a sturdy spoon or a stand mixer with a paddle attachment, mix these two ingredients together until they are well combined and form a relatively smooth, cheese-like paste. This initial creaming step is important to incorporate air and ensure a tender texture in the final crackers. Don’t worry if small pieces of cheese are still visible; This is absolutely fine and will contribute to the wonderful cheesy pockets in your Homemade Cheese Eats.
Step 2: Add Dry Ingredients
Next, we will add our dry ingredients to the butter and cheese mixture. Sift the flour directly into the bowl. Sieving helps in aerating the flour, preventing lumps and resulting in a lighter flour. Add 1 teaspoon kosher salt. You can also use a little more cheese if you want extra flavor and aroma of the grape juice, but for this classic recipe, a teaspoon of salt is perfect to enhance the natural saltiness of the cheddar. Add these dry ingredients to the wet ingredients using your spoon or mixer on low speed until roughly combined. At this stage, the mixture will probably harden and resemble coarse meal. This is what we want before we add liquids.
Step 3: Add Cold Water
Now it’s time to bring our dough together. This is where the cold water comes in and it’s important to use ice cold water for best results. Gradually add the cold water, a tablespoon at a time, mixing gently after each addition. You’ll probably only need 2 to 3 tablespoons total. The goal is to add enough water to make the dough homogeneous. Overworking the dough at this stage may cause the gluten to develop too much, resulting in tough crackers. So, mix only until the dough starts to come together and form a shaggy ball. You may still see some dry spots, but these will be incorporated as you knead it briefly. Turn the dough out onto a lightly floured surface and knead it gently a few times, just enough to form a homogeneous disk. Don’t over knead!
shaping and cooking
Step 4: Roll and Cut the Crackers
This is where the fun really begins – shaping our homemade cheese! Lightly flour your work surface and your rolling pin. Take out the pulp of the dough and start rolling it out very thin. For that classic cracker texture, aim for a thickness of about 1/8 inch. It is important to roll it out evenly so that the crackers cook evenly. If you’re a perfectionist you can use a ruler to check consistency, but visual estimation is usually sufficient. Once the dough is rolled out to your desired thinness, it’s time to cut out the crackers. You can use a small square cookie cutter, a pizza cutter to make strips and then cut them into squares, or even use a knife. I like to make them about 1-inch square, but the size is completely up to you and your preference. Place the shaped crackers on a baking sheet lined with parchment paper as you cut them. Don’t worry if the edges are a little rough; Which increases domestic attraction.
Step 5: Prepare for Baking and Bake
Before these little cheesy pieces hit the oven, we have a few important steps to take to ensure the perfect cheesy finish. First, we need to prick each cracker with a fork. This step is necessary to allow steam to escape during baking, which prevents the crackers from becoming too puffy and airy instead of crisp. Just a few light pricks per cracker will do. Next, lightly brush each cracker with olive oil. It imparts a subtle richness and helps create a beautiful golden-brown color. Finally, and this is a crucial step for that distinctive flavor and visual appeal, sprinkle additional kosher salt on top. This salt topping really elevates your homemade cheese to the next level of deliciousness. Preheat your oven to 375°F (190°C). Arrange the prepared crackers on the baking sheet, making sure to leave a little space between them for even cooking. Bake for 12-15 minutes, or until the edges are golden brown and the crackers are firm and crisp. Keep a close eye on them during the last few minutes, as they can go from slightly overcooked to fully cooked very quickly due to their thinness. Once baked, let them cool on the baking sheet for a few minutes before transferring them to a wire rack to cool completely. This cooling process is important to achieve maximum crispness.
conclusion:
And there you have it – your own batch This is homemade cheese! We hope you enjoyed it and are now looking forward to some delicious, crunchy treats. This recipe is surprisingly simple, making it a perfect weekend project or a fun activity to do with the kids. The satisfaction that comes from eating a made-from-scratch cracker, packed with classic cheddar flavor, is truly unmatched.
in This is homemade cheese They’re fantastic on their own as a quick snack, but they also pair wonderfully with a variety of dips, from creamy spinach artichokes to zesty salsa. They make an excellent addition to cheese boards and charcuterie platters, providing a homey touch that guests will definitely appreciate.
Don’t be afraid to experiment! Feel free to replace the cheddar with other sharp cheeses like Gruyere or spicy Monterey Jack for a different flavor profile. You can also add a pinch of cayenne pepper for a little heat or a little garlic powder for extra flavor. We encourage you to make this recipe your own and find your favorite flavor combinations. Happy baking, and enjoy every delicious bite you make This is homemade cheese!
Frequently Asked Questions:
What type of cheddar cheese is best for homemade cheese?
A sharp or extra sharp cheddar cheese will provide the strongest and most authentic flavor for you This is homemade cheese. Medium cheddar can also work, but the flavor may be a bit mild. Using good quality cheese will make a noticeable difference in the final taste.
Can I make these vegetarian?
While this specific recipe relies on dairy cheese, it is possible to adapt it for a vegan version. You will need to experiment with vegan cheese substitutes and potentially adjust other ingredients for texture and binding. This will probably involve a different approach to preparing the dough.
How should I store homemade cheese?
Once completely cooled, store your This is homemade cheese In an airtight container at room temperature. They should stay fresh and crisp for up to a week, although they are so delicious, they may not last that long!
Easy Homemade Paneer – Its Recipe – Best Breakfast Ever
Make your own delicious, cheesy crackers at home with this simple and satisfying Cheez-Its recipe. Perfect for snacking!
Material
-
1/4 cup unsalted butter, softened
-
8 ounces sharp cheddar cheese, finely shredded
-
1 1/4 cup flour
-
1 teaspoon kosher salt, plus extra for sprinkling
-
2-3 tbsp ice cold water
-
2 tbsp olive oil
Instruction
-
step 1
In a medium bowl, mix the cream with the softened butter and shredded sharp cheddar cheese until it is well mixed and forms a smooth, cheese-like paste. -
step 2
Sift the flour into a bowl with the butter and cheese mixture. Add 1 teaspoon kosher salt. Mix on low speed until completely mixed and crumbly. -
step 3
Gradually add the ice-cold water, 1 tablespoon at a time, mixing slowly until the dough starts to come together and form a shaggy ball. Don’t overwork. Knead briefly on a lightly floured surface to form a homogeneous disk. -
step 4
Roll out the dough thinly (about 1/8 inch thick) on a lightly floured surface. Cut into desired shapes, such as 1-inch squares. Place crackers on a parchment-lined baking sheet. -
Step 5
Prick each cracker with a fork. Lightly brush with olive oil and sprinkle with additional kosher salt. Bake in preheated oven at 375°F (190°C) for 12-15 minutes or until golden brown and crisp. -
Step 6
Let the crackers cool on the baking sheet for a few minutes, then transfer to a wire rack to cool completely for maximum crispness.
important information
Nutrition Facts (per serving)
It is important to consider this information as approximate and not to use it as definitive health advice.
Allergy Information
Please check ingredients for potential allergens and consult a health professional if in doubt.