

Good news for guest cottages and all of mankind! While the electrical, plumbing, HVAC, and framing haven’t started, I have dedicated hours to designing the stained glass doors that will go into the toilet cubicle inside the bathroom. And I have almost zero guilt about it (“almost” because when the electrician came and my lighting plan wasn’t perfectly dialed in, I wondered if I should have changed some preferences). But as they say, these doors are the starting point, and they’re giving me the creative fuel to pull the entire bathroom together, which in a way plays an important role in designing the look and feel of the rest of the house. I am very happy. Now, if you’re working on this project right now, read this post about its goals (but it’s a design lab for me, with no pressure to be perfect or be done soon, just impractical creative experimentation and unbridled fun). Now…over to those doors.
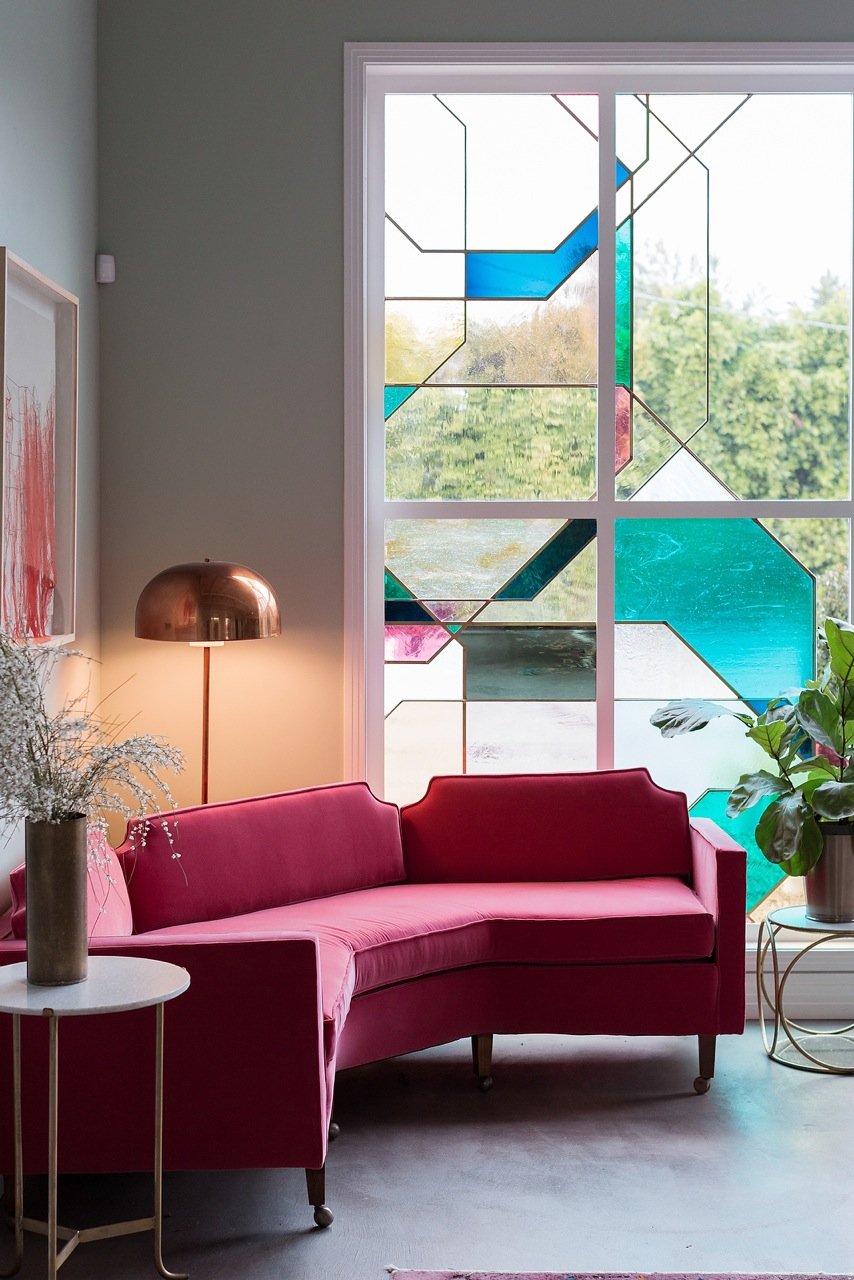
It’s going to be quite an unexpected moment, and it’s going to happen before you open up and find out what’s inside. The structure of the outhouse will be paneled “siding” and painted a dark color (not sure what the actual color will be, but that’s what we chose). hague blue here), and behind it will (hopefully) be a red-painted reclaimed wood wall.
inspiration gate
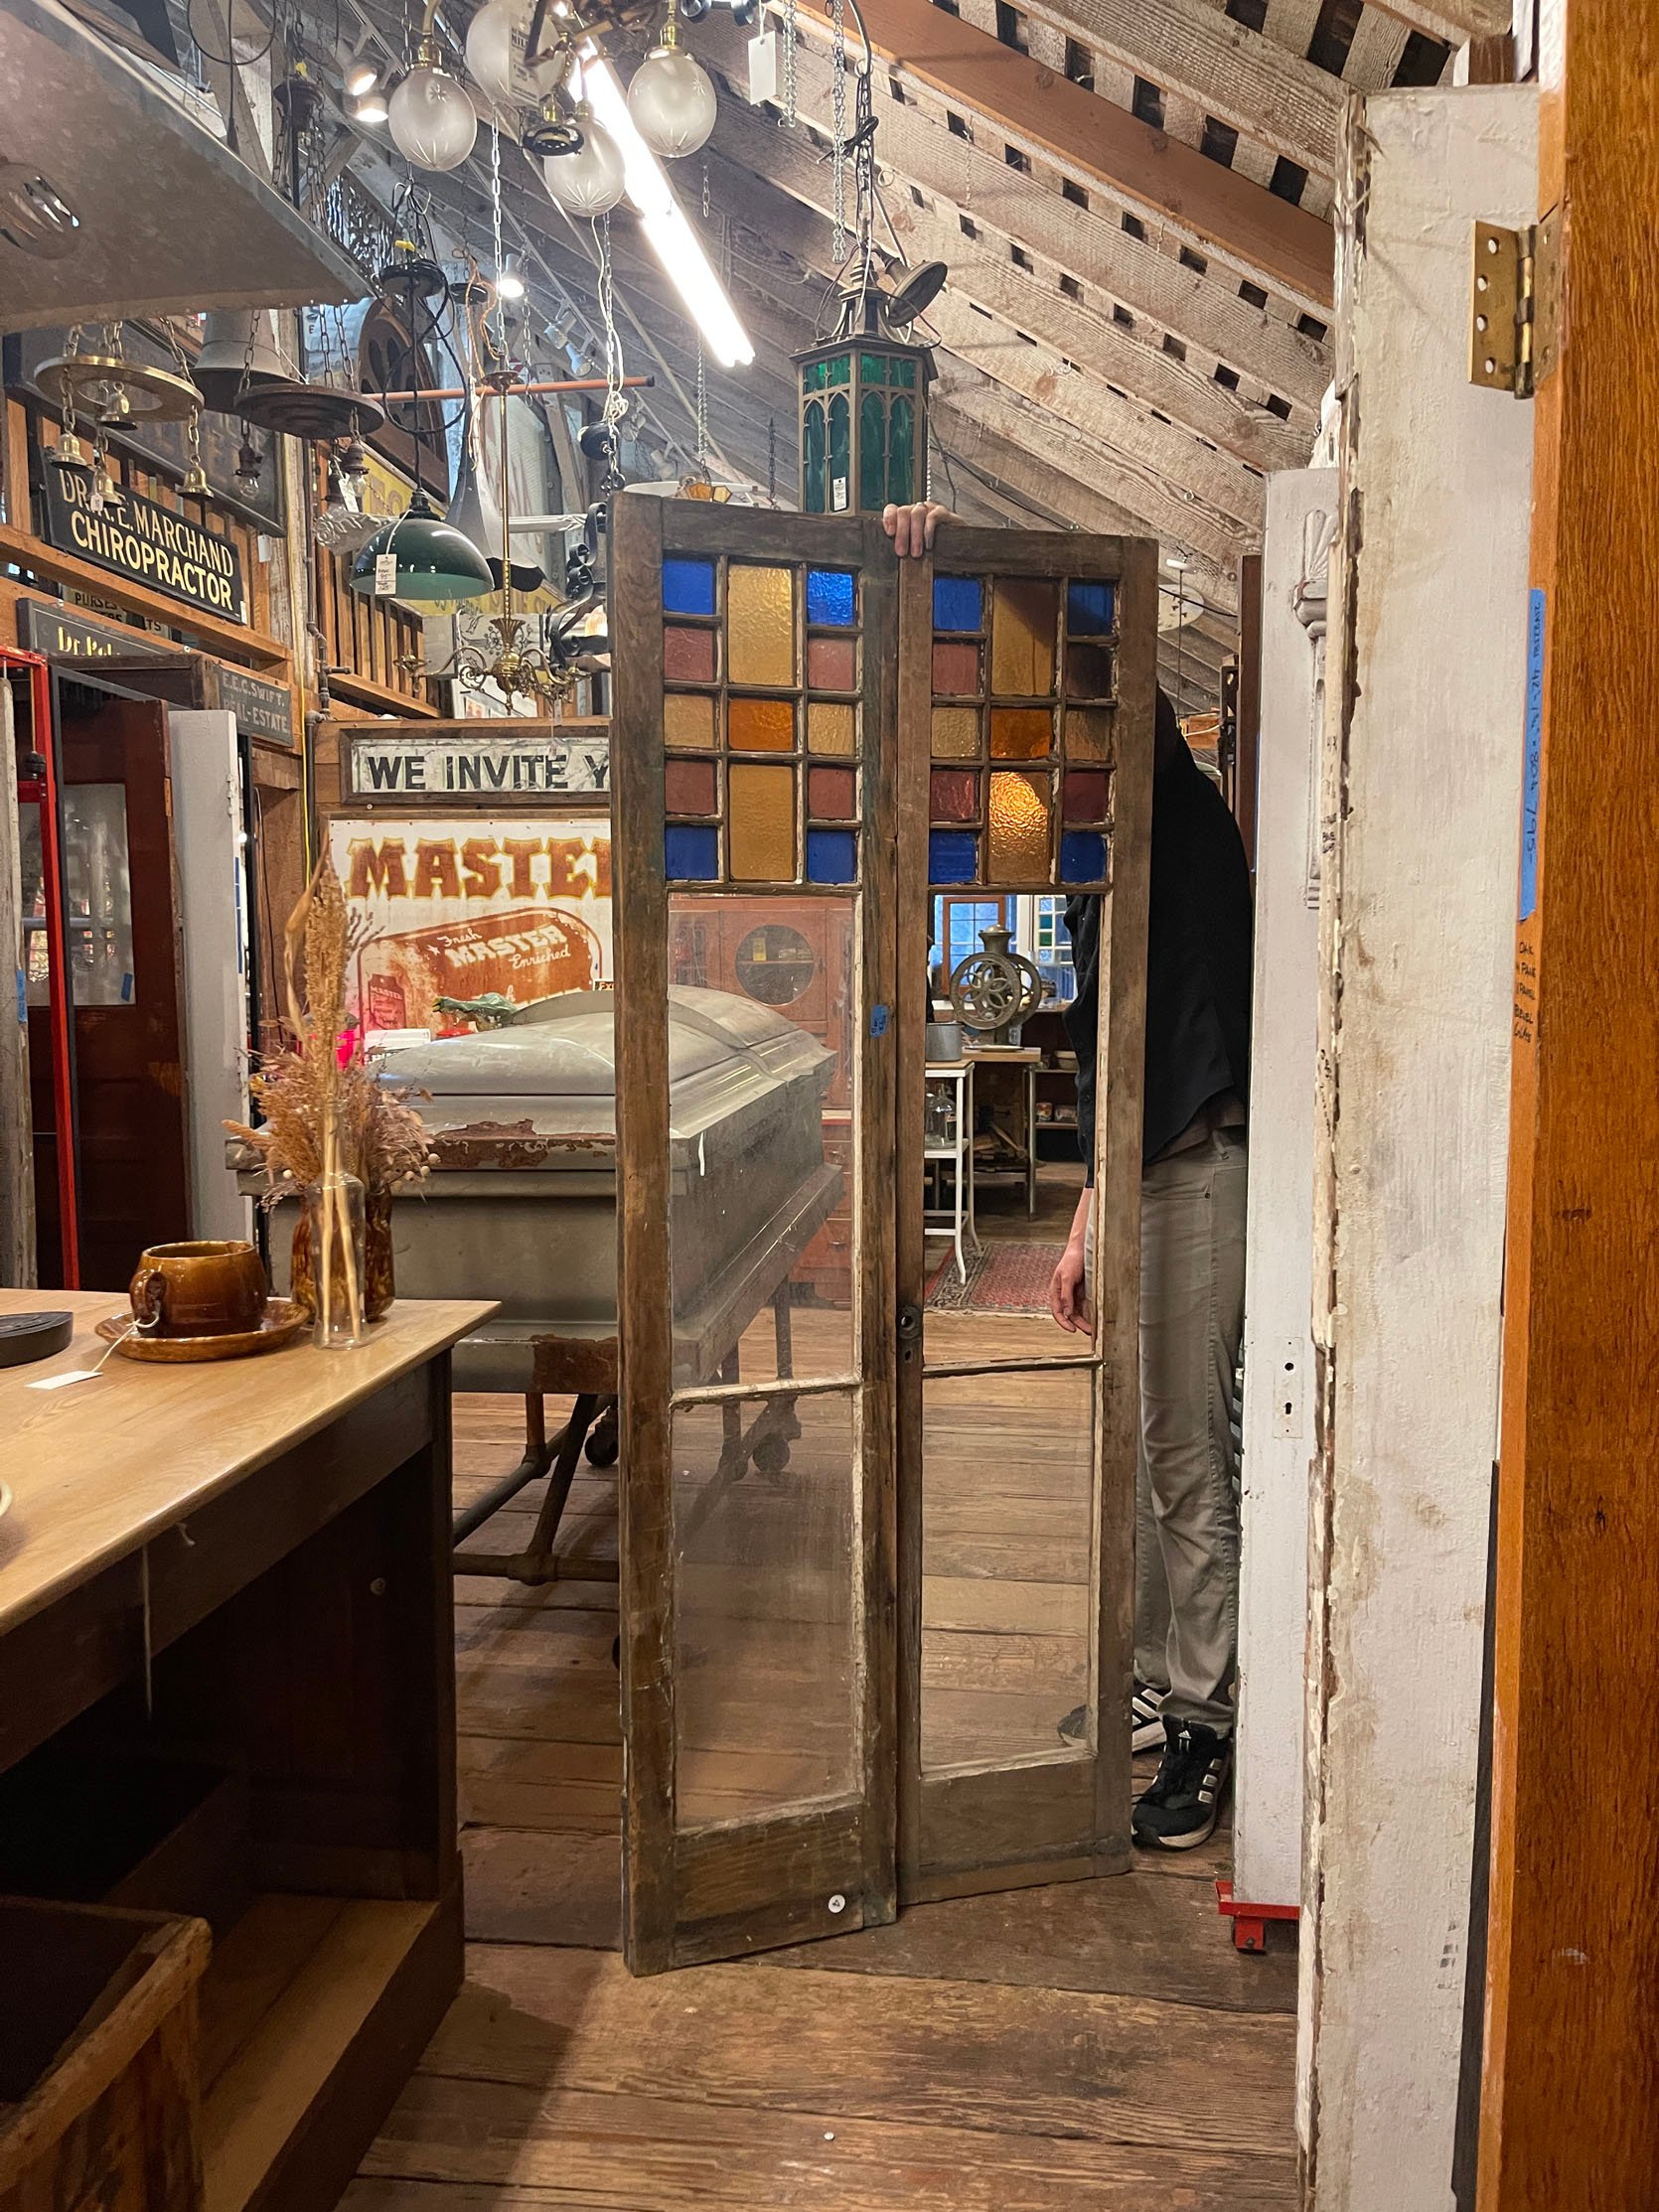
These old doors were the inspiration for the whole thing. i found them here Aurora MillsAnd I could just buy them and fix them, but why do that when you can spend days, weeks and thousands of dollars building your own??? The real reason I didn’t stick with these is twofold: 1. They were 18″ each, which meant the opening would be 36″ overall – obviously fine for daily use, but very annoying to shoot. And I need great photos of it because I really plan on breaking the internet with my urinal moment (hopefully this sentence goes to my grave), so not being able to capture photos of the inside really easily is a bummer. This is the case with a lot of our bathrooms that we design and shoot, and we make it work, but it’s always challenging. And 2. I wanted to see stained glass and see what my version of this door would be – it seemed like a fun opportunity to learn and teach. You can say that the privacy issue of the clear glass panels would have been a hindrance, but I could have solved it with opaque glass or a small door curtain on the inside.
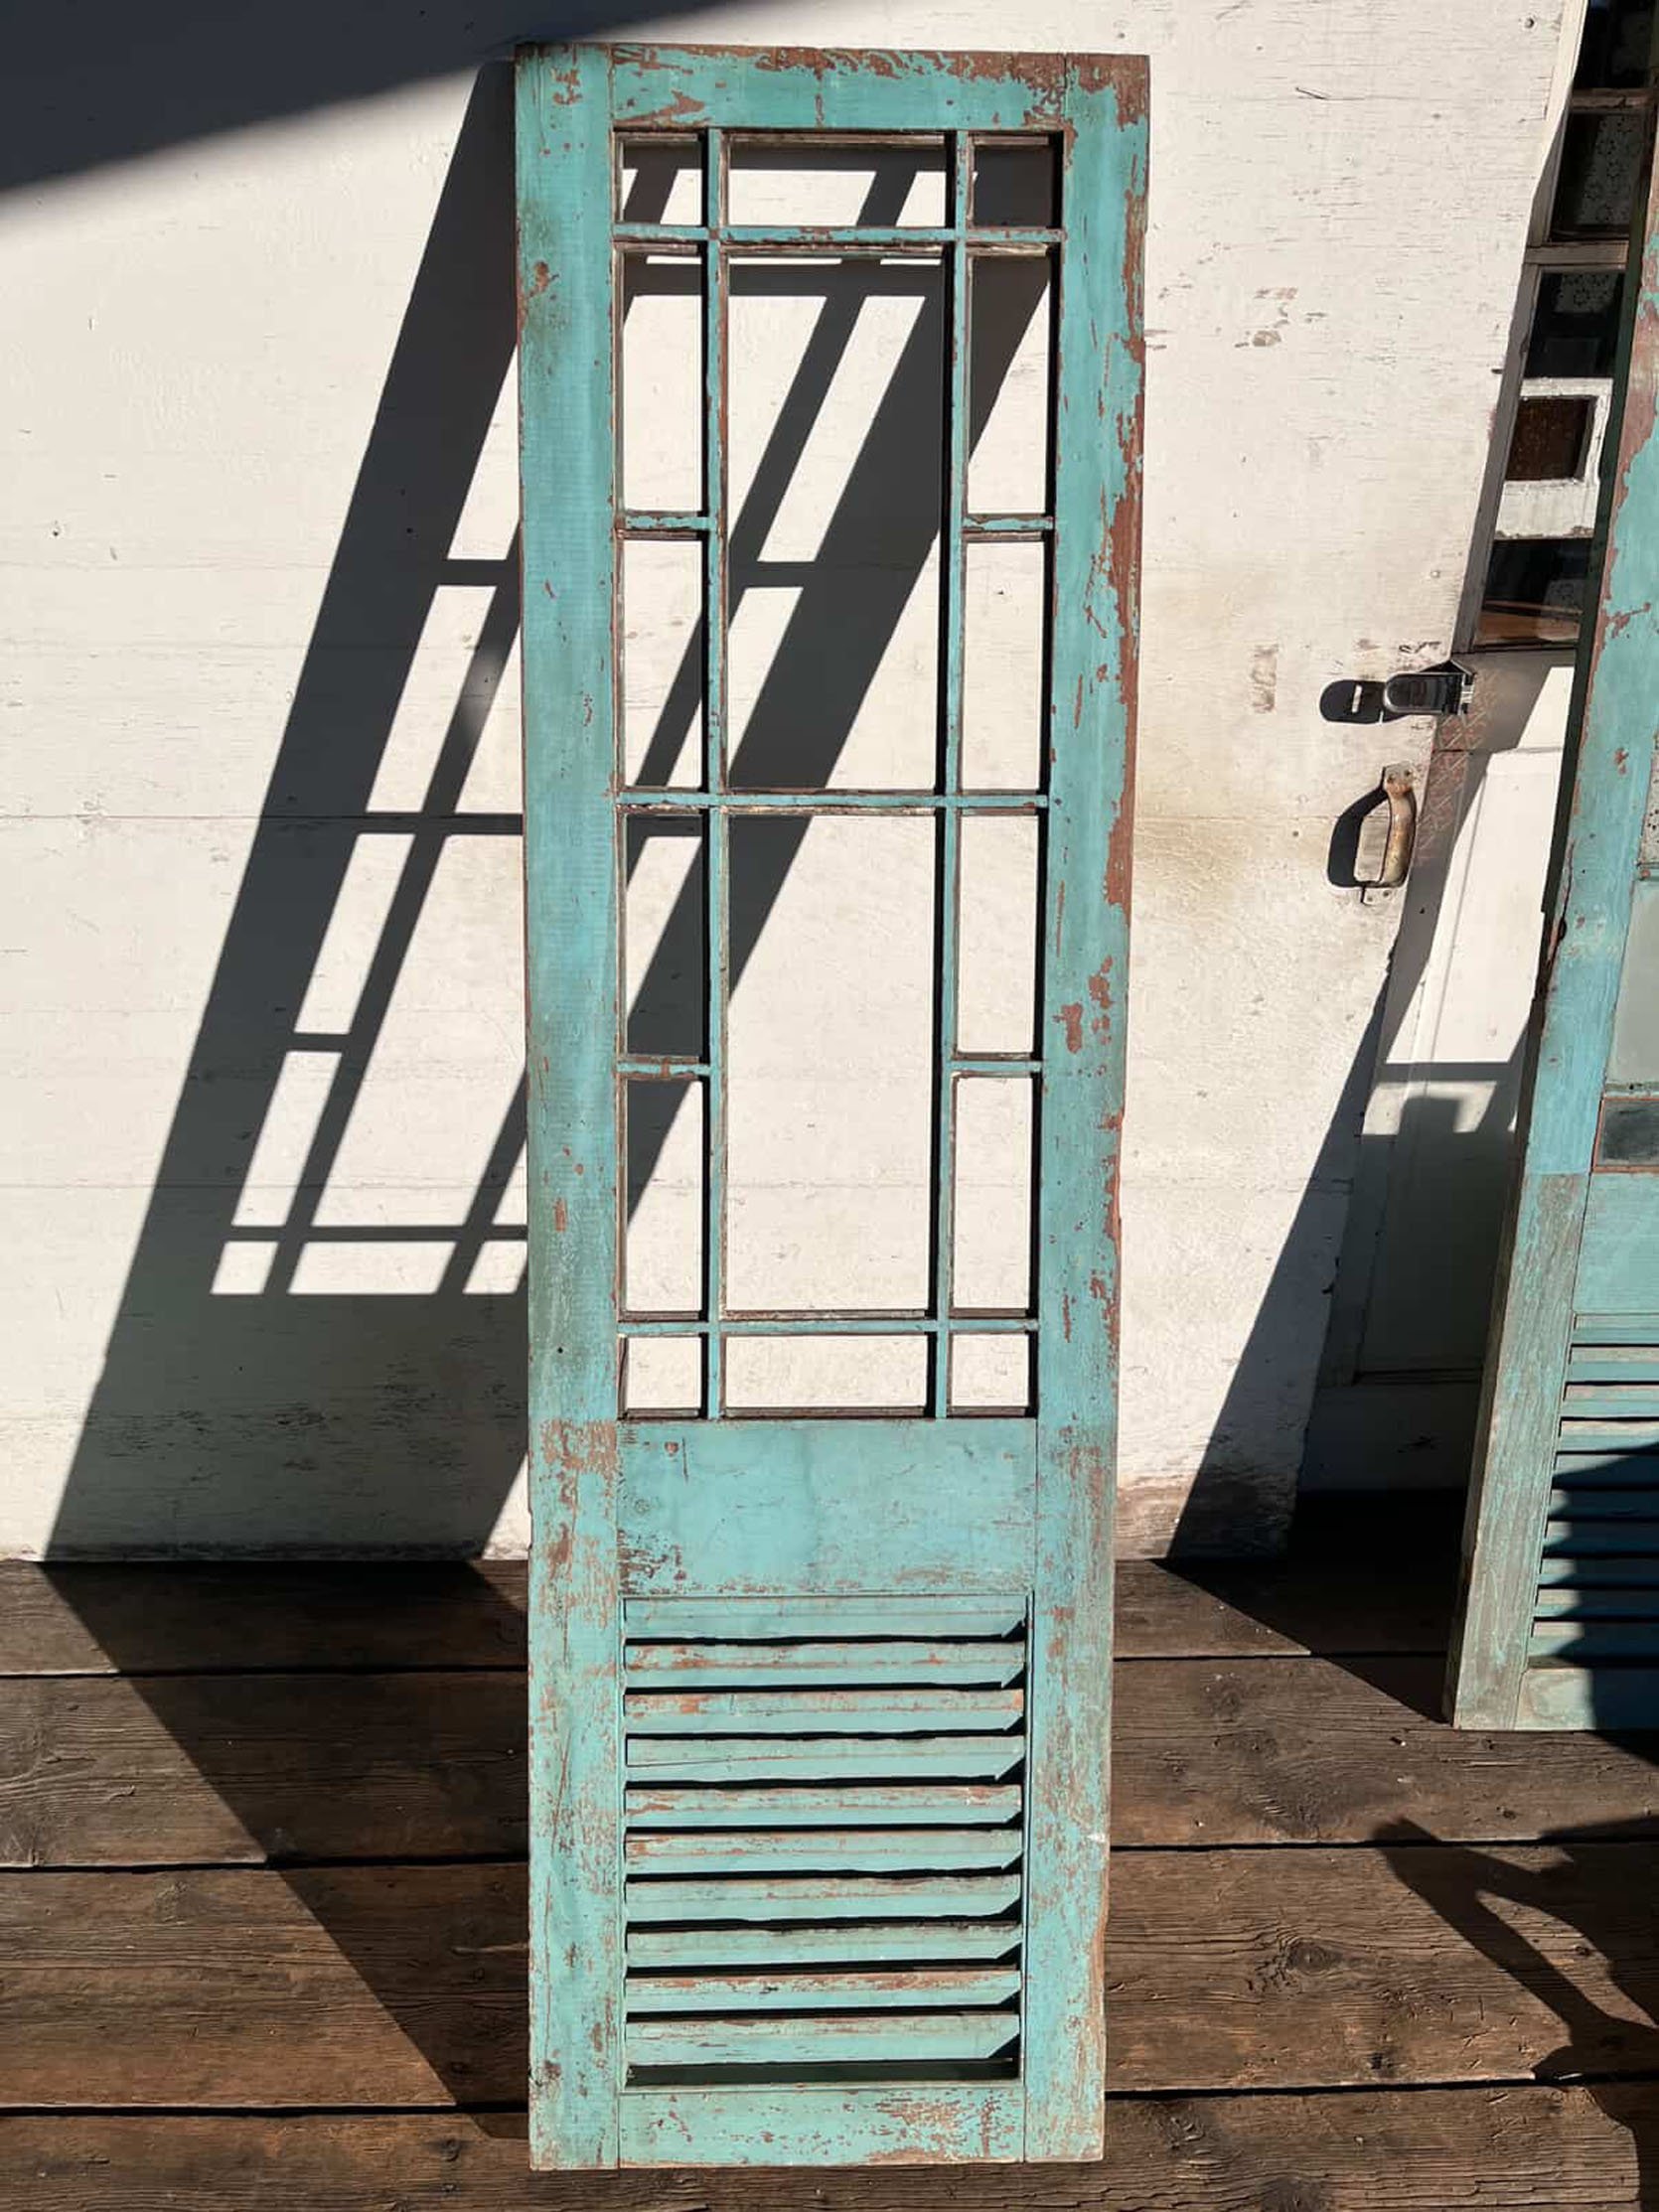
the doors i bought
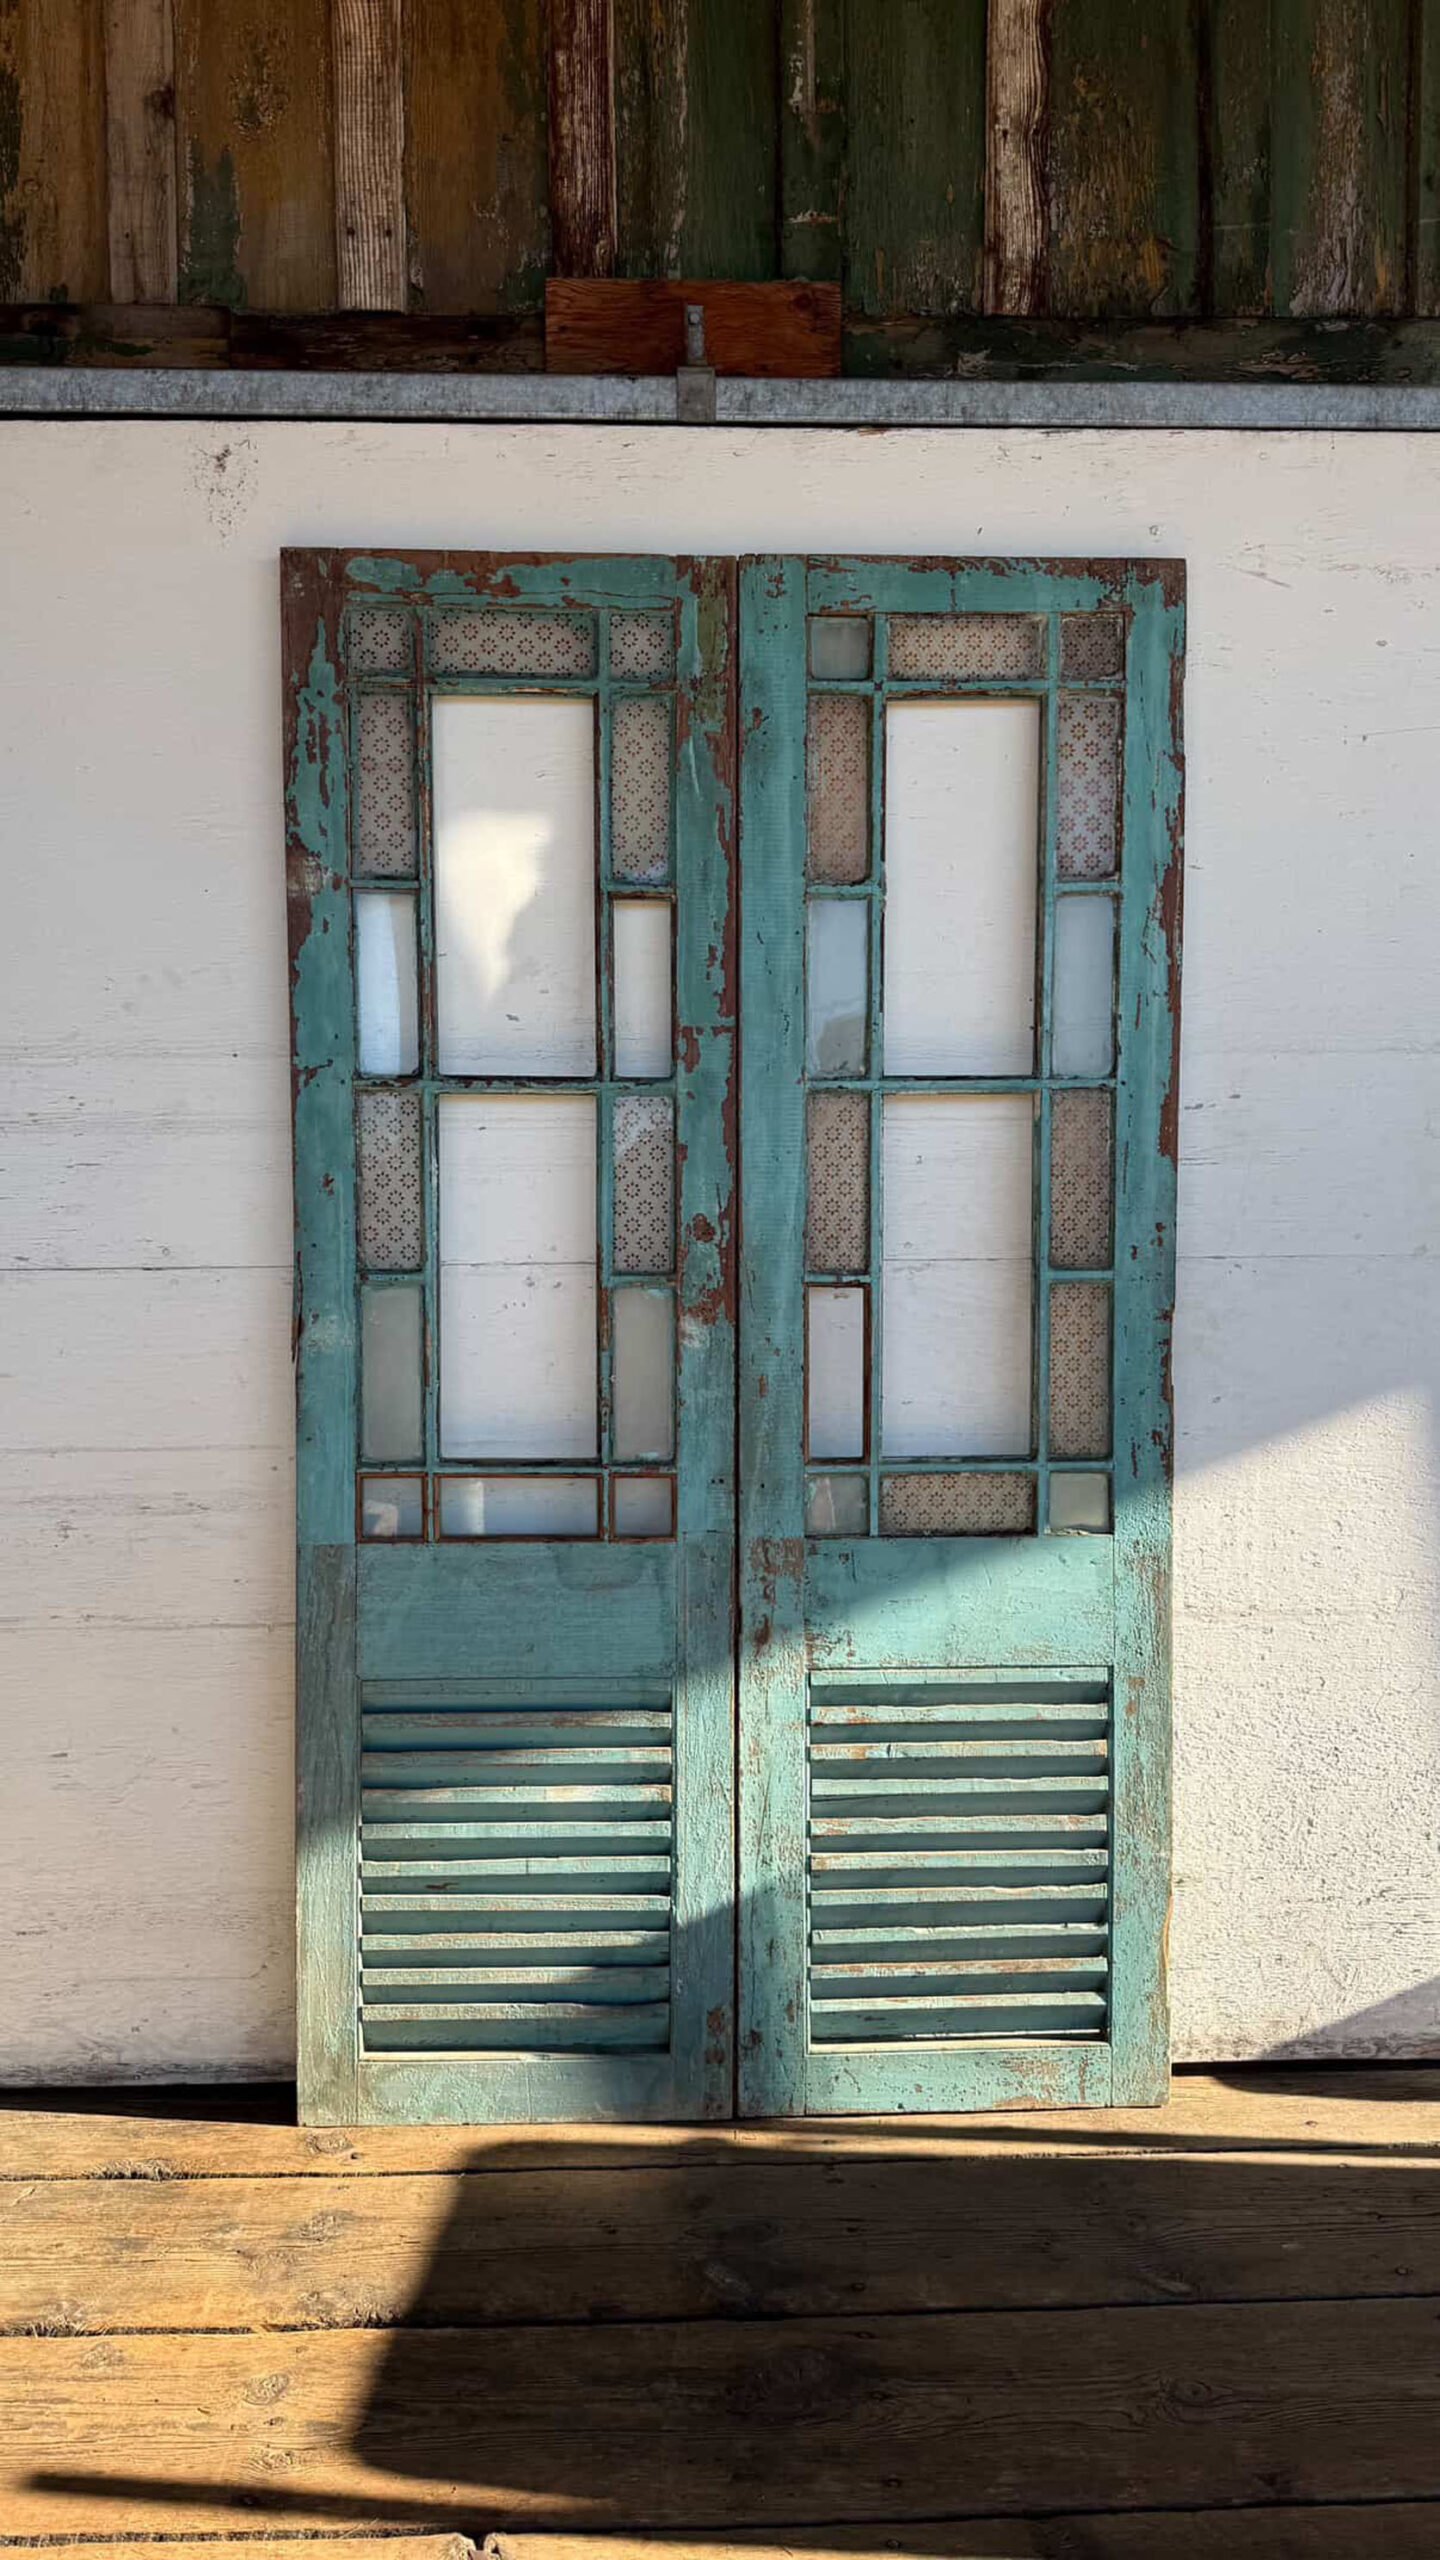
These are my old ladies here. Now I could start from scratch, but I need/love that old soul in my life (and home). These (also from Aurora Mills) were the perfect size and had ample opportunity to add whatever colored glass color I wanted, in any configuration, so the creative freedom was very appealing. What’s even better is Nathan from AM, their resident stained glass repair guy, and he’s going to coach me through refurbishing them (and then I’ll show you). I think they were $1,200, which was nothing, but AM gave me a lot of credit because I donated a ton of built-ins, doors, a bathtub, and shelving salvaged from both of our houses. (Hilariously, I wish I had a shelf of books and a clawfoot tub – oops. That’s a lesson that you should hoard everything for the rest of your life!)
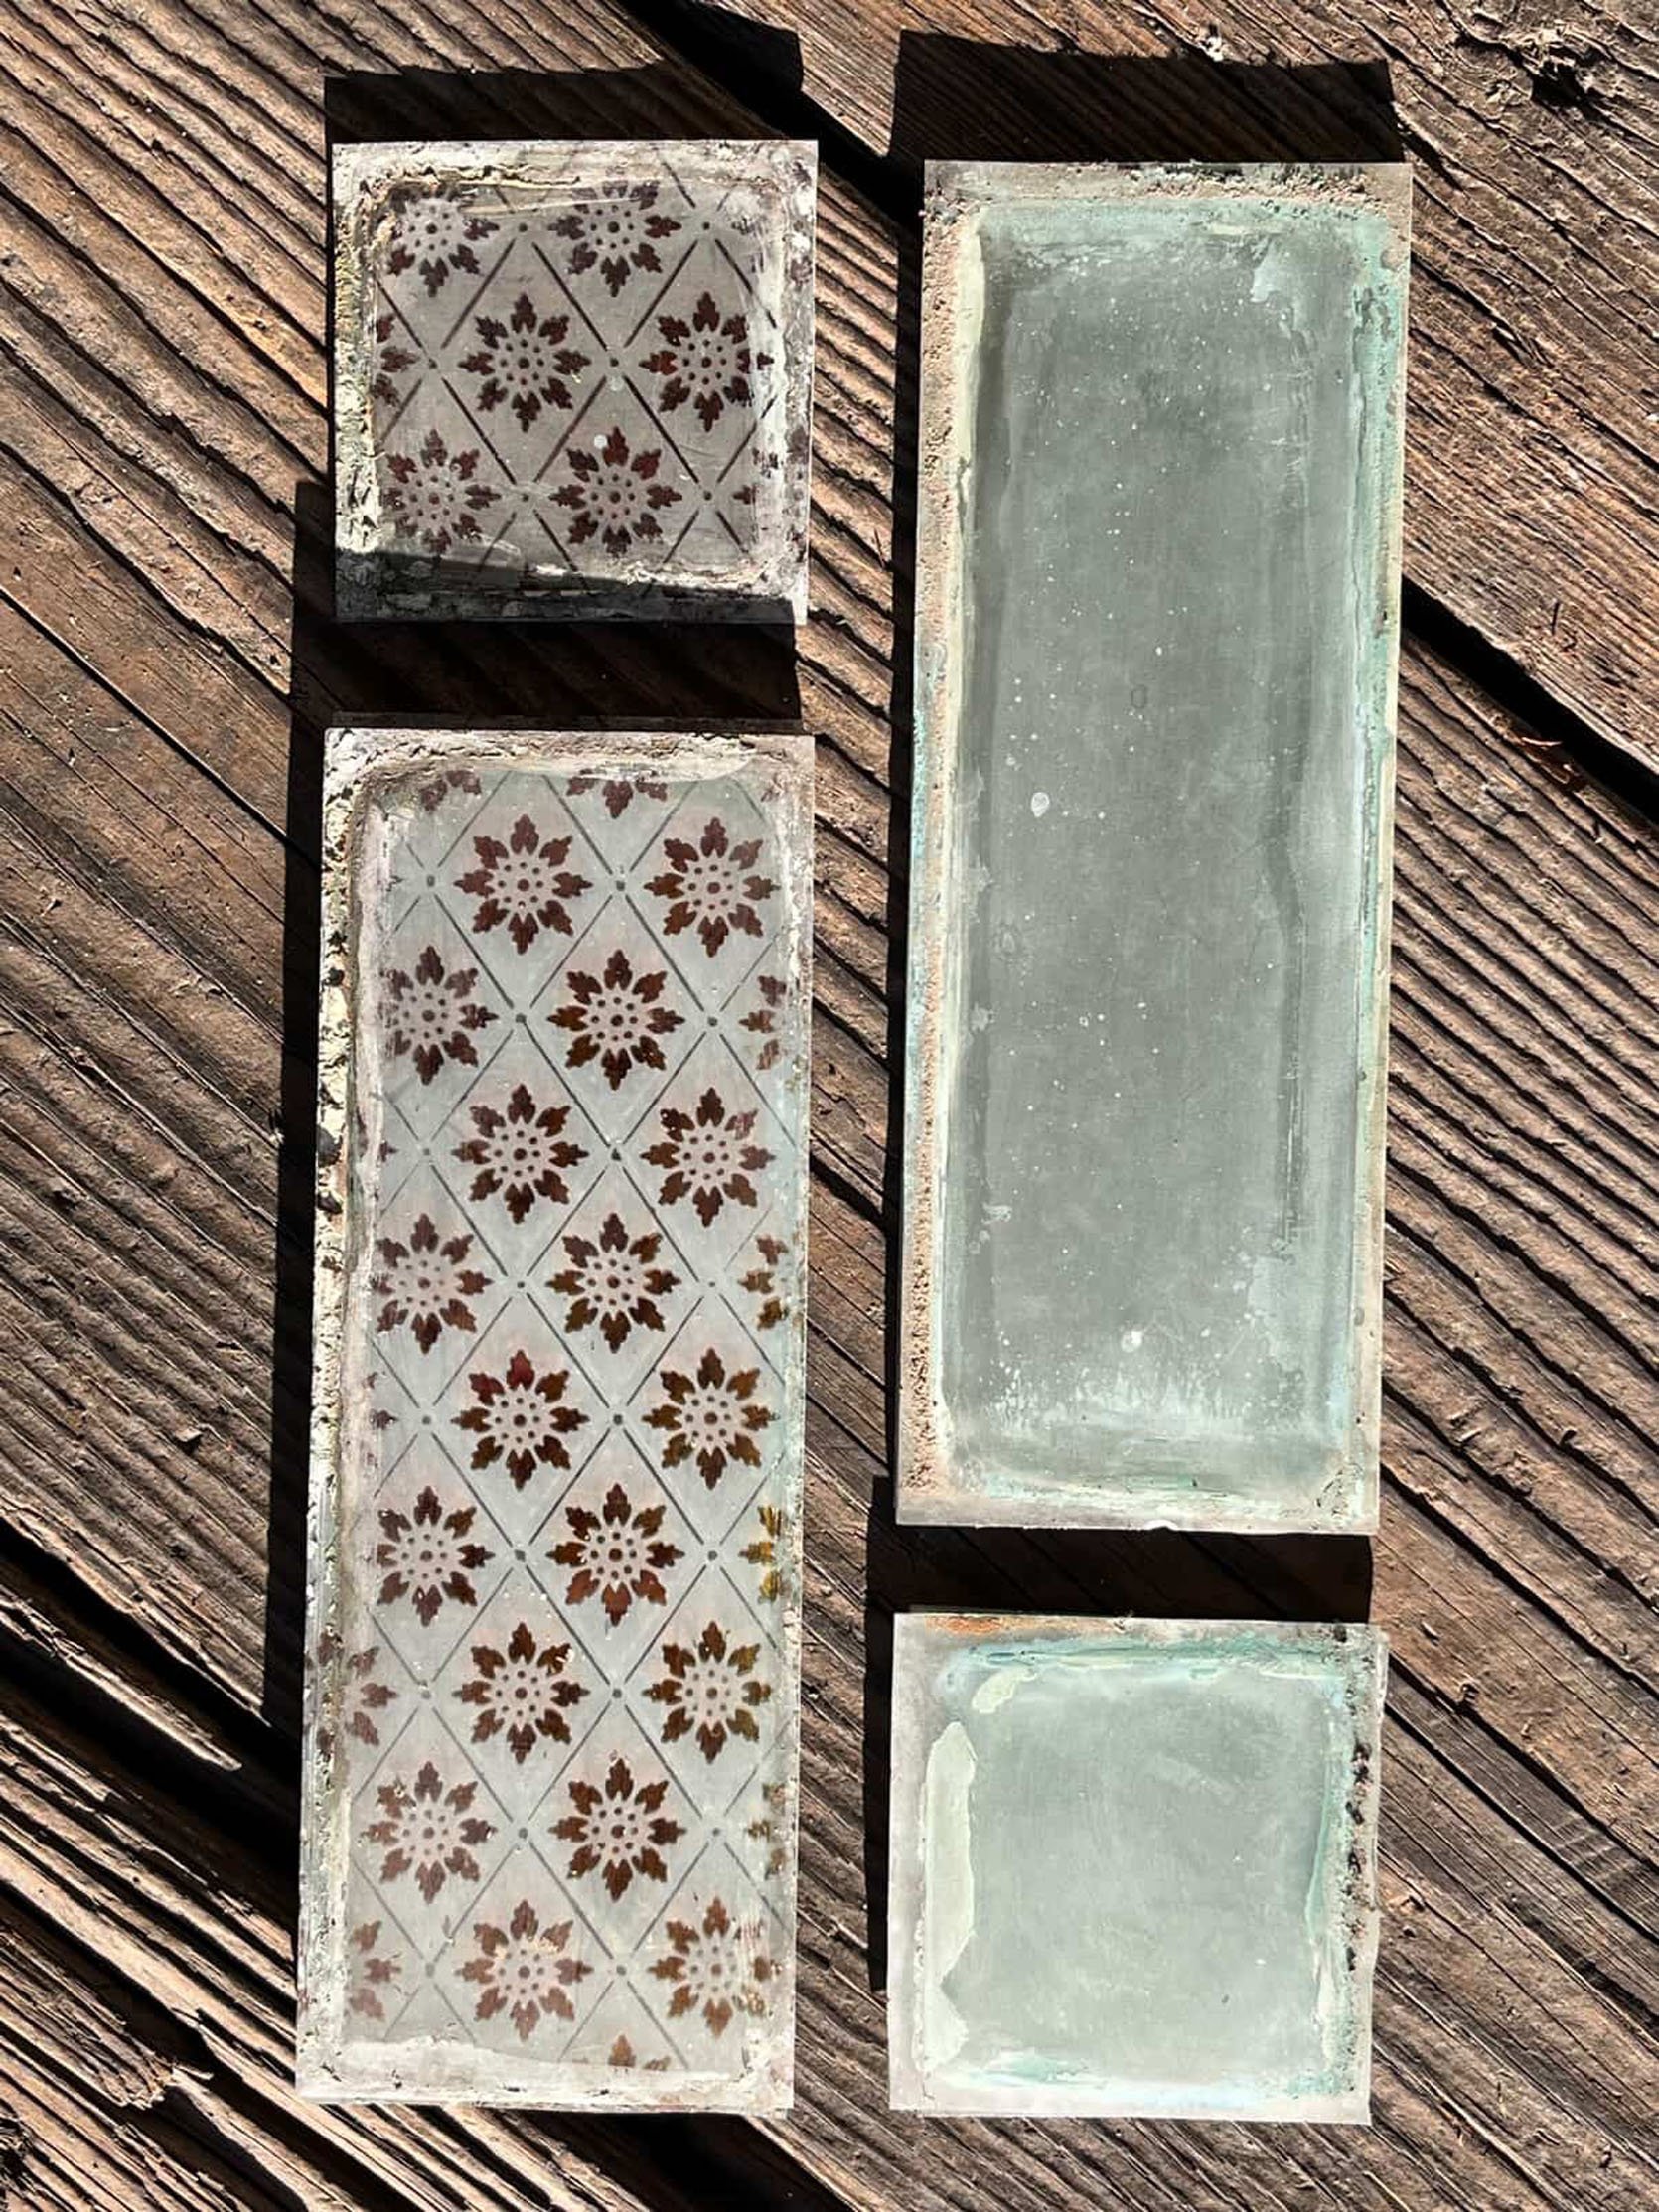
removal of original glass
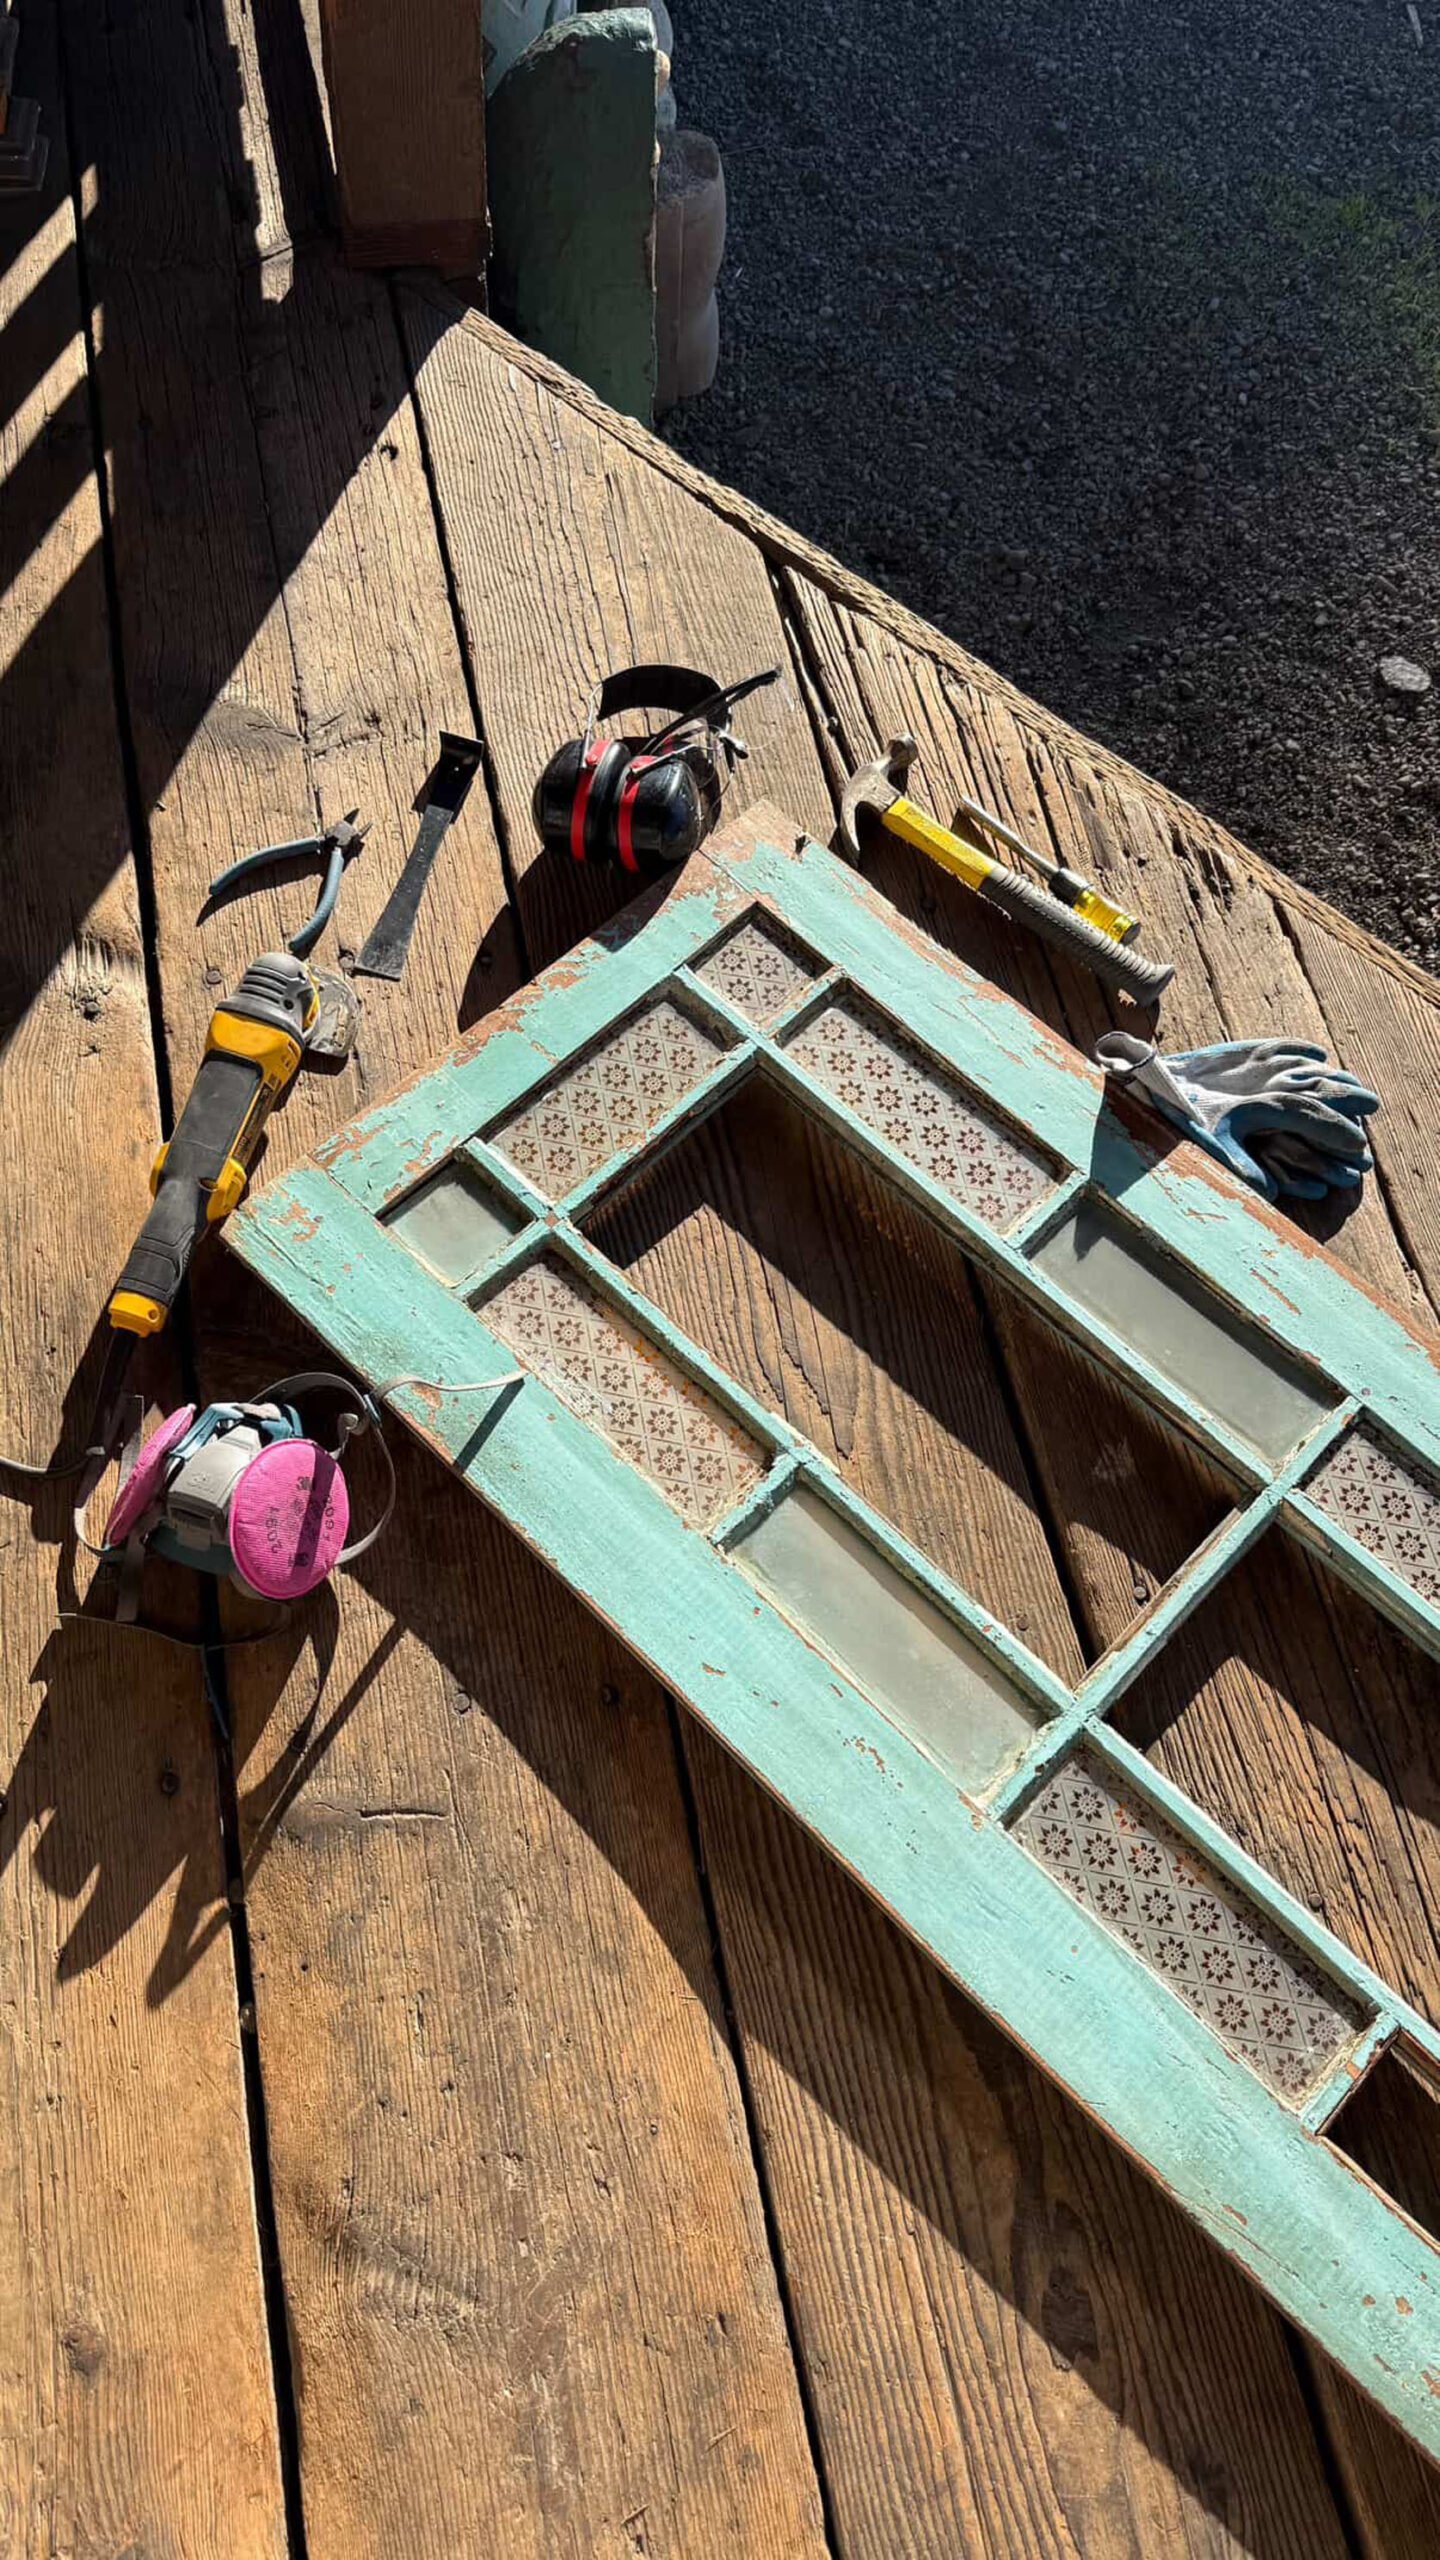
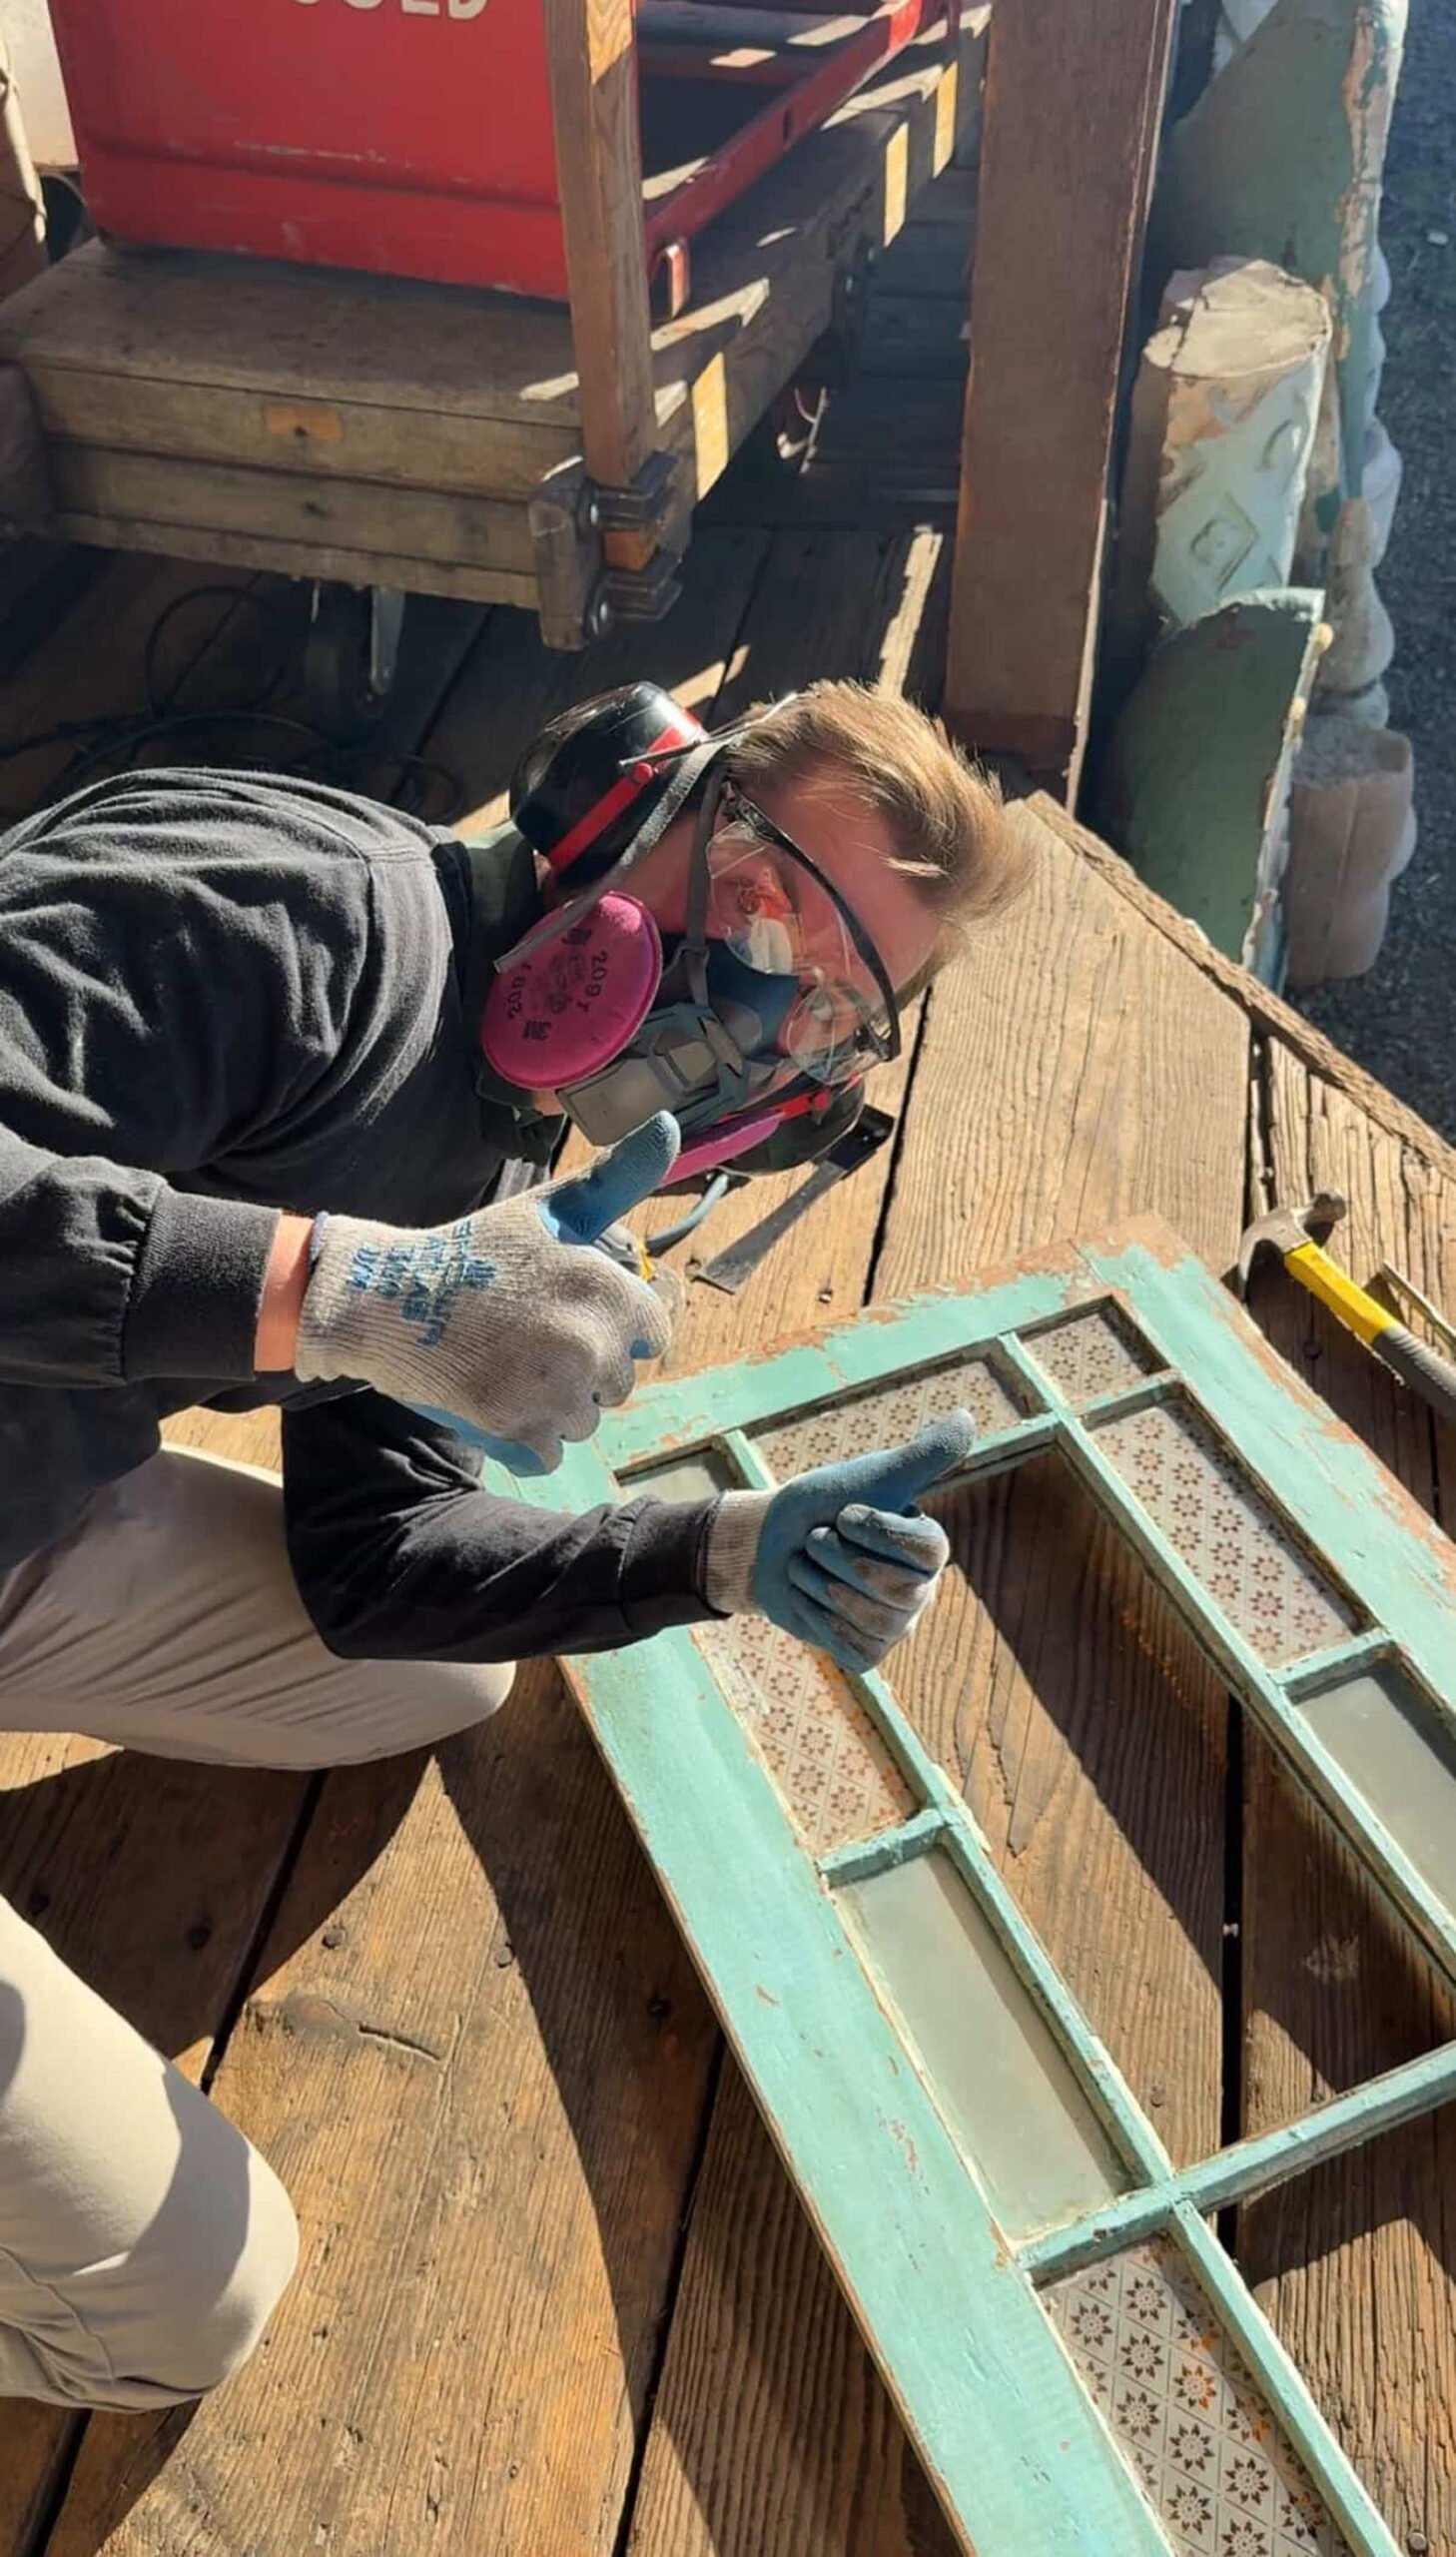
Some mirrors were damaged, some were missing, and frankly, none of it was anything special. I was attracted by the scale and configuration of the glass. So Nathan carefully removed each piece of glass so we could choose the color we wanted.
A blank canvas. When she did that, I went shopping.
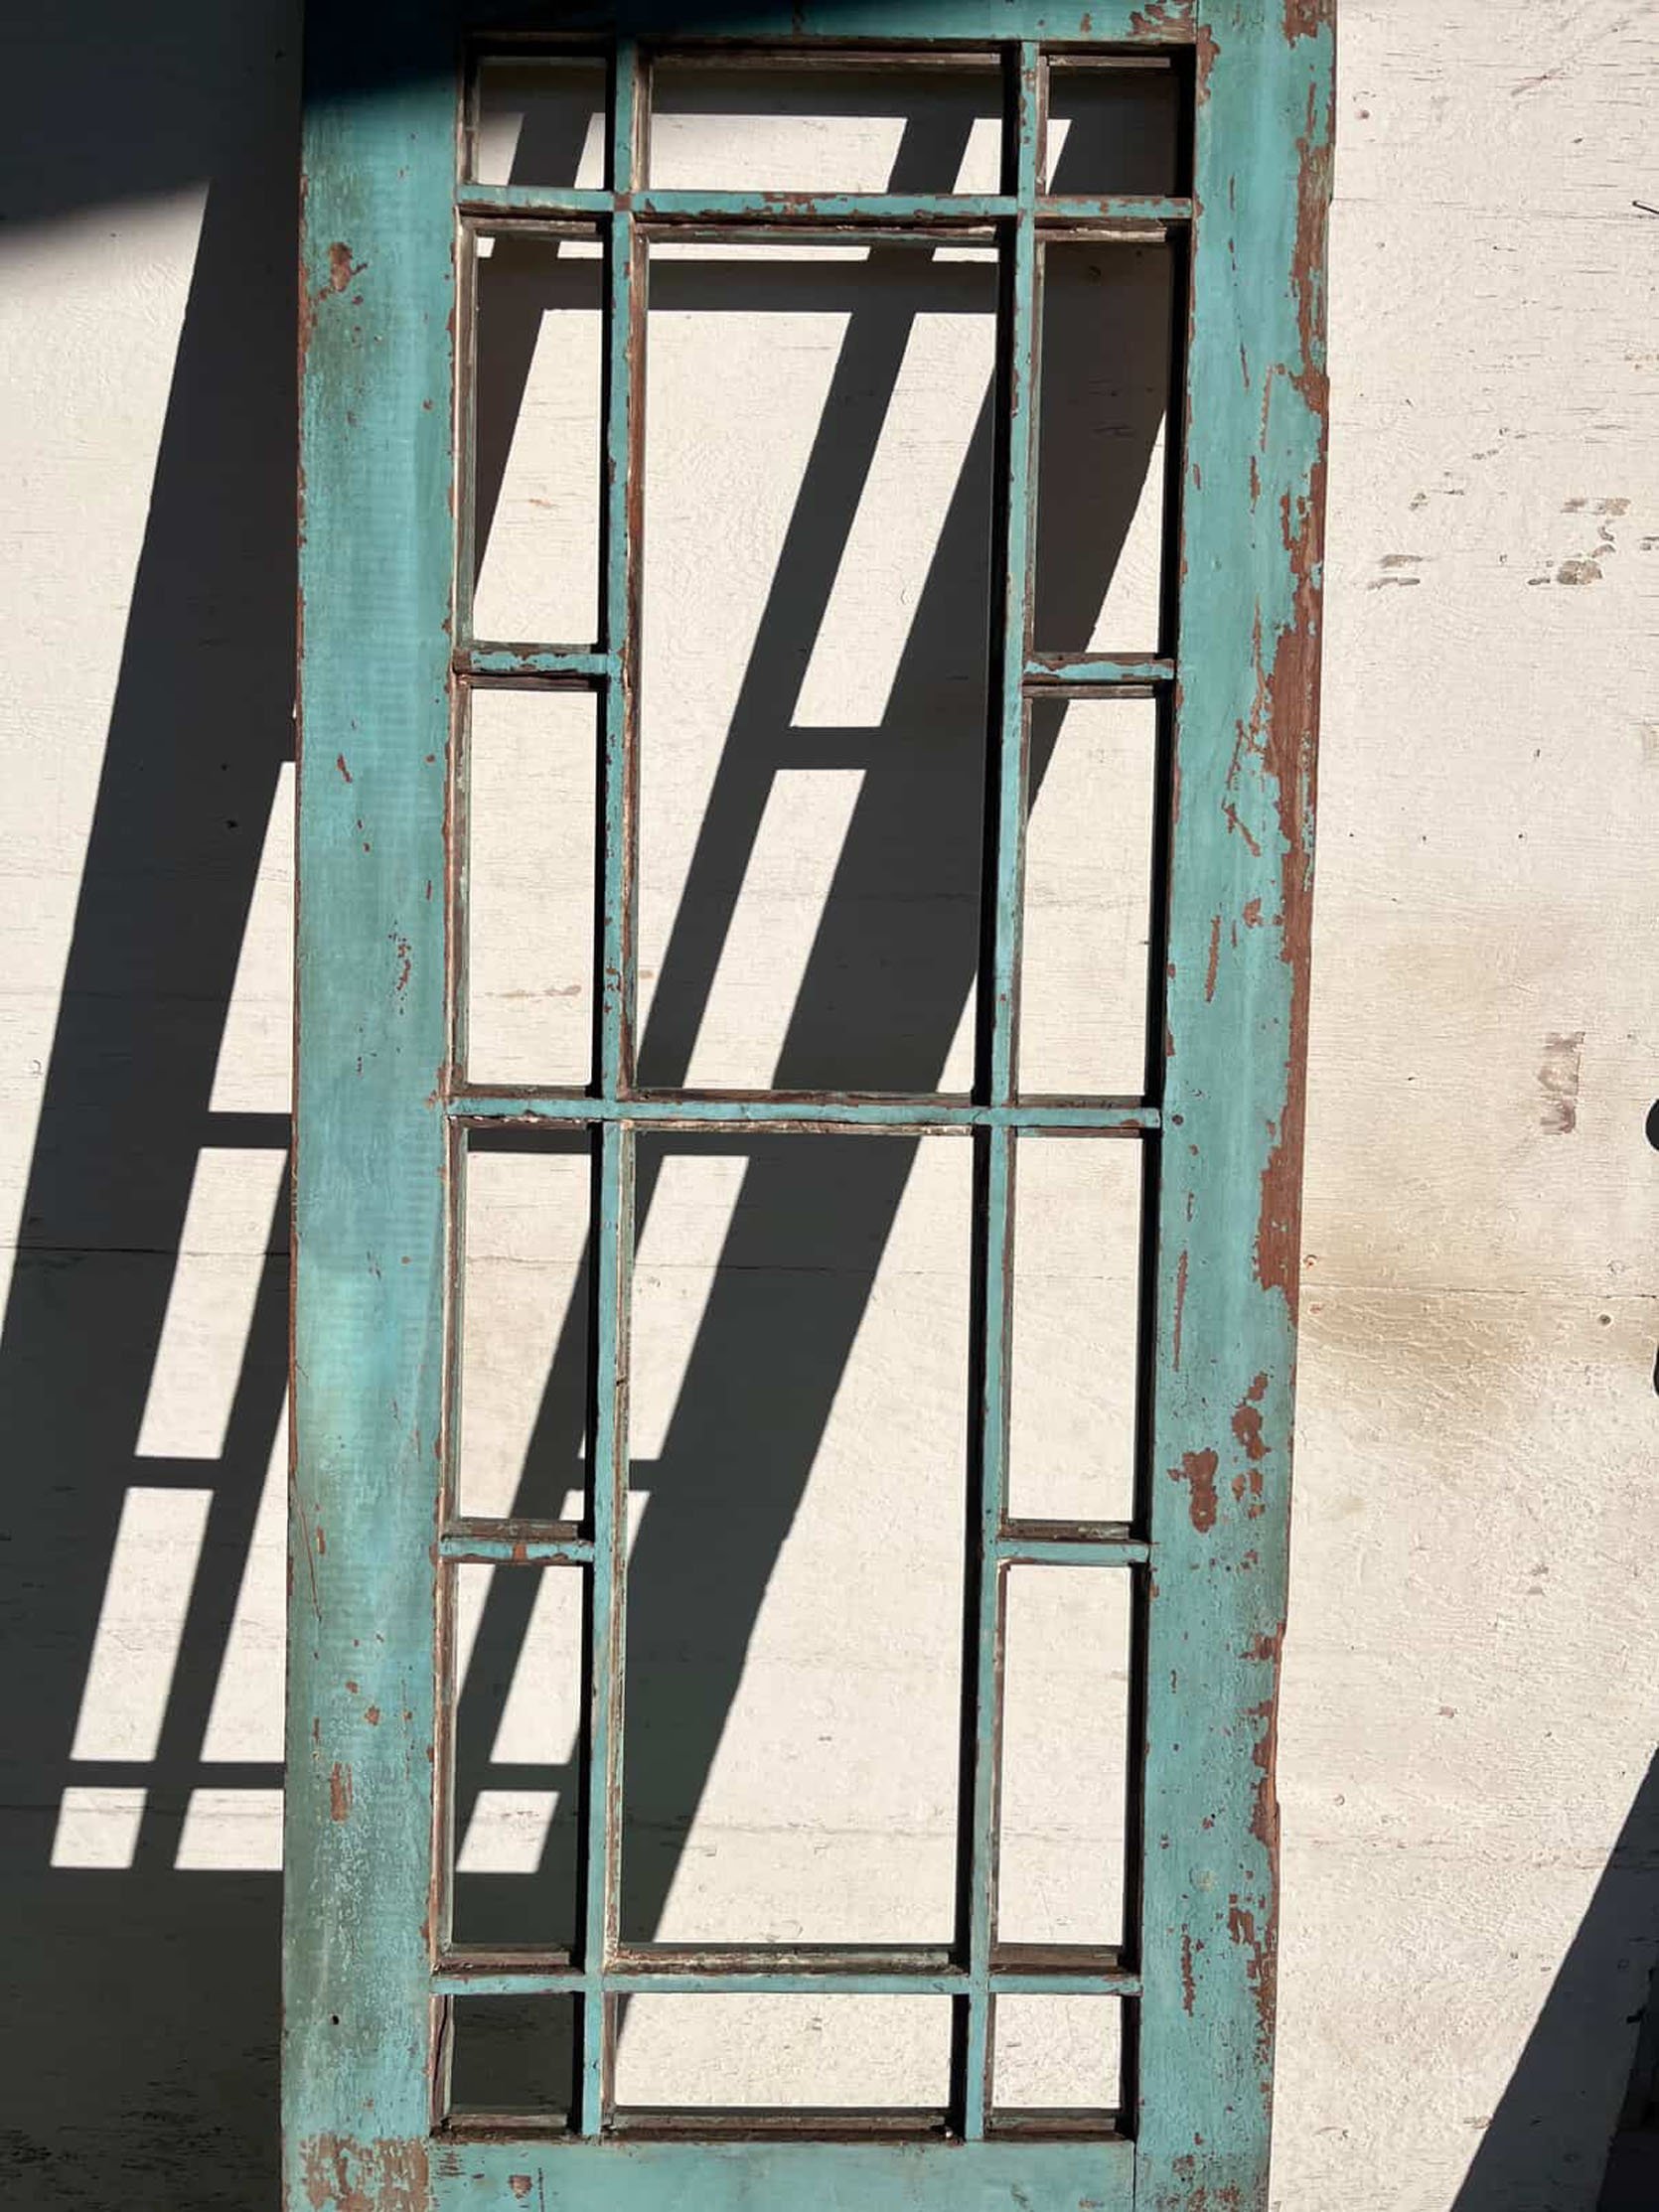
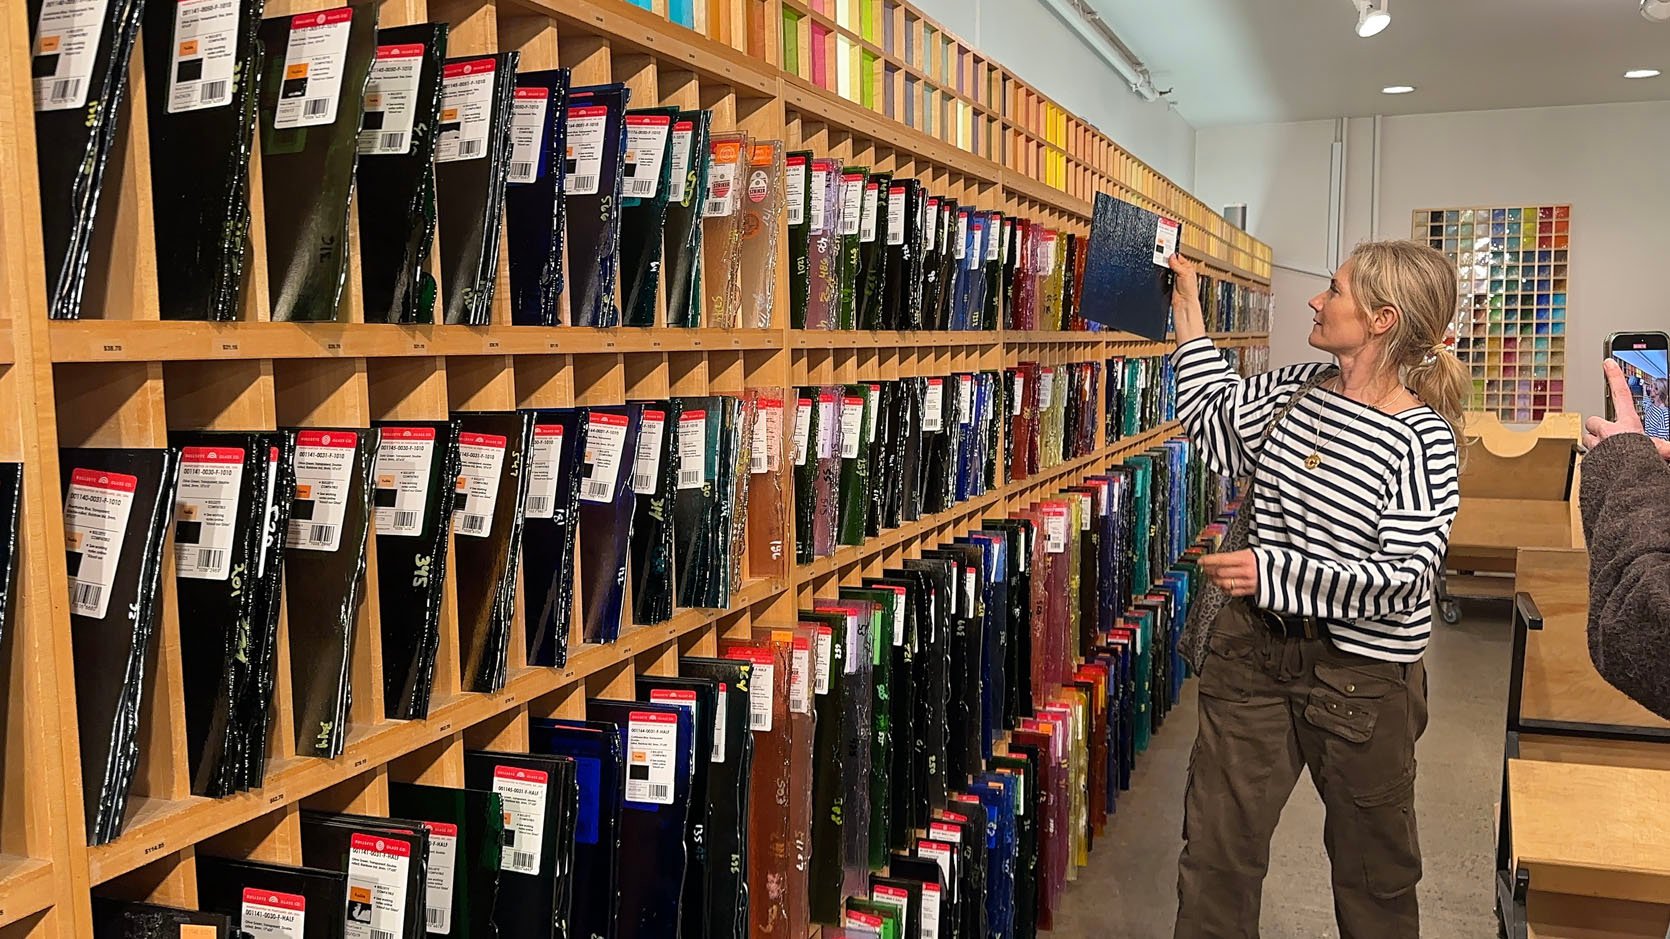
He had to scrape the putty off each one. The goal here is to “dip and strip” it to remove the original paint. Then we’ll patch it, sand it and paint it whatever color we want and then put new glass back in. But before we could choose the paint color, we had to choose the glass colors, which was very exciting.
Now, if you’re a longtime follower (bless you, thank you, I love you), you’ll remember the giant stained glass doors of The Fig House that I designed Judson Studio. So technically I’ve done this before, but it’s been 12 years, and honestly, I love stained glass so much that I wanted to do it again (but it felt a little strange in a mountain house, farmhouse, or river house). But this unique cottage could absolutely handle some colored glass.
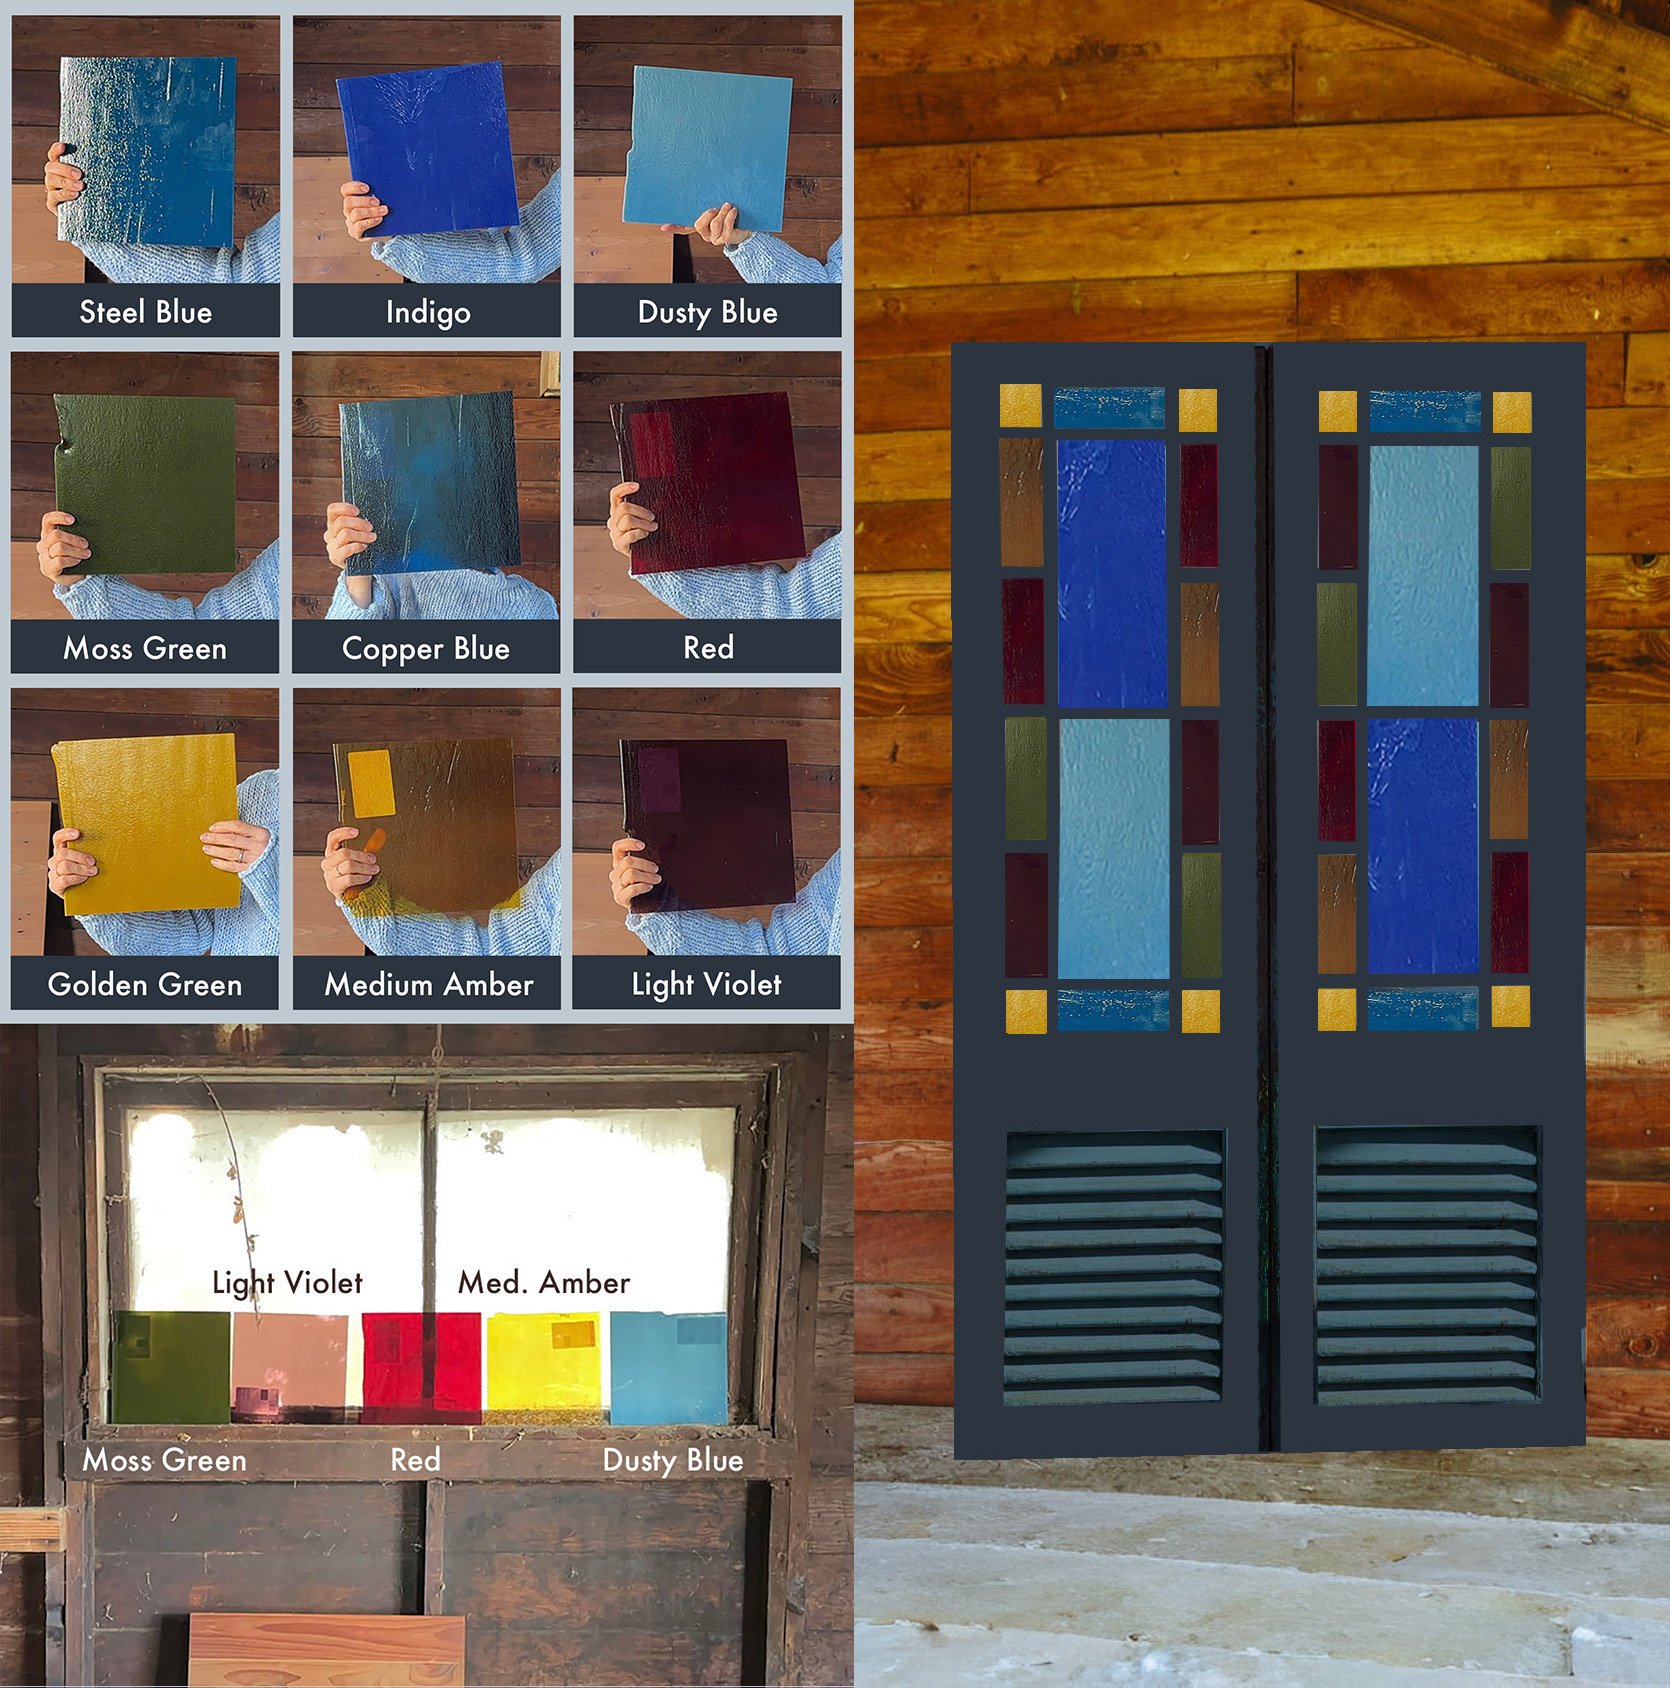
Choosing New Stained Glass Colors
so we went bullseye glasses In Portland, which is an incredible resource. They have a huge inventory, plus they make their own glass right there in their own factory. The vendors were amazing (so helpful and friendly, and no, they didn’t know who I was, so it wasn’t special treatment) and had such enthusiasm for the craft, full of little tidbits and tips and suggestions. That’s why I like Portland, by the way. The maker environment here is lively and nice, and everyone is very supportive of each other. I asked a lot of basic/stupid questions that were answered so well (I feel like in LA I was treated as some kind of competitor for trying my hand at a craft I had no right to attempt).
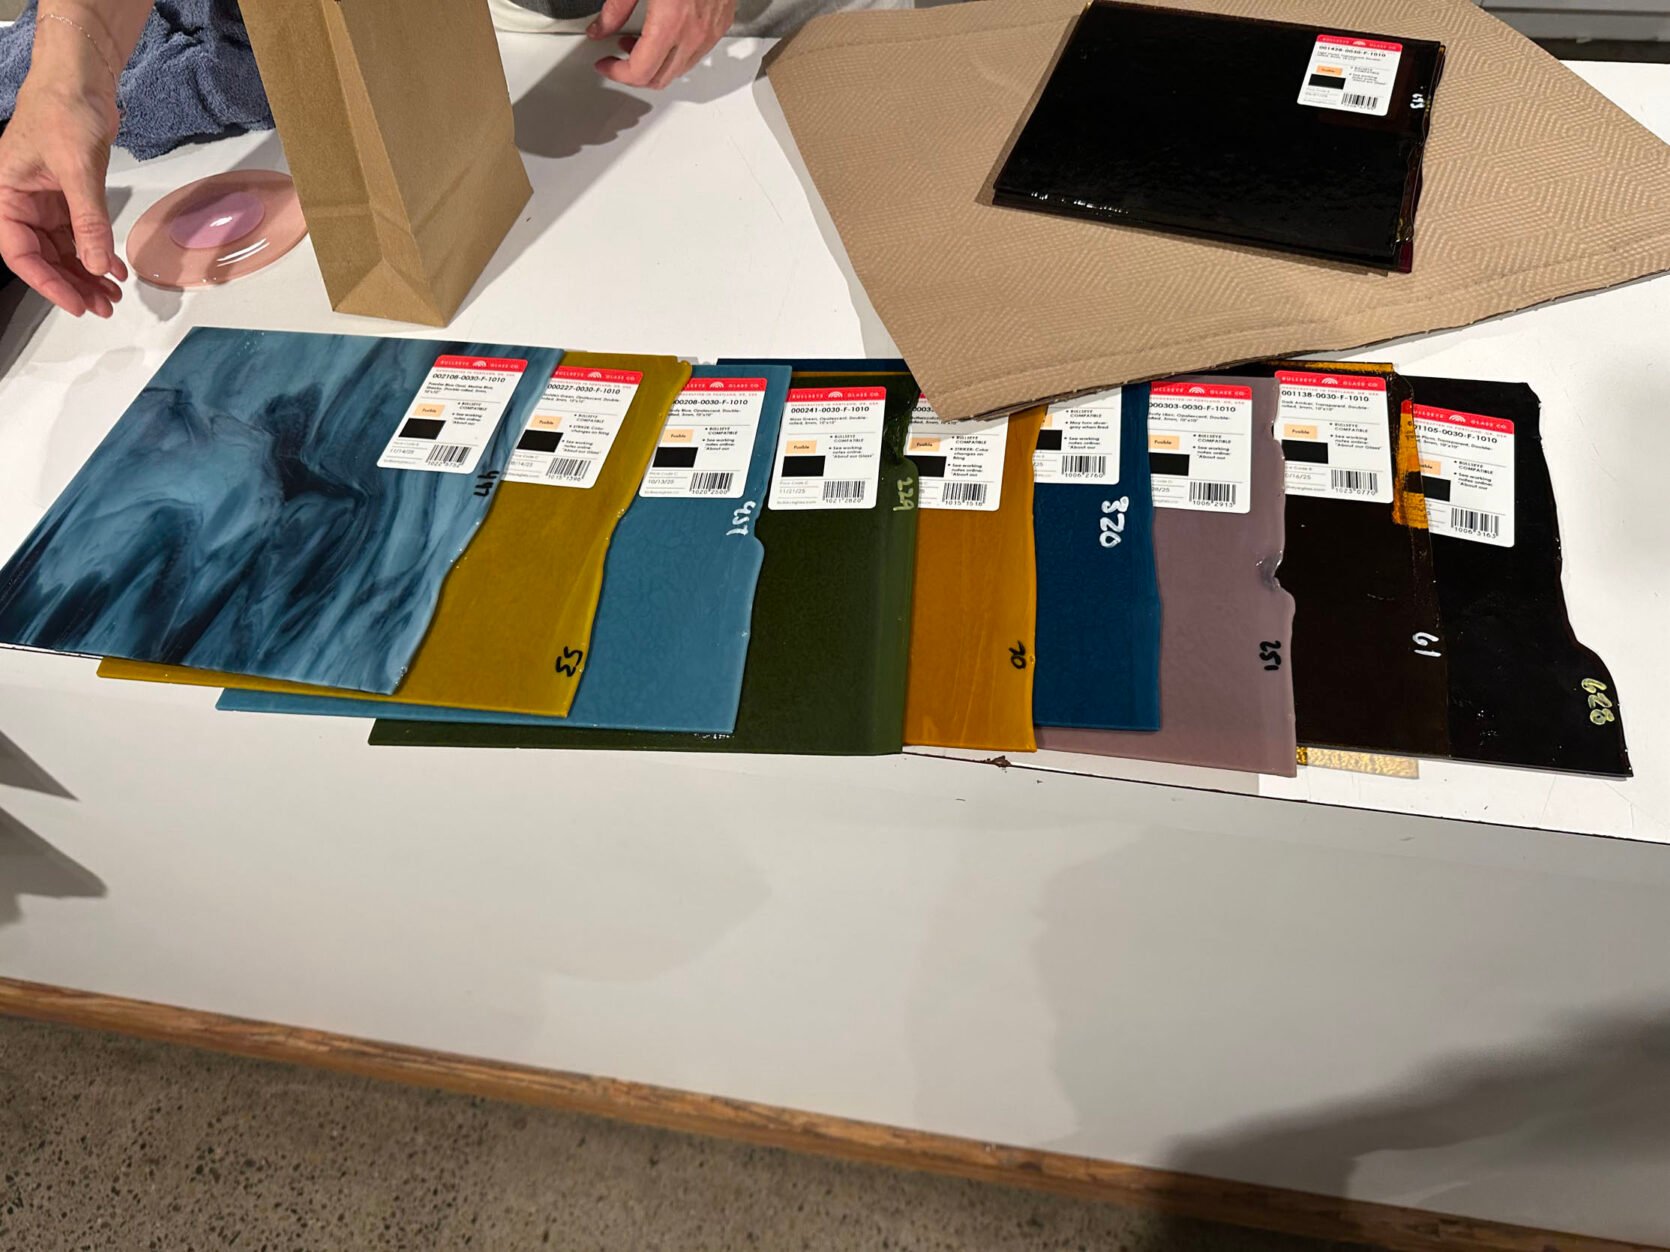
Marley and Grech asked me, “So how do you want to do it?” As if I had a “proper plan.” Ha. I was a kid in a candy store, and my “plan” was for my eyes and gut to cooperate and tell my hands what color to draw. This collaboration will likely take hours. 🙂
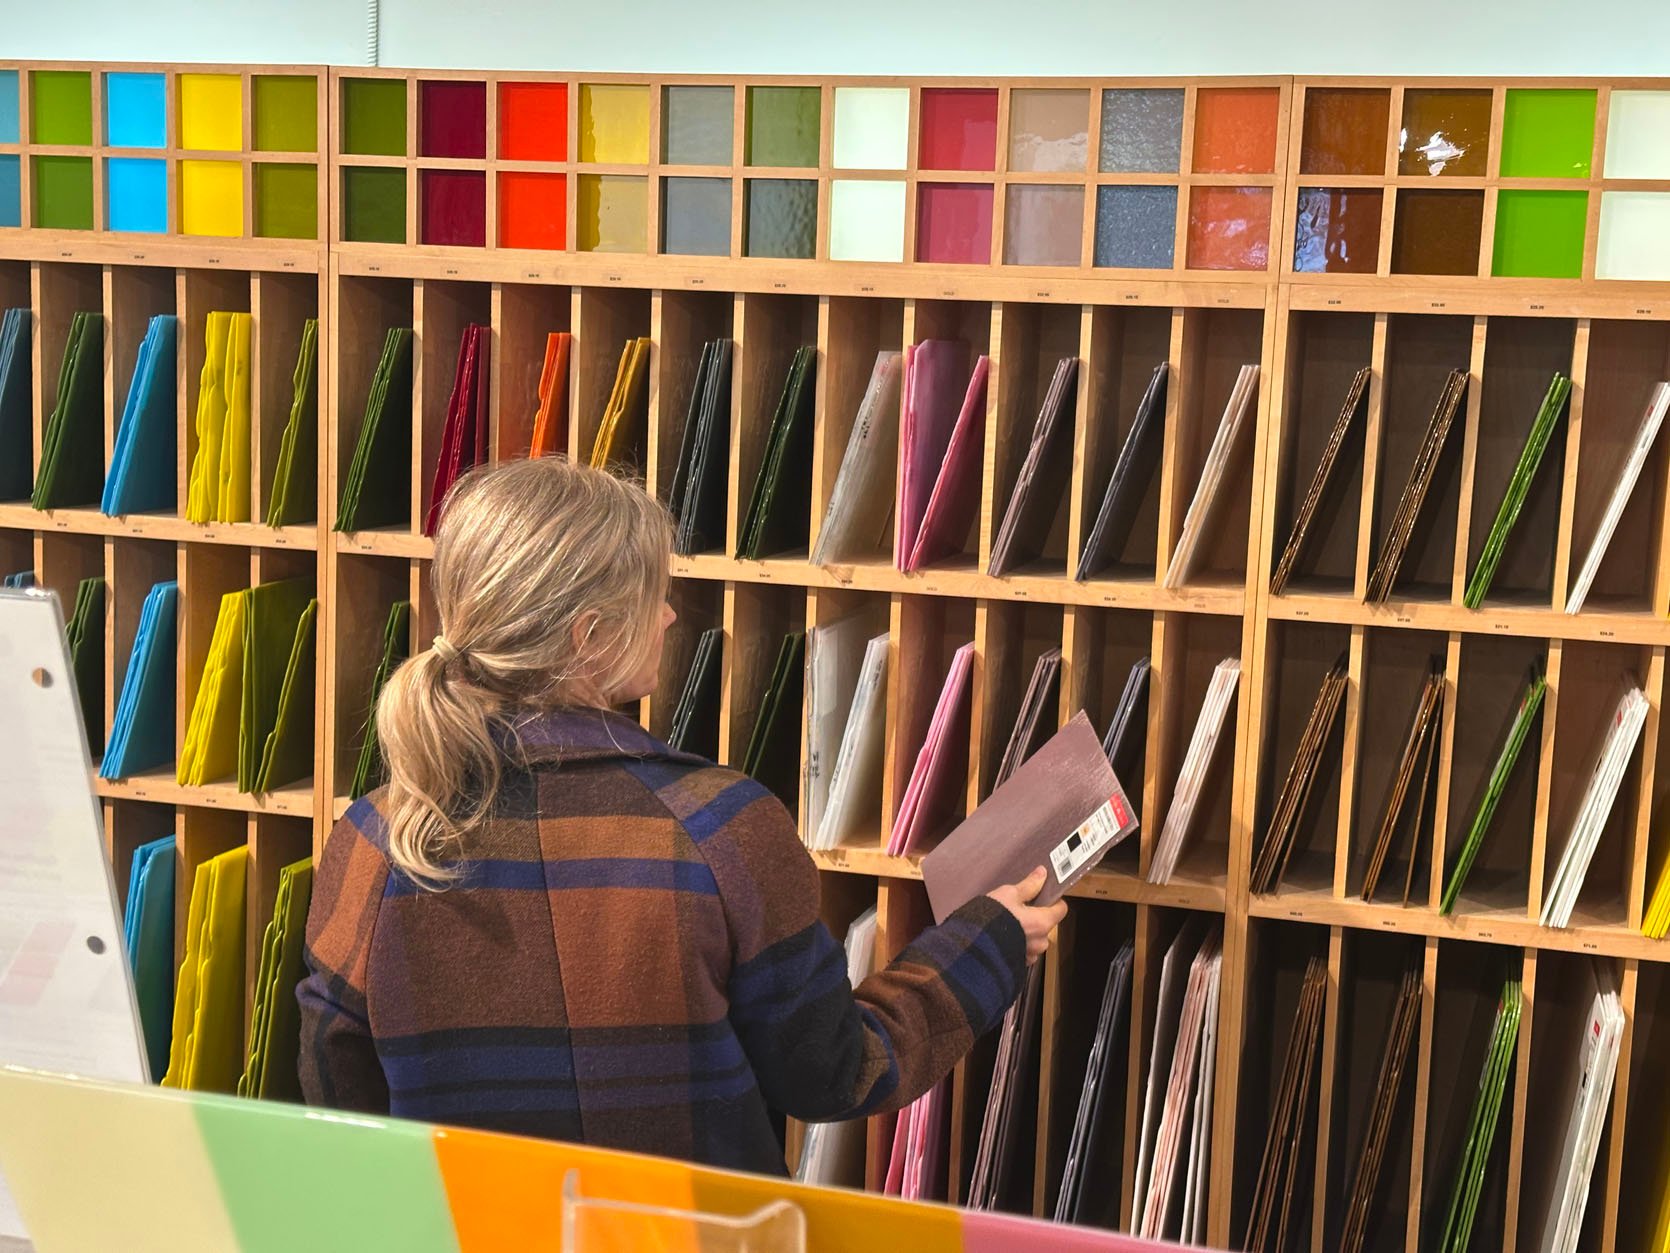
I achieved more than we needed and then played and played and played. Grech and Marley pulled out their favorite colors and arranged and rearranged them for a while. Nothing was off the table.

The biggest consideration here isn’t actually the color of the glass; Studies will take place in the room in the same manner both day and night. Some transparent colors appear black without any light. And some that were more opaque maintained their saturation regardless of light. I knew I didn’t want to go subtle (the whole point is to add color instead of obvious). And I definitely had cobalt, red and amber in mind (inspired by those original doors, actually). But I also love all the pink colors and greenery…
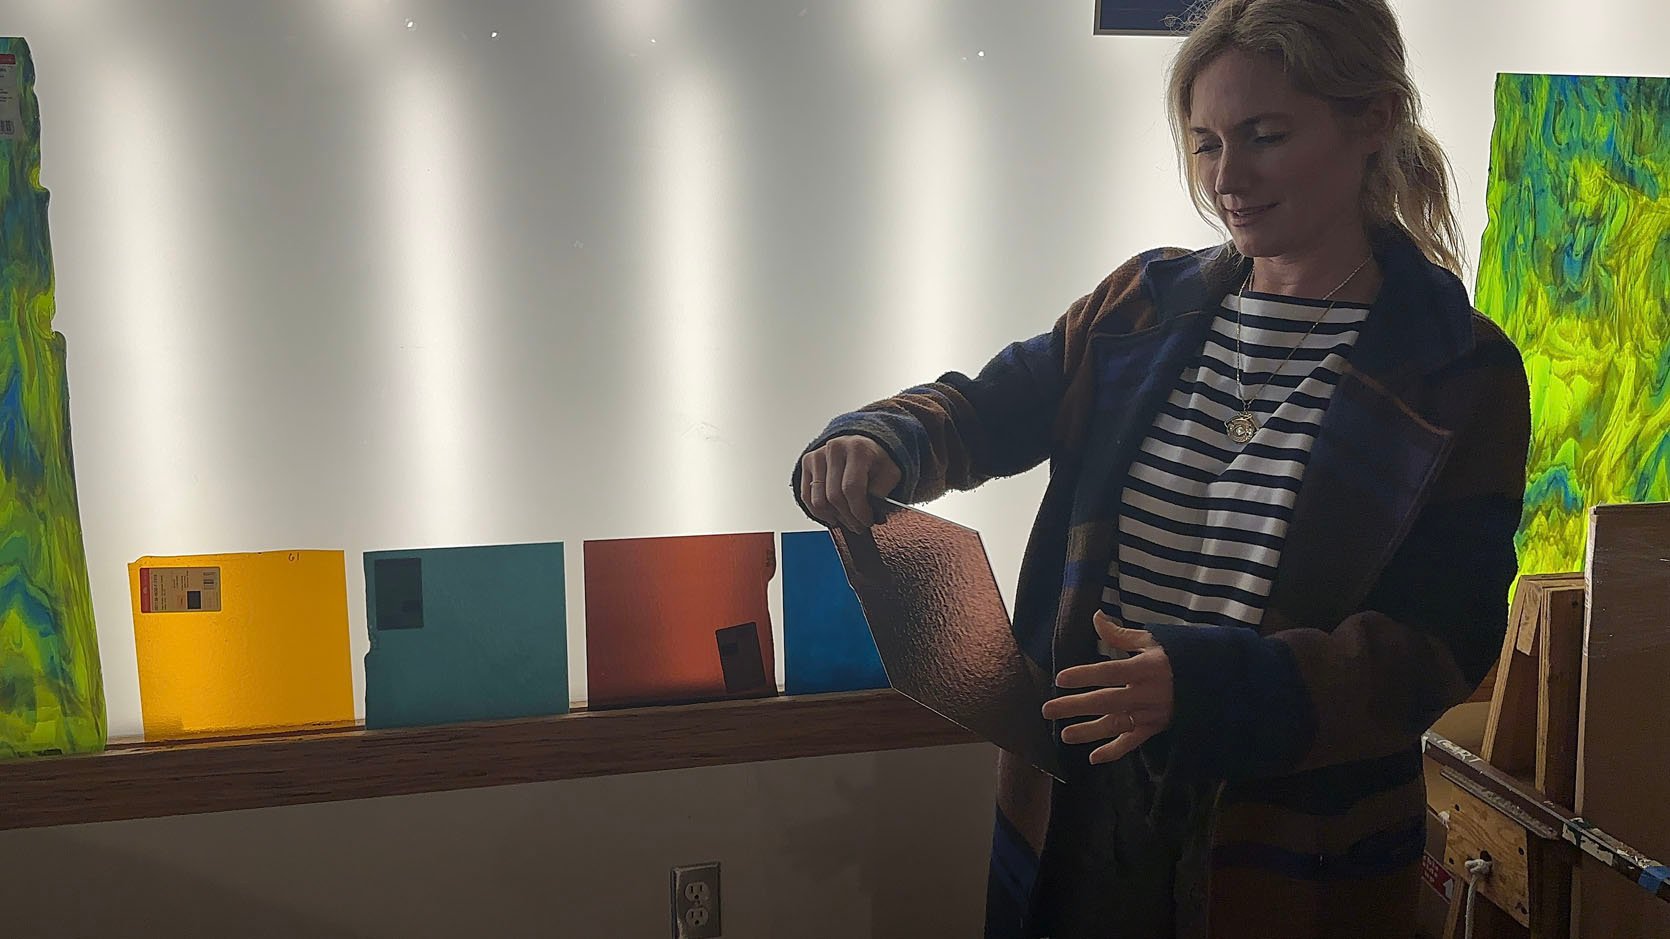
They had a big light wall that you could put in front of, but it’s not really accurate to how your eyes would see them. This is very specific to your project.
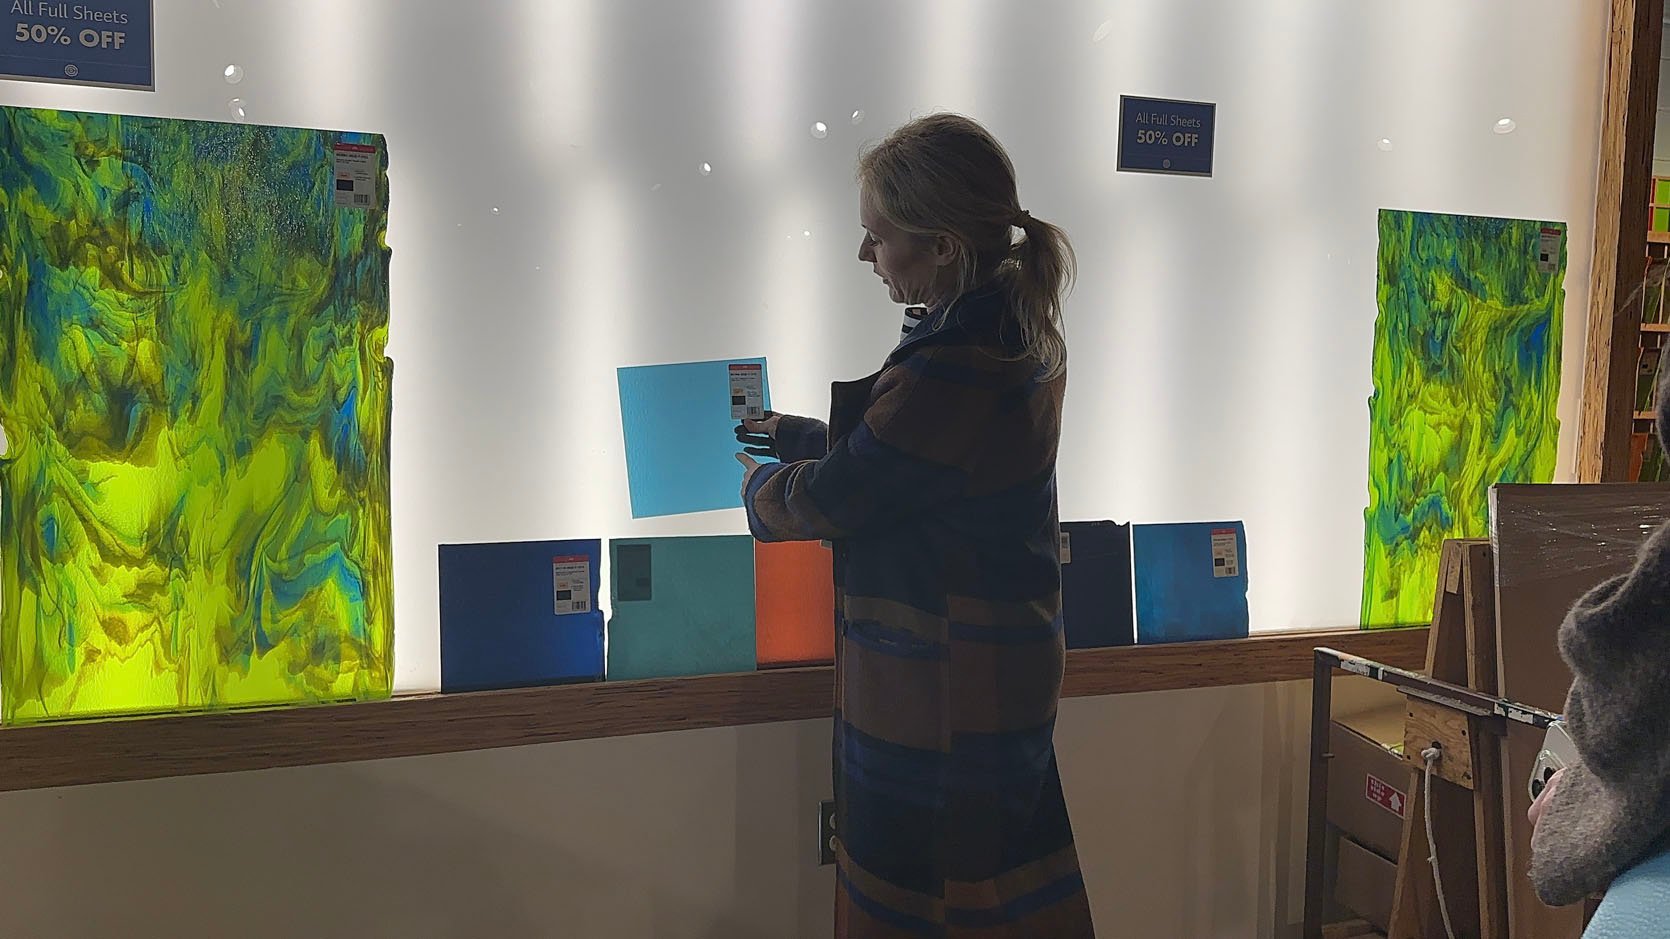
We bought a lot to try out in the room. We knew we needed to see exactly how it would look vertically in the light that would eventually come to life. There is a large window at the front of the room, but technically, there is no natural light inside. Very quickly: We actually changed the whole layout to put it in front of the other window that we planned to remove, and I’ll show you that version another time, but for some reason it didn’t work out – stay tuned.
holding a mirror in the room
So I stood exactly where the future doors would be and held up each plank so we could take a picture and plug them into the door configuration.
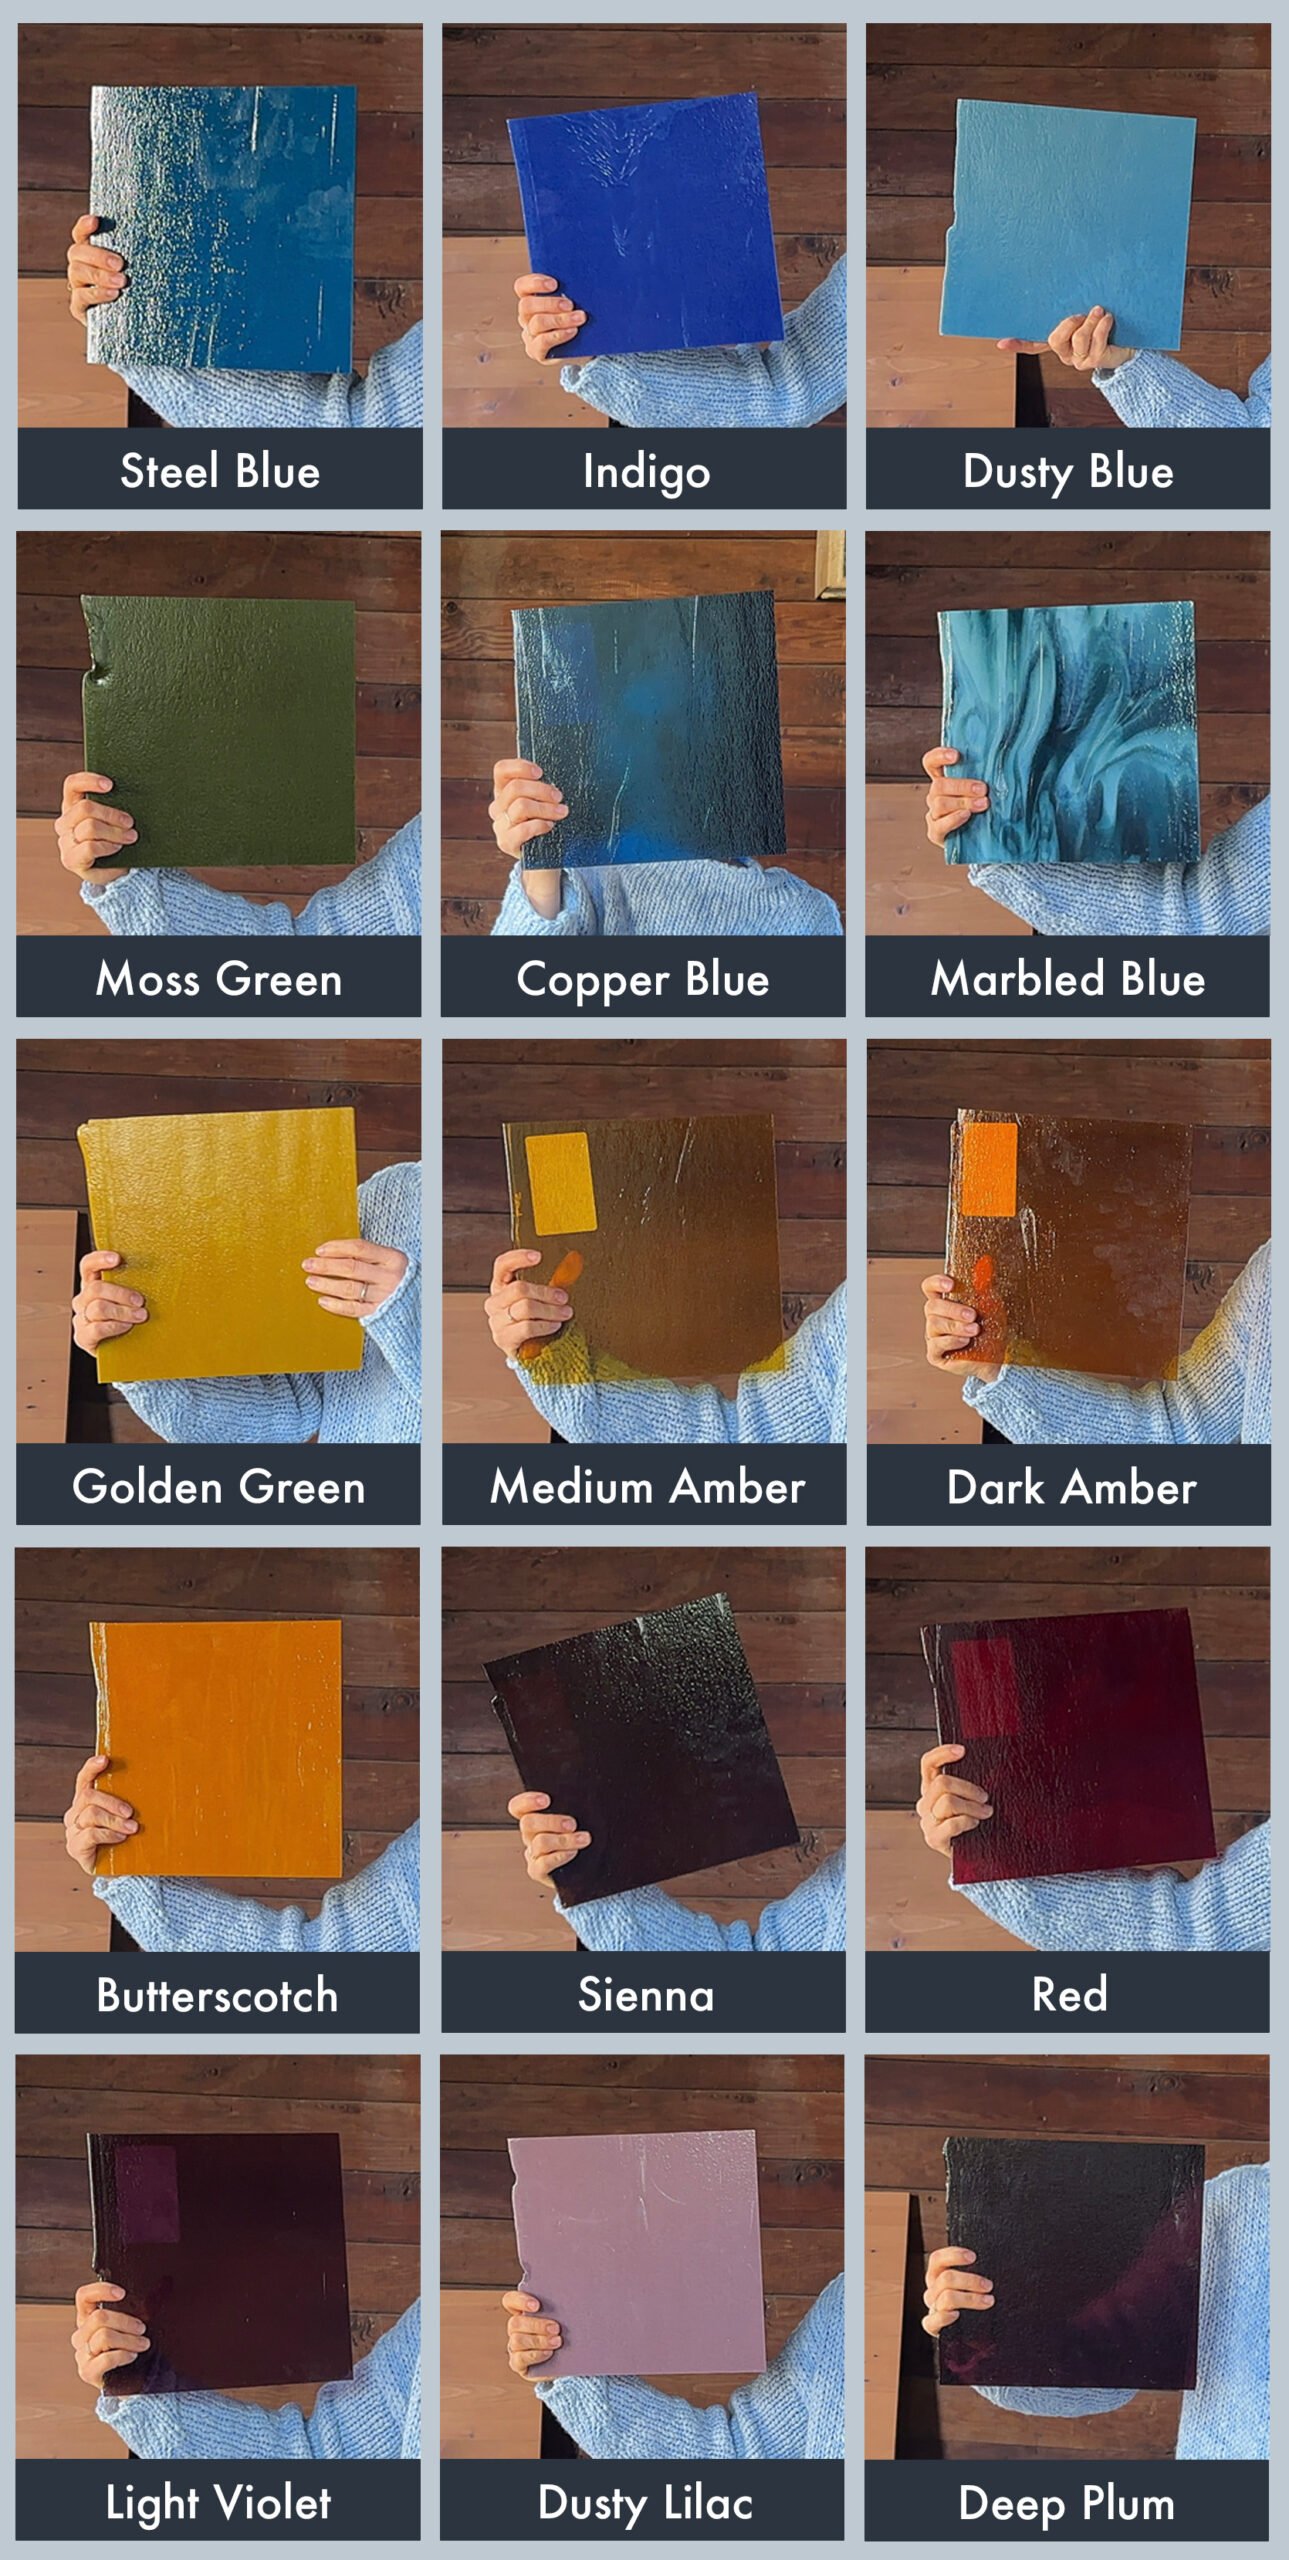
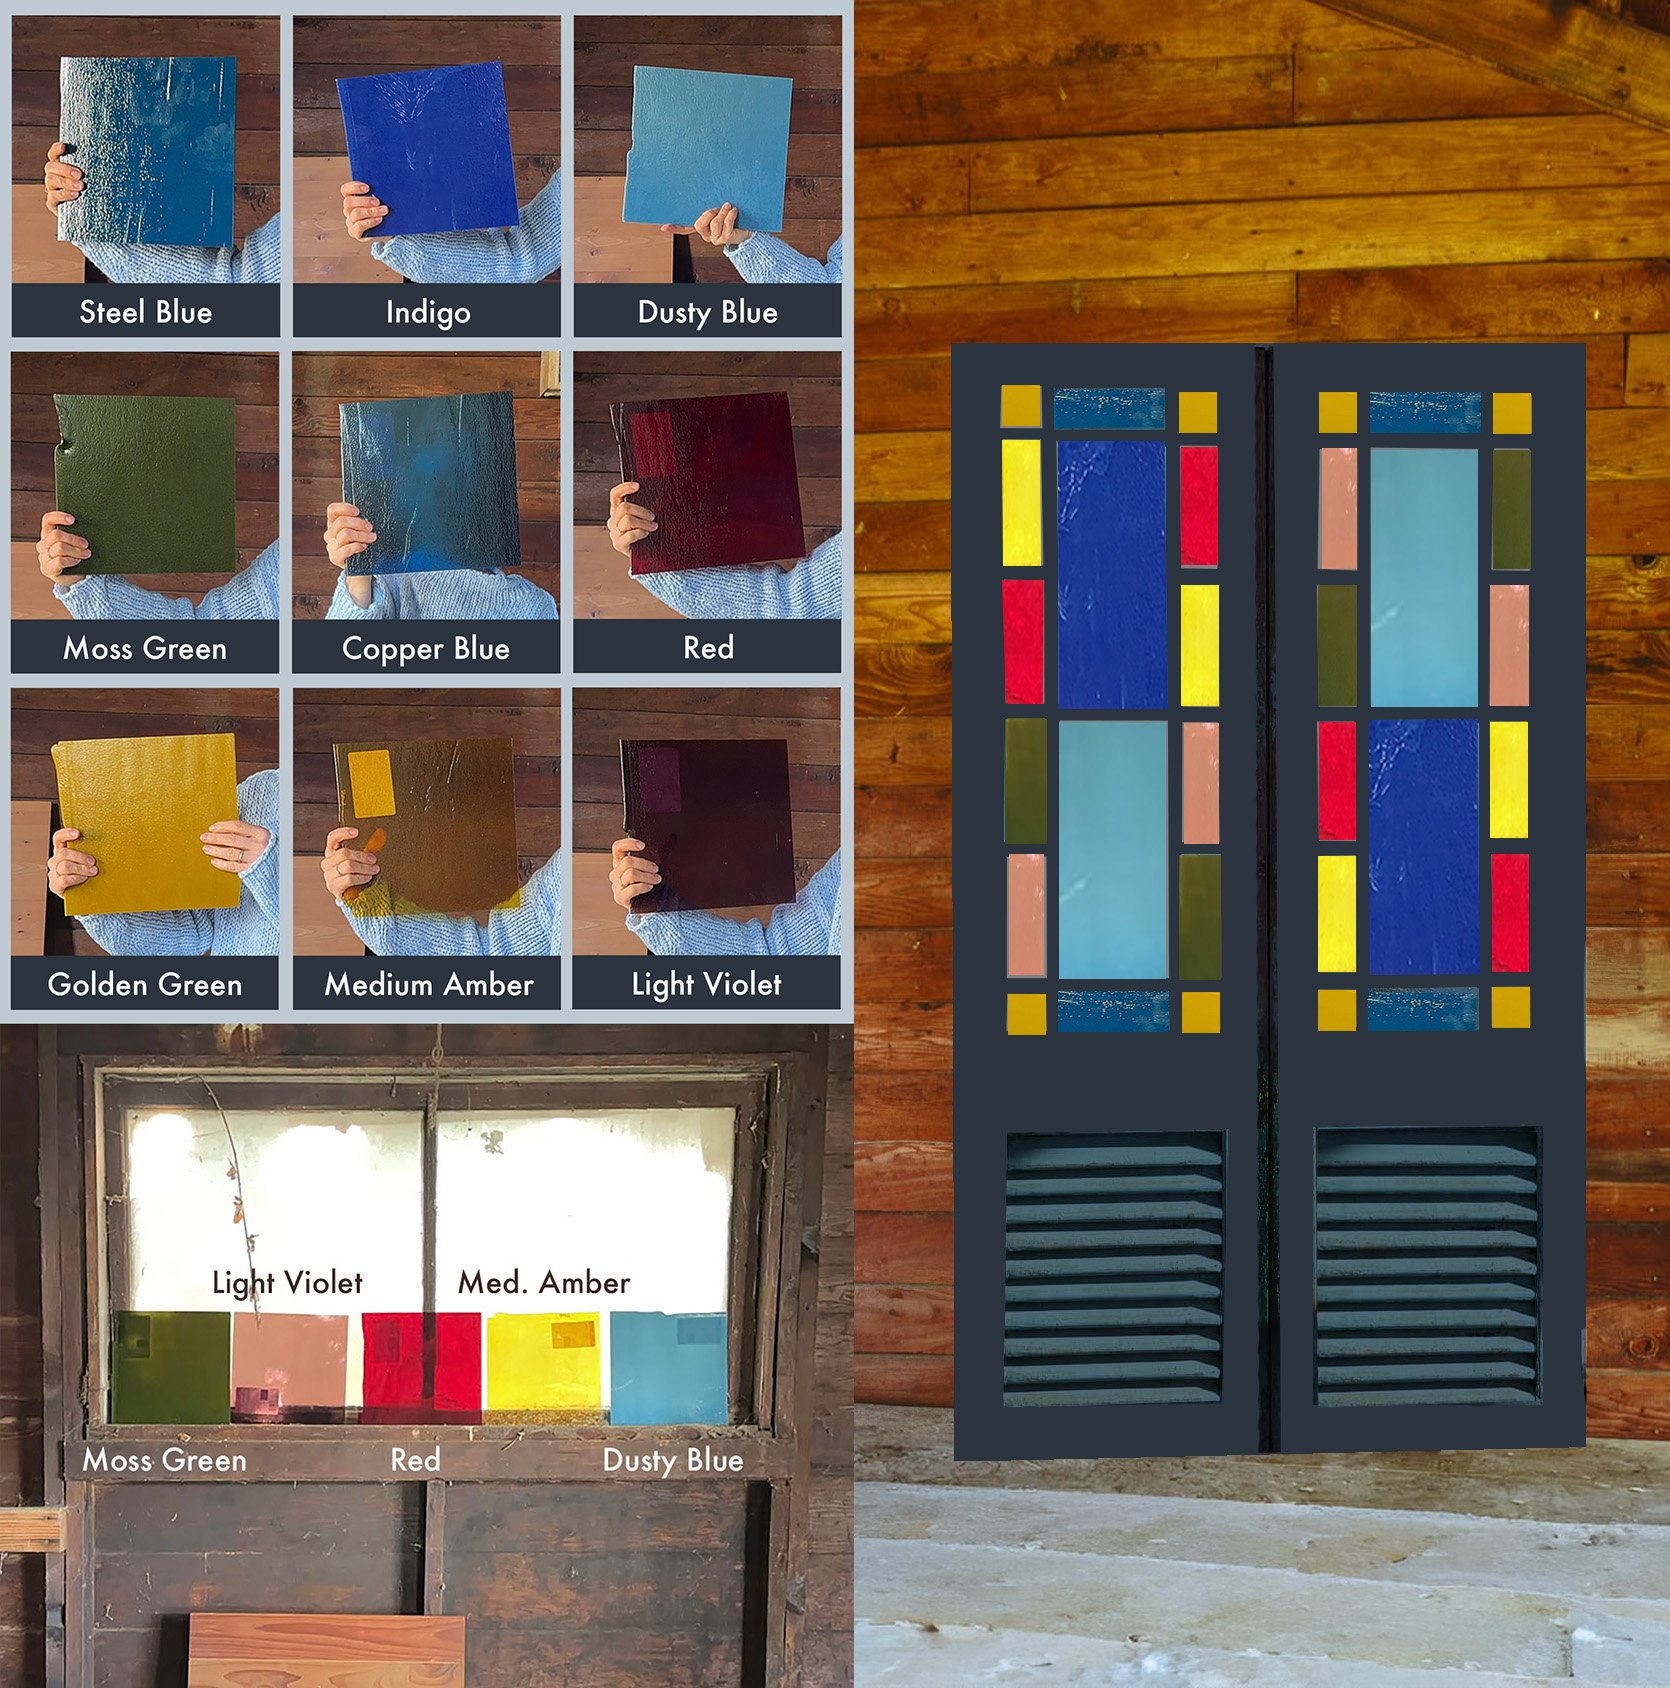
In the space, we decided our least favorite glass panels were Dark Amber (medium amber felt too uniform and more classic), Butterscotch (too orange and vibrant, and golden green was the better opaque warm shade), Sienna (too brown and read as black without any light), Dusty Lilac (it was pretty but dull in person), and Deep Plum (too dark and the light purple felt like a better fit).
In our mock-up, we focused on playing with other colors that we were most attracted to. But one thing to note is that glass looks very different when placed against a wood-paneled wall (like above) and in front of a window. For example, it is extremely difficult to tell the difference between a light purple and a red unless there is a lot of light shining on the glass. This is when we seriously considered relocating the entire structure to face this window, but for reasons I’ll explain in a separate post, we decided to stick with the original plan.
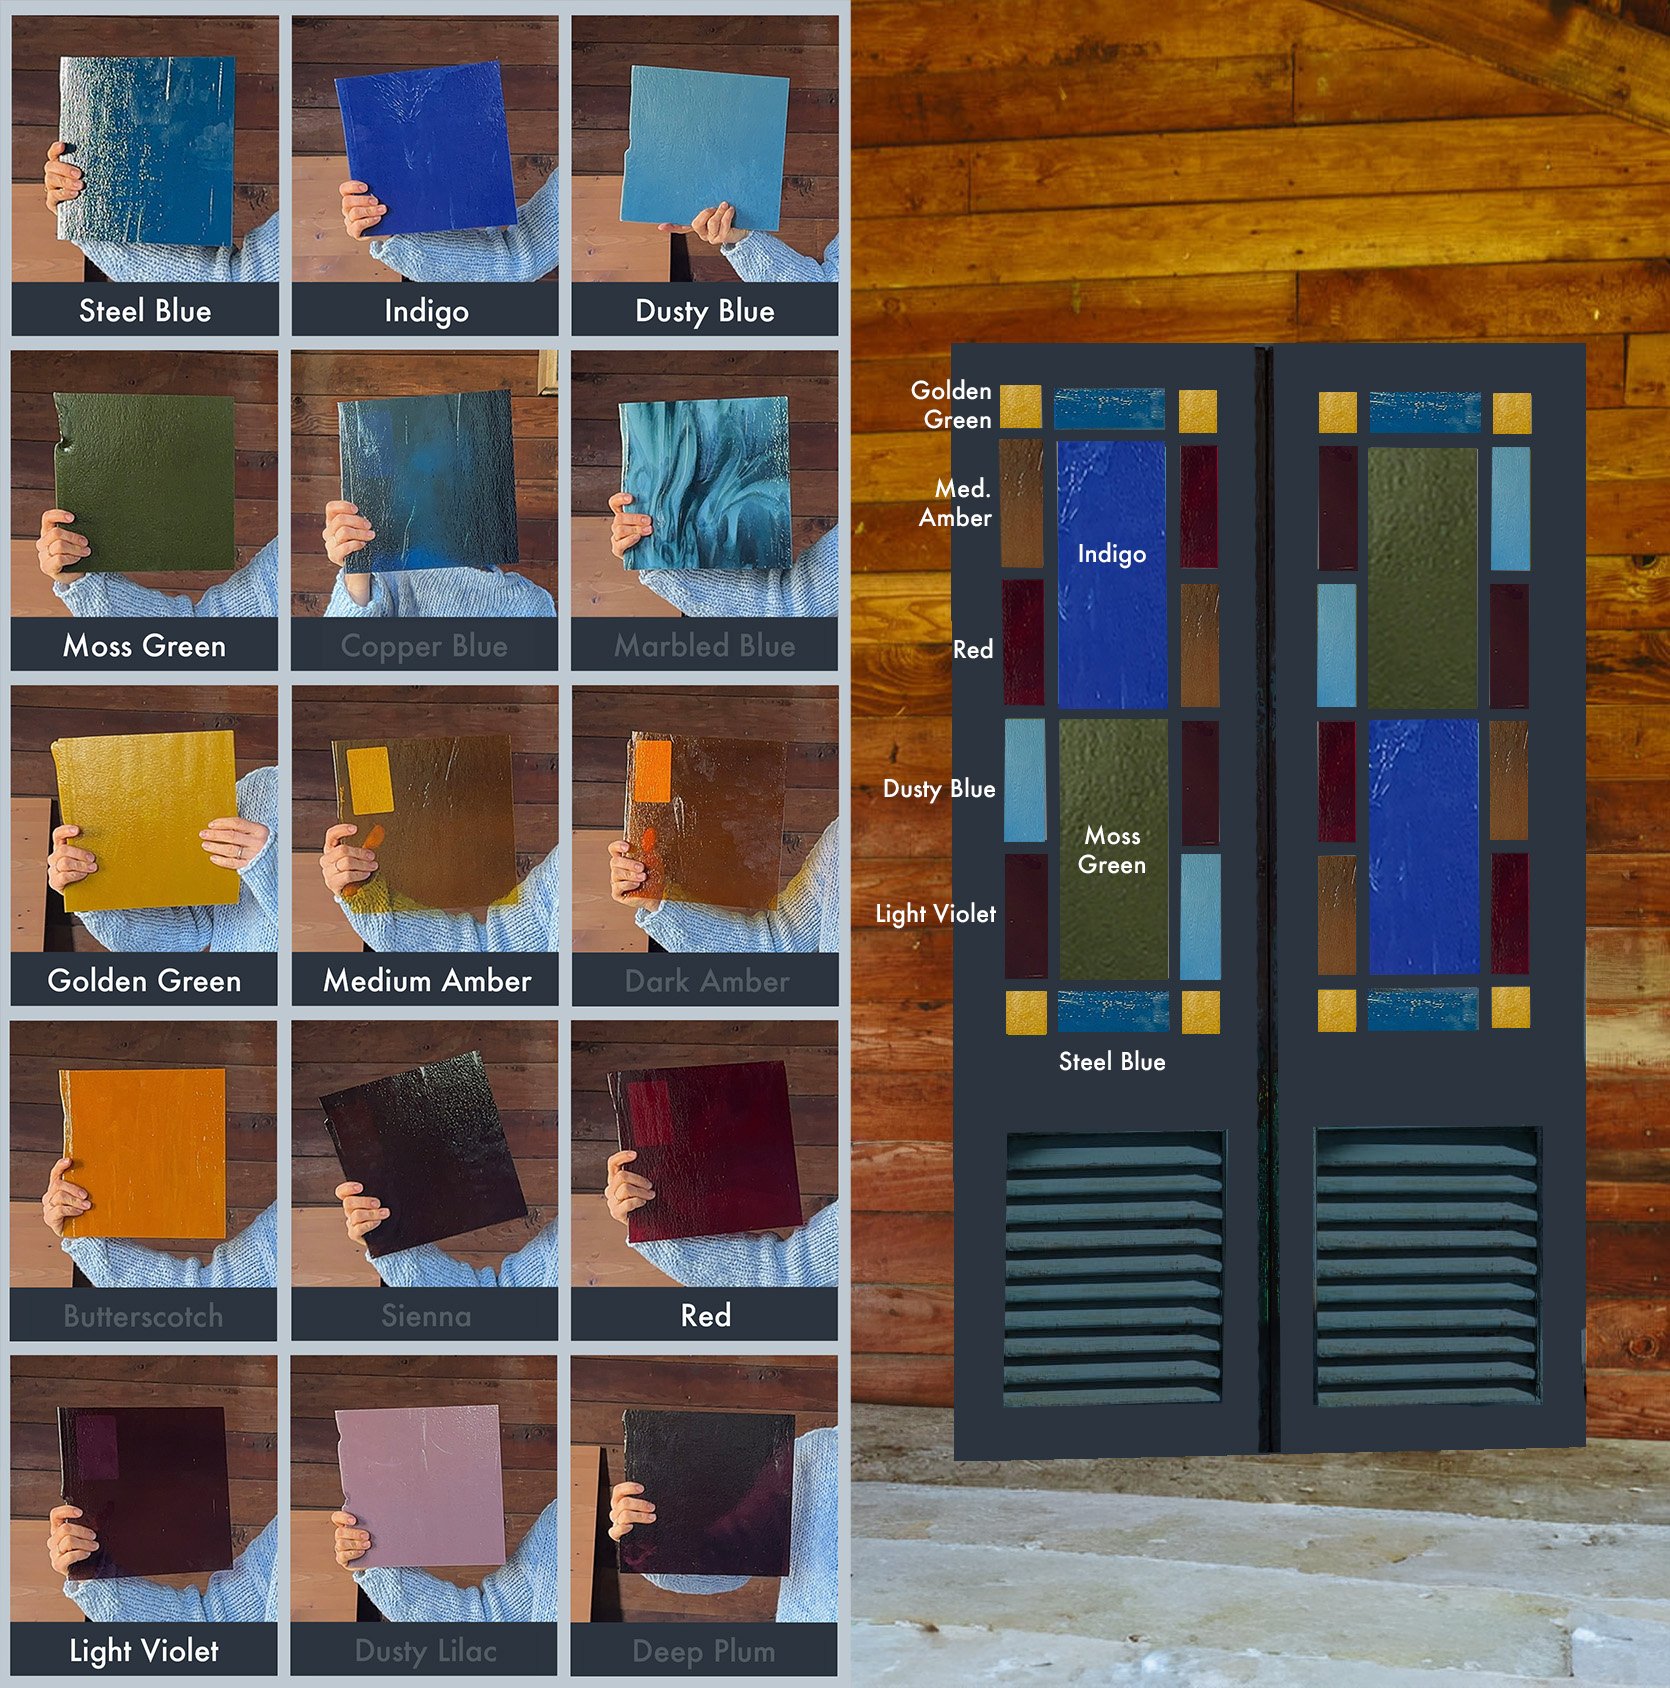
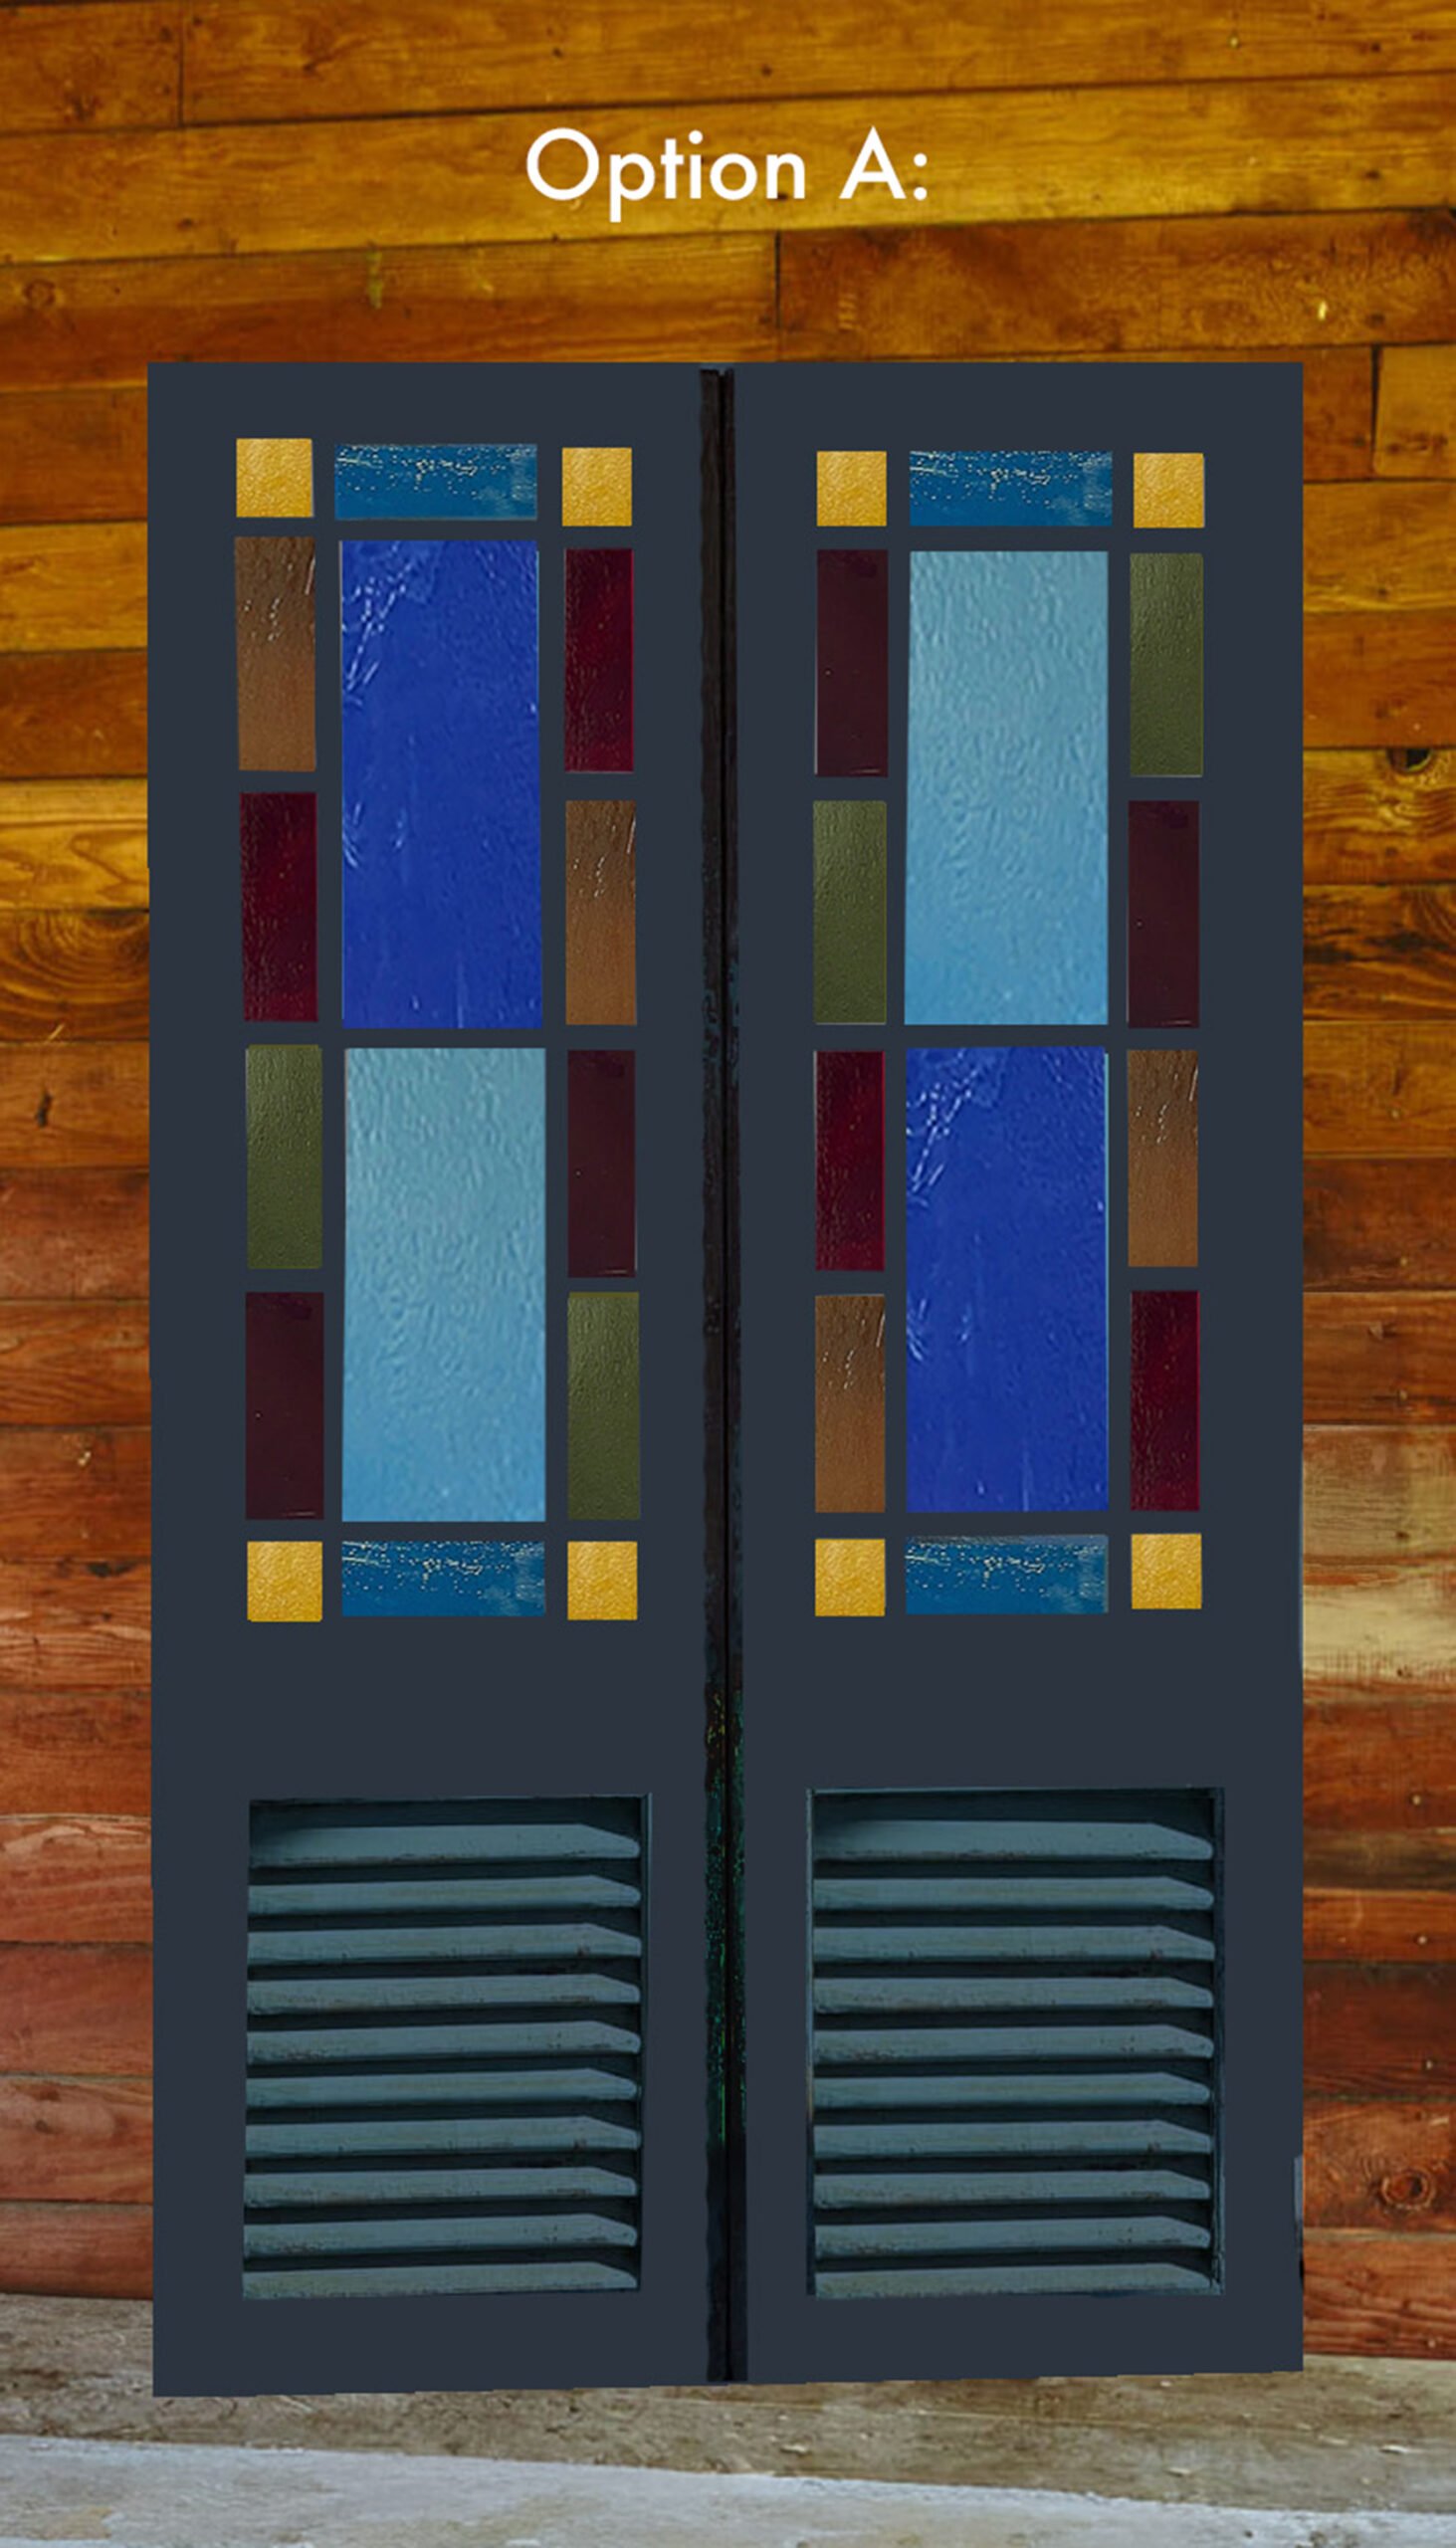
Option A:
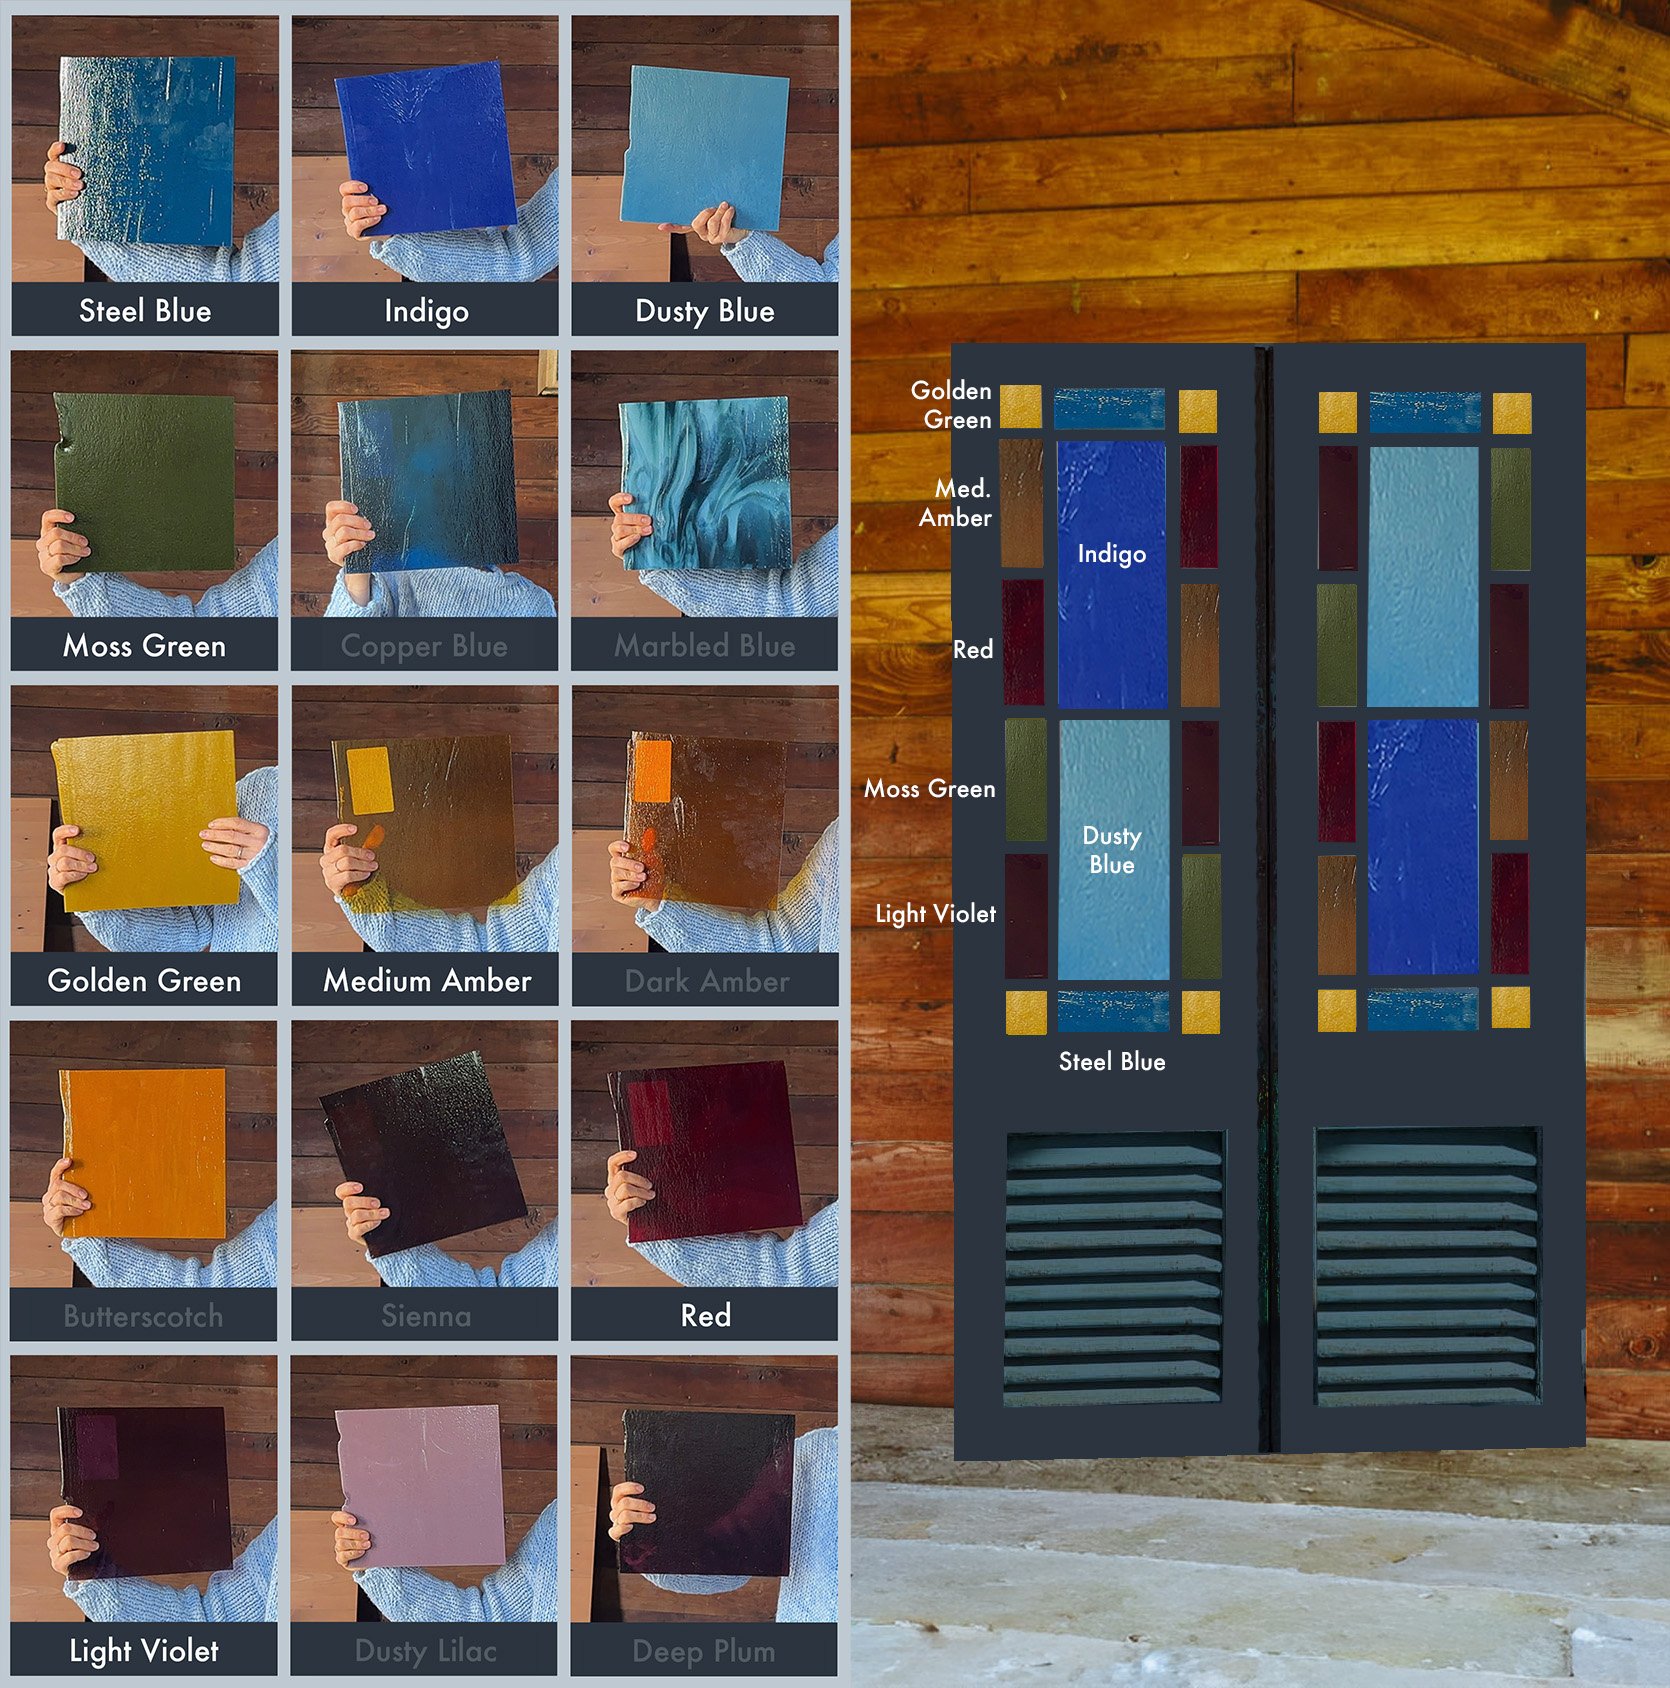
We like it a lot, it sounds nice and balanced. But below the midline it is quite blue.
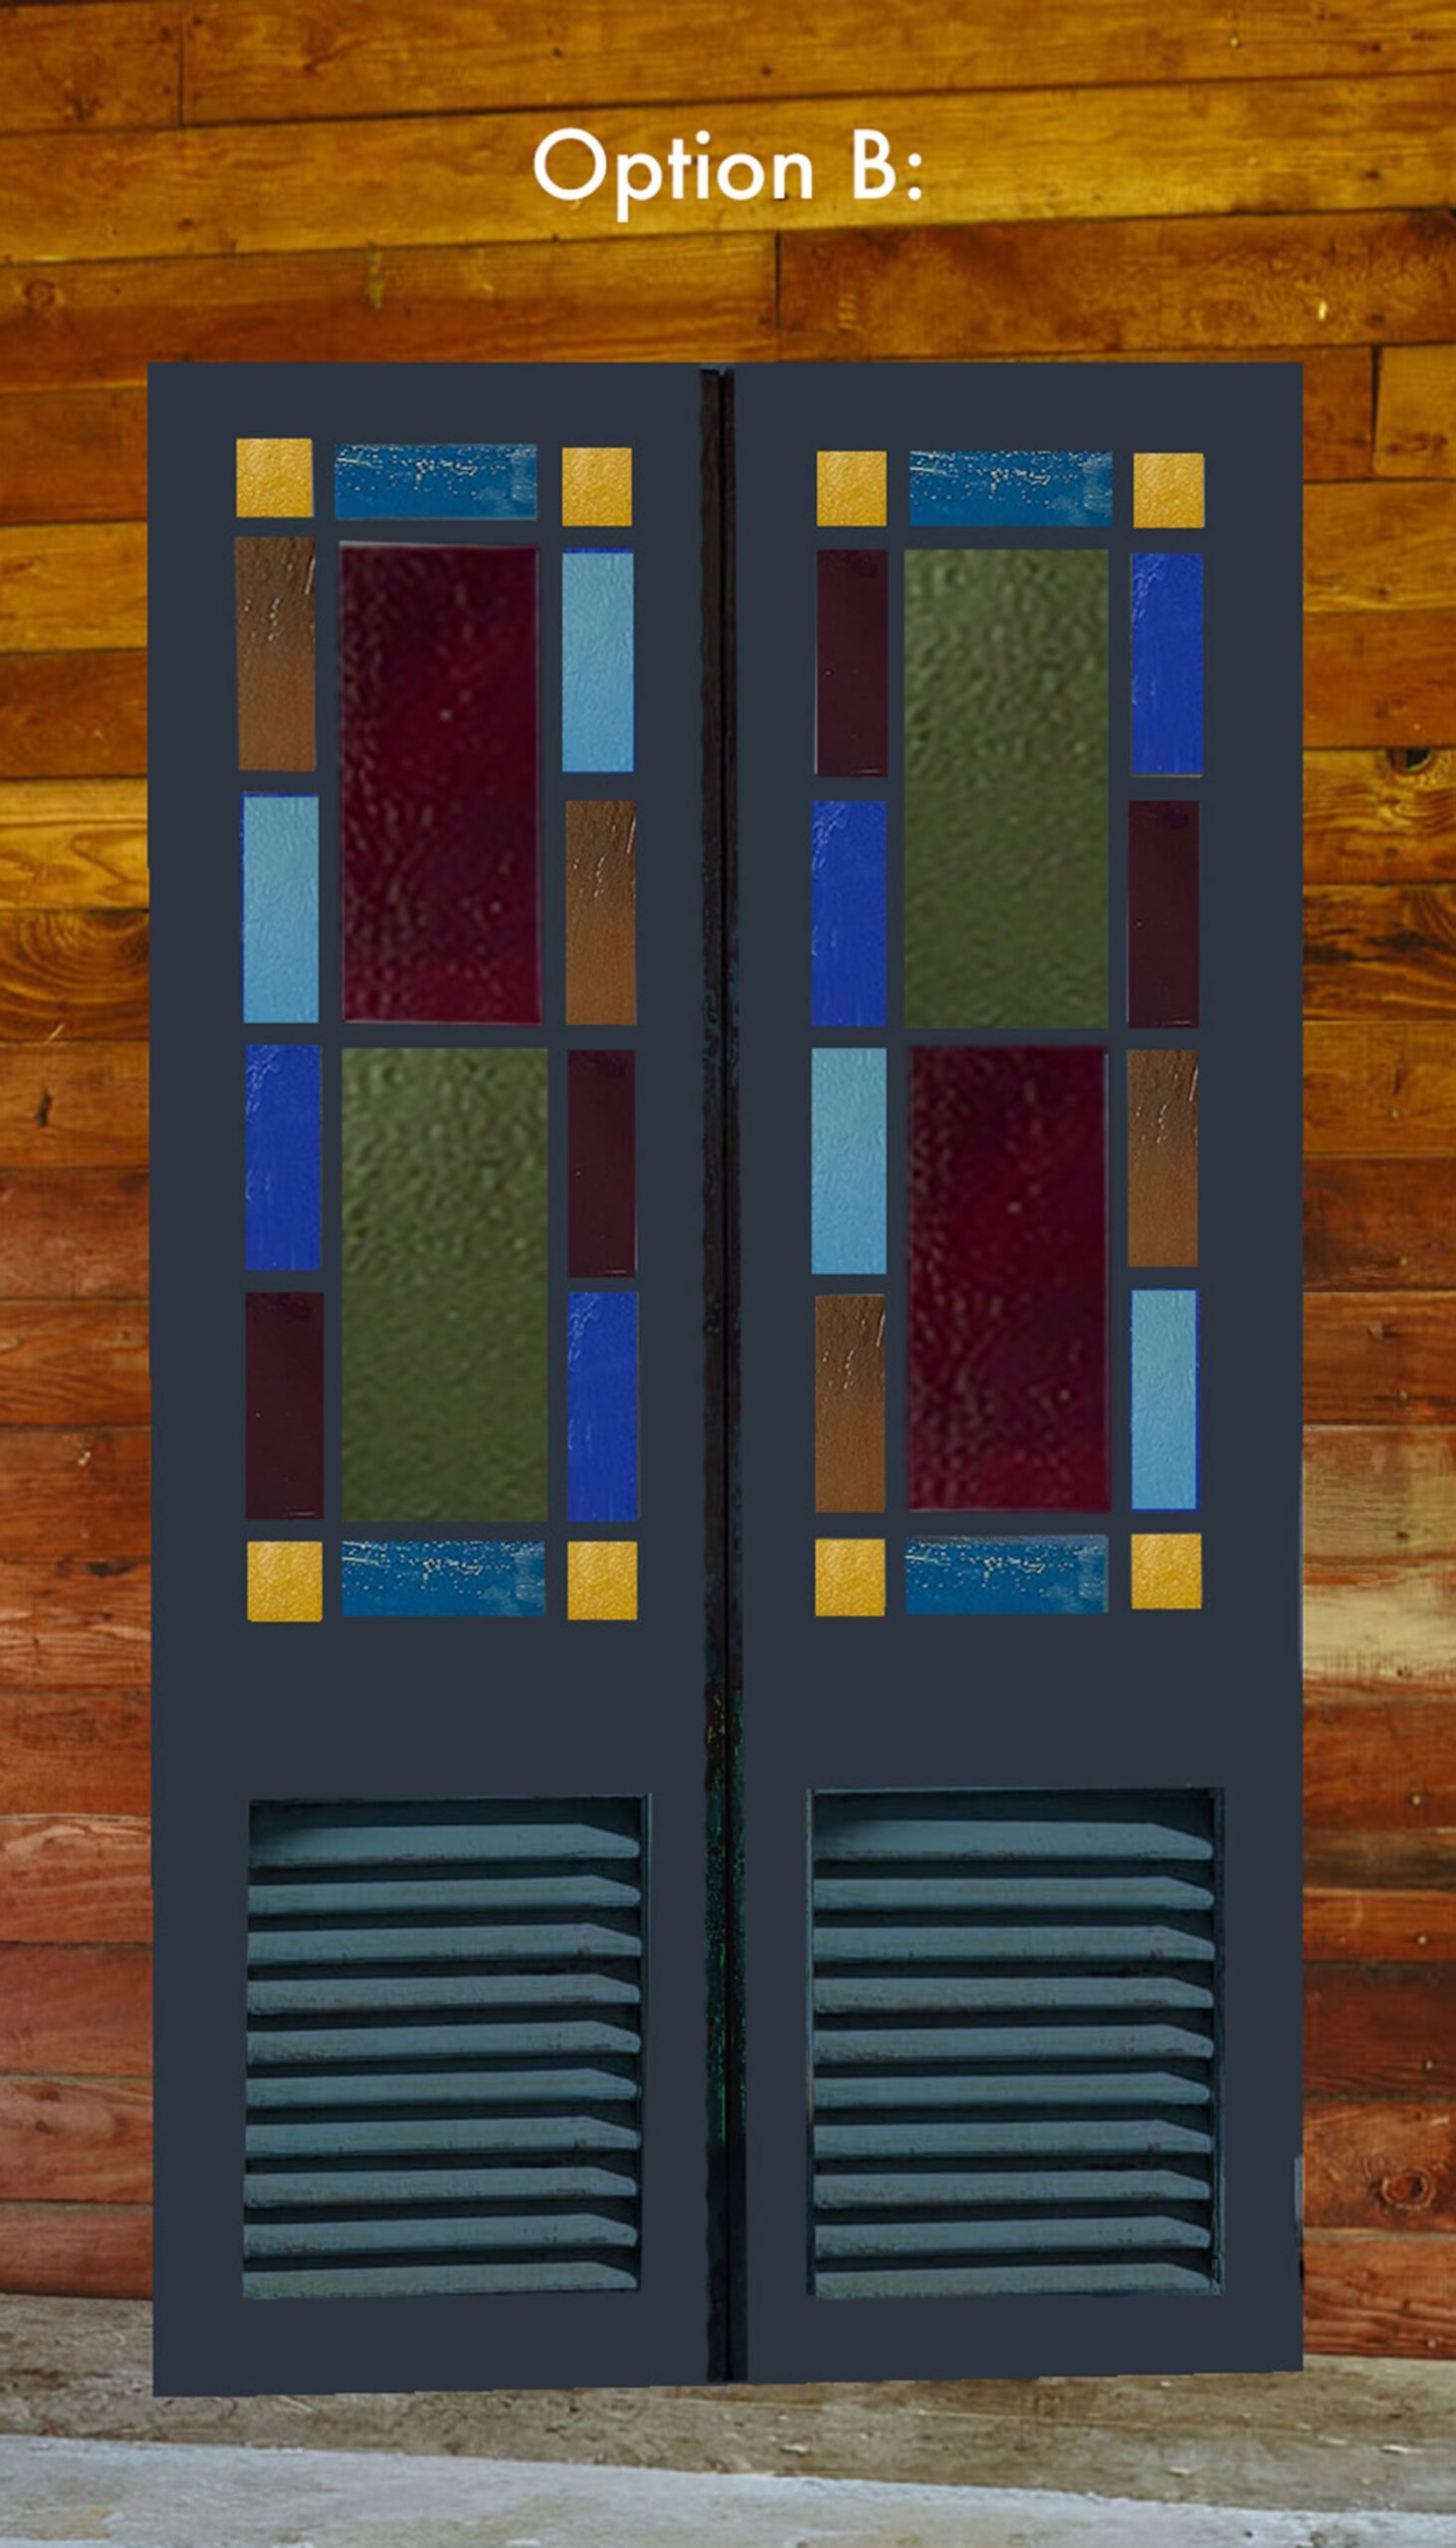
Option B:
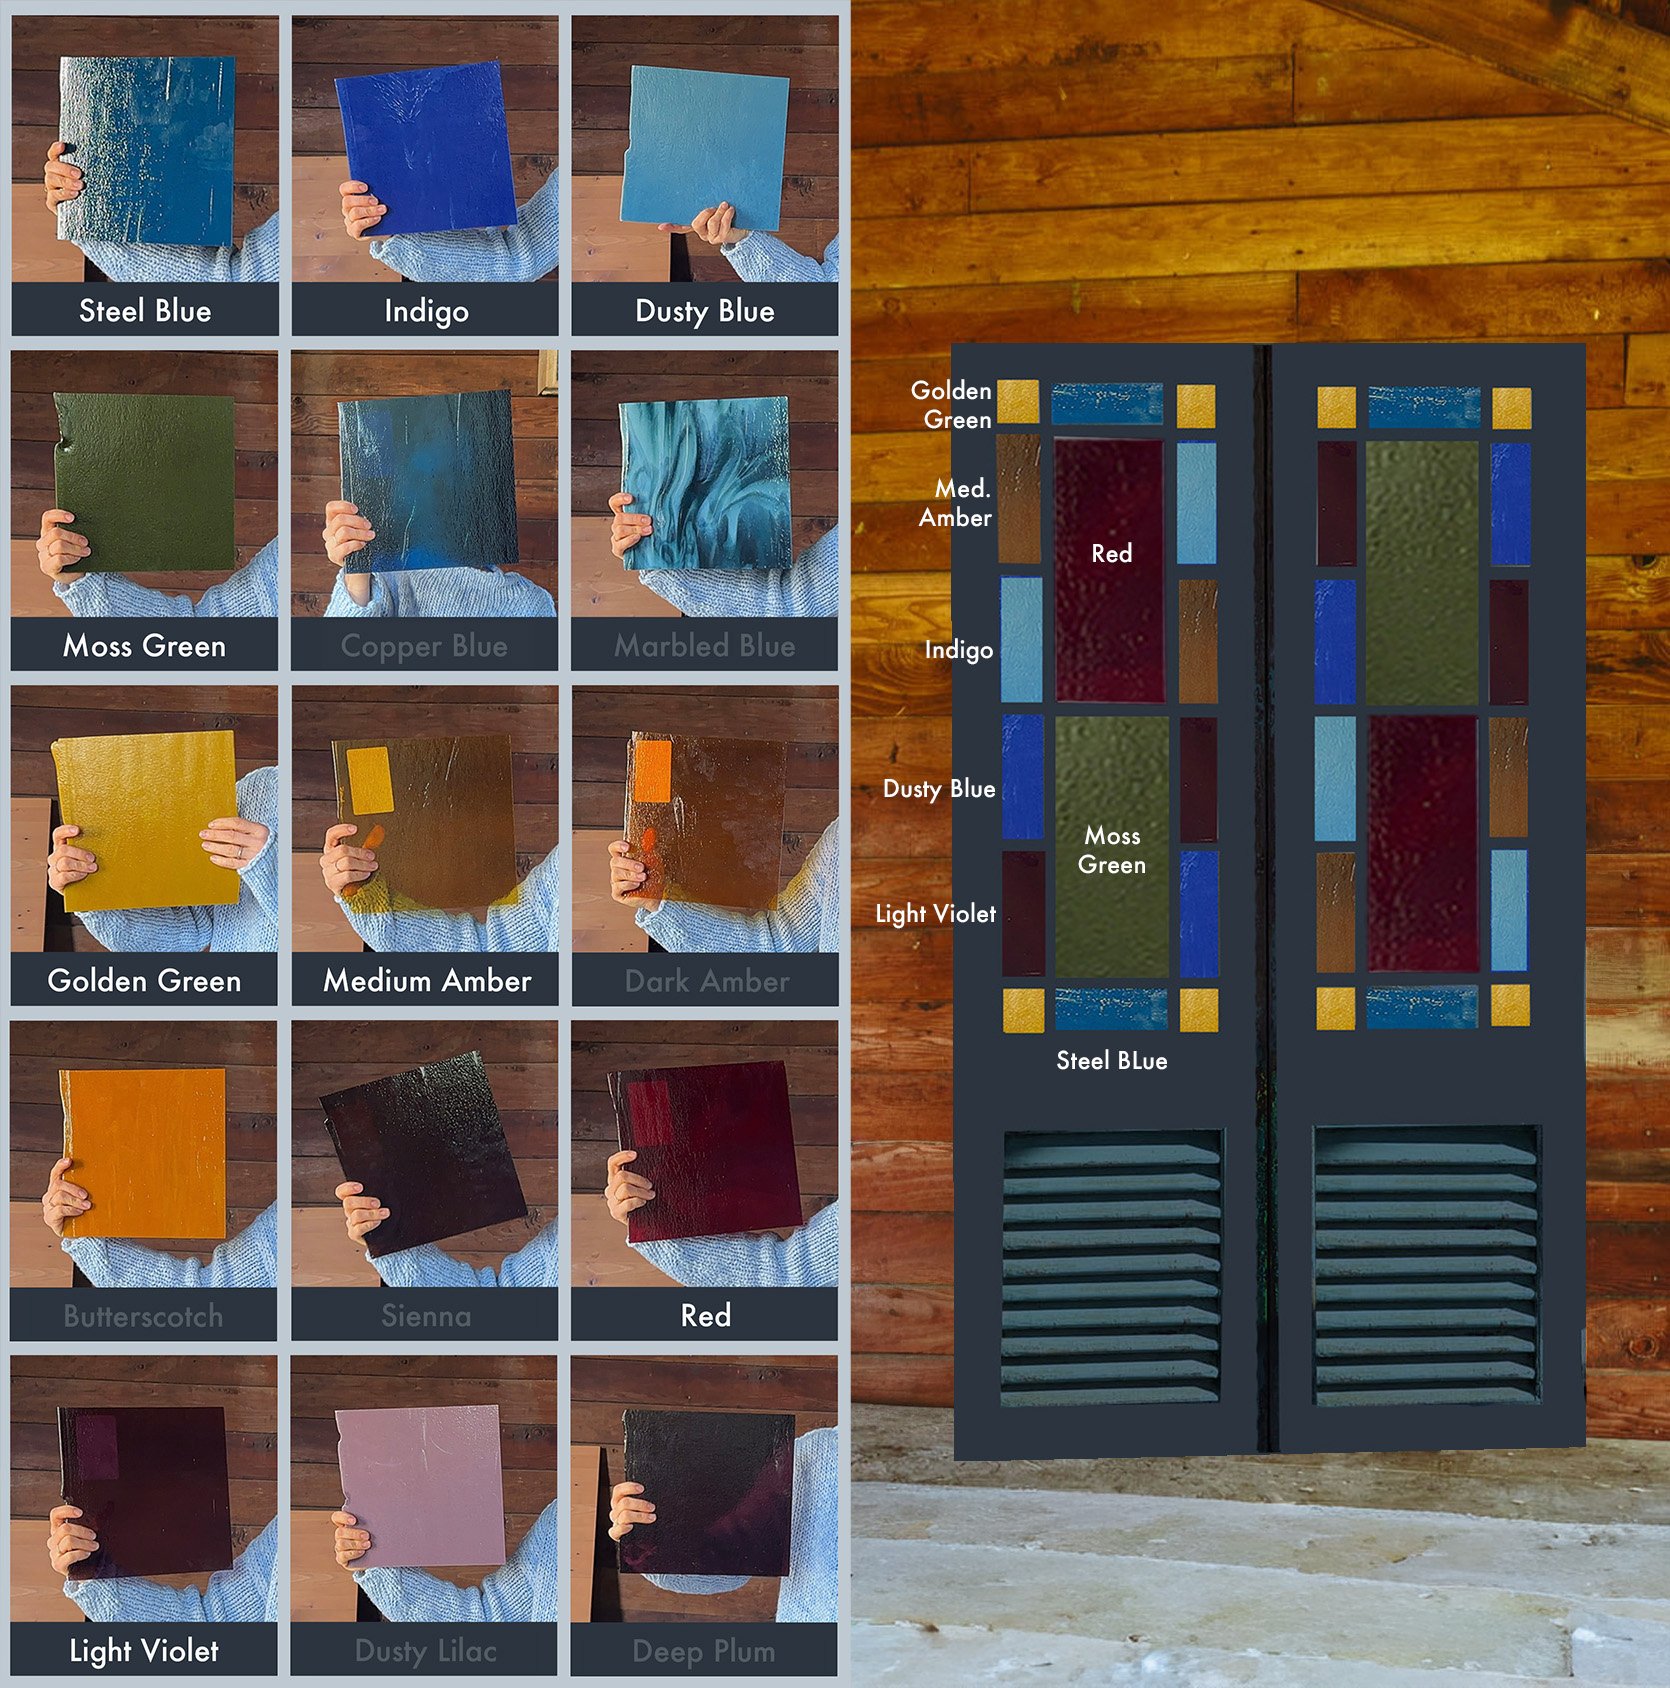
So we decided to replace the big blue with red and green. Hard to tell here but red is translucent and moss is not translucent. RAID will still provide adequate privacy, but it’s definitely something to think about.
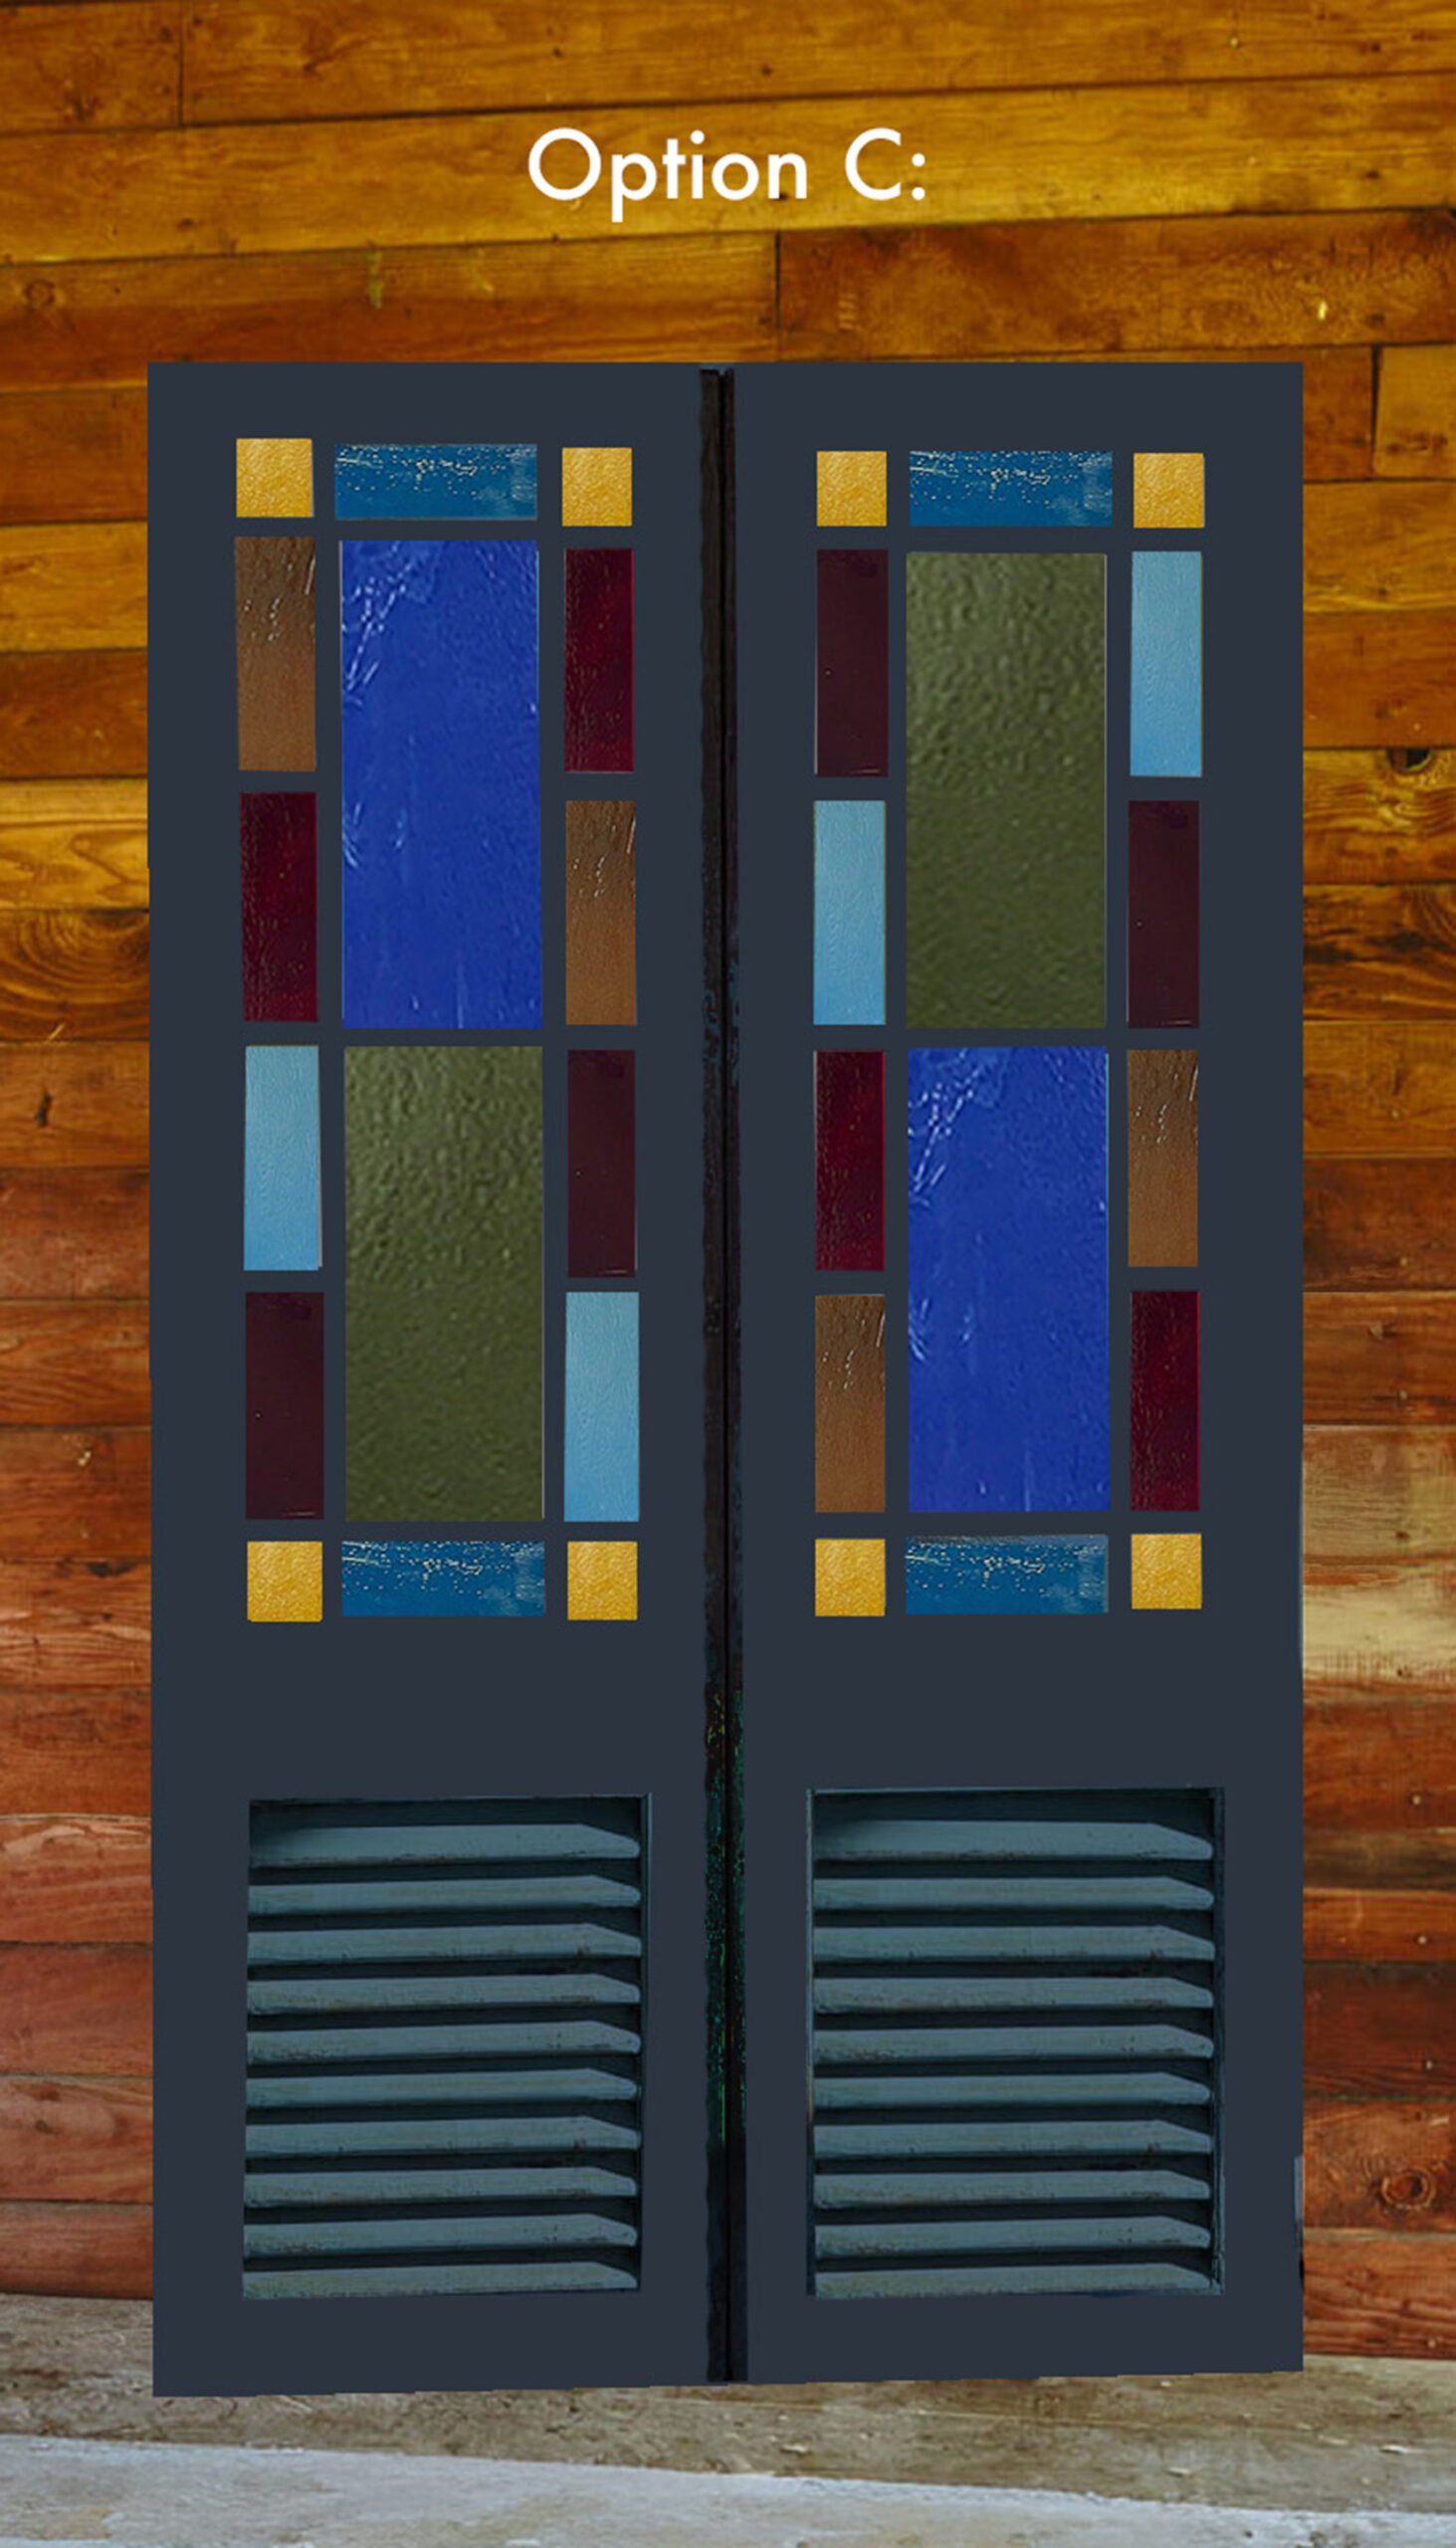
Option C:
For this we brought back the powerful Indigo in the larger panel. I like it!
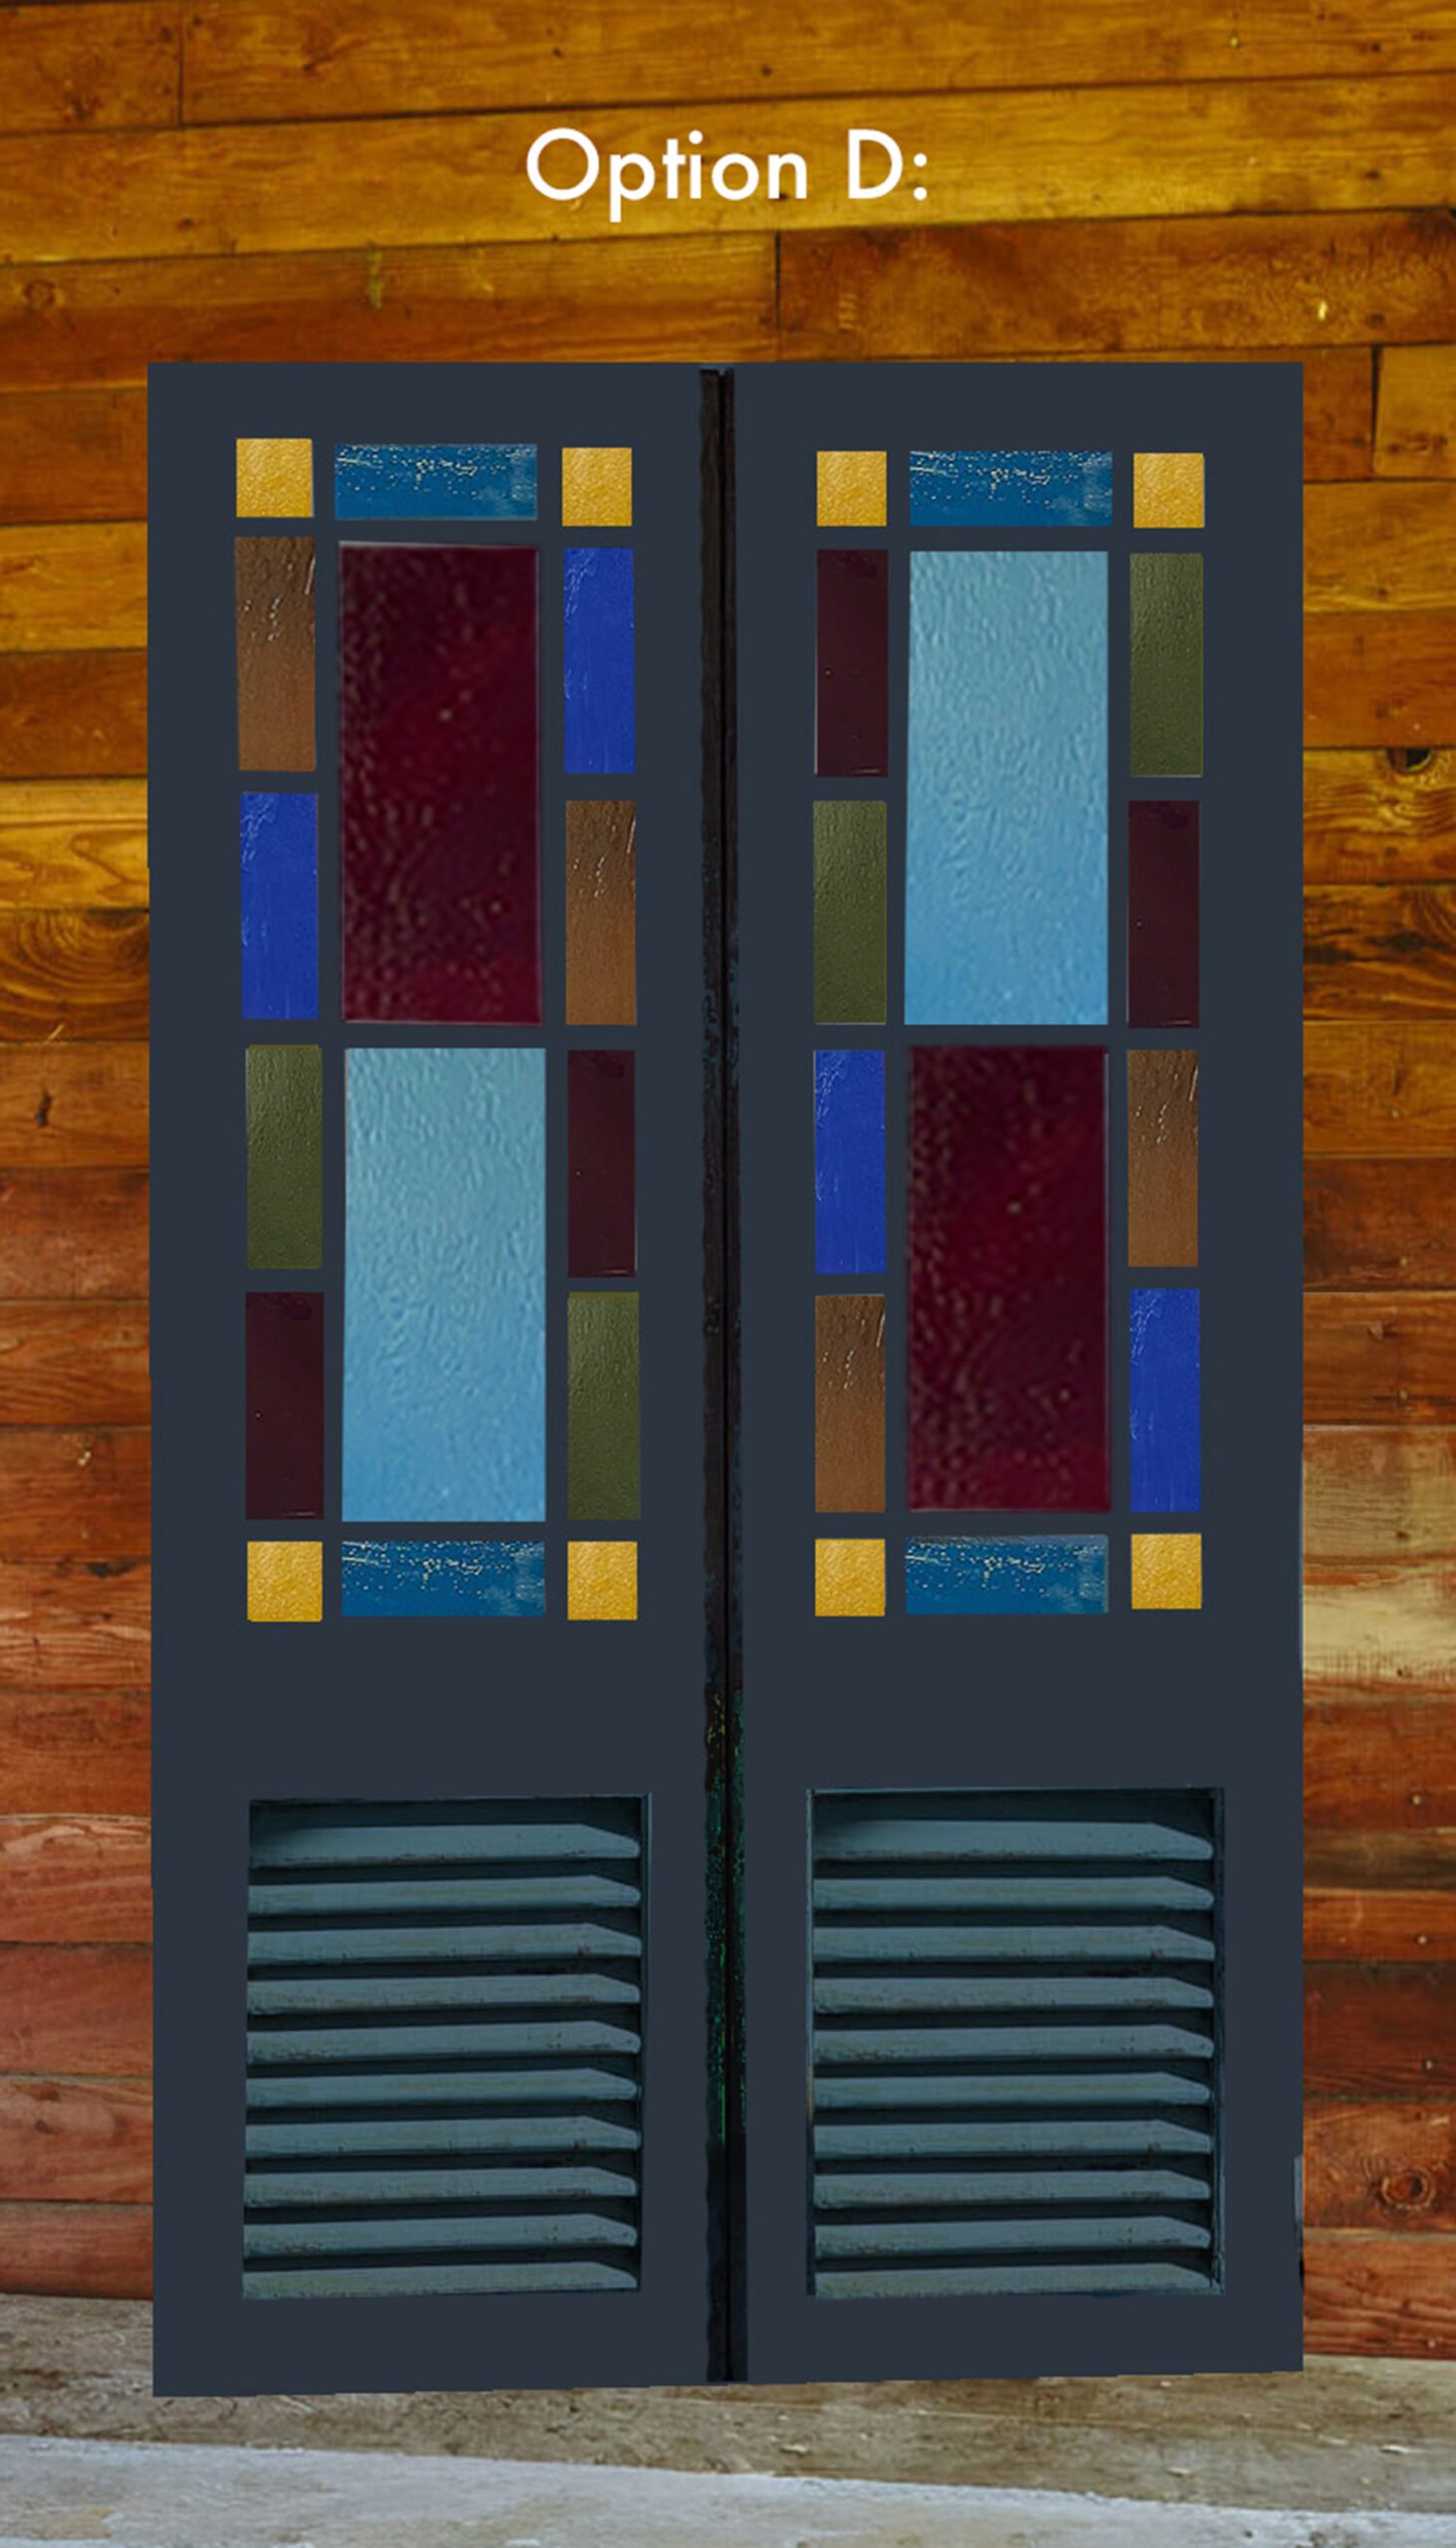
Option D:
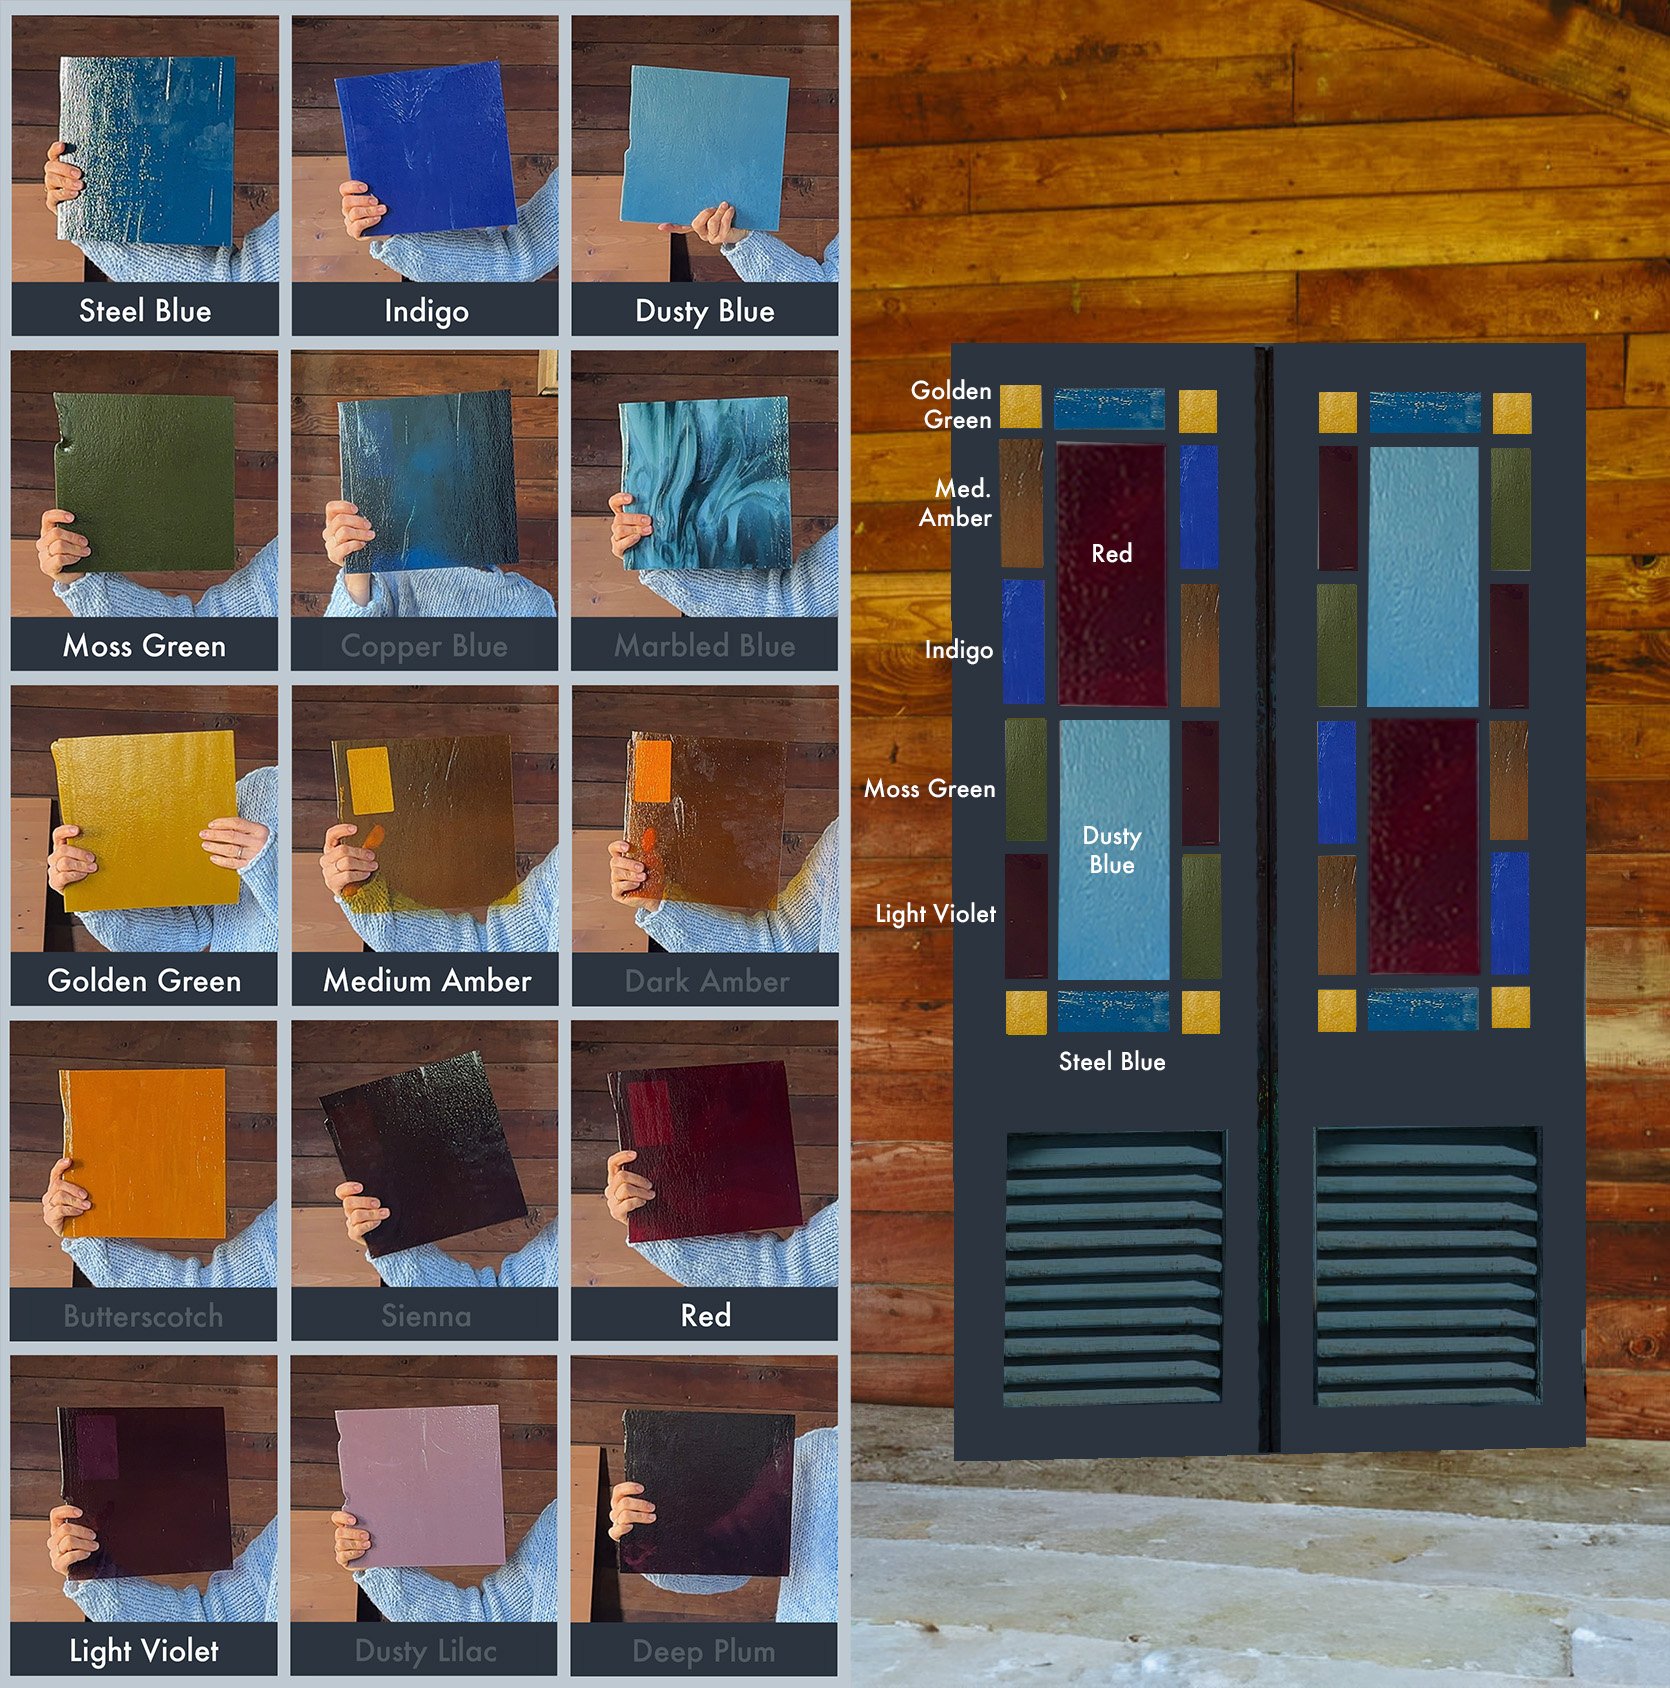
This was Brian’s favorite. I love the contrast between the red and the dusty blue.
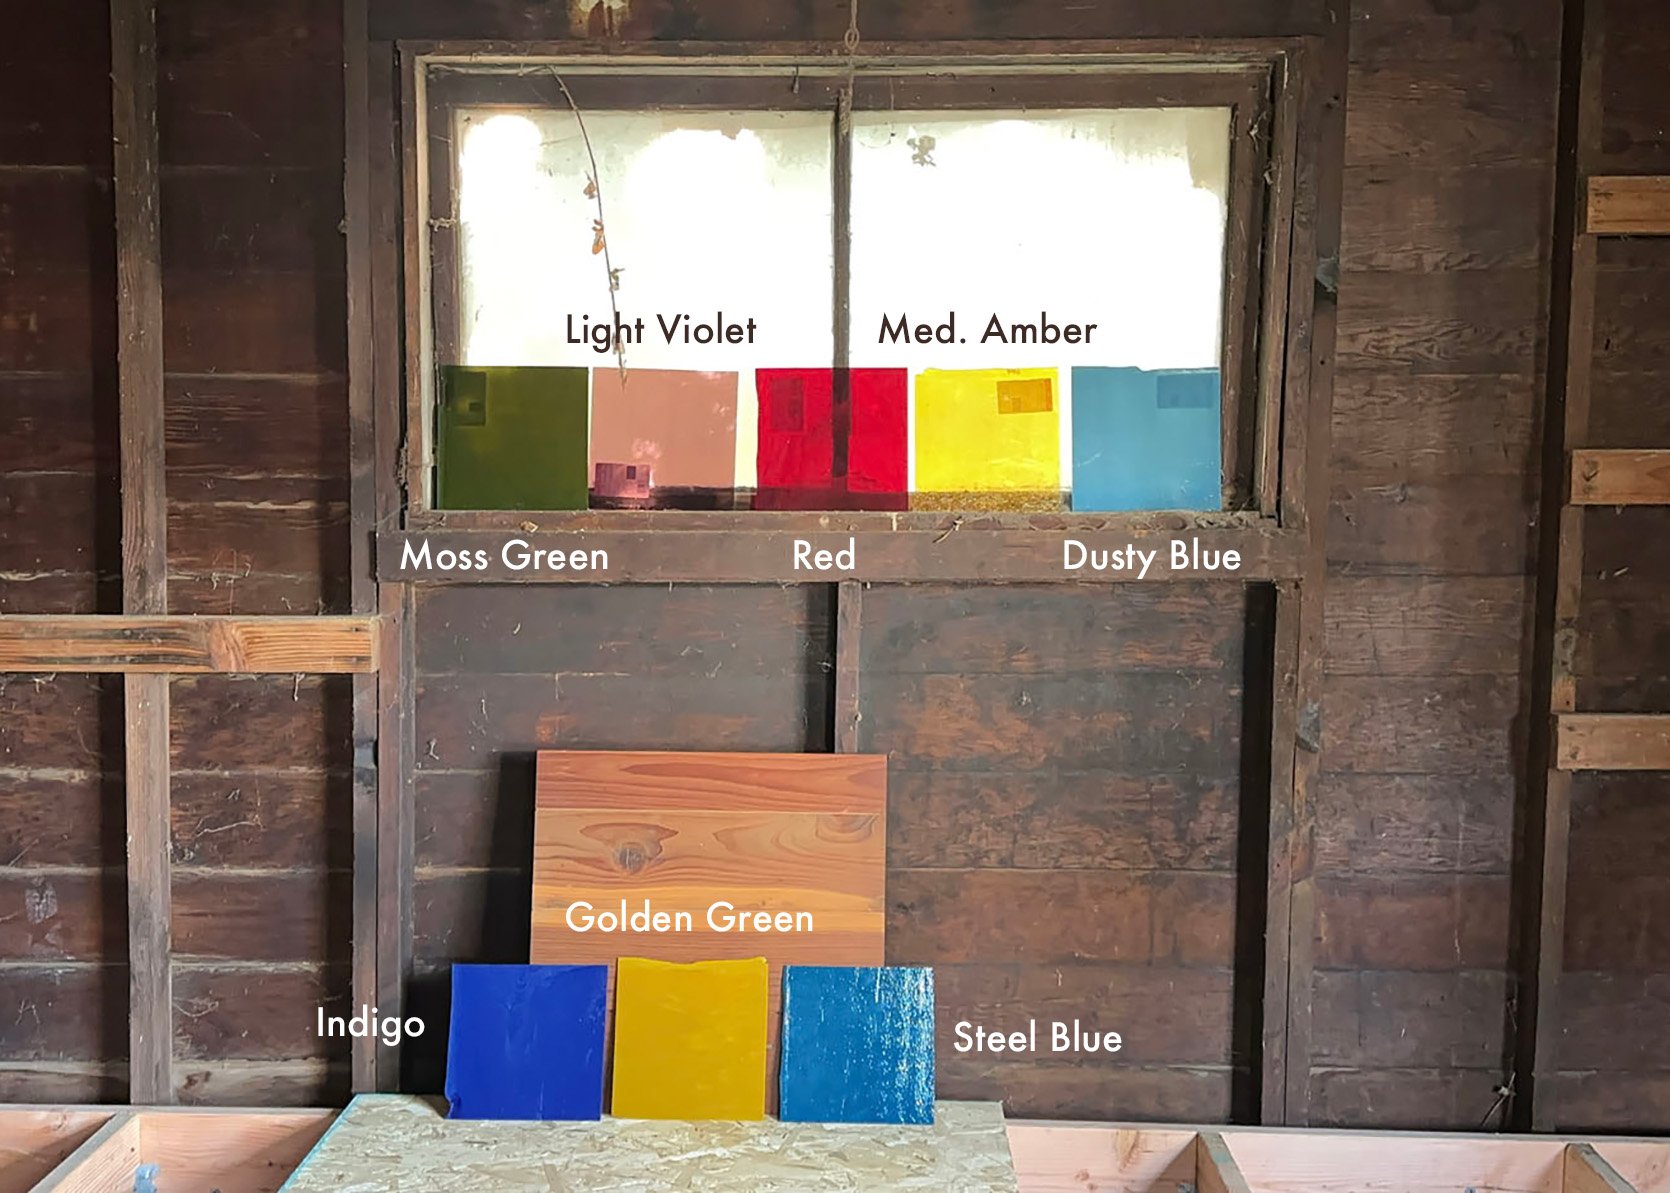
When we were considering putting the door in front of the other window (with light coming in from both sides), the glass looked very different. Opaque colors looked the same, but transparent glass became so saturated.
Use the sliders to see how the colors look as light passes through them. Here we have moss, light purple, red, medium amber and dusty blue (an opaque tile) in front of the window. Grech used this image to show the difference in the colors of glass with and without light.
Red became bright red, amber became bright yellow, and purple became pink. To be honest, it is very beautiful, but has a completely different look.
final decision
Ugh. I love all four. And we haven’t chosen anything else for this room other than thinking that the walls will be warm red wood (and I’m thinking that the dark color of the toilet and urinal will disappear), that’s all. So do all the other elements (shown just painted), including the color of the door and structure. hague blue), can be chosen based on this decision.
Please share your thoughts in the comments!!!! If you want to suggest a different layout or combination of the above, I’m open to it.