

Welcome to the first installment of the inaugural “Design Coach” series, where we help a family through their remodel (emotionally and with design advice) and document it here. Chrissy and Peter couldn’t have been better “clients” with great taste and incredible DIY skills. But with three children under 3 and a career, Peter had to go out of town often, so there were some risks and unknowns. But oh my gosh, we feel so lucky that he was an incredibly fit for this process (and personality-wise, he was a blast to work with, which made a huge difference for me).
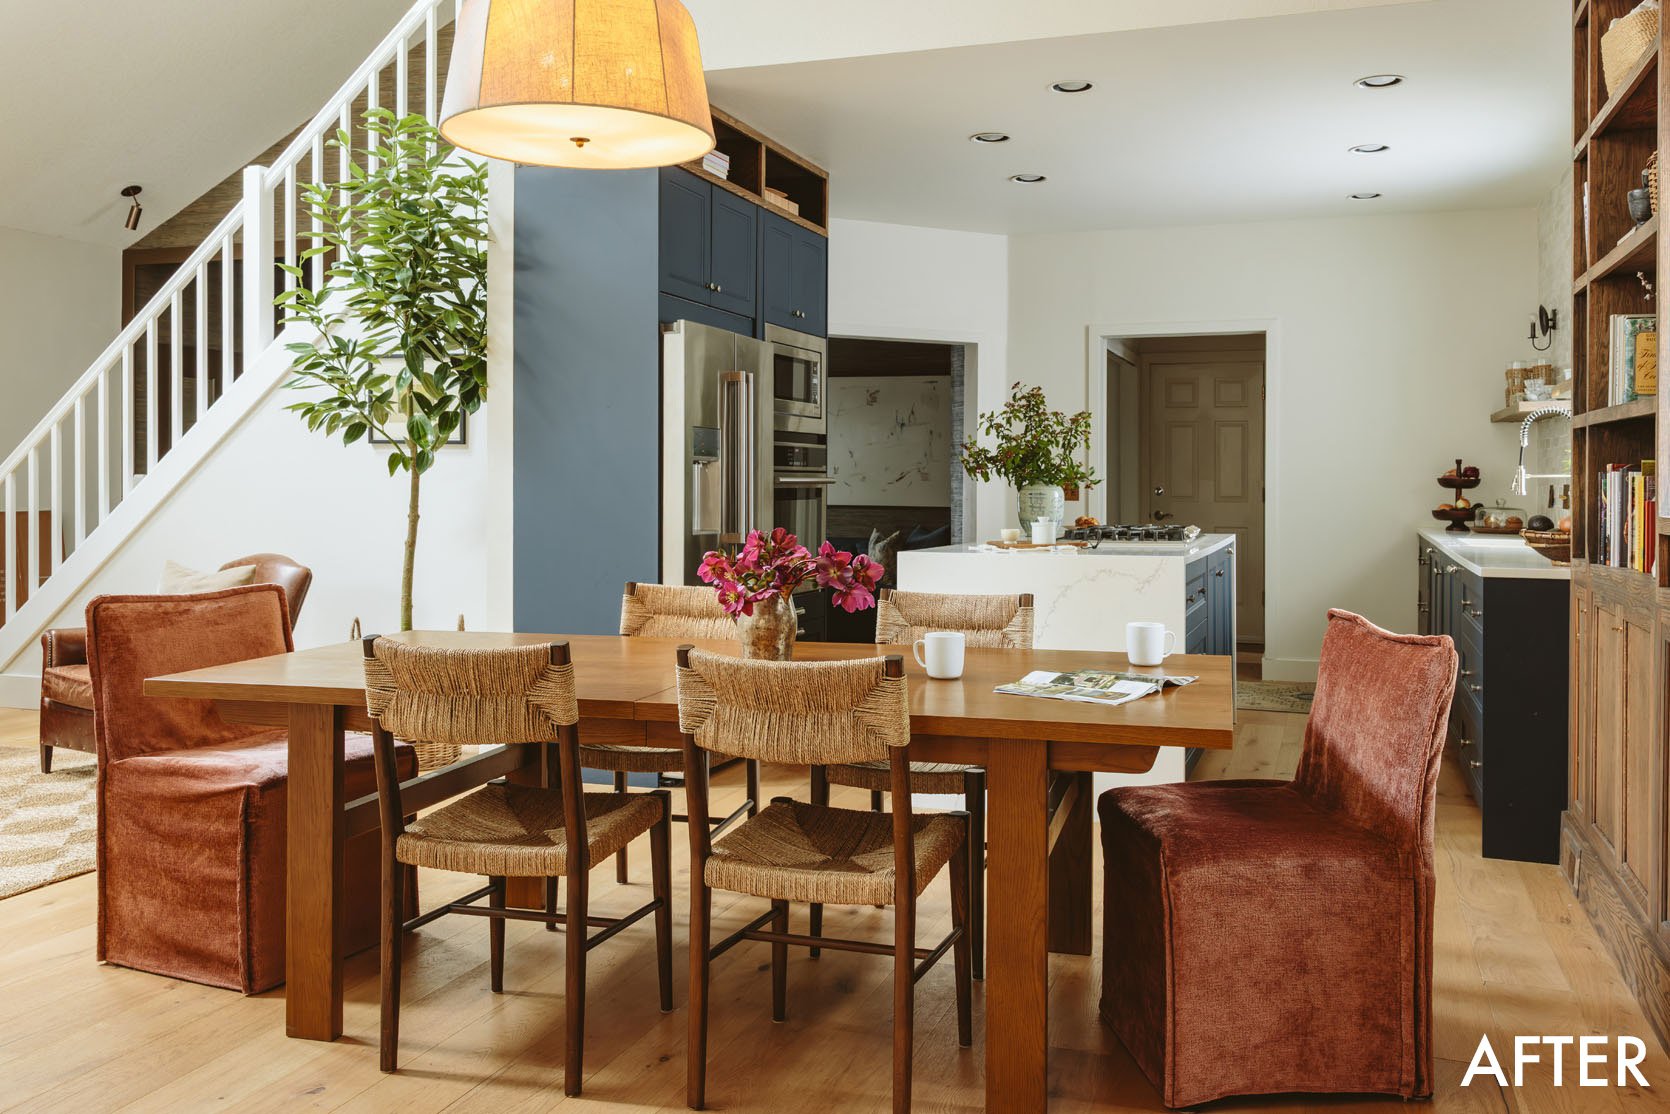
dining table | woven chairs | captain chairs | pendant light
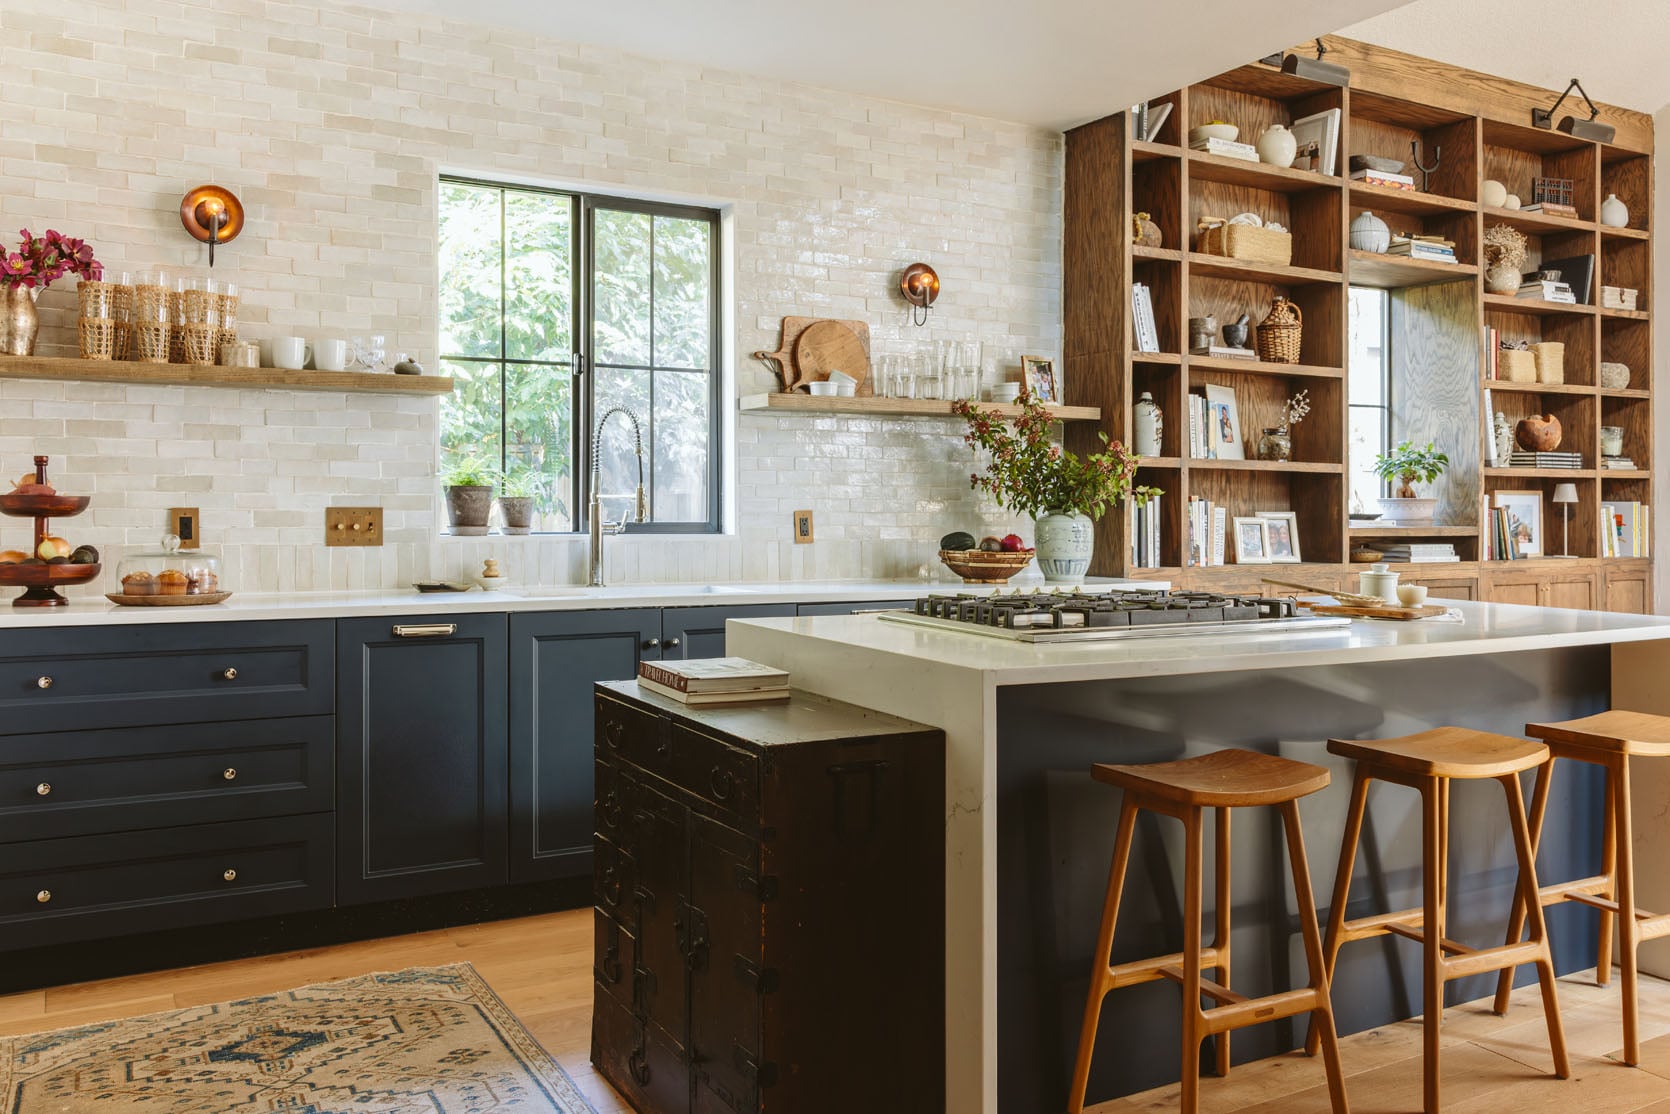
We shot their finished DIY ikea kitchen A few weeks ago, and this before and after article is wild, especially when you read how much she went through alone with three kids under her feet. They stayed very close to their budget where they had to, they compromised, and while it took a little longer due to the 3 month stint in Kentucky, I honestly can’t believe how much they got done in a year. He learned a lot along the way and was kind enough to answer all our burning questions. Without further ado, check out this DIY IKEA kitchen by Chrissy and Peter.
a complete change
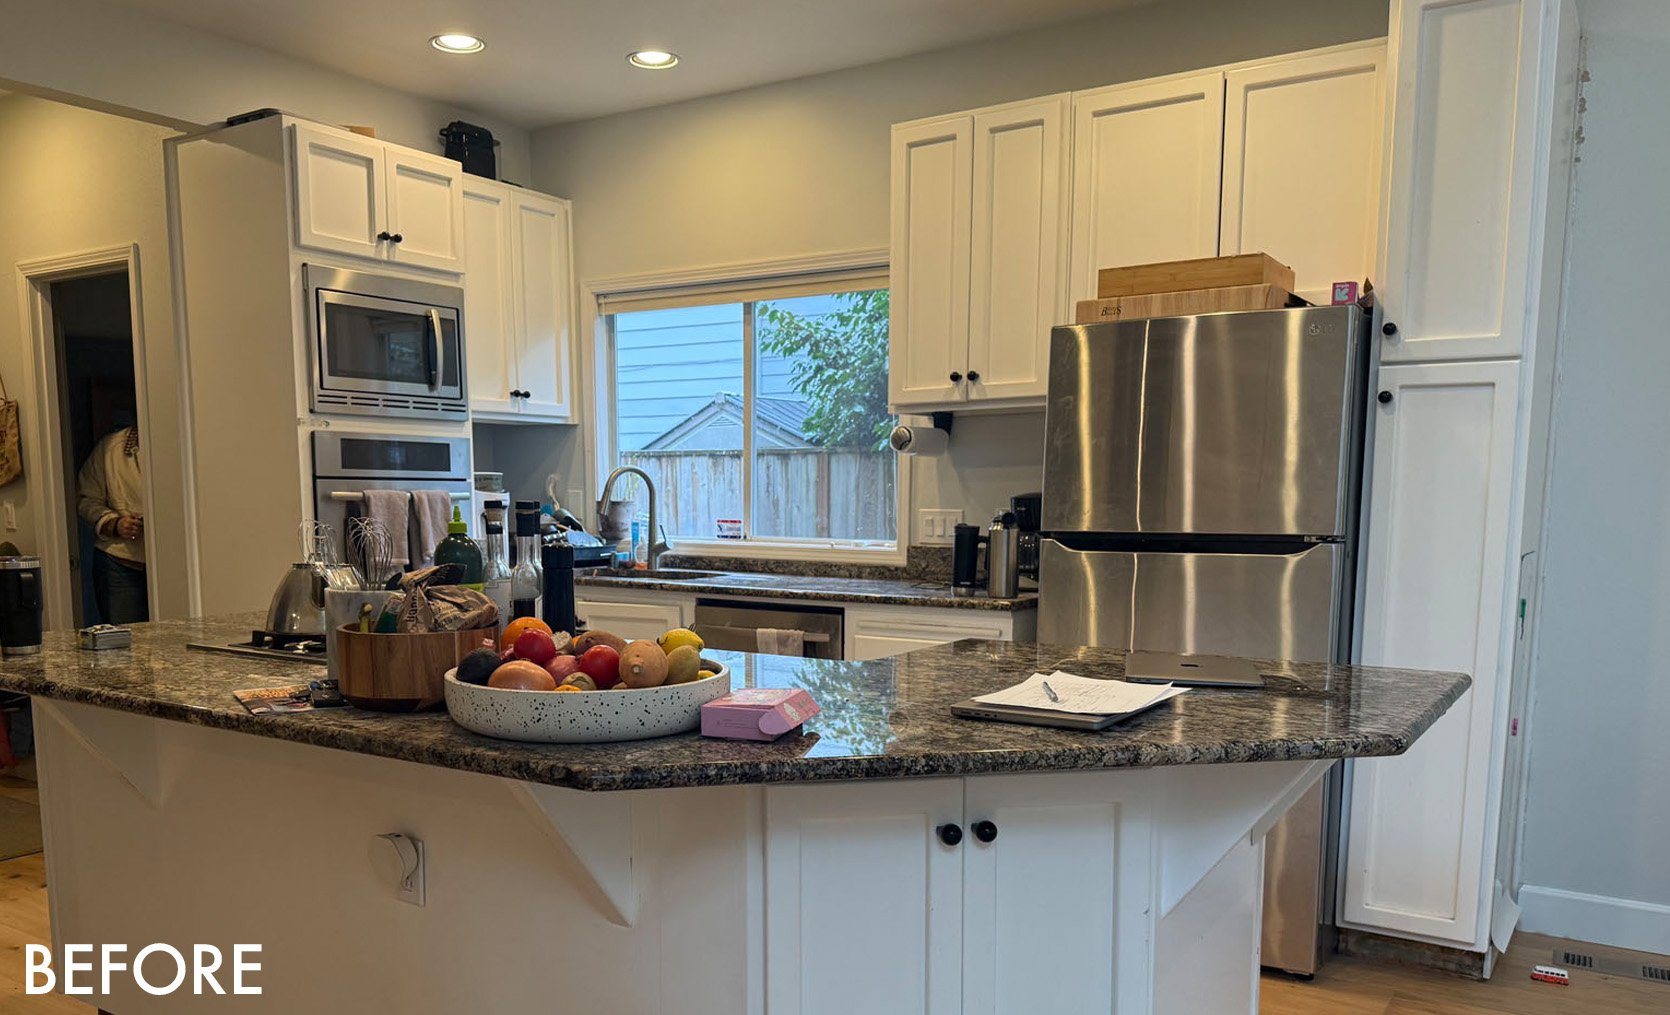
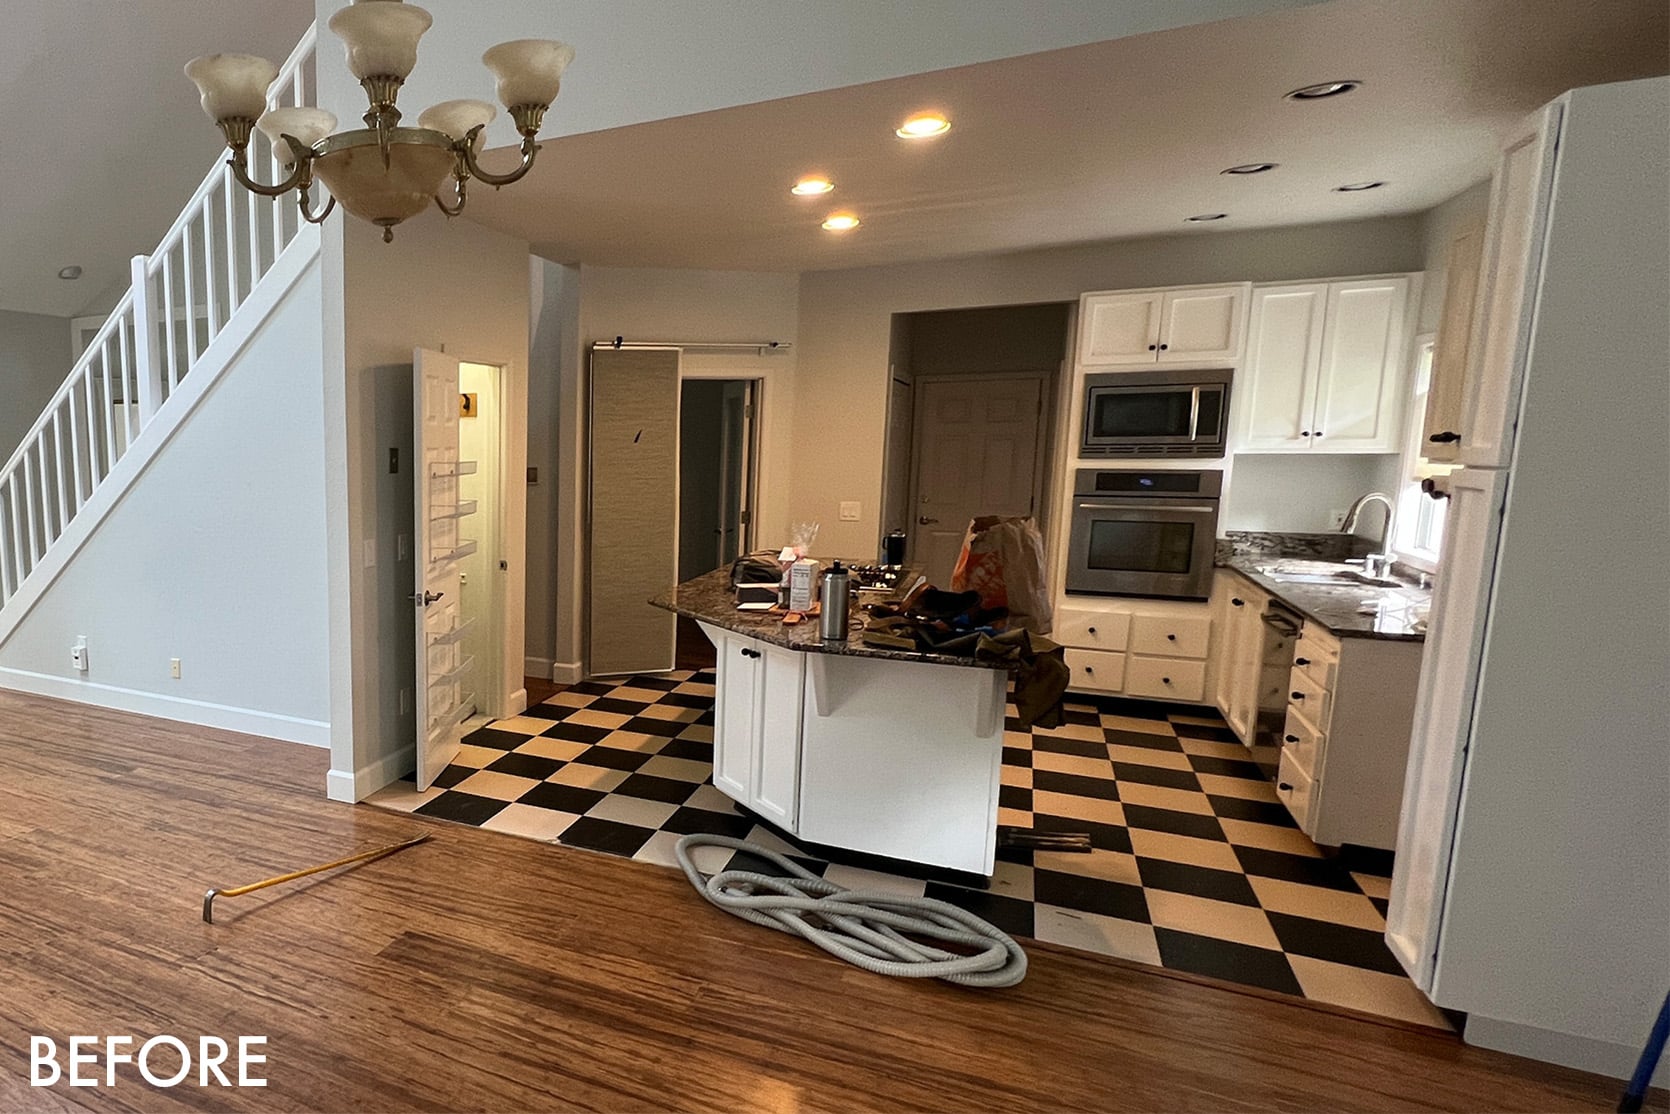
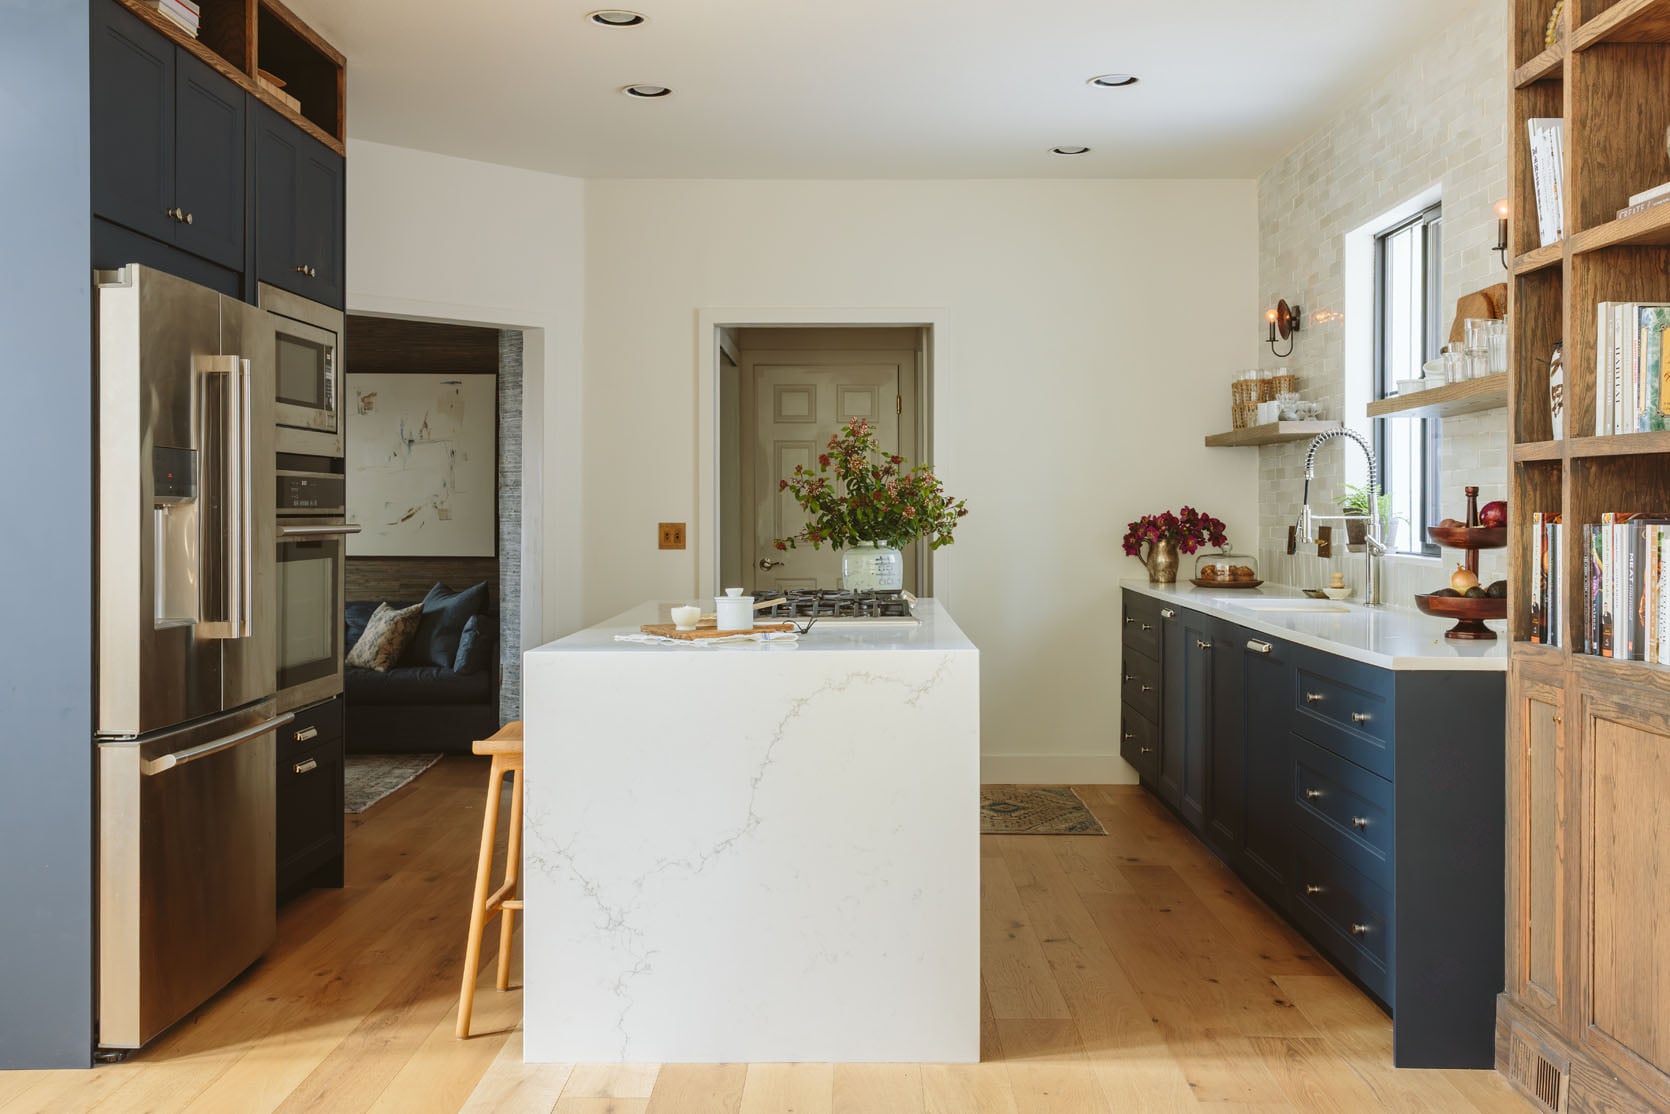
The kitchen they started with was outdated and its layout felt cramped. With careful planning and hard work, they completely transformed their space and really brought this new kitchen to life. To dive deeper into the process and see the work in progress, you can revisit his last post here.
Now that their kitchen project is complete, Chrissy and Peter are sharing everything they learned from this great undertaking.
ikea cabinet
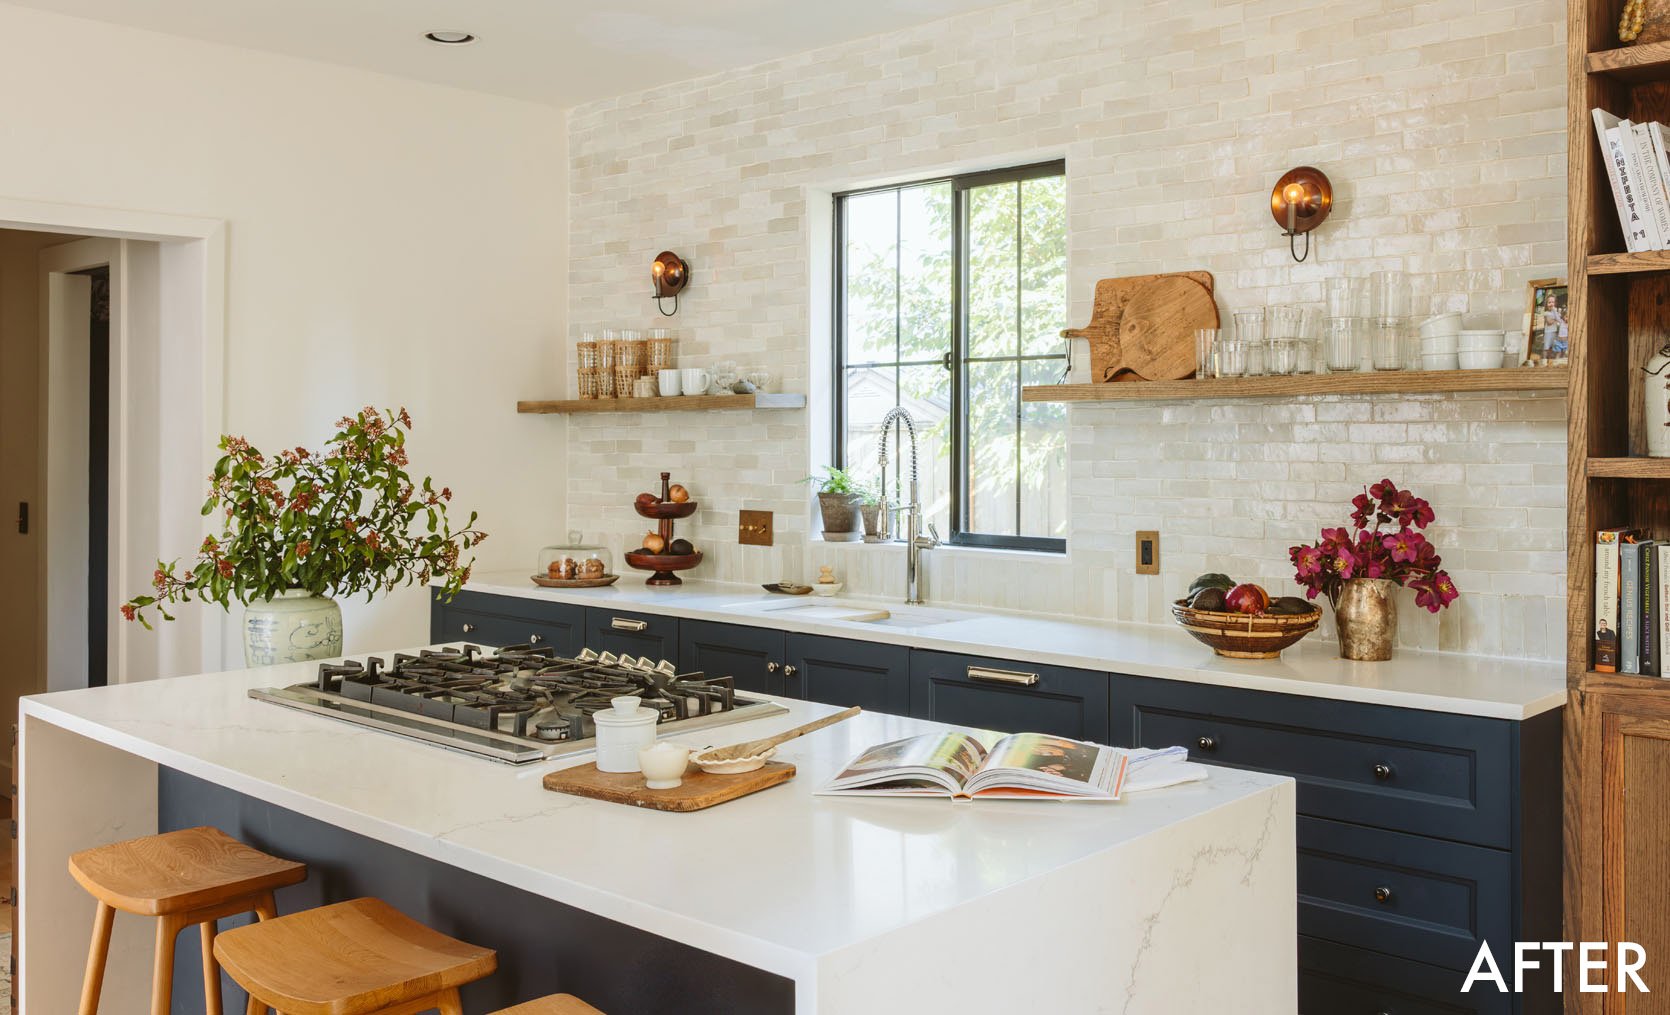
Navy blue AXSTAD cabinet front (a color Ikea is slowly starting to phase out, So get them while you can!) and the SECTION cabinet base served as an excellent base for Chrissy and Pete’s DIY design. Starting with IKEA really helped them refine and adapt their designs.
AXSTAD cabinet fronts | Section Base Cabinet | knob | tussle
How happy are you with your Ikea cabinets?
they are fantastic. Really happy with them. We think the matte navy blue really enhances the “IKEA” look. However, this finish is not for the faint of heart, as like any matte thing, it is difficult to keep spotless. Even though we have small children, dogs, and are avid cooks, this doesn’t bother us, but it’s worth noting. The warm soap/water mixture works!
How long did it take to build the cabinets yourself?
Peter did this alone, so for a week, a few hours a night. Once you get into the flow, rinse and repeat.
How long did it take to install them all?
This was his first time, so it probably took him almost three full days to do it alone. So 36 hours. Like all new DIY projects, it just takes effort to master.
Did you follow the instructions from IKEA, or did you rely on the YouTube video?
We found the instructions that came from Ikea to be really user-friendly, but YouTube was definitely a saving grace. For example, panel-finished dishwasher doors took a while to figure out. YouTube is a great resource, and we’ve learned a lot from using it for DIY projects.
Which type of cabinet was easiest to install? harshest?
Sink and stove (no drawers!). But in reality, drawers are very easy, just time consuming. The fridge and oven were the toughest from a pure strength standpoint. The bus was physically difficult, so Pete needed a friend to help him set up the oven. It’s strange, spice rack drawer It was complicated to make, but we’re happy to have it!
How impressed are you with the quality of the cabinets?
We have three other kitchens from three previous homes, and while this is our first IKEA kitchen, it surprised us in durability, features, and yes, quality – fantastic quality (for the price!), and we’d definitely recommend it to those who aren’t afraid to roll up their sleeves.
Are there any Ikea must-haves that you would recommend to someone else?
Panel-ready dishwasher from Ikea Was a foolish person. And it’s totally affordable! Oh, and we really enjoy the “drawers within drawers” add-on feature that Ikea offers. Great way to maximize storage space within drawers. Having soft-close cabinets and drawers was important to us, and with the cabinets we chose, it was standard – IKEA for the win!
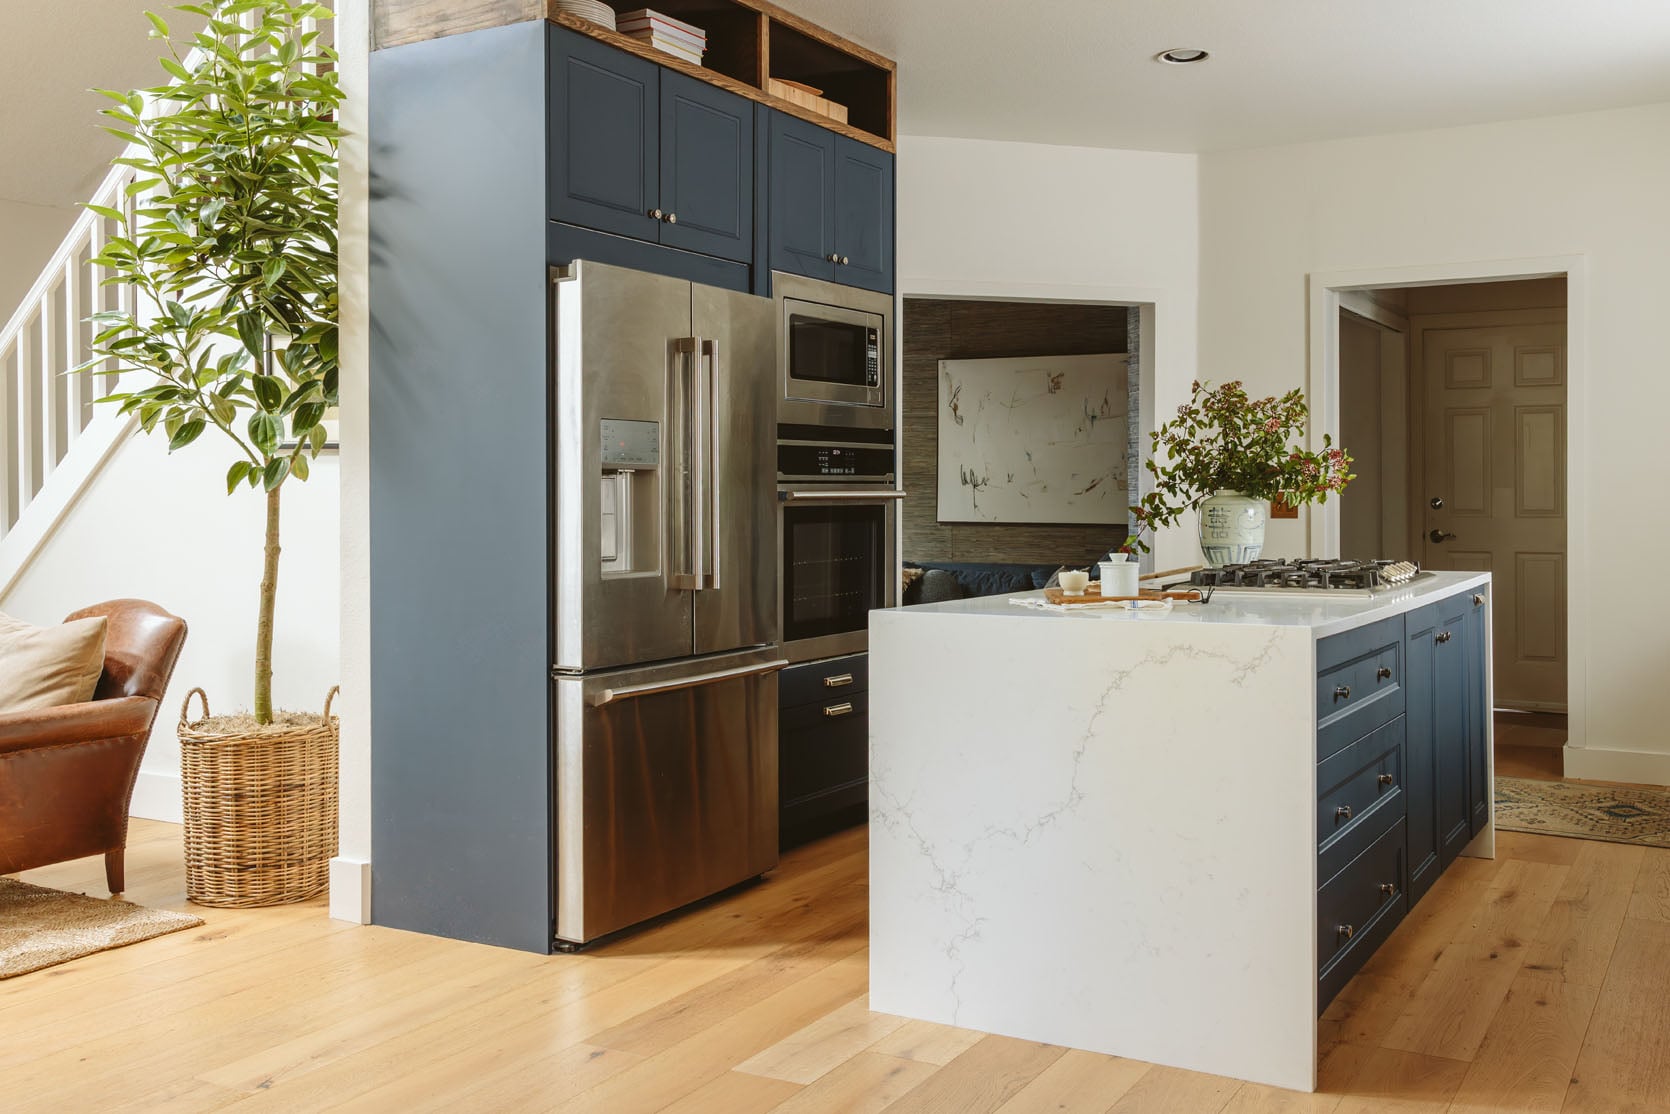
ikea appliances
stove top | fridge | oven | microwave
Did you purchase all your appliances through IKEA?
Yes! This wasn’t critical to the design, but it made everything easier when designing and using their kitchen planning tools, so we could plug those tools in using the exact dimensions. We’re happy with them so far!
Were there any parts you had to troubleshoot or DIY?
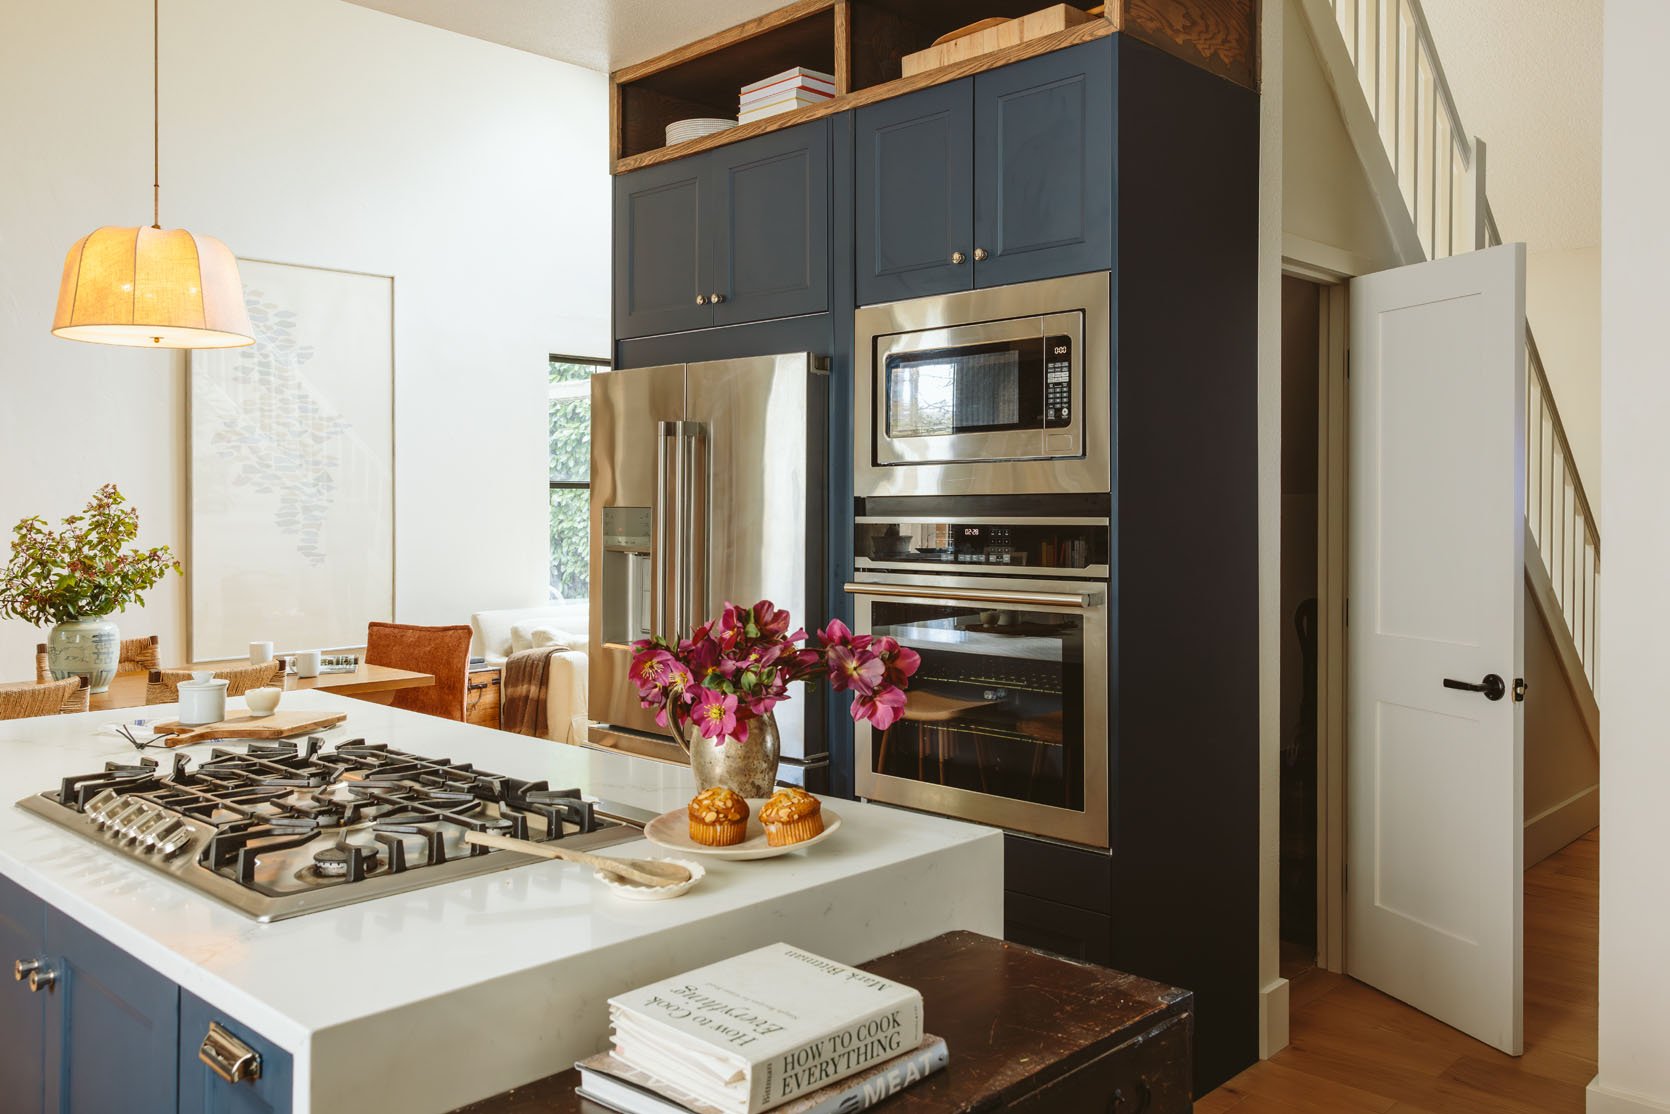
So above the refrigerator and oven, the ceiling height is 9 feet (approximately), and I believe the maximum height of an Ikea panel is 8 feet. We didn’t want a gap between the top of the cabinets and the ceiling, and IKEA didn’t have any matching gap-filler. When we knew we were going to use a wood color on the wall with built-in bookcases, we decided to put a matching cubby there. It worked great and tied in perfectly.
planning their layout
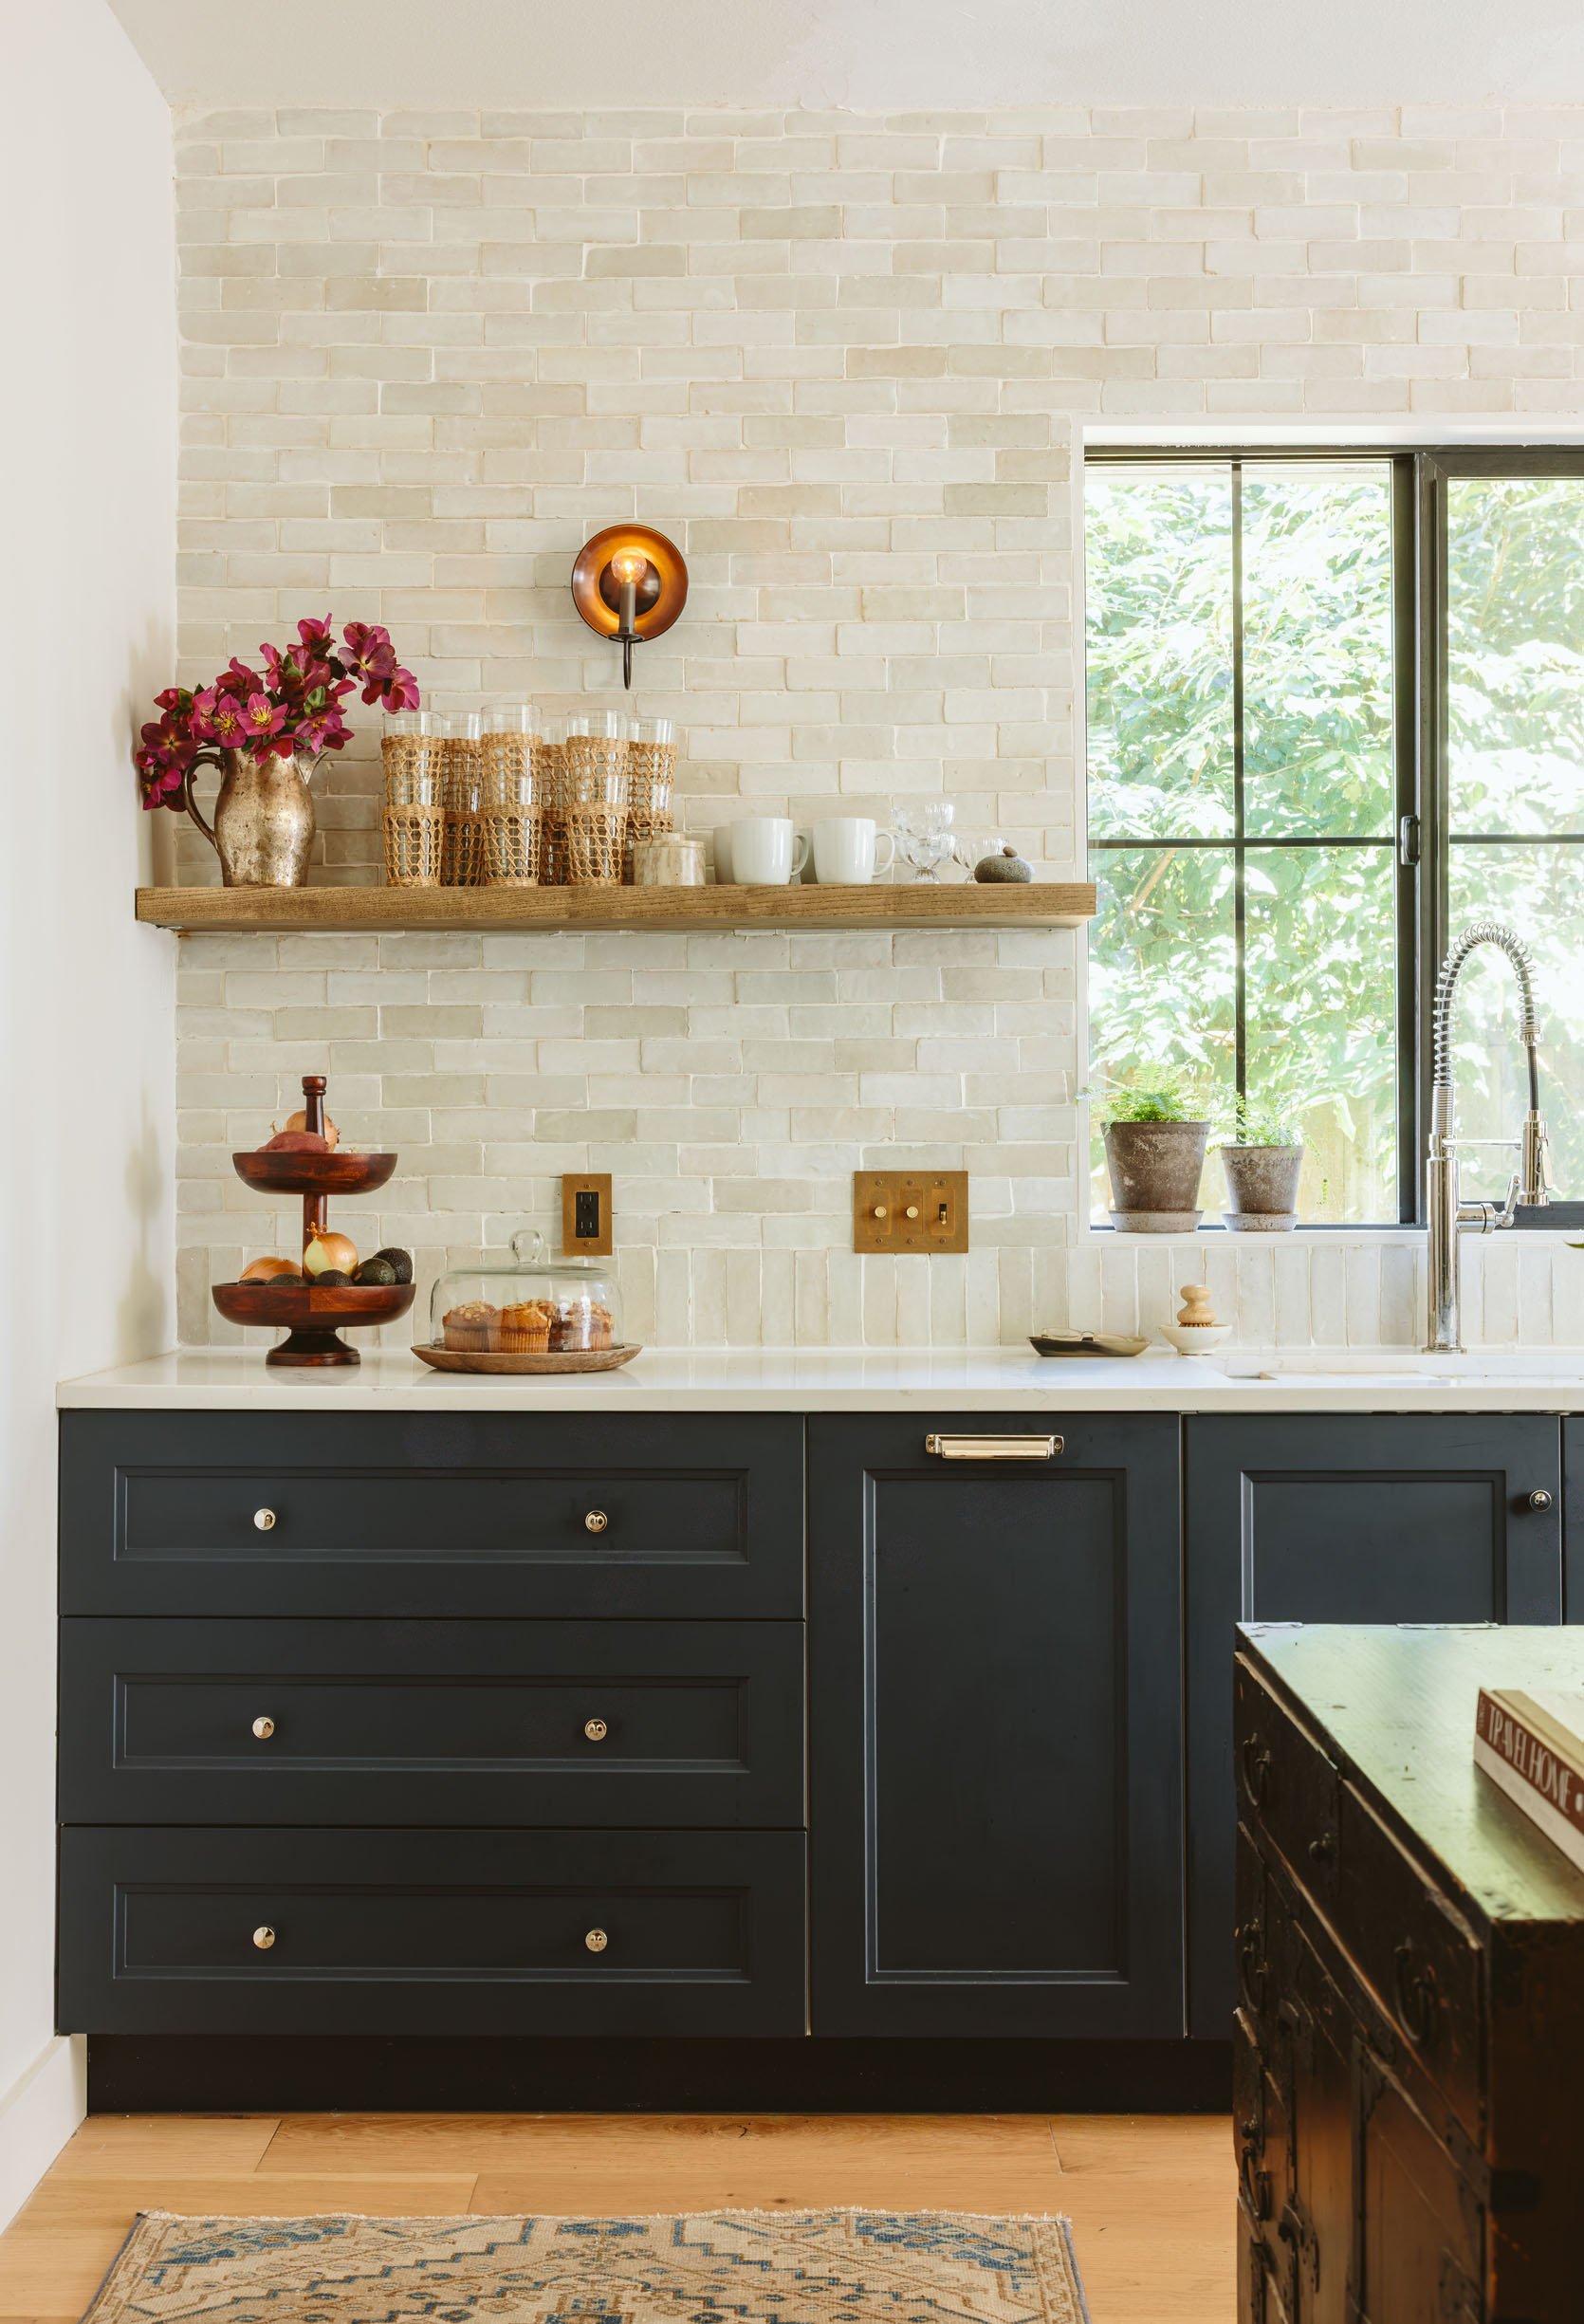
One of the best things Chrissy and Peter did was change their layout. While some readers were worried that moving their everyday tools to the old pantry wall would seem too far, Chrissy and Peter report that the move has been a huge success.
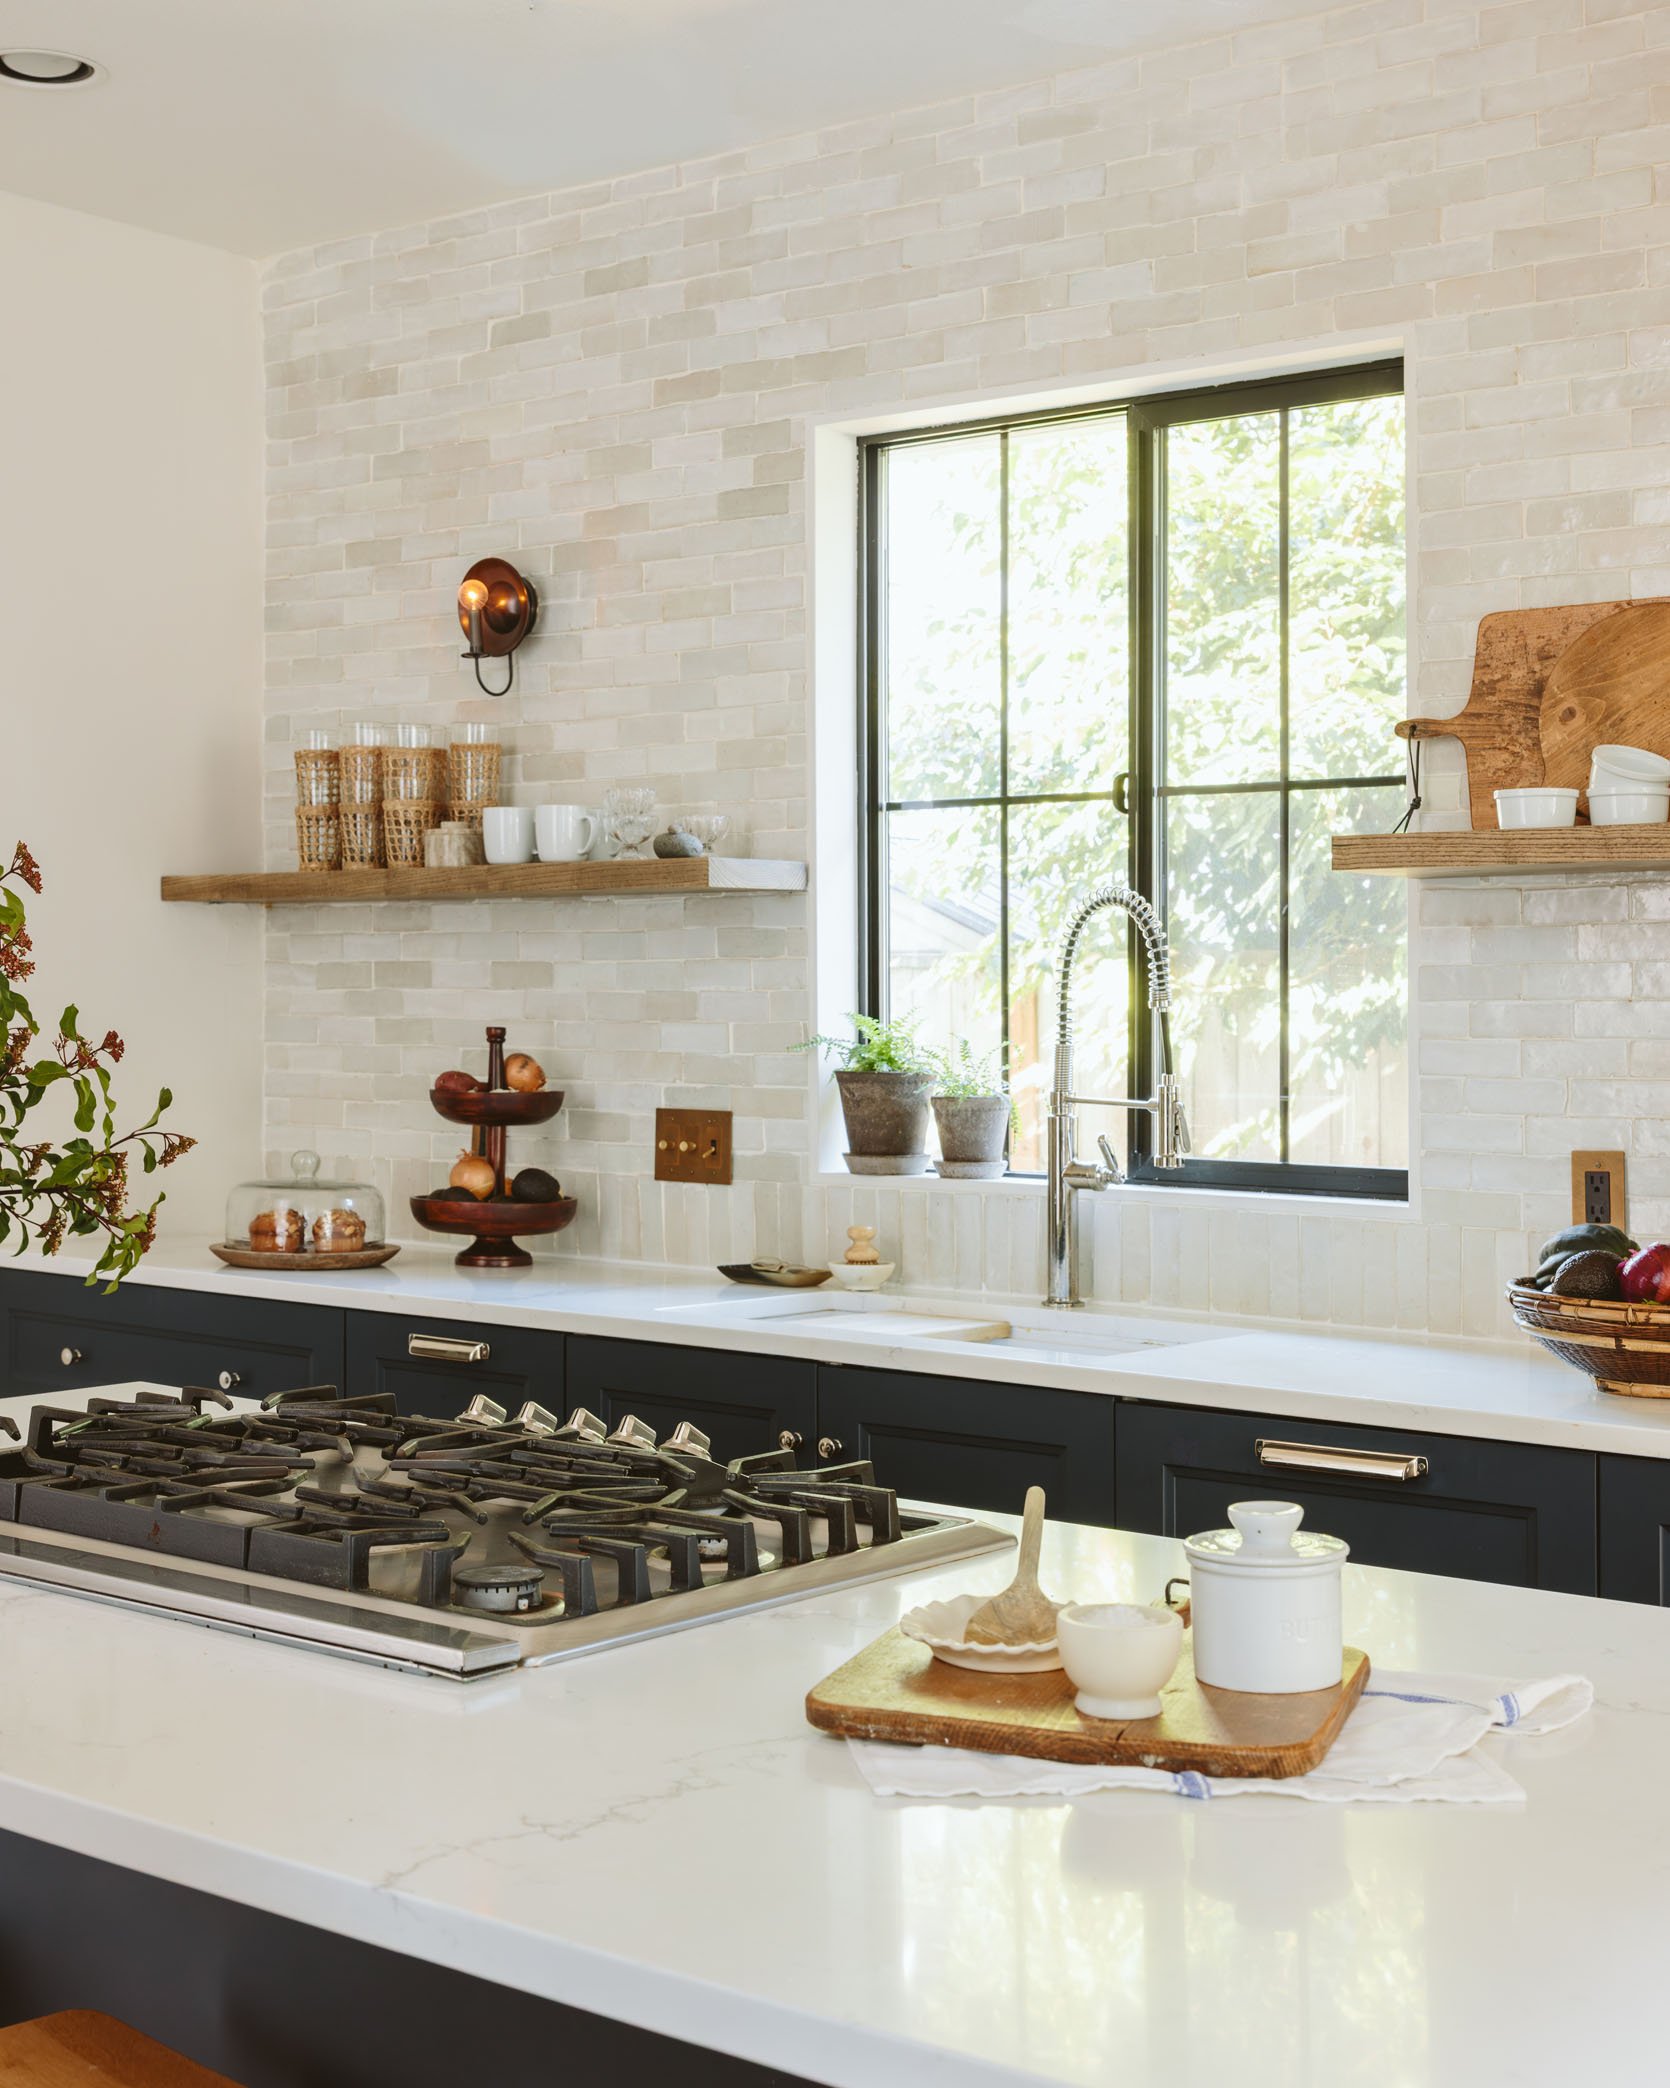
Floating Shelf (Made by Pete) | round sconces (old)
How do you feel about the new layout? Are you happy with the “Tool Wall”?
We absolutely love this layout – hanging out near the fridge? Not even a single thought came to our mind. We like the separation because it reduces the potential bottle neck problem on one side of the kitchen. Flow is very important, and while the footprint is technically small, the way we use the kitchen works well for our family and makes the most sense. The great thing here is that by moving the pantry opening into the hallway, we were able to utilize a previously underutilized wall. Thus we get the illusion of more (usable) space. Bingo!
How useful or accurate was IKEA’s 3D planner tool?
Very precise and very essential for the whole process. Chrissy led the charge on this, and that really helped make sure everything would work perfectly in the space. interface Was quite reliable; You have to make sure to save the creation so you don’t lose it. But definitely an extremely useful tool.
How was the ordering and delivery process?
Amazingly, everything went as expected. You just have to take the time to make sure the order is correct. And of course making an appointment with a cabinetry specialist and going into the store to walk them through is a must – at least for us. This allows you to double, triple, and quadruple to confirm that you’ve done everything right. This will take a few hours, but it is worth the time.
DIY Drama
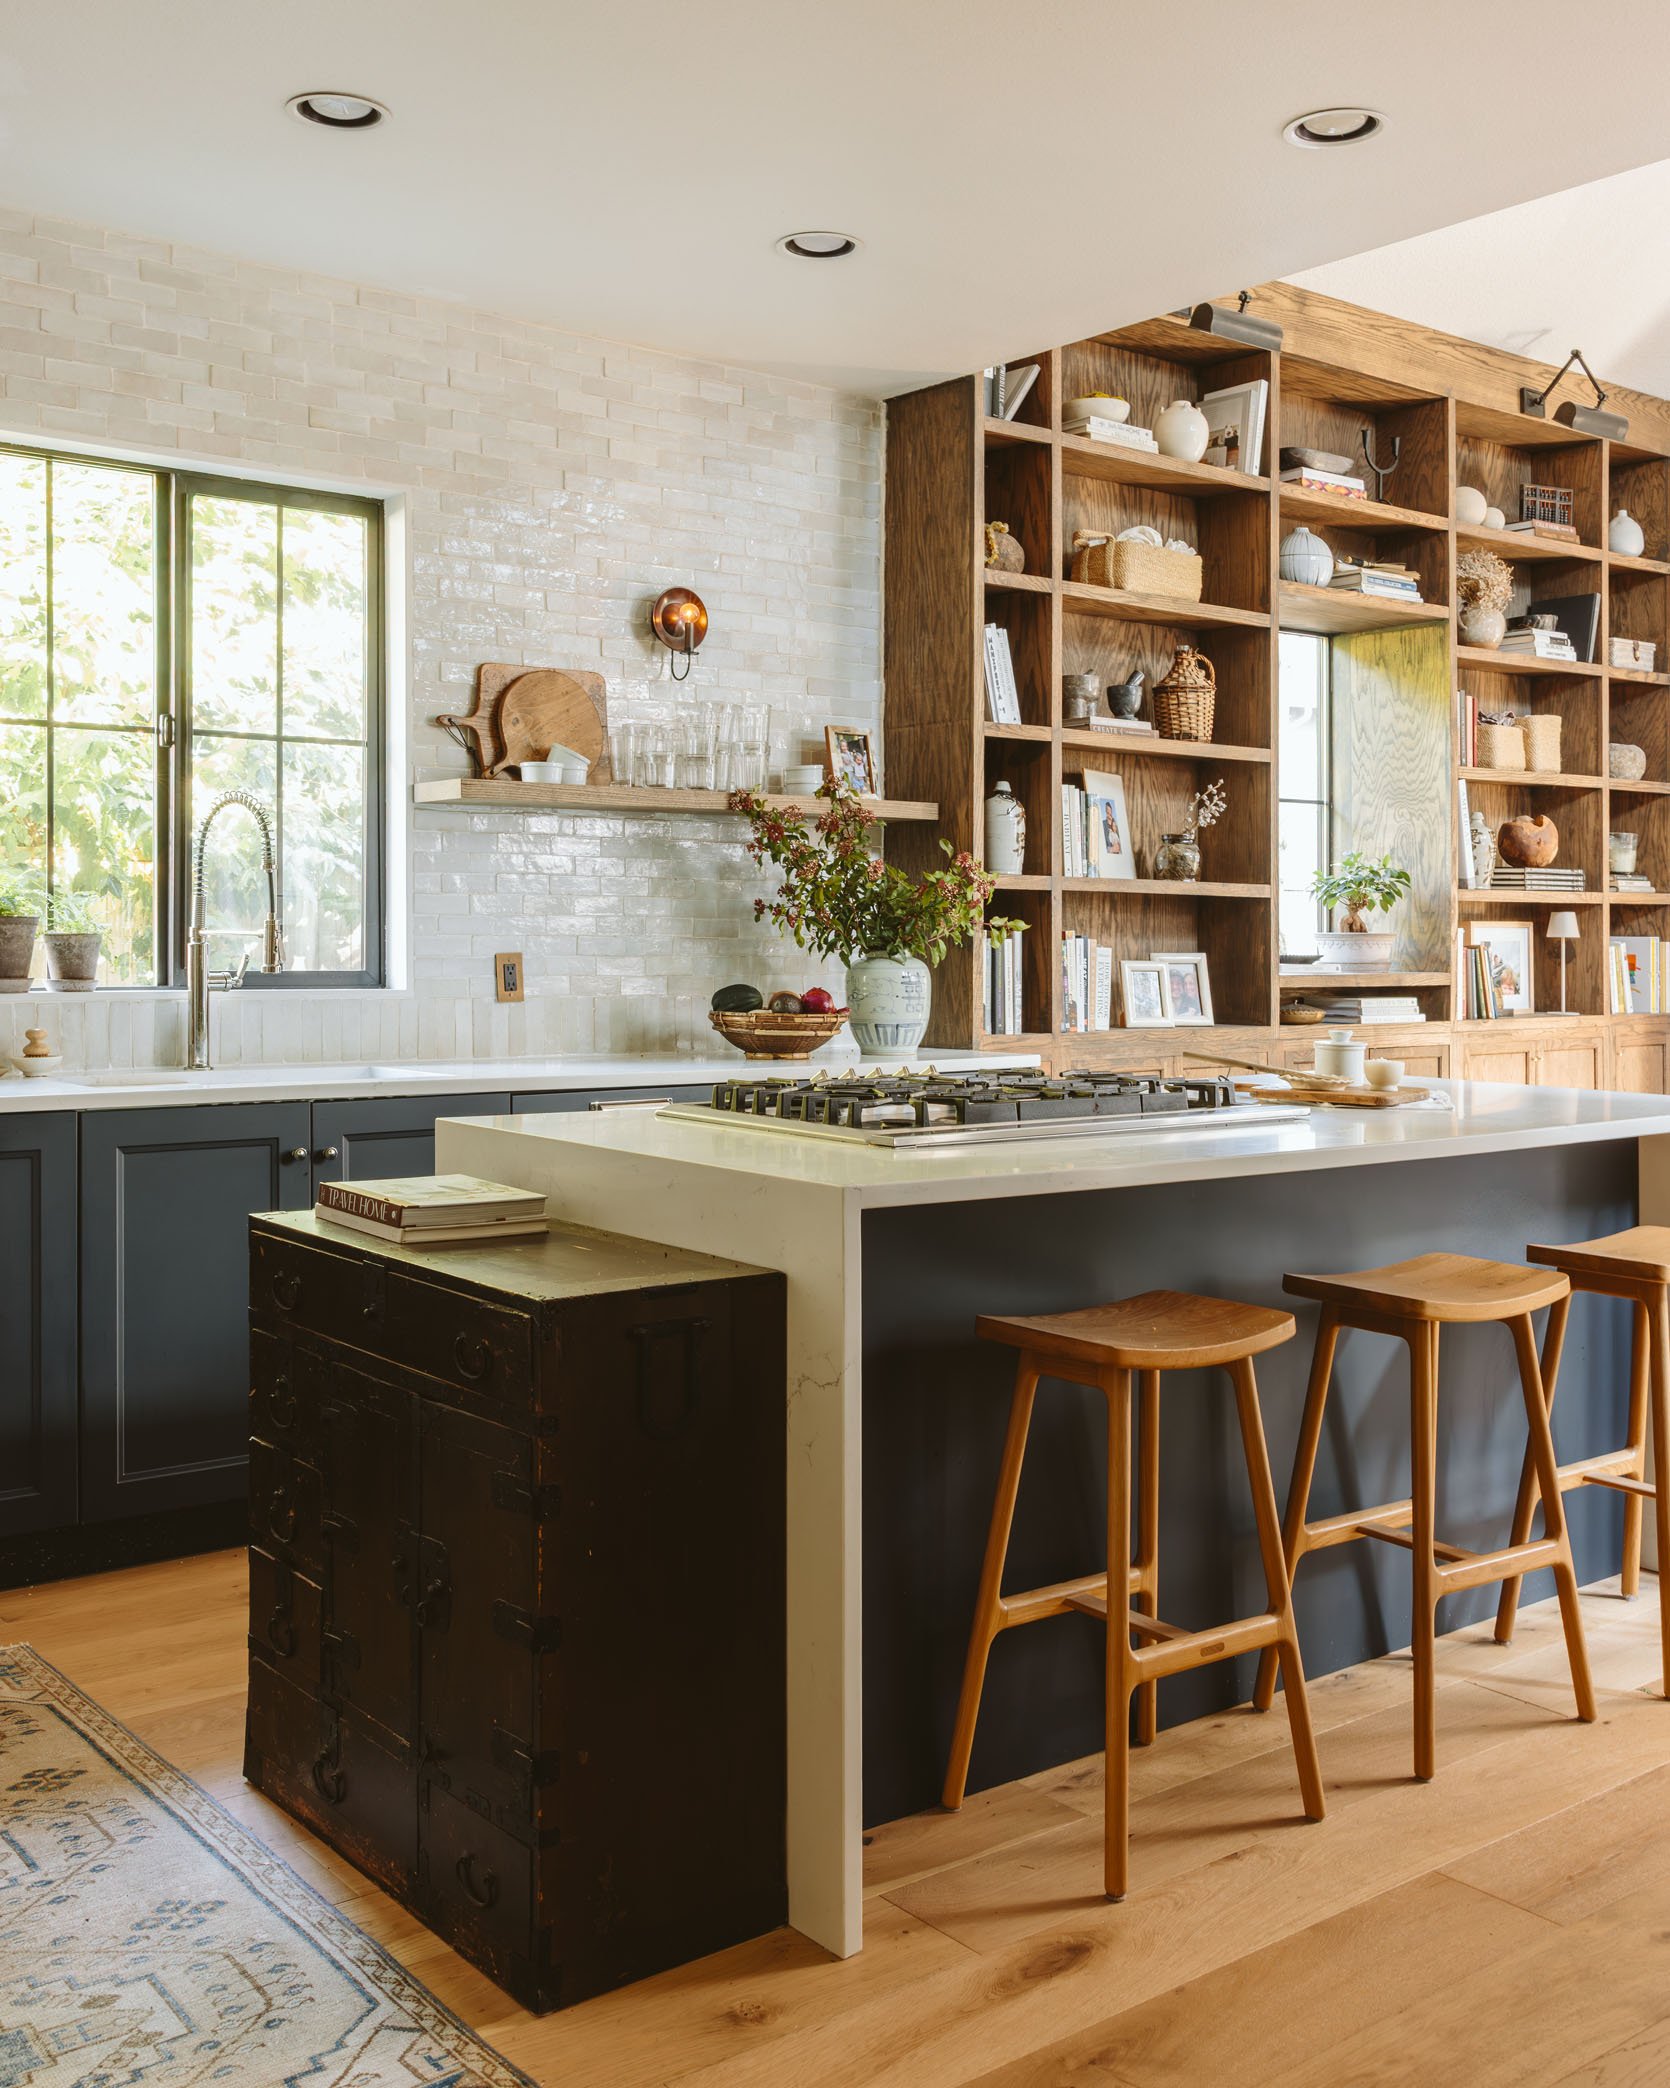
Japanese Tansu Storage Chest (Antique) | runner | Diarrhea
What was the most stressful part of this project?
This was an island. We had to move the gas line (one of the things we contracted to do), and fix the hardwood floors (again, we contracted for this). The periscoping vent is something I installed myself, and it was a perfect thing. To create an island, you’ll need to create a support brace that you can attach cabinets to, and you’ll need to make room for vents. This was incredibly time-consuming, difficult, and stressful, as the fabricator was cutting the stone based on the exact measurements of this vent. IE – no mistakes (I did the math probably 5000 times to make sure I got it right) and in the end, everything came together and fit like a glove. The back panel is also IKEA. Used my table saw to cut it, and it worked perfectly!
Countertops
Why did you decide to go with this quartz countertop?
Ikea had a variety of countertop options including quartz – we just wanted the more unique looking quartz. And yes, true to form, quartz counters are overall durable and affordable* (depending on where you live…for example, in Oregon, it’s about the same price, if not more, than natural stone). I wouldn’t say that blurring is gone. You just have to be careful.
How does waterfall style work with IKEA cabinets?
The waterfall is very nice. We were definitely hesitant about it at first – from a design perspective, they weren’t our first choice, but we felt it was the best way to make the IKEA island work. Due to the cooktop being on the island and the periscoping vent fan, there would have been a large gap in the end panels, and the waterfall ensured it was seamlessly covered.
Tile and Floating Cabinets
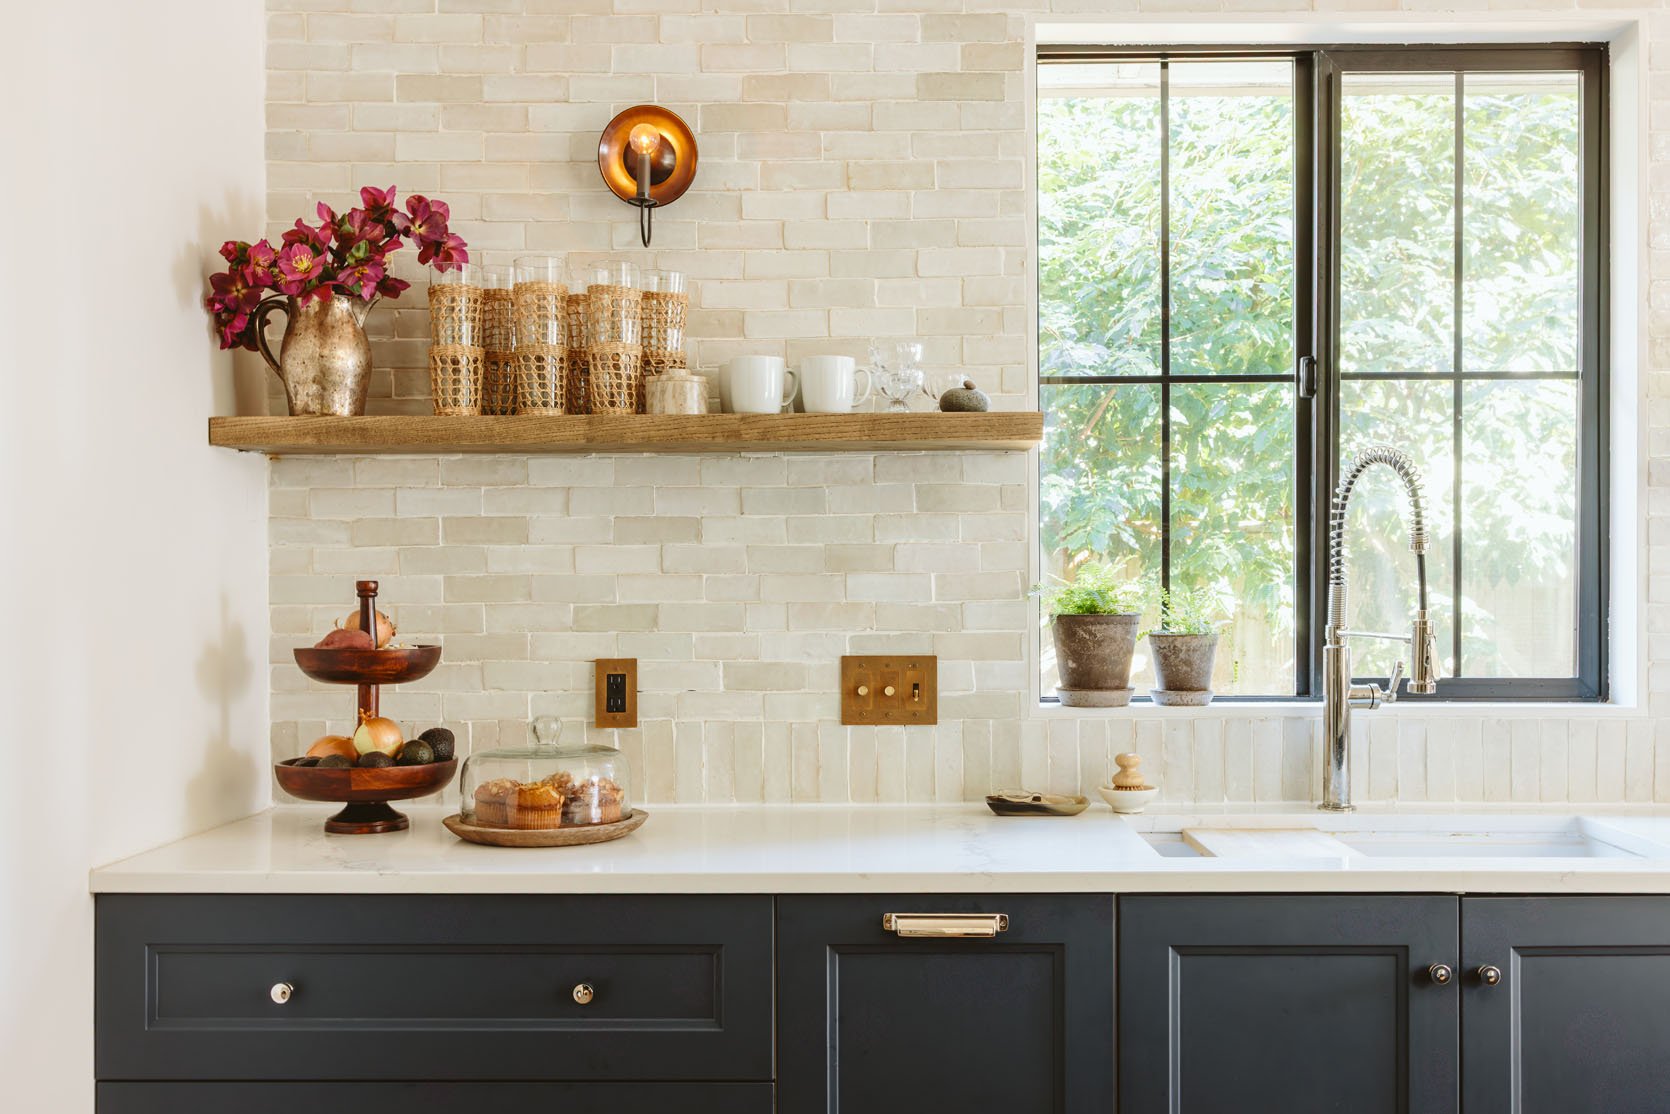
tile | grout | switchplate
Was your tile worth the splurge? Would you do “Zelige” again?
Yes! It’s 100% worth the splurge, and yes, we would do it again. And then. we like
Imperfections and color variations – the depth they add to our space is mesmerizing. Re: soaking the tile (read about that here) – Look, for all those people who blow-dry their hair before curling it, it’s all about soaking. Blow-dry step before curling. It doesn’t have to be perfect, delicate or precise. Soak it quickly (assembly-line it quickly with two people) and then tile. No big deal.
Are you happy with your decision to make floating cabinets instead of overhead cabinets?
For our space, it felt like the right decision – while there would be room in upper cabinets, here it would
A lot of crowding, and eliminating overhead really opened up the space.
Light
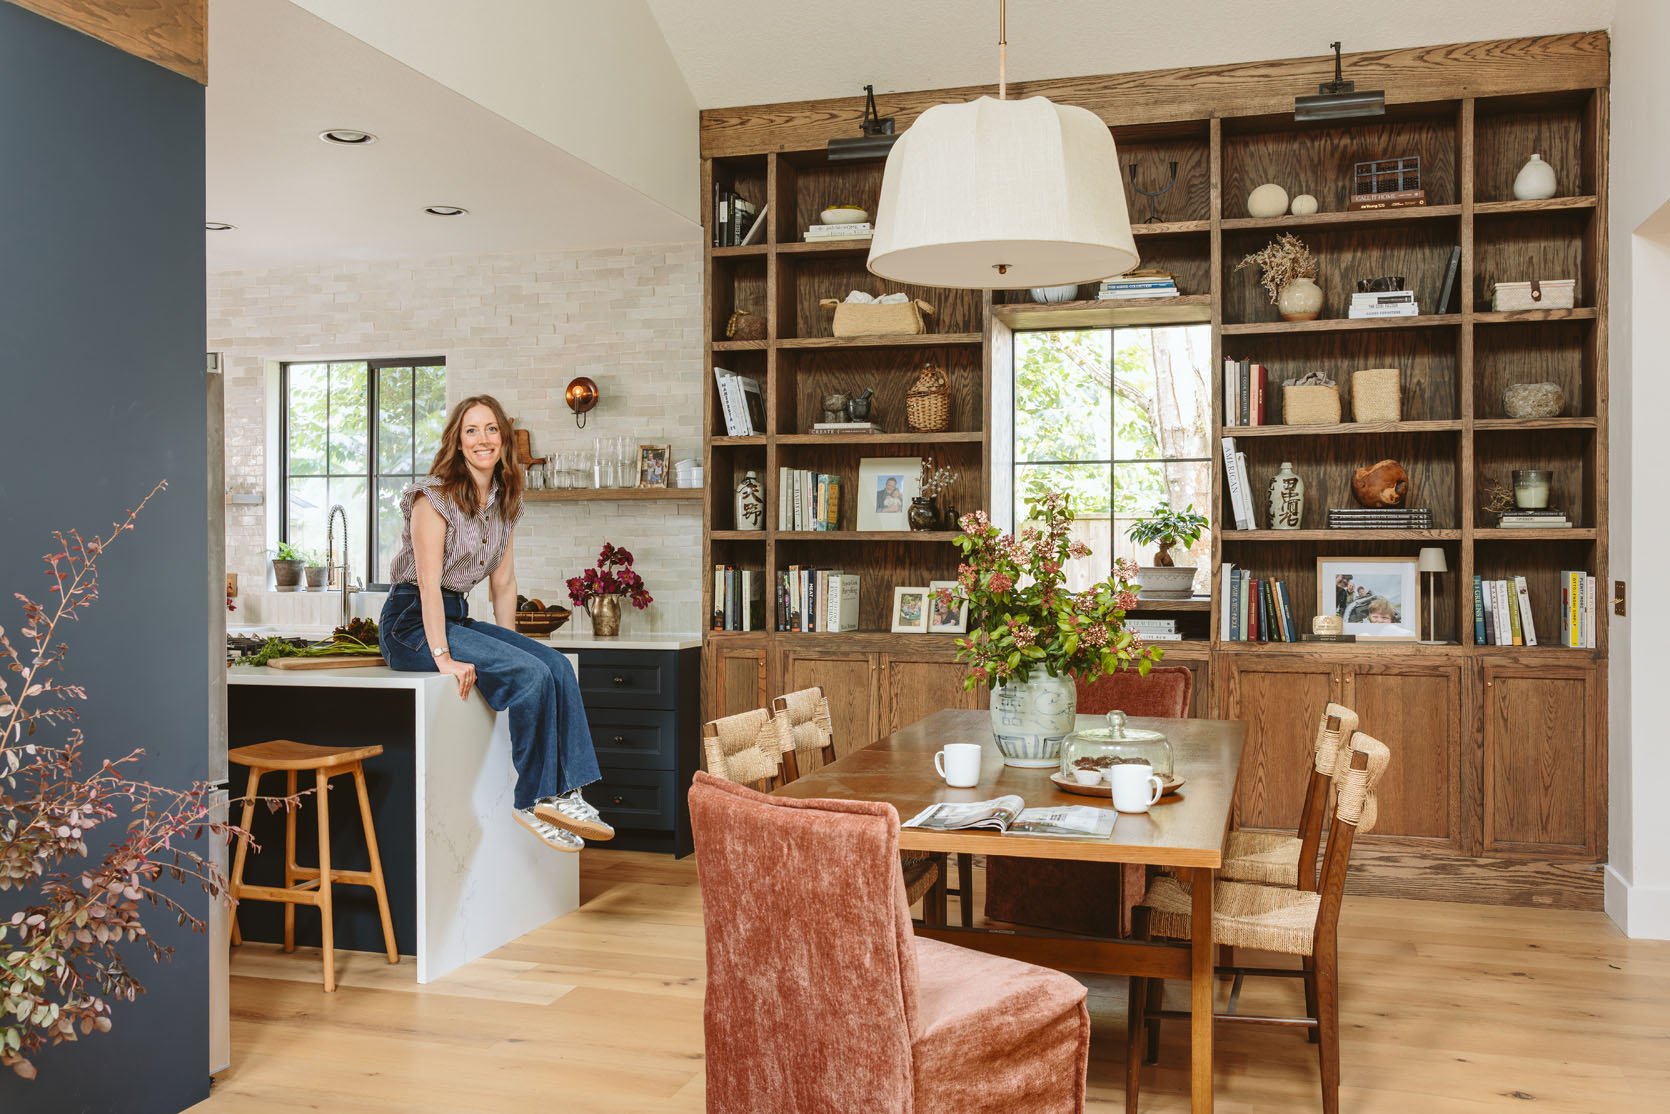
We decided to save most of the existing can lighting in the kitchen in an effort to keep our budget under control. We installed a few lights around the window/sink area, as well as removed one. This way, we were able to use that budget for lighting in the dining room, where we felt it had a big impact.
final thoughts
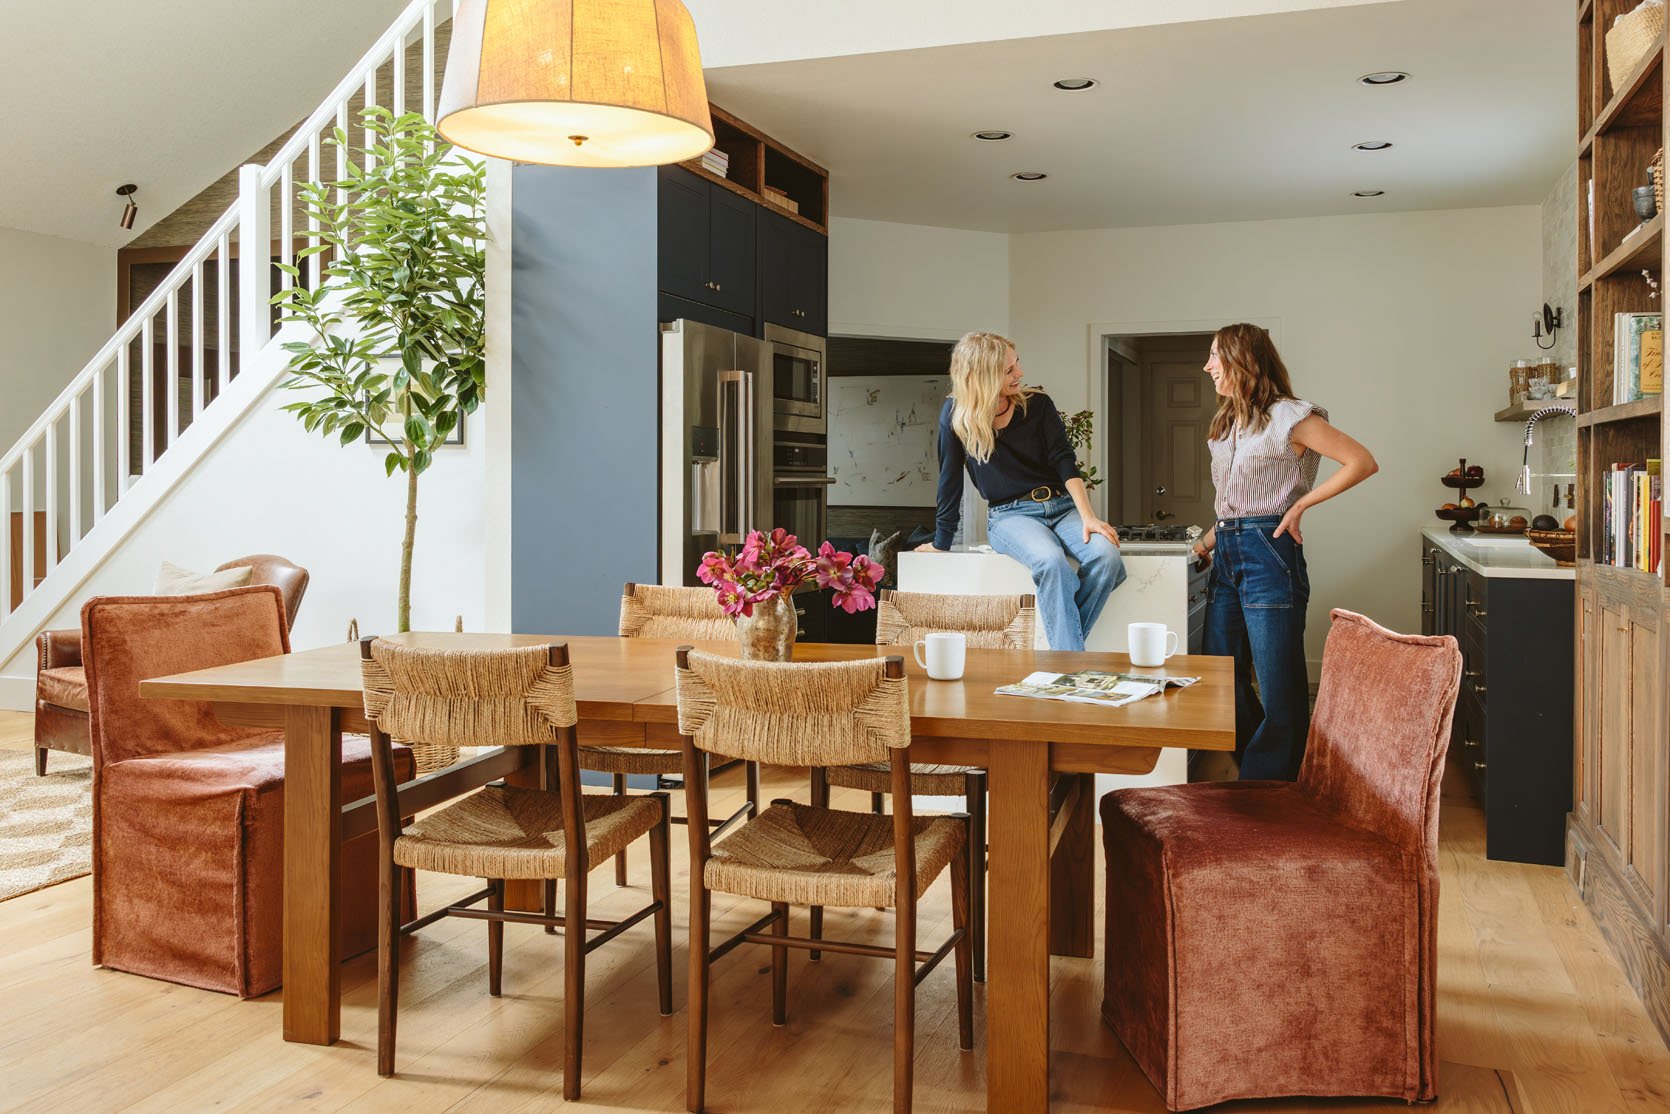
dining table | woven chairs | captain chairs
Any suggestions for those who are indecisive?
Definitely go to Ikea and check it out Everything. In the case of the shelves we chose, they were very
Better than comparable shelves available in the market, advanced in both style and quality.
Your greatest achievement?
Of course, the disadvantage of this project was that it was a lot of work, but the advantage is that it is ours, and there is a real story behind it. This is something we created together, and it means something to us. It’s work to get the finished product, and it definitely requires design creativity, but for us it was all worth it!
Would you ever tackle another Ikea kitchen?
Completely. We are proud that it is IKEA. Using the cabinets as our foundation, we incorporated all the rest of the design elements that make it our own.
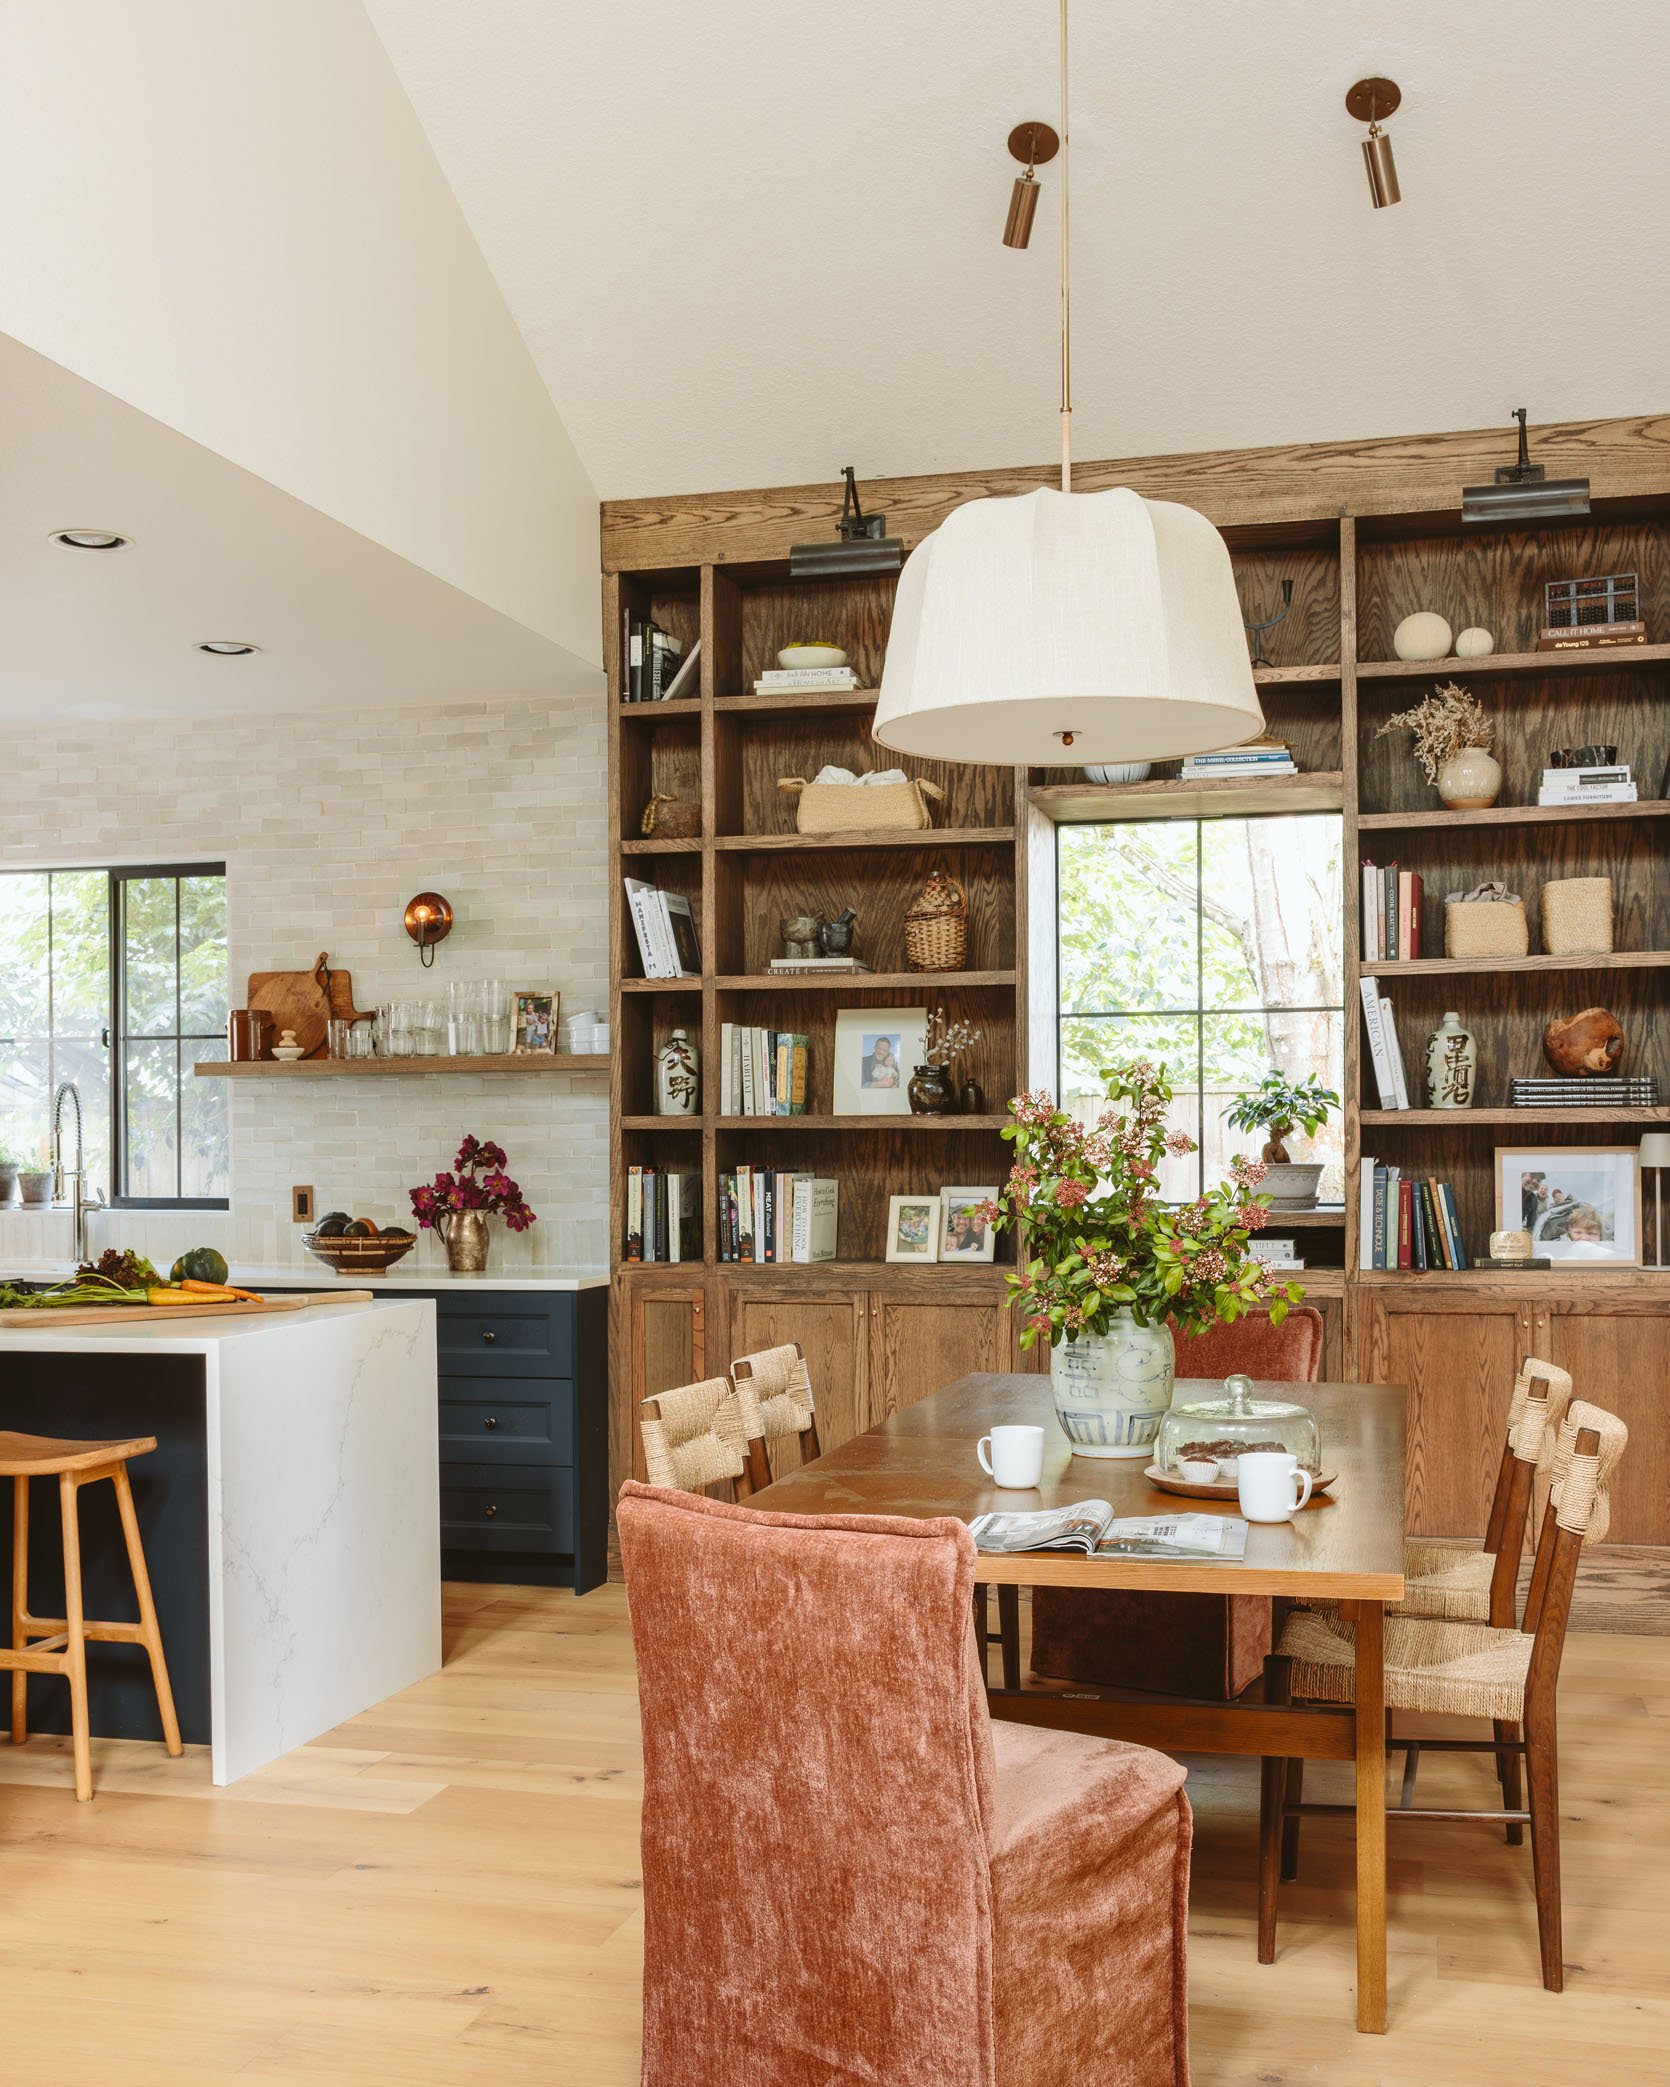
We’re totally impressed with their IKEA kitchen transformation, and hope you are too! Thank you so much to Chrissy and Peter for sharing your beautiful space, words of wisdom, and excellent documentation. Now, you’re probably wondering why we didn’t touch the beautiful bookcase or dining area built right next door. More to come on that project next week! Another amazing element that he designed and built himself. Adding all these custom touches really made it Ikea Taking the kitchen to the next level. The incorporated wood tones, thoughtful layout, waterfall countertops, and navy cabinetry – we love it all. DIY for the win!
Kitchen Resources:
cabin contents:ikea
wardrobe Hardware:reinstall hardware
countertops:Casa Bella Granite
Tap, Drown: Kohler
equipment:ikea
windows: Milgard
tile:Zia Tile
switch/outlet: housing supply
wall color:Sherwin Williams, “Aesthetic White”
counter stool: Article
dining table: Article
*Design and creation by Chrissy Cambor and Pete Cambor
** Styled by Chrissy Cambor and Emily Henderson
***By photo Keltin Green