

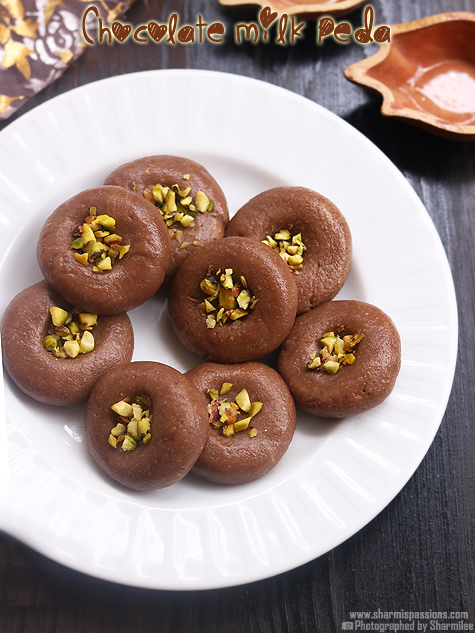
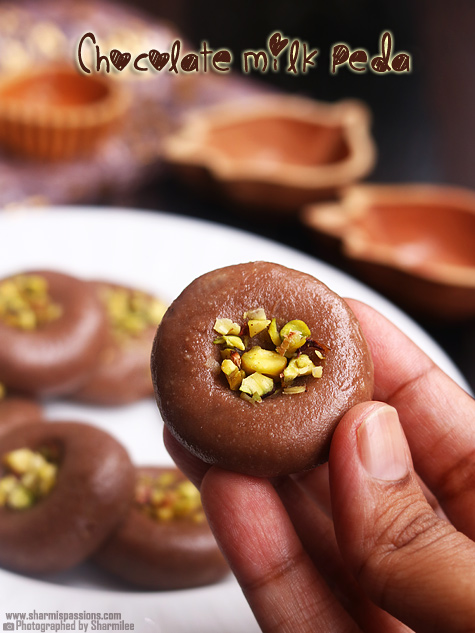
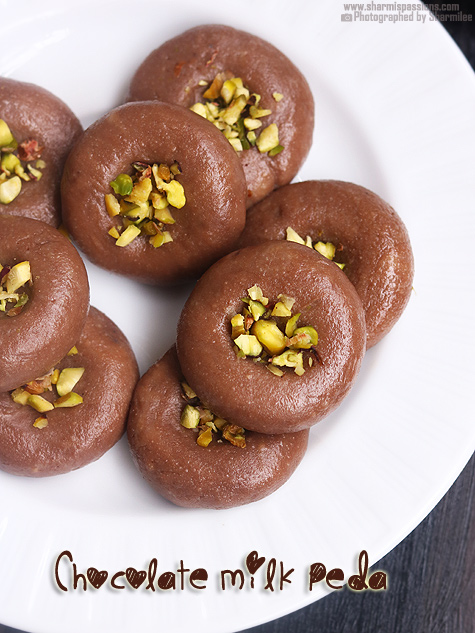
Chocolate Peda is a simple sweet made with milk powder, condensed milk and cocoa powder. It is cooked until the mixture thickens and then shaped into small discs and dry fruits are added on top. This dessert has a rich chocolate flavor with a mild milky flavor which makes it a delight to eat. It looks simple but tastes very good.
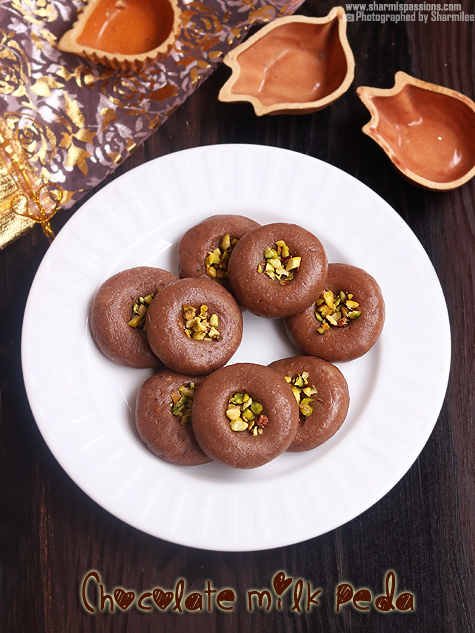
This Chocolate Milk Peda is often made during festivals as well as on special occasions at home. This is a quick sweet recipe which does not take much time to prepare. Its texture is soft and fudgy and the chocolate flavor makes it very appealing. Children especially enjoy this chocolate flavored pedas and ask for more.
jump to:
About Chocolate Peda
Chocolate peda is a modern take on the traditional Indian milk peda sweet. Generally peda is made from milk solids and sugar, but in this version cocoa powder is added to give it a chocolate flavour. This gives rich taste and dark brown color to the sweet. The chocolate flavor makes it more attractive especially to children and chocolate lovers.
The mixture is cooked slowly until it thickens and leaves the sides of the pan. After it cools down a bit, it is rolled into small balls and then flattened a little in the shape of pedas. Also, chopped pistachios are added for garnish. This little garnish also adds a little crunch to a soft dessert.
This recipe has a soft and slightly chewy texture when made fresh. After resting for a few hours it hardens a bit and tastes better. Chocolate chips added to the mixture give additional chocolate flavor. When it cools completely, the color of the peda also becomes darker.
I usually make this chocolate peda during festivals when I want a quick sweet recipe. It does not require many ingredients and the result is very tasty. My family always enjoys it with evening tea or after meals. It also works well when guests arrive suddenly.
Chocolate Peda Ingredients
- condensed milk – I used it in pedas for sweetness and creamy texture. This helps the mixture become smooth and rich while cooking.
- milk powder – This is the main base ingredient for this peda, it thickens the mixture and gives a sweet taste to that milk.
- cocoa powder – I have added it to give chocolate flavor and darker color. If there are lumps left in the powder, you can filter it.
- Milk – I added cocoa powder for easier mixing, this helps avoid lumps when adding to the mixture.
- chocolate chips – I added chocolate chips to the pedas for extra chocolate flavor. When it melts it blends well with the mixture.
- Ghee While cooking the mixture, I melted ghee and added it. This adds thickness and prevents the mixture from sticking to the pan.
- pistachio – I add chopped pistachios for garnish on the pedas. It gives a little crunch and the peda also looks good.
similar recipe
How to make Chocolate Peda step by step
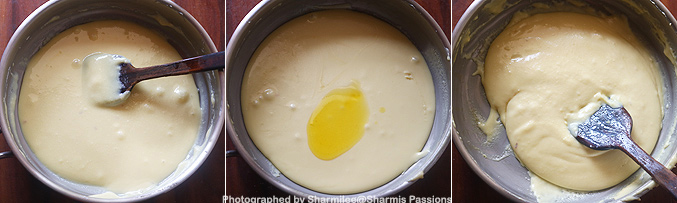
1. In a pan – add condensed milk and milk powder.

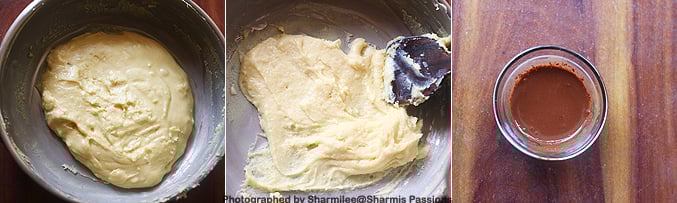
2. Mix well with a ladle so that there are no lumps. Now turn on the flame and cook on low flame. Add ghee and continue cooking. It will thicken in 2-3 minutes.
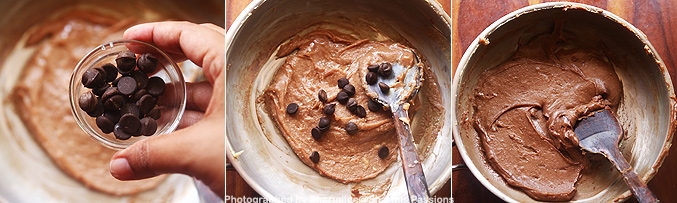
3.When it forms a thick mass and leaves it on the sides of the pan. Prepare cocoa powder mixture, add cocoa powder to milk, mix well and make a smooth paste.
4.Now add cocoa paste to it and continue cooking.
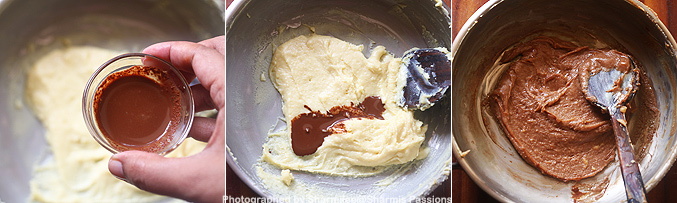
5. Add choco chips and cook until it melts completely and is mixed evenly.
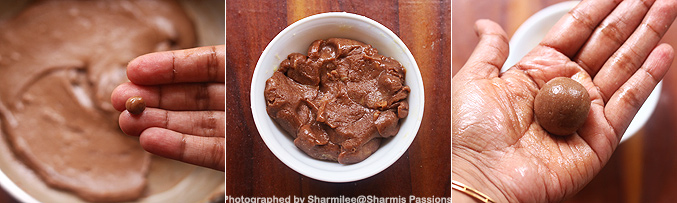
6.Then first of all grease your fingers. Now pinch off a small portion, make small balls, if a ball is formed then stop cooking. Switch off and keep aside for at least 20 minutes. Take out the mixture in a bowl and cool for 15-20 minutes. – Now select a small lemon sized ball and roll it.
7.Flatten it a bit and make a depression in the middle. Add chopped pistachios in the middle.
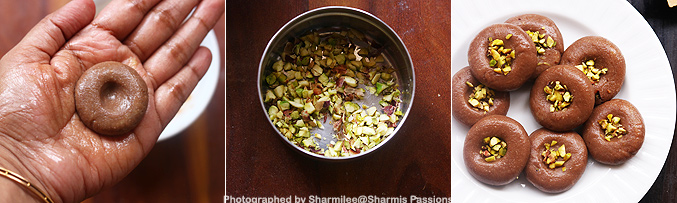
Cool completely.
Expert Tips
- cook slowly – I cook the mixture on low flame while stirring occasionally. This helps the mixture thicken evenly without burning.
- cocoa mixture – I usually add cocoa powder to the milk first. Due to this there will be no lumps in the peda mixture.
- check continuity – When the mixture becomes thick and leaves the sides of the pan, it is ready.
- let the mixture rest – I let the mixture cool for some time before shaping it. This makes it easier to roll Peda.
- fix cracks – If the mixture curdles while rolling, you can add a little milk to it and mix again. Do not add too much milk.
serving and storage
Serve Chocolate Peda as a sweet dish on festivals or special occasions. After resting for a few hours, the taste of this sweet becomes even better. Keep the peda in an airtight container at room temperature for about two days. If kept in the refrigerator it remains good for about a week.
general questions and answers
1.Can I sift cocoa powder with milk powder?
Yes, you can strain both together before cooking. This helps in removing lumps in the mixture.
2.Why are my peda mixture not making balls?
If the mixture is undercooked it will remain soft. Cook it a little more until it thickens properly.
3.Why is my Peda breaking while shaping?
If the mixture becomes too dry it may curdle. Adding a little milk and mixing again may help.
4.Can I add dry fruits?
Yes, if you like a little crunch in sweets then you can also add cashew nuts or almonds. It also gives a slightly spicy taste.
5.Does Chocolate Peda taste better later?
Yes, the taste gets better after resting for a few hours. The texture also becomes a little hard.
If you have any further questions about this Chocolate Peda Recipe Mail me at sharmispassions@gmail.com. Also, follow me Instagram, Facebook, pinterest ,youtube And Twitter .
tried this Chocolate Peda Recipe? Do let me know how you liked it. Tag us @sharmispassions on Instagram and hash tag #sharmispassions.
📖 Recipe Card
Chocolate Peda Recipe
Chocolate Peda is a simple sweet made with milk powder, condensed milk and cocoa powder. It is cooked until the mixture thickens and then shaped into small discs and dry fruits are added on top. This dessert has a rich chocolate flavor with a mild milky flavor which makes it a delight to eat. It looks simple but tastes great.
Material
- half and half cup condensed milk
- ¾ cup milk powder
- 1 and ¼ small spoon cocoa powder
- 1 and ½ tablespoon Milk
- 1 tablespoon Sweet Choco Chips
- 2 small spoon Melted ghee + 1 tsp for greasing
- 1 and ½ tablespoon chopped pistachios
Instruction
-
– Add condensed milk and milk powder in a pan. Mix well with a ladle so that there are no lumps.
-
Now turn on the flame and cook on low flame.
-
Add ghee and continue cooking. It will thicken in 2-3 minutes.
-
When it forms a thick mass and leaves the sides of the pan.
-
Prepare cocoa powder mixture, add cocoa powder to milk, mix well and make a smooth paste.
-
Now add cocoa paste to it and continue cooking.
-
Add choco chips and cook until it is completely melted and evenly mixed.
-
Then first of all grease your fingers. Now pinch off a small portion, make small balls, if a ball is formed then stop cooking.
-
Switch off and keep aside for at least 20 minutes.
-
– Now select a small lemon sized ball and roll it. Flatten it a bit and make a depression in the middle.
-
Add chopped pistachios in the middle. It will look sticky but will harden after some time. Enjoy Chocolate Peda!
notes
- cook slowly – I cook the mixture on low flame while stirring occasionally. This helps the mixture thicken evenly without burning.
- cocoa mixture – I usually add cocoa powder to the milk first. Due to this there will be no lumps in the peda mixture.
- check continuity – When the mixture becomes thick and leaves the sides of the pan, it is ready.
- let the mixture rest – I let the mixture cool for some time before shaping it. This makes it easier to roll Peda.
- fix cracks – If the mixture curdles while rolling, you can add a little milk to it and mix again. Do not add too much milk.
nutrition Facts
Chocolate Peda Recipe
Quantity per serving (40 grams)
calories 122
Calories from Fat 54
% daily value*
thick 6 grams9%
saturated fat 4g25%
Trans Fat 0.001 grams
polyunsaturated fat 0.3 g
Monounsaturated Fat 2g
cholesterol 17 mg6%
sodium 56 mg2%
potassium 210 mg6%
carbohydrates 13 grams4%
Fiber 0.3 grams1%
sugar 13 grams14%
protein 4g8%
Vitamin A 140IU3%
vitamin C 1mg1%
calcium 136 mg14%
Iron 0.2 mg1%
*Percent Daily Values are based on a 2000 calorie diet.